
Related Manuals for Cardinal 204


Summary of Contents for Cardinal 204
- Page 1 Weight Indicating Instrument Operation Manual 8555-M313-01 Rev B PO BOX 151 WEBB CITY, MO 64870 Printed in USA 02/02 PH (417) 673-4631 - FAX (417) 673-5001 Web site - http://www.cardinalscale.com...
-
Page 2: Table Of Contents
Low Battery Indicator ..before attempting to install or operate your 204 and keep it handy for future reference. Battery Status ....6 ____________________________________ Battery Charging . -
Page 3: Specifications
This section is provided to assist you in obtaining such an environment. Electrical Power The 204 indicator has been designed to operate from a 115 VAC 50/60 Hz (optional 230 VAC 50/60 Hz) AC adapter. Note that an optional AC adapter is required for operation at 230 VAC. -
Page 4: Precautions
This bracket may be removed or left in place for desktop use. Regardless of how and where you mount your 204, it should be in a safe area where it will not be in the way of normal traffic. The location chosen should be free of temperature extremes and water. -
Page 5: Interconnections
Figure No. 1 Interconnections All Input, Output and power connections to the 204 are made at the rear panel of the indicator. Connections for the Load Cell input and the RS-232 Serial I/0 are all made via 9 pin "D"... -
Page 6: Low Battery Indicator
(NiCad or NiMH), a low battery annunciator on the display will turn on. (See Figure No. 7). If the battery voltage drops too low for accurate weighing, the 204 will automatically shut off and you will be unable to turn it back on. -
Page 7: Battery Status
NOTE: When the 204 is turned off, the indicator is NOT charging the batteries. Load Cell Connection The load cell cable connects to the 204 via a 9-pin "D" connector on the rear panel of the indicator. Figure No. 4 shows the pin identification for the load cell connector. Make certain that the pins are correctly identified before soldering a wire to them. -
Page 8: Main Pcb (Figure No. 5)
NOTE! Remove the left end cap to access the jumpers. Refer to Figure No. 9. SERIAL INTERFACE SPECIFICATIONS Your Model 204 has a RS-232 serial port that may be connected to a printer to record weight and associated data or it may be connected to a remote display (like the SB-80) or to a computer for transmission of weight data. -
Page 9: Serial Data Formats
If the Printer Continuous output was not selected, COnt=0 (0=NO) during setup and calibration of the indicator, and the 204 is connected to a computer, it will transmit a single set of weight data each time the computer sends an ENQ (hex 05) or a SMA weight request (W). This is known as Weight-On-Demand. -
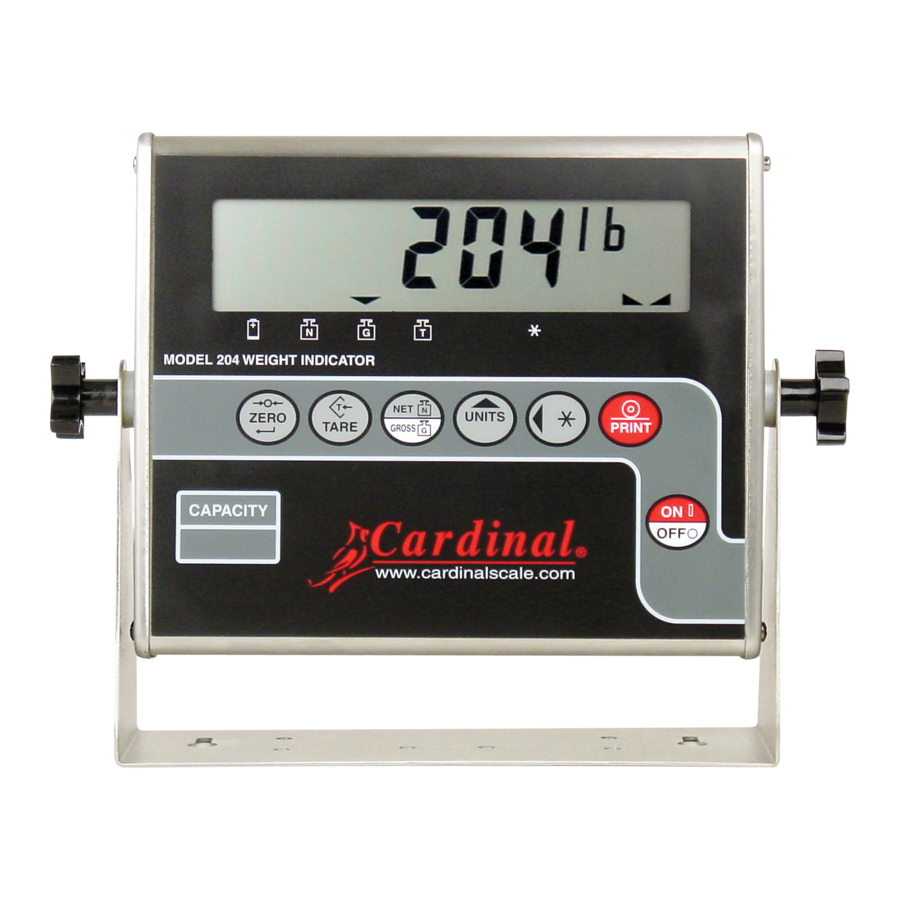
Page 10: Keypad Functions
ON / OFF (I / O) KEY With the indicator off, pressing this key will apply power to the 204 and turn on the display. If the indicator is already on, pressing this key will remove power from the indicator. -
Page 11: Annunciators
If displaying gross weight, the only weight printed is gross weight. If displaying net weight, the gross, tare, and net weights are printed. The 204 includes support for nControl . NControl is a PC based program that can design a ticket then download the ticket information to the 100.00 lb G... - Page 12 ANNUNCIATORS, Cont. The lb annunciator is located on the right of the weight display and is turned on to show that the displayed weight units is pounds. The kg annunciator is located on the right of the weight display and is used to indicate that the displayed units of weight measurement is kilograms.
-
Page 13: Setup And Calibration
204's keyboard. Pressing the PRINT key will cause the data entered or displayed to be retained and the 204 will advance to the next prompt. The cursor location is identified by the blinking character and can be advanced to the left to the next position by pressing the ASTERISK key. - Page 14 3. Determine the exact amount of test weights to be placed on the scale platform and enter this value into the 204 by using the UNITS and ASTERISK keys in the same manner used to enter the scale's capacity. Verify that the numbers entered are the same as the total weight of test weights, and the least significant digit agrees with the scale interval.
- Page 15 - Break Range Next, the 204 will display br= . Press the ASTERISK key to show the current setting for the Break Range. The break range is a number from 1 to 64 that corresponds to the number of division change to break out of filtering.
- Page 16 Press the ASTERISK key to show the current setting. Use the UNITS key to select the number (1 through 9) of minutes ( time approximate ) of inactivity before turning the 204 off. A 0 disables the Automatic Shutoff feature. Press the PRINT key to save the setting. Note: This setting may be revised without having to enter the calibration mode.
-
Page 17: Setup Review
End-Of-Print Line Feeds The display will now show EoP=. At the end of a data transmission to a printer, the 204 can send a number of line feed commands to space the paper in the printer to the desired position for withdrawal or for the next print. -
Page 18: Error And Status Displays
Displayed to indicate the 204 is turning off. BEFORE YOU CALL FOR SERVICE The 204 has been designed to provide you with years of trouble-free operation. In spite of this, troubles sometimes happen. Before calling for service assistance you should make some initial checks to verify that a problem does exist. -
Page 19: Care And Cleaning
8. DO keep the surroundings clear to provide clean and adequate air circulation. CALIBRATION SEAL INSTALLATION If your Model 204 Weight Indicator is used in a commercial application it must be tested and sealed by your local weights and measurement official. The 204 is designed to accept a lead and wire security seal to prevent unauthorized access to the calibration adjustments. -
Page 20: Parts Identification
PARTS IDENTIFICATION... - Page 21 PARTS IDENTIFICATION ITEM PART NO. DESCRIPTION 593GR986 SERIAL TAG 6013-0039 NUT HEX #6-32 6013-0245 HEX NUT #4-40 6021-0661 SCW PAN HEAD #6-32 x .25 S.S. 6024-0037 #10 SPLIT LOCK WASHER 6021-1032 THUMB SCRW, 6-32 x 0.25 6021-1108 SCW FILLISTER MACHINE-SCW #10-32 x .375 S.S. 6021-2071 SCW FILLISTER #6-32 x .250 S.S.
Need help?
Do you have a question about the 204 and is the answer not in the manual?
Questions and answers