Table of Contents
Advertisement
Quick Links
Advertisement
Table of Contents

Related Manuals for OCULUS ImageCam 3


Summary of Contents for OCULUS ImageCam 3
- Page 1 ® OCULUS ImageCam INSTRUCTION MANUAL Slit Lamp Documentation System...
- Page 2 Our team will be happy to assist you. OCULUS Optikgeräte GmbH OCULUS is certified according to DIN EN ISO 13485, setting high stan- dards of quality for the development, manufacture, quality assurance and service of the entire range of products.
-
Page 3: Table Of Contents
Table of Contents Scope of Delivery.........................1 Structure of the Documentation ....................1 Symbols............................2 Safety Instructions........................3 About this Manual ......................3 4.1.1 Pictograms Used in this Manual ..............3 Safety Instructions for Use ..................4 Intended Use..........................8 Device Description ........................8 How the ImageCam® 3 Works..................9 First-time Operation........................9 Putting Back Into Operation .................... - Page 4 11.5.1 Determine distances..................29 11.5.2 Identify Angles for Toric Contact Lenses..........34 11.6 Copy and Insert Image ....................34 11.7 Edit Image........................35 11.8 Print Image ........................36 11.9 Import Image.........................37 11.10 Export Image .........................37 11.11 Delete Image .........................38 11.12 Capture an Image from a Video................39 11.13 Change Settings ......................40 11.13.1 Buttons and Displays.................41 11.13.2 Change Date Format .................41...
- Page 5 19 Appendices..........................65 19.1 Operating Instructions for the Beam Splitter............65 19.1.1 Technical Data Beam Splitter..............66 Instruction Manual ImageCam® 3 (G/69200/XXXX/EN 0120 Rev01) iv / v...
- Page 6 v / v Instruction Manual ImageCam® 3 (G/69200/XXXX/EN 0120 Rev01)
-
Page 7: Scope Of Delivery
1 Scope of Delivery Scope of Delivery Components Order Number ImageCam® 3, consisting of 69200, 69210, 69220, 69230, 69240, 69250, Camera modul ImageCam® 3 69260, 69270, 69280, Beam splitter 69290, 69300, 69310, 69320, 69330 Data medium with ImageCam® 3 software 70989 USB foot switch 77006... -
Page 8: Symbols
3 Symbols Software Installation: The introduction to the Software Installation describes how to install the ImageCam® 3 software and the associated drivers. Symbols Symbols on device Symbols packaging Date of Manufacturer Keep dry manufacture Conformité Article number This way up européenne Follow instruction Serial number... -
Page 9: Safety Instructions
4 Safety Instructions Safety Instructions About this Manual Carefully read through the Instruction Manual. Keep the Instruction Manual in good condition near the device. Observe the legal regulations with regard to accident prevention. 4.1.1 Pictograms Used in this Manual Attention Identifies a potentially dangerous situation which may cause minor injury or damage to property. -
Page 10: Safety Instructions For Use
Before first use: Let OCULUS or an authorized dealer train you in the operation of the ImageCam® 3. Only operate the device if you have understood the operating instructions. - Page 11 4 Safety Instructions Instructions for Maintenance To ensure satisfactory and reliable operation, we recommend: Have the ImageCam® 3 checked every two years by our service department or an authorized dealer. If an error occurs which you cannot correct, label the ImageCam®...
- Page 12 4 Safety Instructions Instructions on Electrical Safety Attention Risk of personal injury or damage to property due to an incorrect level of safety Connecting the ImageCam® 3 with its non-medical electrical equipment (e.g. data processing equipment) to a medical electrical system must not result in a patient safety level below that prescribed by DIN EN ISO 60601-1.
- Page 13 4 Safety Instructions Precautions for access control of the computer Secure the computer with a password (for example at Windows start up). Choose a complex password: A good password should be at least eight characters long and are not in the dictionary. In addition to letters, it should also include numbers and special characters.
-
Page 14: Intended Use
5 Intended Use Intended Use The ImageCam® 3 system is intended for the use described in this operating manual. It is used to capture, process and archive images and video sequences of the slit lamp examination. Make sure that the device is only be used by personnel, who, due to their training or their knowledge and practical experience, can guarantee proper handling of the device. -
Page 15: How The Imagecam® 3 Works
Risk of incorrect values/equipment damage due to improper setup Please note that the ImageCam® 3 must be set up, connected and instructed by our Service Department or by an authorized OCULUS technician prior to initial use. Then proceed as described in sect. -
Page 16: Putting Back Into Operation
8 Putting Back Into Operation Putting Back Into Operation If you want to put the ImageCam® 3 back into operation, e.g. due to a software update, the following setup jobs may need to be done. Install the software, sect. 8.1, page 10 ... -
Page 17: Preparing For Capturing Images
9 Preparing for Capturing Images Preparing for Capturing Images Before you can capture images or record video sequences with the camera, you must first make some preparations: These include: Start the Patient Data Management, sect. 9.1, page 11 Start the ImageCam® 3 programme, sect. -
Page 18: Entering A New Patient
9 Preparing for Capturing Images To start the ImageCam® 3 programme, first enter a new patient (8) or select an existing patient from the list of patients (7). For more information on Patient Data Management, refer to the sect. 12, page 9.1.1 Entering a New Patient... -
Page 19: Starting The Imagecam® 3 Programme
9 Preparing for Capturing Images In the list that appears, click the entry you were searching for to transfer the patient’s name to the patient window. This also brings up a list of any previous examinations for that patient in the examination window (bottom right side). Extended Patient Search: [Extended] check box ... -
Page 20: Preparing The Camera
9 Preparing for Capturing Images The following overview is displayed: Patient and examination data Image: Large view Toolbar Image: Date and Time Menu bar Info text field Image bar with thumbnails of the images Zoom factor Fig. 9-5: ImageCam® 3 programme operation Preparing the Camera Before capturing an image or recording a video sequence, you must prepare the camera. -
Page 21: Select Slit Lamp Magnification
9 Preparing for Capturing Images Press the button for the right eye, or for the left eye. The Image screen opens: Menu bar [Save] button Shortcut to exposure programmes [Settings] button Drop-down list “Exposure programmes” Camera image [Delete] button Fig. -
Page 22: Select Exposure Programme
Use Shortcut to Select an Exposure Programme An exposure programme enables you to quickly re-access already set image capture parameters. OCULUS has pre-set four exposure programmes, which can be opened via the shortcut; you can define another four as needed sect. -
Page 23: Adjust The White Balance
9 Preparing for Capturing Images Select an exposure programme from the drop-down list, fig. 9-6, page 15, item Fig. 9-9: Drop-down list “Exposure programmes” If you have created your own exposure programmes, these are displayed in this list, see sect. - Page 24 9 Preparing for Capturing Images Adjust the white balance as follows: Select an exposure programme from the drop-down list fig. 9-6, page 15, item If necessary, press the [ ] button. The following settings are then also displayed on the image screen: [White balance] button [Save] button Fig.
-
Page 25: Editing Pre-Set Exposure Programmes, If Necessary
9 Preparing for Capturing Images 9.3.4 Editing Pre-Set Exposure Programmes, If Necessary To achieve the best possible image quality, OCULUS has pre-set the camera parameters for common image capture situations and has saved them as exposure programmes. You can edit these settings, sect. - Page 26 9 Preparing for Capturing Images If necessary, press the [ ] button. The following settings are then also displayed on the image screen: Resolution Gain Exposure Gamma value Fig. 9-11: ImageCam® 3 image window Adjusting the Resolution Activate the function “High resolution”. If you want to record and send an email or a longer video sequence, the lower resolution has a lesser data volume and gives a smoother video.
-
Page 27: Saving User-Defined Exposure Programmes
9 Preparing for Capturing Images Change Gamma Value You can correct the gamma by changing the gamma value. In other words, the colour values (or grey values) between 0 (black) and 1 (white) can be increased or lowered to achieve an optimal presentation. With the help of the gamma correction, you can influence, for example: How pronounced the vessels in the sclera are shown. -
Page 28: Shortcut Assignment To Exposure Programmes C1 Through C4
9 Preparing for Capturing Images 9.3.6 Shortcut Assignment to Exposure Programmes C1 through C4 You can also save your own configuration as an exposure programme, thus giving you quick access to the desired settings at any later time. Four buttons are provided for this purpose: Fig. -
Page 29: Capturing An Image Or Recording A Video
10 Capturing an Image or Recording a Video 10 Capturing an Image or Recording a Video Situate the patient so that he/she is sitting comfortably. Use the slit lamp in accordance with the instructions given in the supplied user manual for the slit lamp. Different image-capture screens are opened, depending on which camera is connected. -
Page 30: Capture (Grab) Image
10 Capturing an Image or Recording a Video 10.1 Capture (Grab) Image Click on the [ ] button. Alternatively foot switch: Press the foot switch. Alternatively slit lamp SL-IC4 D/SL-IC5 D: Press the capture button on the joystick. The present image is captured. ... -
Page 31: Recording A Video Using The Foot Switch
10 Capturing an Image or Recording a Video Press the [ ] button to stop recording. Press the [ ] button to end the recording. The video recording appears highlighted in green in the thumbnail preview on the overview screen. 10.4.1 Recording a Video Using the Foot Switch ... -
Page 32: Optimisation Of The Image Quality
10 Capturing an Image or Recording a Video 10.6 Optimisation of the Image Quality If you are not satisfied with the quality of the images, there are several different ways of optimising them: After the optimisation, save the changed camera configurations separately. -
Page 33: Viewing The Images
11 Viewing the Images 11 Viewing the Images 11.1 Overview of the ImageCam® 3 Programme The following areas are displayed on every screen: Patient and examination data Toolbar Menu bar Fig. 11-1: ImageCam® 3 programme operation Patient and Examination Data The following patient and examination data (1) are displayed: Patient’s last name and first name ... -
Page 34: Display Image
11 Viewing the Images You can also select an image/ video directly from the full view. This applies for both single image display mode and for the active window of four image display mode. Press one of the buttons to proceed to the next examination or to return to the previous one. -
Page 35: Identify Lengths And Angles
“Calibration for the display of the distance in mm” on page 30 programme, you can identify both lengths and angles. Attention OCULUS Optikgeräte GmbH is not liable for any re-using of obtained data by the ImageCam® 3 or any calculated evaluations. 11.5.1 Determine distances You can determine a distance in a full screen. - Page 36 11 Viewing the Images For non-calibrated systems the distance is given in the unit pixel [px]. Fig. 11-2: ImageCam® 3 - Measure length Calibration for the display of the distance in mm To calibrate this function, you must first capture an image of a ruler (alternatively: standard graph paper) at all magnifications of the slit lamp, then enter the reference lengths for the corresponding images.
- Page 37 11 Viewing the Images Attach a ruler (1) to the chin rest. Start with the smallest magnification (2) of your slit lamp, here 6x magnification. Fig. 11-4: Attach the ruler and set the magnification Focus the ruler on the monitor. The scale on the ruler must be clearly legible.
- Page 38 11 Viewing the Images Enter the reference lengths Open single screen mode, sect. 11.3, page Open the ruler image with the lowest magnification, in this case 6x magnification. ImageCam® 3 Program > Tools > Estimate distance Click on the left mouse button to set the starting point in the image.
- Page 39 11 Viewing the Images Select the magnification at which the image was taken, in this case 6x magnification. The reference distance defines the reference length in mm. Confirm with [OK] to accept the calibration for the first magnification. ...
-
Page 40: Identify Angles For Toric Contact Lenses
11 Viewing the Images 11.5.2 Identify Angles for Toric Contact Lenses With this function, you can display an angle which defines the inclination of the contact lens. ImageCam® 3 programme > Tools > Estimate angle (Tabo) Click on one of the marks. ... -
Page 41: Edit Image
11 Viewing the Images 11.7 Edit Image You can edit an image at any later time. ImageCam® 3 programme > Edit > Image-settings The following window is displayed (example): Change the parameters as needed: Brightness Contrast Image sharpness ... -
Page 42: Print Image
11 Viewing the Images 11.8 Print Image ImageCam® 3 programme > Examination > Print... Example of a Printout in Four Image Mode OCULUS ImageCam Name: Elise, Maier Version 3.11r07 Date of birth: 11.11.2011 Exam. date: 18.04.2012 Exam. date: 18.04.2012 Time:... -
Page 43: Import Image
11 Viewing the Images 11.9 Import Image ImageCam® 3 programme > Examination > Import images/videos The following window opens: Select the folder from which the image is to be imported. Select the image that is to be imported ... -
Page 44: Delete Image
11 Viewing the Images 11.11 Delete Image Mark the examination that is to be deleted in the thumbnail preview by clicking on the respective thumbnail image. The examination is now highlighted in blue: Fig. 11-11: Delete Examination ImageCam® 3 programme > Examination > Delete marked images ... -
Page 45: Capture An Image From A Video
11 Viewing the Images 11.12 Capture an Image from a Video In the ImageCam® 3 programme, you can copy an individual image frame from a video. Start a video. Two buttons appear beside the comments line below the camera image: Capture image Comments line... -
Page 46: Change Settings
11 Viewing the Images 11.13 Change Settings In the ImageCam® 3 programme, you can change basic settings as needed. ImageCam® 3 programme > Settings Group boxes for settings [Cancel] button Display of the software version [Save] button [System] button [Use] button Fig. -
Page 47: Buttons And Displays
Activate the desired video format. ImageCam® 3 USB camera: If you work with the OCULUS ImageCam® 3, the appropriate parameters, such as the video format, are pre-set. Changing the video format has no effect. Instruction Manual ImageCam® 3 (G/69200/XXXX/EN 0120 Rev01) -
Page 48: Compress Images
11 Viewing the Images 11.13.5 Compress Images Select the desired image format from the drop-down list. Setting the Image Compression If you have selected a JPEG format, you can set the image compression to reduce the data quantity of an image. This, of course, impairs the quality of the image. -
Page 49: Patient Data Management
12 Patient Data Management 12 Patient Data Management Once you have completed an examination you can do the following with the patient data: Rename it, sect. 12.1, page 43 Export it, sect. 12.2, page 43 Import it, sect. 12.3, page 44 ... -
Page 50: Import Patient Data
12 Patient Data Management following steps (e.g. selection of the directory). Select the “Target” (1) where you would like to export the data to. Recommendation: Use the option “Single file (U12)” to export the patient data. Press the [...] button (2). ... - Page 51 12 Patient Data Management Press the [Import] button. The following dialog is displayed: Select data source [Import] button [...] button Patient list Previous examinations Fig. 12-2: “Import” dialog box The options for the import and export of data are pre-set in the “Settings” area, also refer to sect.
-
Page 52: Data Backup
12 Patient Data Management 12.4 Data Backup You should make a backup copy of patient and examination data at regular intervals. In case of loss of data, you can reconstruct the data from a previously created backup with the help of this function. Since data backup takes several minutes, depending on the scope of the database and the data to be backed up, a backup should be carried out when the PC and the device will not be needed. -
Page 53: Restoring Data
12 Patient Data Management The Patient Data Management system internally tags all saved data records. If you select the option “Changed and new data only”, only the data records that were not saved during a previous backup will be backed up. ... -
Page 54: Change Settings
12 Patient Data Management 12.5 Change Settings Basic specifications for working with the Patient Data Management user interface can be made in the “Settings” area. Press the [Settings] button at the top right of the Patient Data Management system. The “Settings”... -
Page 55: Main" Tab
12 Patient Data Management 12.5.1 “Main” Tab “Language selection” drop-down list Optional patient entries [Autocasing] check box Fig. 12-5: “Settings” screen, “Main” tab “Language” Group Box Select the language in the “Language” drop-down list (1) to be displayed on the Patient Data Management user interface screen. ... - Page 56 12 Patient Data Management Select the desired attribute, e.g. “Comments” [2]. Presently active attributes New attribute, selected Fig. 12-6: Activate new attribute The context menu is closed, the attribute “Comment2” is displayed both in the input fields for patients (1) in the top section of the screen, and in the patient list (2).
-
Page 57: Devices" Tab
12 Patient Data Management 12.5.2 “Devices” Tab 1 Drop-down list for selecting a database 6 Path for the currently selected device 2 Radio button “load while starting” 7 check box for activating a device 3 Folder selection 8 Path for the database 4 Drop-down list for selecting a device 9 check box for activating a database 5 [Write permission] check box... - Page 58 12 Patient Data Management “Devices” Group Box Settings for connected devices can be carried out in the group box. In the drop-down list, select the desired device (4). If the device is in fact connected, then activate the check box [Active] (7).
-
Page 59: Import/Export" Tab
12 Patient Data Management 12.5.3 “Import/Export” Tab Automatic backup folder Standard format for import and export Select import/export folder [Active] check box Interface for manual operating unit [Include bitmaps] chechbox Fig. 12-9: “Import/Export” tab “Automatic backup” Group Box In addition to the manually performed backup (sect. - Page 60 12 Patient Data Management “Import/Export” Group Box You can enter settings in this group box for import and export of Patient Data Management user interface data. Note The settings specified in this tab for import and export of data can be overwritten.
-
Page 61: Email" Tab
12 Patient Data Management 12.5.4 “Email” Tab Selection of the email connection SMTP connection selection Standard text for subject and body text Fig. 12-10: “Email” tab The three radio buttons in the top section of the tab panel (1) are used to select whether the email connection is activated, and if so, how the data transfer is to take place. -
Page 62: Interface" Tab
12 Patient Data Management 12.5.5 “Interface” Tab Settings for HL7 Settings for Default.pat Settings for GDT Fig. 12-11: “Interface” tab Use this tab to enter the folder for different interface types and to activate or deactivate them. The interface “Default.pat” (3) is used if the Patient Data Management user interface is launched by a third-party programme. -
Page 63: Smartcardreader" Tab
12 Patient Data Management 12.5.6 “Smartcardreader” Tab [Config] button [Active] check box Fig. 12-12: “Smartcardreader” tab You can configure a smartcard reader on this tab panel so that you can directly import patient data via the patient’s insurance card into the Patient Data Management user interface. -
Page 64: Misc"6 Tab
12 Patient Data Management 12.5.7 “Misc”6 Tab 1 check box for managing a database check box for initialising in a database Fig. 12-13: “Misc” tab Patient Data Management is implemented in two different versions: V2.x and V6.x. In principle, implementing both versions on the same network should be avoided. -
Page 65: Cleaning And Maintenance
Gain is too high Increase slit lamp brightness and simultaneously reduce the gain. Image off-center with respect Beam splitter is maladjusted Contact OCULUS Service or to binocular eyepiece your authorized dealer Instruction Manual ImageCam® 3 (G/69200/XXXX/EN 0120 Rev01) 59 / 68... - Page 66 14 Troubleshooting Error Possible Cause Remedy Jerky camera image with i3/i5 Change status of i3/i5 processor Navigate to the folder: processor C:\IMAGECAM\DRIVER\IDS_uE Execute program „IDSProcIdleConfig.exe“ Disable both options 60 / 68 Instruction Manual ImageCam® 3 (G/69200/XXXX/EN 0120 Rev01)
-
Page 67: Transport And Storage
15 Transport and Storage 15 Transport and Storage The ImageCam® 3, must be properly dismantled and packed before being transported or stored. 15.1 Transport and Storage Information Storage conditions Ambient temperature -10 — +55°C Relative humidity, including condensation 20% — 80 % Air pressure range 700 hPa —... -
Page 68: Disposal
16 Disposal 16 Disposal In accordance with Directive 2012/19/EC of the European Parliament and the Council of 4 July 2012, and in accordance with German law governing the marketing, return and environmentally compatible disposal of used electrical and electronic devices, such appliances must be recycled and may not be discarded as household waste. -
Page 69: Assumption Of Liability For Functions And Damage
This certification must contain the date of performance and statement of the performing firm, with signature. If requested, OCULUS will provide the service technician with a list of spare parts and additional descriptive material for this purpose. -
Page 70: Technical Data
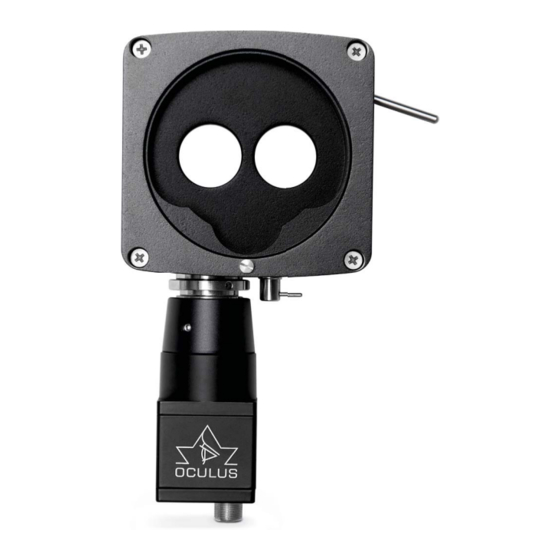
18 Technical Data 18 Technical Data Camera Camera Progressive scan Interface USB 3.0 Dimensions (W x D x H 29 x 29 x 48 mm (1.1 x 1.1 x 1.9 in) Weight 47 g (1.7 oz) Operating Conditions Temperature +10°C — +35°C Humidity 20% —... - Page 71 19 Appendices 19 Appendices 19.1 Operating Instructions for the Beam Splitter rotary knob 1 Lever for swivelling in and out beam splitter prism Fig. 19-1: Operating elements of the beam splitter Swing in the Beam Splitter Optic The beam splitter optic couples out the light for the video recording from one of the two beam paths.
- Page 72 Camera mount C-mount Objective lens 4.0/f=50 mm integrated Slit lamp adaptions See: www.oculus.de > Products > Slit lamp Documentation > ImageCam® 3 > Slit lamp adaptions Fig. 19-2: Dimensions in mm (in inches) Shown with Zeiss / Nidek mounting plates Depth: 39 to 55 mm (1.5 to 2.2 in), depending on model...
- Page 73 19 Appendices Instruction Manual ImageCam® 3 (G/69200/XXXX/EN 0120 Rev01) 67 / 68...
- Page 74 19 Appendices 68 / 68 Instruction Manual ImageCam® 3 (G/69200/XXXX/EN 0120 Rev01)
- Page 76 Manufacturer and Service Address Headquarters: OCULUS Optikgeräte GmbH Münchholzhäuser Straße 29 • 35582 Wetzlar • GERMANY Tel. +49 641 2005-0 • Fax +49 641 2005-295 E-Mail: export@oculus.de • www.oculus.de USA: OCULUS, Inc. 17721 59th Avenue NE • Arlington • WA 98223 Tel.
Need help?
Do you have a question about the ImageCam 3 and is the answer not in the manual?
Questions and answers