
Related Manuals for ECOTEST VIRTUOSO RKG-14


Summary of Contents for ECOTEST VIRTUOSO RKG-14
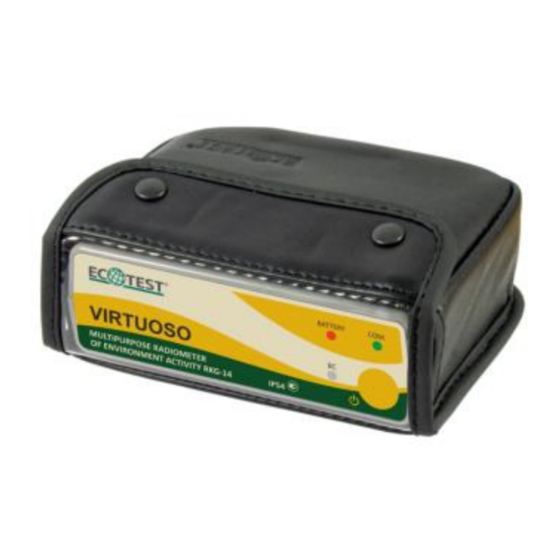
- Page 1 RKG-14 “VIRTUOSO” multipurpose environment activity radiometer Operating manual ВIСТ.412139.003-02 НЕ...
- Page 3 The device enables a user to independently update a software version using the Internet. The Virtuoso software is available on the Google Play for free. Best regards, “ECOTEST” team...
- Page 4 Version 8 Last updated: June 2021...
-
Page 5: Table Of Contents
CONTENTS 1 DESCRIPTION ..................8 1.1 P ....................8 URPOSE OF USE 1.2 T ................8 ECHNICAL SPECIFICATIONS 1.3 D ....................11 ELIVERY KIT “VIRTUOSO” 1.4 D ..........12 ESIGN OF THE RADIOMETER 1.5 S .......... 14 WITCHING THE DETECTING DEVICE ON AND OFF 1.6 C .... - Page 6 6.2 CESIUM ISOTOPES SURFACE ACTIVITY STANDARDS UNDER NRBU-97 STANDARD ..................92 6.3 STANDARDS OF EFFICTIVE SPECIFIC ACTIVITY OF NORM UNDER NRBU-97 ......................93 7 MANUFACTURER INFORMATION ............ 94 APPENDIX 1 EXAMPLES OF MEASUREMENT REPORTS ........95...
- Page 7 INTERESTING FACTS Why do we monitor exactly cesium? Human external exposure and a risk to inhale radioactive substances are attributed to the early phase of a nuclear and radiological accident. In the years following the Chornobyl nuclear accident in Ukraine, of the most long-lasting and dangerous factors of radiation impact has remained radionuclide intake with food in humans.
- Page 8 from a point not typical of the environment or from a material too clean or too contaminated). Moreover, carrying out an examination by sampling practices appear to be quite a time-consuming, inconvenient and sometimes even unacceptable procedure as the sample collection might cause damage to the integrity of a product (or packaging).
- Page 9 from the volume significantly larger in size than a common Marinelli sample container. Depending on a state and density of tested food, information about radiation is transferred to the attached detector from the food with the volume of ~50÷250 l. If performing the same number of measurements by placing the detector as that of taking samples by a traditional method, one will get much more reliable integrated image of large volumes of food as there is a sort of direct data communication with the substantially larger volume of tested object.
-
Page 10: Description
1 DESCRIPTION 1.1 Purpose of use The RKG-14 “VIRTUOSO” multipurpose environment activity radiometer (hereinafter called – the radiometer) is designed for - detection of Cs and Cs radioisotopes (hereinafter - radiocesium) in the objects of the environment; - evaluation of the detected radiocesium content in the values of specific, volume and surface activities;... - Page 11 Table 1.1 (continued) Unit of Standardized Name measurement value Main relative permissible error limit of measurement of the effective specific activity of naturally occurring 35 radionuclides K in the objects of the environment in geometries “2”, “4”, Р=0.95 Measurement range of gamma radiation μSv/h ambient dose equivalent rate from 0.001 - 10...
- Page 12 Table 1.1 (continued) Unit of Name Standardized value measurement Dependence of sensitivity from the angle of recorded radiation incidence (anisotropy), does not exceed Time of continuous operation of the detecting device from full battery under gamma background not more than 0.5 μSv/h, not less than Dimensions of the detecting device, not 114×36×83...
-
Page 13: Delivery Kit
1.3 Delivery kit Table 1.2 – Delivery kit of RKG-14 “VIRTUOSO” radiometer Type Name Q-ty Note Detecting device of RKG-14 With the installed “VIRTUOSO” LIR14500 BICT.468166.030-02 multipurpose 1 pc. Lithium-ion battery of environment AA type activity radiometer Supplied under Android device 1 pc. -
Page 14: Design Of The "Virtuoso" Radiometer
1.4 Design of the “VIRTUOSO” radiometer The RKG-14 “VIRTUOSO” multipurpose environment activity radiometer consists of the detecting device of the radiometer, an Android device (a tablet PC or a smartphone running Android OS) and special-purpose software “Virtuoso” for the Android device. 1.4.1 Android device Android device* is a smartphone or a tablet PC, which runs the Android™... - Page 15 1.4.2 Radiometer’s detecting device is sown in Figure 1.1. Figure 1.1 - Detecting device of RKG-14 “VIRTUOSO” multipurpose environment activity radiometer...
-
Page 16: Switching The Detecting Device On And Off
The radiometer’s detecting device is designed in a plastic dump- and dustproof housing. The ingress protection rating is IP54. The housing of the radiometer consists of covers (1, 2), a panel (3) and a battery compartment lid (4), and a connector for storage battery charging (9). The “BATTERY” (5), “COM.”... -
Page 17: Charging The Storage Battery Of The Detecting Device
1.6 Charging the storage battery of the detecting device The external battery charger, which is included in the radiometer’s kit, is connected to the connector (9). When you connect the charger to the detecting device, the “BC” LED (meaning that external power is supplied) and the "BATTERY"... -
Page 18: Operation Of The "Virtuoso" Radiometer
2 OPERATION OF THE “VIRTUOSO” RADIOMETER 2.1 Installing the Virtuoso application on an Android device If a tablet PC or a smartphone were included in the delivery kit of the device, the Virtuoso application would be already installed on it. If some other Android device is used, you should download and install the application on the latter. - Page 19 Figure 2.1 - Symbol area The “Antenna” (1) symbol indicates the status of the connection to the detector. The background of “Antenna” turns green if your Android device is connected to the detector. The blinking symbol in the red background means that connection to the detector is either unstable or absent.
-
Page 20: Connecting The Android Device To The Detector
2.3 Connecting the Android device to the detector 4(a) 4(b) 4(c) Figure 2.2 - Connecting the Android device to the detector... - Page 21 To connect the Android device to the detector, do as follows (see Fig. 2.2): 1 Press the on/off button on the detector’s housing to turn the detector on. 2 Make sure a green LED is blinking at high frequency. 3 Run the Virtuoso application on the Android device. 4 If the required detector has already connected to the Android device, choose it from the list in the start window (see Fig.
- Page 22 After an attempt to connect with the detector, the window shown in Figure 2.3 may appear. The probable causes are: а) the detector is not switched on; b) the detector is located too far from the Android device (at a distance of more than 3 m);...
-
Page 23: Mode Of Gamma Radiation Dose Rate Measurement
2.4 Mode of gamma radiation dose rate measurement The detector enters this mode immediately after the Android device is connected to the detector. The Virtuoso application window in the mode of gamma radiation dose rate measurement is shown in Figure 2.4. Figure 2.4 - Mode of gamma radiation dose rate measurement This window shows ambient dose equivalent rate of gamma radiation (2) and counts per second from the gamma detector (shown graphically and numerically) -
Page 24: Saving Measurement Results Of Gamma Radiation Dose Rate
Attention: For correct measurement of low levels of specific/volume activity of radiocesium (from 0 to about 100 Bq/kg) in relatively small objects (smaller than 50 cm), dose rate of environmental background radiation should not exceed 0.15 µSv/h. 2.4.1 Saving measurement results of gamma radiation dose rate When you tap on the icon (see Fig. -
Page 25: Mode Of Radiocesium Specific/Volume Activity Measurement
2.5 Mode of radiocesium specific/volume activity measurement In this section we consider a procedure of measurement of specific/volume activity of radiocesium on the example of food. Testing of soil and wood should be carried out in a similar sequence. To enter the mode of specific/volume activity measurement of food, touch the TEST button in the mode of gamma radiation dose rate measurement (see Fig. - Page 26 Select “Cs” tab and then the icon "Specific/volume activities". Before starting food testing, please read carefully the guidelines on carrying out measurements described in Section 2.5.2 “Important recommendations for measuring cesium specific/volume activity”. Pay attention to the required type of a food packaging or a container, as well as the way of positioning the detector towards the food, etc.
-
Page 27: Sequence Of Determining Specific/Volume Activity Of Radiocesium In Food
2.5.1 Sequence determining specific/volume activity radiocesium in food 2.5.1.1 “Selecting a food group” Figure 2.7 illustrates the window of specific/volume activity measurement mode of radiocesium on the “Food” tab. Figure 2.7 - Selecting a group to which the food belongs... - Page 28 Tap an icon showing a group with the food to be tested. The table below will help you determine a food group to which your food belongs. Group Food product (food) Powdered baby formula, dried milk Water, juice, tea, milk, fermented milk drink, yoghurt, cottage cheese, butter, sour cream Meat, smoked meat products, fresh fish, sushi, eggs.
- Page 29 2.5.1.2 “Selecting an object thickness” Depending on the object of measurement selected from the list, its recommended thickness will be set automatically. However, measurements can be carried out on thinner objects and the objects that are not provided in the recommended list.
- Page 30 2.5.1.3 “Selecting an object position” A window will appear (see Fig. 2.9) in which you should specify the way of positioning the detector towards the tested object – either placed on the surface (optimum alternative for measurement) or between the two “large objects” (ideally).
- Page 31 2.5.1.4 "Selected parameters" In the next window that appears, all the parameters that you specified in the previous paragraphs will be listed. You can also change the value of density of the tested object. To do this, tap on "Edit" and enter a different value. If all the parameters are correct, place the detector as it was selected in the previous step and tap "START"...
- Page 32 2.5.1.5 "Searching for cesium isotopes in food" Important: After you tap "START", the very food testing begins. Information about the parameters specified in previous windows can be viewed via the “About measurement” menu item. The radiometer features two modes for presenting testing process: 1) a basic mode;...
- Page 33 The user can observe current results of radiocesium isotopes detection in food in the basic mode. The line 1 will move either to the “NOT FOUND” or “FOUND” labels during measurement depending on the presence or absence of cesium in the food, respectively. The progress indicator 2 displays accumulation of necessary radiological information in the process of testing and in length of time fills from 0 % tо...
- Page 34 Display options in the expert mode: 1 A gamma radiation spectrum (Figure 2.12 (a)) is activated upon tapping a button. The experienced users with its help can visually control (observe) typical display of cesium radiation in the spectrum or control potential abnormalities of background radiation.
- Page 35 2.3 Ideally, the band should gradually and symmetrically move towards a conditional central line in horizontal direction (examples are shown in Figure 2.13). If the band behaves that way during measurement (we can see that band edges are more or less symmetric with respect to the horizontal center shown with a red line-cursor), it means that the current result of specific activity calculation is valid enough.
- Page 36 2.4 In reality, the band almost always behaves in a different way. If the band during measurement clearly deviates from a horizontal direction (moves up or down), it means that spectrum balancing processes are not steady yet (Figure 2.14 illustrates some examples of the unstable band). In order to get more reliable measurement results you should wait until the band begins moving in a stable horizontal direction (Figure 2.15 illustrates the examples of a gradual change for a stable measurement mode).
- Page 37 Figure 2.15 – Stable trend band 2.5 A bandwidth is another important feature apart from its shape and direction, since it displays the error in measurement. Considering the level of accuracy you want to obtain, please wait until the band reaches an acceptable width.
- Page 38 Figure 2.16 – Evaluating the width of the trend band 2.6 The line-cursor can also be used to control the bandwidth. By placing the cursor at the level of the right end of the band’s upper edge, and then shifting it to the lower edge (see Figure 2.17), we can observe a numeric value, which corresponds to the level of a cursor position.
- Page 39 2.7 The band is always much narrower and more stable when a large object is under measurement. All the figures, described in the following subsections, will be improved and reached much more quickly in such a case. 2.8 If the aim of your measurement is to make sure whether the specific activity exceeds some specified level (threshold value), the trend mode appears to be the most time-effective.
- Page 40 2.10 If cesium is detected in the product under testing, the lower band edge will move up the line of “zero activity” (i.e. 0 Bq/kg threshold is exceeded). Moreover, for a more confident conclusion you should wait until the gap between the edge and the zero line becomes well-defined and lasting enough, and there is no apparent tendency for a repeated dropping of the lower band edge below the zero line.
- Page 41 (a) correct cursor position (b) incorrect cursor position Figure 2.20 – Control of the current activity value with the help of the cursor 2.12 If the band shape becomes stable, i.e. its edges are coming together towards the horizontal central line in a stable and continuous manner (ideally as in Figure 2.13), one can anticipate that this very central line will later on converge with the most accurate value of the specific activity.
- Page 42 maximum probable case that there is no cesium present. The figures will show the following value of specific activity: Bq/kg − Figure 2.21 – Cesium absence 2.13.2 If the band covers the zero line (in Figure 2.22 the red line-cursor shows the zero level, which falls within the band edges), but the band center is a bit beyond the zero line, it means either cesium is absent or there is relatively little cesium present.
- Page 43 2.13.2 will assume increasingly accurate and “constricted” values. It is important to realize that even if the band covers the zero line at a given time, cesium might still be present. To get more specific answer you should continue measurement. The band, in this instant, will get narrower around zero, or, perhaps, around some relatively small real value of specific activity.
- Page 44 (b) three results of a long-term measurement of a “large sample” with ≈0 Bq/kg Figure 2.23 - Examples of the trend band behavior during long-term measurements 2.13.4 The above-mentioned features of the band development pattern during measurement can serve the basis for control of the presence or absence of cesium radiation within background radiation irrespective of the task to monitor either food or surface contamination.
- Page 45 There are three ways to complete the search for cesium radioisotopes in food: 1 Automatic completion upon achieving measurement progress equal to 100 %; 2 Forced completion after you tap the “Stop” button (the option of activity evaluation will become available, provided that you have currently gathered sufficient information and the progress equals to more than 50%);...
- Page 46 Figure 2.24 - Search for cesium isotopes in food is completed To evaluate specific and volume activities of cesium radioisotopes, touch the “Activity evaluation” button. To exit the mode of specific/volume activity measurement and return to the mode of gamma radiation dose rate measurement, touch the “Exit Test”...
- Page 47 2.5.1.6 “Activity evaluation” The final window of the mode of specific/volume activity measurement with the values of specific and volume activities of cesium isotopes is shown in Figure 2.25. Figure 2.25 – Evaluation of activity...
- Page 48 This window shows the results of calculated specific and volume activities for cesium isotopes in a food product under testing in the events of forced (Figure 2.25 (a)) and automatic (Figure 2.25 (b)) measurement completion. If the calculated activity exceeds the minimum detectable activity of the device (50 Bq/kg) as well as the minimum monitoring level of cesium for the chosen location and specified object dimensions, the results will appear as in Figure 2.25 (b).
-
Page 49: Important Recommendations For Specific/Volume Activity Measurement
2.5.2 Important recommendations specific/volume activity measurement Attention: Failure to adhere to the following recommendations may lead to incorrect measurement results. This section provides recommendations on measurement of specific/volume activity of radioactive cesium on the example of food. Best practices for testing of soil and timber are the same. - Page 50 2.5.2.2 Food shape and dimensions 1. Larger food product size deliver greater precision and shorter period of time to get measurement results. The best way to conduct measurements of products is when they are stacked in a fairly large piles or large containers – it is quite easy to put the device on a pile, or a container.
- Page 51 Figure 2.29 – Putting single-type containers together 3 The relatively small-sized containers (up to ≈25 cm) are required to have a parallelepiped-like or cylinder-like shape. If the dimensions of the object exceed ca 25 cm in all directions, the shape of the container is of no importance. Attention: Testing of food products with the dimensions of less than 14×14×11 cm should be considered as indicative, i.e.
- Page 52 2.5.2.3 Positioning the detector near a food product 1 Place the detector close to the widest side of the food container. Figure 2.30 – Attaching the detector to the widest side of the container 2 Place the detector with its reference point (side labeled with the “+” symbol) close to the food.
- Page 53 3 Place the detector on the surface of the container so that there is no significant air layer between the detector and the food product. Figure 2.32 – No air layer 4 Place the detector above the surface of the food container in the case there is some air layer at the package top and the food container is large-sized and heavyweight.
-
Page 54: Mode Of Radiocesium Surface Activity Measurement
2.6 Mode of radiocesium surface activity measurement Measurement of surface activity is appropriate only when there is evidence that the radioactive cesium is right on the surface and has not penetrated into the soil deeper than for 5 cm. If this is not achieved, we should understand that the result serves as an estimate. - Page 55 Select “Cs” tab, and then “Surface activity” icon. Before starting soil testing, please read carefully the guidelines on carrying out measurements described in Section 2.6.2 “Important recommendations for soil testing”. Pay attention to the way of selecting the type of measurement, as well as positioning the detector above the soil surface, etc.
- Page 56 The mode of radioactive cesium surface activity measurement allows testing the following soil types: Fertile soil Lawn Marsh soils Sand Crushed stone Asphalt, concrete...
-
Page 57: Sequence Of Determining Surface Activity Of Radiocesium In Soil
2.6.1 Sequence of determining surface activity of radiocesium in soil 2.6.1.1 “Selecting a soil type” Figure 2.35 - Selecting a soil type for testing Tap an icon showing a type of soil to be tested. - Page 58 2.6.1.2 “Selecting height” Figure 2.36 - Selecting height Select a height above a surface where the detector will be located during testing. The higher the detector, the bigger the tested surface area is. Select 10 cm height for local testing (surface radius up to 1-3 m), select 100 cm height for large areas (surface radius up to 20-50 m).
- Page 59 2.6.1.3 “Selected options” Figure 2.37 - Starting a test In the next window that appears, all the parameters that you specified in the previous paragraphs will be listed. If the parameters are correct, place the detector over the surface at a height selected in the previous step, and tap "START" to begin testing.
- Page 60 2.6.1.4 “Searching for cesium isotopes on surface” Search for cesium isotopes on surface is performed the same way as search for cesium isotopes in food. All peculiarities of the measurement process monitoring and interpretation of measurement results in the basic and expert modes are absolutely identical to those described in 2.5.1.5 of the mode of specific/volume activity measurement.
-
Page 61: Important Recommendations For Radiocesium Surface Activity Measurement
Specify sanitary standards for cesium isotopes surface activity in your country. The “Continue search” button allows further detection of cesium isotopes. To return to the mode of gamma dose rate measurement, touch the “EXIT TEST” button. As you exit the surface activity measurement mode, the application warns you that the measured data will be lost. - Page 62 Figure 2.39 - Radius covered by the detector 2.6.2.2 Recommendations for choosing the type of measurement 1. When choosing the type of measurement, check out the size of a tested area. If the area is limited in size (for example, one of its directions does not exceed 3 m or buildings are located within a few meters), local measurement performed by positioning the detector at the height of 10 cm is recommended.
- Page 63 2. Regardless of the overall size of the area, if it features local holes (with a radius extending from tens of centimeters to several meters) that are potentially susceptible to contamination, local measurement is recommended Figure 2.42 – Measurement of rough surface 3.
- Page 64 Figure 2.44 – Measurement of heterogeneous surface 2.6.2.3 Additional recommendations for measurements Use simple supporting stands made of light materials (for example, the 10 cm thick sheet of foamed plastic can be put under the device for local measurement) to hold the device at a necessary height during measurement time. Keep the stand free from contaminants.
-
Page 65: Mode Of Der From Radiocesium Measurement
2.6.3. Mode of DER from radiocesium measurement The mode of DER measurement from radiocesium is designed to detect cesium emissions in the environment and to assess the values of the man-made radiocesium radiation component in the natural background. The mode of DER measurement from radiocesium can be accessed by tapping the “TEST”... - Page 66 You can find the rules in the application help window, which is called with the "Help" button (see Fig. 2.46). 2.6.3.1 Measurement of cesium radiation DER can be performed in any position of the detector, i.e. the detector may be located in an open space, or may be attached to any objects or materials, or even deepened in their mass.
- Page 67 Spectrum of explicit radiocesium Spectrum of less explicit radiocesium Figure 2.48 – Examples of radiocesium spectrum; orange color - a characteristic peak of radiocesium-137, yellow color - a characteristic peak of radiocesium-134...
- Page 68 2.6.3.7 In the absence of radiocesium emission you will see the following view of the "FOUND-NOT FOUND" indicator and DER value = Х.ХХХХ mSv/h (see Fig. 2.49). The spectrum will be approximately as follows (see Fig. 2.50). Figure 2.49 – No radiocesium Figure 2.50 –...
- Page 69 2.6.3.8 If the measurement progress indicator gains 100%, it does not mean that everything has been completely and thoroughly measured. If you continue the measurement time, the reliability and accuracy of measurement will increase. 2.6.3.9 The result will be much more reliable if we continue measurement after 100% by tapping "CONTINUE SEARCH".
-
Page 70: Measurement Mode Of Specific/Volume Activity Of Naturally
2.7 Measurement mode of specific/volume activity of naturally occurring radioactive materials 2.7.1 Sequence of determining specific/volume activity of naturally occurring radioactive materials The measurement procedure of specific/volume activity of naturally occurring radioactive materials is similar to the measurement procedure of specific/volume activity of radioactive cesium, as described in Section 2.5. - Page 71 2. The side of the object the detector is attached to should be selected so as to avoid visibility of large foreign objects (especially of land, stone facilities or buildings). If this is not possible, choose that side, where the external radiation may be the least.
- Page 72 However, if we only want to know if the activity of the tested object exceeds the sanitary standards, measurements can still be conducted. If even in this case the value of the activity is lower than the sanitary standards, the tested object meets the standard for sure.
- Page 73 3. One of the measurement types is measurement of NORM activity inside the building. The thickness of the walls, floor and ceiling should be no less than 20 cm (with less thickness the measurement result will be somewhat underestimated). In case of such measurement, it is sufficient to place the detector in any point in the room (preferably closer to the center).
-
Page 74: Tracks
2.8 Tracks The mode of tracks recording is designed to measure gamma radiation dose rate on a particular route and pooling of measurement points into a track with reference to geographical coordinates. Before recording the track, you should carry out setup (see Section 2.11). One can access the mode of tracks recording by tapping “TRACK”... - Page 75 In the map mode you can switch to display of the current location of the Android-device by tapping the icon. If the coordinates are determined, the current location will be showed with a green icon. The icon turns gray if you lose a signal from the GPS-receiver.
- Page 76 Figure 2.59 – Track recording Figure 2.60 – Track pausing...
-
Page 77: Data Management And Viewing
2.9 Data management and viewing 2.9.1 Data viewing Tap on the "Menu" button of the Android device and select "Settings" from the menu. Choose "Data Management" item in the "Data" section of the open settings window of the program. A window opens, shown in Figure 2.61, which includes the categories of saved data available for viewing. - Page 78 Figure 2.62 – The list of saved tracks Each track name in the list includes the date and time of recording start (see Fig. 2.62). The track can be viewed by selecting its name from the list (see Fig. 2.63). You can specify one or more tracks and perform additional operations by long tap (see Section 2.9.2).
- Page 79 By tapping on the icon opposite the required track, you can view the route with plotted points (see Fig. 2.64) and the results of measurement in any of these points by tapping the required one. There is an option to switch to the satellite map view and back with icon.
-
Page 80: Data Management
2.9.2 Data Management Tap the "Menu" button on the Android devices and select "Settings". Select "Data Management" in the "Data" section of the open settings window of the program. A window opens, shown in Figure 2.61, which includes the categories of saved data available for viewing. - Page 81 2.9.2.1 Additional operations with tracks and gamma results The following additional operation can be performed with the specified track records or gamma results (long tap on the required record): Show on map icon), Export to .KMZ file ( icon) and Delete ( icon).
- Page 82 2.9.2.2 Additional operations with test results The following additional operation can be performed with the specified records of test results (long tap on the required record): Show on map ( icon), Export to .KMZ file ( icon), Export to .HTML file to generate the report ( icon) and Delete ( icon).
- Page 83 Export to .KMZ file is done similarly to export of tracks or gamma results. The exported .KMZ file can be opened via Google Maps or Google Earth (on a smartphone, a PC or other compatible equipment) to view the saved test results regardless of the Virtuoso application.
-
Page 84: Metrological Operations
2.10 Metrological operations The mode of metrological operations is used in cases where it is necessary to make sure that the device preserves metrological characteristics in the most responsible type of measurement - namely, in the measurements of specific activity. This mode is also used when it is necessary to compare the device measurement results with those of other measuring instruments, especially laboratory spectrometers-radiometers. -
Page 85: Program Setting, Help Text, Information
2.11 Program setting, help text, information The icons, illustrated on Fig. 2.69 will appear in the upper part depending on an open application window or a measurement mode. Figure 2.69 – Icons “Menu” and “Help” Button (1) shows contextual hints depending on the currently open windows. Button (2) opens a menu, wherefrom you can switch to the program settings (see Fig. - Page 86 The program setup menu contains the following items: 1. Measurement - you can review the information about the detector, which is currently connected to the Android device, delete information about the “bound” detector and select the text types, which will be displayed in the test selection window.
- Page 87 For detailed information about the tracks, please refer to Section 2.8. 3. Data – moving to the data management window. For more information, please refer to Section 2.9. You can also switch to the menu of database management (see Fig. 2.72), wherefrom you can make backup copying/restore and clean up the database.
-
Page 88: Demo Mode
2.12 Demo mode The application provides for a demo mode that allows you to learn about functional capabilities of the radiometer even if you do not have the detector. Open the Virtuoso application. Do not connect the Android device to the detector (do not tap the “Connect”... -
Page 89: Virtuoso Application Update
3 VIRTUOSO APPLICATION UPDATE The Virtuoso app is constantly updated and filled with new features, useful information. It is therefore recommended to check for the new program versions on Google Play. Do the following: 1. Set up an Internet connection in your Android device. 2. -
Page 90: Energy Calibration
4 ENERGY CALIBRATION The energy calibration is done with the aim to correct spectrometric tract parameters, which tend to be changed during a device operation. The recommended calibration intervals – not less than one every six months. The energy calibration is based on the measurement of naturally occurring isotope K, which in most cases exists in the environment, with a subsequent automatic recalculation of coefficients of the “VIRTUOSO”... - Page 91 Important: Please read these instructions carefully before starting calibration. Disregarding the listed below recommendations might cause incorrect operation of “VIRTUOSO”! Recommendations on how to prepare for the energy calibration: 1 Keep the detector within the temperature range from +17 ºС to +25 ºС for at least 1.5 hours;...
-
Page 92: Troubleshooting And Messages
5 TROUBLESHOOTING AND MESSAGES The “Detector damaged” message appears. There is a problem with the “VIRTUOSO” detector. Switch the detector off, and then turn it on. If the message appears again, contact the service center or the manufacturer. The “Could not calibrate detector. Potassium was not found” message appears during the energy calibration. -
Page 93: Safety Standards For Cesium Isotopes Activity
6 SAFETY STANDARDS FOR CESIUM ISOTOPES ACTIVITY 6.1 SAFETY STANDARDS FOR CESIUM ISOTOPES SPECIFIC ACTIVITY IN FOOD Attention: Applicable safety standards for cesium isotopes specific activity in food in your country may be different from those included in this section. Food safety standards for cesium isotopes specific activity in Japan (dated April 2012) Food products... -
Page 94: Cesium Isotopes Surface Activity Standards Under
6.2 CESIUM ISOTOPES SURFACE ACTIVITY STANDARDS UNDER NRBU-97 STANDARD Table D.9.1 (NRBU 97) – The lower limits of justification, absolutely justifiable intervention levels and action levels for a decision on the permanent relocation (shortened). Absolutely justifiable Lower limits of Criteria for as decision intervention justification * levels** and action... -
Page 95: Standards Of Effictive Specific Activity Of Norm Under Nrbu-97
6.3 STANDARDS OF EFFICTIVE SPECIFIC ACTIVITY OF NORM UNDER NRBU-97 6.3.1 Effective specific activity of naturally occurring radioactive materials in construction and mineral raw materials. 6.3.1.1 The value of А (effective specific activity of naturally occurring radioactive materials) in construction and mineral raw materials that is used for all types of construction without restrictions (I class) should not exceed 370 Bq∙kg 6.3.1.2 Construction materials, where А... -
Page 96: Manufacturer Information
Private enterprise “Scientific and production private enterprise “Sparing-Vist Center” (PE “SPPE “Sparing-Vist Center”) 33 Volodymyr Velyky Str., Lviv, 79026, Ukraine Tel.: +380 32 242 15 15 (multichannel) +380 32 242 21 15 (multichannel) Fax: +380 32 242 20 15 Е-mail: sales@ecotest.ua website: www.ecotest.ua... -
Page 97: Appendix 1
APPENDIX 1 EXAMPLES OF MEASUREMENT REPORTS а) VIRTUOSO measurement report (with the added geographical coordinates and an option to display data on the map of the area) - Page 98 VIRTUOSO measurement report...
- Page 99 с) VIRTUOSO measurement report...
Need help?
Do you have a question about the VIRTUOSO RKG-14 and is the answer not in the manual?
Questions and answers