Tenda N300 Wi-Fi xPON ONT User Manual
Hide thumbs
Also See for N300 Wi-Fi xPON ONT:
- User manual (136 pages) ,
- Easy setup manual (10 pages) ,
- Quick installation manual (11 pages)
Table of Contents
Advertisement
Quick Links
Advertisement
Table of Contents

Related Manuals for Tenda N300 Wi-Fi xPON ONT


Summary of Contents for Tenda N300 Wi-Fi xPON ONT
- Page 1 N300 Wi-Fi xPON ONT User Guide V1.0...
- Page 2 Tenda does not assume any liability that may occur due to the use or application of the product described herein. Every effort has been made in the preparation of this document to ensure accuracy of the contents, but all statements, information and recommendations in this document do not constitute a warranty of any kind, express or implied.
- Page 3 Preface Thank you for choosing Tenda! This user guide walks you through all functions of the N300 Wi-Fi xPON ONT (HG3 used for illustration). All the screenshots herein, unless otherwise specified, are taken from HG3. Web UI of different models may differ. The Web UI displayed shall prevail.
- Page 4 (Toll Free: Mon - Fri 9 am - 6 pm PST) Hong Kong: 00852-81931998 www.tendacn.com Website Revision History Tenda is constantly searching for ways to improve its products and documentation. The following table indicates any changes that might have been made since this guide was first published. Version Date Description V1.0...
-
Page 5: Table Of Contents
Contents Contents Get to know your device ........................1 1.1 Overview ............................. 1 1.2 Appearance ..........................1 1.2.1 Indicators, ports, and buttons ..................1 1.2.2 Label ..........................3 Web UI ............................... 4 2.1 Login ............................4 2.2 Logout ............................5 2.3 Web UI layout .......................... - Page 6 Contents 5.3.2 Customize the Wi-Fi password ..................19 5.4 Access control ........................... 21 5.4.1 Overview ........................21 5.4.2 Allow certain clients to access the Wi-Fi network ............21 5.5 WPS............................23 5.5.1 Overview ........................23 5.5.2 Connect to the Wi-Fi network using the WPS button ..........23 5.5.3 Connect to the Wi-Fi network using PBC on the web UI ..........
- Page 7 Contents 7.2.1 ALG ..........................55 7.2.2 IP/Port filtering ......................56 7.2.3 MAC filtering ........................58 7.2.4 Port forwarding ......................61 7.2.5 URL Blocking ........................65 7.2.6 DMZ ..........................66 Advance ............................70 8.1 Advanced settings ........................70 8.1.1 ARP table........................70 8.1.2 Routing ...........................
- Page 8 Contents 10.5 Password ..........................88 10.6 Firmware upgrade ........................89 10.7 ACL ............................90 10.8 Time Zone..........................92 10.9 TR-069 ............................. 93 10.10 Logout ........................... 94 11 Statistics ............................95 Appendixes .............................. 96 A.1 Configure the computer to obtain an IPv4/IPv6 address automatically ......96 A.1.1 Windows 10 ........................
-
Page 9: Get To Know Your Device
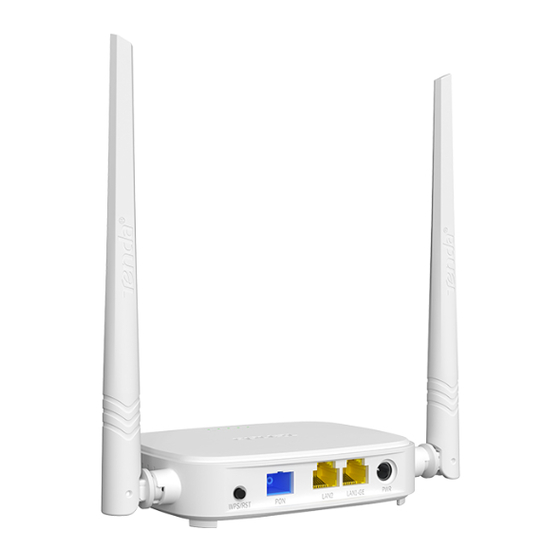
Get to know your device Overview The N300 Wi-Fi xPON ONT is a Fiber to the Home (FTTH) device that provides internet access and other services with a fiber cord connected. You can enjoy internet access and make phone calls simultaneously by connecting your devices and landline phones to the ONT. - Page 10 Get to know your device LED indicator Color Status Description No Ethernet device is connected or the Ethernet device is not connected to any LAN port properly. The Wi-Fi network is enabled, but no data is being transmitted Solid on wirelessly.
-
Page 11: Label
Get to know your device 1.2.2 Label The label is located on the bottom panel of the ONT. See the following figure for details. Model: Model of the ONT IP Address: Default IP address used to log in to the web UI of the ONT Power: Power supply for the ONT SSID &... -
Page 12: Web Ui
Web UI Web UI Login Step 1 Connect the ONT to a power source using the provided power adapter. Step 2 Connect a computer to a LAN port of the ONT using an Ethernet cable, or connect your smartphone to the Wi-Fi network of the ONT. Step 3 Start a web browser on a connected device and visit the IP address of the ONT (192.168.1.1 by default). -
Page 13: Logout
Web UI If the above page does not appear, try the following solutions: Ensure that the ONT is powered on properly. If a wired device, such as a computer, is used for configuration, ensure that the wired device is to obtain an IP address connected to a LAN port of the router properly, and is set automatically... -
Page 14: Web Ui Layout
Web UI Web UI layout The web UI of the ONT is composed of 4 parts, including the level-1 navigation tree, level-2 navigation tree, tab page area, and configuration area. See the following figure. Name Description ❶ Level-1 navigation tree The navigation bars and tab pages display the function menu of the ONT. -
Page 15: Common Buttons
Web UI Common buttons Some buttons are commonly used in the web UI of the ONT, and their functions are listed as follows. Button Description It is used to refresh the statistics shown on the page. It is used to add the information that you entered. It is used to restore the information that you entered on the page. -
Page 16: Status
Status Status In this module, you can: View device status of the ONT. − View IPv6 status of the ONT. − View PON status of the ONT. − Device status On this page, you can view the basic system information, LAN configuration and WAN configuration of the ONT. - Page 17 Status Parameter description Parameter Description It displays the basic system information of the ONT, including the device System name, uptime, software version, hardware version, CPU usage, memory usage and DNS address information. It specifies the LAN IP address of the ONT, which is also the IP address IP Address used to log in to the web UI of the ONT.
-
Page 18: Ipv6 Status
Status IPv6 status On this page, you can view the IPv6 connection status of the ONT. To access the page, log in to the web UI of the ONT and choose Status > IPv6. Parameter description Parameter Description IPv6 Address It specifies the LAN IPv6 address of the ONT. -
Page 19: Pon Status
Status PON status On this page, you can view the PON status and GPON/EPON connection status of the ONT. To access the page, log in to the web UI of the ONT and choose Status > PON. Parameter description Parameter Description Vendor Name It specifies the vendor name of the ONT. -
Page 20: Lan
In this module, you can configure the LAN IPv4 and IGMP/MLD Snooping settings of the ONT. To access the page, log in to the web UI and choose LAN. Parameter description Parameter Description InterfaceName It specifies the LAN interface name of the ONT. It specifies the IPv4 LAN address of the ONT, which is also the IPv4 address for logging IP Address in to the web UI of the ONT. -
Page 21: Wlan
WLAN WLAN In this module, you can customize your Wi-Fi network, including: Customize Wi-Fi name and other basic settings − Hide Wi-Fi name and set other advanced functions − Customize Wi-Fi password − Allow certain clients to access the Wi-Fi network −... - Page 22 WLAN Parameter Description It specifies the wireless band and protocol of the Wi-Fi network. 2.4 GHz (B): In this mode, the 2.4 GHz wireless devices compliant with IEEE 802.11b ⚫ protocol can connect to the 2.4 GHz wireless network of the ONT. The maximum wireless rate is 11 Mbps.
-
Page 23: Customize The Main Wi-Fi Name
WLAN Parameter Description You can set the intensity of the radio power of the ONT. A higher radio power brings a Radio Power (%) wider coverage of Wi-Fi coverage. You can view the clients that connect to the Wi-Fi network by clicking Show Active WLAN Clients. - Page 24 WLAN ---End After completing the configuration, you can search the SSID(s) on your Wi-Fi-enabled devices and connect to it to access the internet.
-
Page 25: Advanced Settings
WLAN Advanced settings 5.2.1 Overview On this page, you can configure more advanced settings of your Wi-Fi network. To access the page, log in to the web UI of the ONT and choose WLAN > Advanced Settings. You are recommended to retain the default settings if without professional guidance. Parameter description Parameter Description... -
Page 26: Hide The Main Wi-Fi Name
WLAN Parameter Description It specifies whether to broadcast or hide the SSID (Wi-Fi name) of the main Wi-Fi network. Broadcast SSID If the SSID is hidden, it cannot be found on clients and you need to enter the information of the Wi-Fi network on your clients manually to connect to it. 5.2.2 Hide the main Wi-Fi name Step 1... -
Page 27: Security
WLAN Security 5.3.1 Overview On this page, you can perform password settings to secure your Wi-Fi network. To access the page, log in to the web UI of the ONT and choose WLAN > Security. Parameter d escription Parameter Description SSID Type It specifies the Wi-Fi network to be configured. - Page 28 WLAN Step 6 Click Apply Changes. ---End After completing the configuration, you can connect the Wi-Fi networks using the Wi-Fi passwords you set.
-
Page 29: Access Control
WLAN Access control 5.4.1 Overview On this page, you can add and delete access control rules to decide which clients can or cannot connect to all the Wi-Fi networks in the frequency band. To access the page, log in to the web UI of the ONT and choose WLAN > Access Control. Rules added are shown in Current Access Control List. - Page 30 WLAN Step 3 Enter 8E5B54F6E100 in MAC Address, and click Add. Step 4 Enter 8CEC4BB30492 in MAC Address, and click Add. ---End After the configuration is completed, the added devices are listed in Current Access Control List, and only the smartphone and tablet can connect to the Wi-Fi network. If the MAC address of a device is added in the Deny Listed mode, the device will fail to access the Wi-Fi network and a message indicating incorrect password will be displayed on the device.
-
Page 31: Wps
WLAN 5.5.1 Overview The Wi-Fi Protected Setup (WPS) function enables wireless clients that support WPS, such as smartphones, to connect to the Wi-Fi network of the ONT quickly and easily. There are four methods to connect to the Wi-Fi network of the ONT through WPS. Connect to the Wi-Fi network using the WPS button −... - Page 32 WLAN Choose WPS connection. ---End Wait a moment until the WPS negotiation is completed, and the smartphone is connected to the Wi-Fi network. If multiple wireless networks are enabled in a frequency band, the main network is connected by default.
-
Page 33: Connect To The Wi-Fi Network Using Pbc On The Web Ui
WLAN 5.5.3 Connect to the Wi-Fi network using PBC on the web UI Step 1 Get the ONT ready for WPS negotiation. Log in to the web UI of the ONT. Choose WLAN > WPS. Click Start PBC. If the following message is displayed, the PBC is started successfully. Step 2 Configure the WPS function on your wireless devices within 2 minutes. - Page 34 WLAN Choose WPS connection. ---End Wait a moment until the WPS negotiation is completed, and the phone is connected to the Wi-Fi network.
-
Page 35: Connect To The Wi-Fi Network By Entering Pin Code Of Clients On The Ont
WLAN If multiple wireless networks are enabled in a frequency band, the main network is connected by default. To use the WPS function, the encryption mode of the wireless network must be WAP2 or not encrypted. 5.5.4 Connect to the Wi-Fi network by entering PIN code of clients on the ONT Step 1 Find the PIN code of the client. - Page 36 WLAN Choose WPS PIN connection, and record the PIN code of the client. Step 2 Start WPS connection on the ONT. Log in to the web UI of the ONT. Choose WLAN > WPS. Enter the PIN code in Client PIN Number and click Start PIN. ---End After the ONT and the client finish WPS negotiation, the client connects to the Wi-Fi network of the ONT successfully.
-
Page 37: Connect To The Wi-Fi Network By Entering Pin Code Of The Ont On Clients
WLAN If multiple wireless networks are enabled in a frequency band, the main network is connected by default. To use the WPS function, the encryption mode of the wireless network must be WAP2 or not encrypted. 5.5.5 Connect to the Wi-Fi network by entering PIN code of the ONT on clients This method is usually used on Wi-Fi network adapters. -
Page 38: Status
WLAN Status On this page, you can check the information and status of the Wi-Fi network you set up. To access the page, log in to the web UI of the ONT and choose WLAN > Status. Parameter description Parameter Description Mode It specifies the mode of the Wi-Fi network. -
Page 39: Wan
Overview After you have registered the ONT successfully, you can set up the WAN connection. You can set up WAN connections to access different types of services or a combination of them, including internet, TR069, and others. Internet is used for illustration in this chapter unless specified. The ONT can work under the following two modes: Bridge mode: The channel mode is set to Bridged. - Page 40 Common WAN settings This part shows the common settings in all types of WAN connections. Parameter description Parameter Description It specifies the WAN connection name which you set up. You can add multiple WAN connections by clicking the drop-down list and choose new link.
- Page 41 Parameter Description It specifies the mode that you used to set up the WAN connection, including Bridged, IPoE, PPPoE and 6rd. Bridged: Select this type when this device only serves as a modem, and you want to ⚫ set up a dial-up connection or enter other internet parameters directly on your computer for internet access.
- Page 42 Parameter description Parameter Description It specifies the method used by the ONT to obtain WAN IP address information. Fixed IP: You need to configure the local IP address, remote IP address (gateway ⚫ Type address) and other related information manually. DHCP: The ONT obtains WAN IP address information automatically.
- Page 43 Parameter description Parameter Description It specifies how the WAN IPv6 address of the ONT is obtained, including: Stateless DHCPv6 (SLAAC): Stateless Address Autoconfiguration (SLAAC) is a dynamic ⚫ allocation method of IPv6 address, which enables the ONT to auto-generate IPv6 addresses with local information and those from the router advertisement.
- Page 44 Parameter description Parameter Description UserName They specify the PPPoE user name and password for settings up the WAN connection. Password It specifies the PPPoE connection type. Continuous: The ONT keeps connected to the internet. ⚫ Type Connect on Demand: The ONT disconnects from the internet after a certain period ⚫...
- Page 45 Parameter description Parameter Description Board Router v4 It specifies the IPv4 address of the remote border relay router. Address It specifies the length of the IPv4 subnet mask used for 6rd connection. The WAN IPv4 6rd IPv4 Mask Len addresses of both ends must be in the same segment. It specifies the IPv6 prefix of the current network.
-
Page 46: Bridge Mode
Bridge mode If you have a router and want to set up internet access on it, or you only want to access the internet on a certain computer, you can use the ONT under bridge mode. When the ONT is under bridge mode, you can only access the internet through the downstream device used for setting up internet access. - Page 47 Step 4 Click Connect to the Internet and click Next. Step 5 Click Broadband (PPPoE).
-
Page 48: Configure Internet Access On A Router
Step 6 Enter the PPPoE User name and Password provided by your ISP and click Connect. ---End After the configuration, you can access the internet on the computer. 6.2.2 Configure internet access on a router Assume that your ISP provides you with the PPPoE user name and password. Configuring procedure: Step 1 Connect the WAN port of router to a LAN port of the ONT using an Ethernet cable. -
Page 49: Router Mode
Router mode If you want to set up WAN connections for one or multiple services on the ONT, and access the WAN connection through both the Wi-Fi networks of the ONT and LAN ports, you can set the ONT to router mode. Based on the information provided by your ISP, you need to complete different configurations on the web UI. -
Page 50: Set Up A Dynamic Ip Connection
Step 6 (Optional) Configure Port Mapping as required. Step 7 Click Apply Changes. ---End After the configuration, you can access the internet through the LAN ports or Wi-Fi networks of the ONT, or by connecting a router (connection type: DHCP/dynamic IP) to a LAN port of the ONT. 6.3.2 Set up a dynamic IP connection If your ISP does not provide any parameters, you can try to set up a DHCP connection. - Page 51 Step 4 Set other common WAN parameters as required by your ISP. Step 5 Configure WAN IP Settings or/and IPv6 WAN Setting based on the IP protocol you choose. In the WAN IP Settings part, set Type to DHCP and configure other parameters as −...
-
Page 52: Set Up A Pppoe Connection
Step 6 (Optional) Configure Port Mapping as needed. Step 7 Click Apply Changes. ---End After the configuration, you can access the internet through the LAN ports or Wi-Fi networks of the ONT, or by connecting a router (connection type: DHCP/dynamic IP) to a LAN port of the ONT. 6.3.3 Set up a PPPoE connection If your ISP provides the PPPoE user name, password, and other related parameters (if any), you can... - Page 53 Step 6 Enter the PPPoE UserName and Password provided by your ISP in PPP Settings. Step 7 (Optional) If you set IP Protocol to IPv6 or IPv4/IPv6, enter required parameters in IPv6 WAN Setting. Step 8 (Optional) Configure Port Mapping as needed. Step 9 Click Apply Changes.
-
Page 54: Set Up A 6Rd Connection
After the configuration, you can access the internet through the LAN ports or Wi-Fi networks of the ONT, or by connecting a router (connection type: DHCP/dynamic IP) to a LAN port of the ONT. 6.3.4 Set up a 6rd connection When you want to access a certain IPv6 network or service of your service provider through an IPv4 network and you are provided with related parameters, you can set up a 6rd connection. - Page 55 Step 6 Set parameters in the 6rd Config part using the parameters provided by your ISP. Step 7 (Optional) Configure Port Mapping as required. Step 8 Click Apply Changes. ---End After the configuration, you can access the internet through the LAN ports or Wi-Fi networks of the ONT, or by connecting a router (connection type: DHCP/ dynamic IP) to a LAN port of the ONT.
-
Page 56: Services
Services Services Service 7.1.1 DHCP Overview The DHCP server can automatically assign IP addresses, subnet masks, gateway addresses and DNS to LAN clients. When it is disabled, you need to manually configure the IP address information on the LAN device to access the internet. Disable it only when necessary. To access the configuration page, log in to the web UI of the ONT and choose Services >... - Page 57 Services Parameter Description It shows information of the active DHCP clients, including: IP Address: It specifies the IP address assigned to the DHCP leased client. ⚫ Show Client MAC Address: It specifies the MAC address of the DHCP leased client. ⚫...
-
Page 58: Dynamic Dns
Services ----End Now you can access resources on the FTP server free from the influence of the dynamic IP address. 7.1.2 Dynamic DNS Overview The Dynamic DNS (DDNS) maps the WAN IP address (changeable public IP address) of the ONT to a domain name for dynamic domain name resolution. - Page 59 Services Parameter description Parameter Description Enable It specifies whether the rule takes effect after being added. It specifies the DDNS service provider. The ONT supports DynDNS.org and NO-IP. You need to register and purchase services from one of these service providers and DDNS Provider use the parameters provided by the service provider to configure the function on the ONT.
- Page 60 Services FTP server The information of the registered Service port: 21 DDNS service: IP address: 192.168.1.136 IP address: − Service provider: DynDNS.org − User name: JohnDoe 192.168.0.136 − Password: JohnDoe123456 − Domain name: o2849z7222.zicp.vip Configuring procedure: Step 1 Log in to the web UI of the ONT. Step 2 Add a Dynamic DNS rule.
- Page 61 Services In this example, the address is ftp://o2849z7222.zicp.vip. To access the FTP server from the internet with a domain name: Open the file explorer on a computer that can access the internet, and visit ftp://o2849z7222.zicp.vip. Enter the user name and password to access the resources on the FTP server. After the configuration, if internet users still cannot access the FTP server, try the following methods: ...
-
Page 62: Igmp Proxy
Services 7.1.3 IGMP Proxy IGMP proxy enables a device to issue IGMP host messages on behalf of its users, and reduces IGMP messages and the load for uplink device. The ONT with IGMP proxy enabled intercepts and processes the IGMP messages of its users, and then forward them to its uplink device. It assumes the role of router on the user side, queries user information regularly, and assumes the role of client on the network routing side, and sends the current user information to it when needed. -
Page 63: Firewall
Services Firewall 7.2.1 Application Layer Gateway (ALG) is a software component that manages specific application protocols such as Session Initiation Protocol (SIP) and File Transfer Protocol (FTP). The ALG acts as an intermediary between the internet and an application server and allows or denies traffic of certain types to the application server. -
Page 64: Ip/Port Filtering
Services Parameter Description The Layer Two Tunneling Protocol (L2TP) is an extension of the Point-to-Point Tunneling Protocol (PPTP) used by an Internet Service Provider (ISP) to enable the operation of a Virtual Private Network (VPN) over the Internet. L2TP If you select L2TP protocol when you create a VPN connection on your computer in the LAN of the ONT, it takes effect only when this function is enabled. - Page 65 Services Parameter description Parameter Description Outgoing Default They specify the default action for the outgoing (LAN WAN) or incoming (WAN LAN) Action data. Deny: Denies traffic which does not match the filter rule in the Current Filter Table. ⚫ Incoming Default Action Allow: Allows traffic which does not match the filter rule in the Current Filter Table.
-
Page 66: Mac Filtering
Services Parameter Description Subnet Mask It specifies the subnet mask of the source IP address. It specifies the source port of the packets. The source port is only available for the TCP/UDP protocol. If ICMP or ANY is selected for Protocol, this field is not required. - Page 67 Services Parameter description Parameter Description Outgoing Default They specify the default action for the outgoing or incoming data. Action Deny: Denies traffic which does not match the filter rule in the Current Filter Table. ⚫ Incoming Default Allow: Allows traffic which does not match the filter rule in the Current Filter ⚫...
- Page 68 Services Assume that: Device MAC address Status Your own phone 8C:EC:4B:B3:04:93 Connected Family member's phone 1 94:C6:91:29:C2:12 Disconnected Family member's phone 2 98:9C:57:19:D0:1B Disconnected Configuring procedure: Step 1 Log in to the web UI of the ONT. Step 2 Choose Services > Firewall > MAC Filtering. Step 3 Set both Outgoing Default Action and Incoming Default Action to Deny.
-
Page 69: Port Forwarding
Services ---End In this example, after the configuration is completed, only the three devices added can access the internet through the ONT. 7.2.4 Port forwarding Overview By default, internet users cannot access any service on any of their local hosts. The port forwarding function enables you to open certain ports of a local host to internet users and allow them to access the corresponding services. - Page 70 Services Parameter Description Local Port from It specifies a port or a range of ports used for the LAN service. Protocol It specifies the service protocol. Select Both if you are uncertain about the service type. It specifies the IP address of the host which needs to access the local service. Remote IP When it is left blank, users with any IP address can access the local server.
- Page 71 Services FTP server Access using an IP address IP address: 192.168.1.136 Service port: 21 MAC address: D4:61:DA:1B:CD:89 WAN IP address: 102.33.66.88 Configuring procedure: Step 1 Log in to the web UI of the ONT. Step 2 Add a port forwarding rule. Choose Services >...
- Page 72 Services After the configuration, users from the internet can access the FTP server by visiting “Intranet service application layer protocol name://WAN IP address of the ONT”. If the remote port number is different from the default intranet service port number, the visiting address should be: “Intranet service application layer protocol name://WAN IP address of the ONT:Remote port number”.
-
Page 73: Url Blocking
Services After the configuration, if internet users cannot access the FTP server, try the following methods: Ensure that the LAN port number configured in the port forwarding function is the same as the service port number set on the server. ... -
Page 74: Dmz
Services Step 4 Enter facebook in FQDN and click Add. Repeat this step for blocking Twitter and Instagram. ---End After the configuration, Facebook, Twitter, and Instagram are not accessible through the ONT. 7.2.6 Overview A DMZ host on a LAN is free from restrictions in communicating with the internet. It is useful for getting better and smoother experiences in video conferences and online games. - Page 75 Services access the resources of the FTP server from the internet. Solution: You can configure the DMZ host function to reach the goal. Assume that the information of the FTP server includes: IP address: 192.168.1.136 − MAC address: D4:61:DA:1B:CD:89 − Service port: 21 −...
- Page 76 Services Choose Services > Service > DHCP. Click MAC-Based Management. Enter the MAC Address of the host of the server, which is D4-61-DA-1B-CD-89 in this example. Enter the assigned IP Address for the server host, which is 192.168.1.136 in this example. Click Assign IP.
- Page 77 Services If you want to access the server within a LAN using a domain name, refer to the solution Dynamic DNS. After the configuration, if internet users still cannot access the FTP server, close the firewall, antivirus software and security guards on the host of the FTP server and try again.
-
Page 78: Advance
Advance Advance Advanced settings 8.1.1 ARP table On this page, you can view the IP address and MAC address of devices connected to the ONT in a wireless and wired manner. To access the page, log in to the web UI of the ONT and choose Advance > Advance > ARP Table. 8.1.2 Routing Overview... - Page 79 Advance Parameter description Parameter Description Add Route It is used to add a new static route rule. Update It is used to update your modification to an existing rule. Delete Selected It is used to delete the selected rule. Show Routes It is used to display the commonly used routes of the ONT.
- Page 80 Advance ---End After the configuration succeeds, the static rule will be displayed in Static Route Table. Modify a static rule Step 1 Log in to the web UI of the ONT. Step 2 Choose Advance > Advance > Routing. Step 3 Select a static route rule, and it will appear in the configuring part.
- Page 81 Advance After the configuration succeeds, the updated parameters of the static rule will be displayed in Static Route Table. Delete an existing rule To delete an existing rule, select the rule in Static Route Table and click Delete Selected. Show commonly used routes Click Show Routes, and you will find the commonly used routes in the prompt window.
-
Page 82: Snmp
Advance 8.1.3 SNMP The Simple Network Management Protocol (SNMP) is the most widely used network management protocol in TCP/IP networks. SNMP enables you to remotely manage all your network devices compliant with this protocol, such as monitoring the network status, changing network device settings, and receiving network event alarms. - Page 83 Advance Parameter description Parameter Description SNMP It specifies whether to enable the SNMP agent function. It specifies a description of the ONT, which can be anything you like and is used for System Description identification. System Contact It specifies the contact information of the ONT. SystemName It specifies the name of ONT.
-
Page 84: Ipv6 Settings
Advance IPv6 settings The ONT supports both IPv4 and IPv6 for internet access. In this module, you can enable and disable IPv6 of the ONT, and perform other IPv6-related configurations on the ONT. 8.2.1 IPv6 status On this page, you can enable or disable the IPv6 function of the ONT. To access the page, log in to the web UI of the ONT and choose Advance >... - Page 85 Advance Parameter description Parameter Description They specify the Maximum and Minimum Router Advertisement Intervals. MaxRtrAdvInterval They are the intervals between each router advertisement message. The router sends these messages periodically. The actual interval used is randomly selected from a MinRtrAdvInterval value between the minimum and maximum values.
-
Page 86: Dhcpv6
Advance Parameter Description Prefix They specify the prefix information included in the RA message to hosts for generating their IPv6 address. Prefix Length AdvValidLifetime They specify the Advertisement Valid Lifetime and Advertisement Preferred Lifetime. When the preferred lifetime expires, the use of the prefix is not encouraged, but not prohibited. - Page 87 Advance Parameter description Parameter Description You can select a DHCPv6 server mode or disable it. DHCPv6 Mode NONE: The DHCPv6 server of the ONT is disabled. ⚫ DHCPServer: The DHCPv6 server of the ONT is enabled. ⚫ It specifies whether the DHCPv6 Server is configured automatically or manually. DHCPServer(Manual): You need to define the IP address pool, prefix length and ⚫...
- Page 88 Advance Parameter Description It shows information of the active DHCPv6 clients, including: IP Address: It specifies the IP address assigned to the DHCP leased client. ⚫ Show Client DUID: It specifies the DHCP Unique Identifier (DUID) of the DHCP leased client. ⚫...
-
Page 89: Diagnostics
Diagnostics Diagnostics Overview The ONT provides connectivity diagnosis tools, which include Ping and Tracert. You can use these tools to test the connectivity to the internet, a certain IP address or domain name. Ping: It is a utility that helps to check if an IP address or domain name is accessible or −... - Page 90 Diagnostics Parameter description Parameter Description Host Address It specifies the IP address or domain name of the tracert target. It specifies the maximum number of times that the host tries to reach the host address. Number Of Tries If all the attempts fail, it denotes network congestion and a reason for slow loading Web pages and dropped connections.
-
Page 91: Execute Ping To Test Connectivity
Diagnostics Execute Ping to test connectivity Step 1 Log in to the web UI of the ONT. Step 2 Choose Diagnostics > Ping. Step 3 Enter the IP address or domain name in Host Address, such as www.google.com. Step 4 Choose any interface from WAN Interface. -
Page 92: Execute Traceroute To Test Routing
Diagnostics Execute Traceroute to test routing Step 1 Log in to the web UI of the ONT. Step 2 Choose Diagnostics > Tracert. Step 3 Enter the IP address or domain name in Host Address, such as www.google.com. Step 4 Specify the number of attempts in Number Of Tries. -
Page 93: Admin
Admin Admin 10.1 GPON/EPON settings On this page, you can register your ONT for internet access. The ONT may register itself automatically after you connect a fiber cord to it and power it on. Under some circumstances, you may need to manually register the ONT with parameters provided by your ISP on this page. -
Page 94: Omci Information
Admin 10.2 OMCI information ONU Management Control Interface (OMCI) defines a mechanism and message format that is used by the Optical Line Termination (OLT) to configure, manage, and monitor ONTs. To access the page, log in to the web UI of the ONT and choose Admin > OMCI Information. You can click Refresh to update the information. -
Page 95: Back Up The Configuration Of The Ont
Admin 10.4.1 Back up the configuration of the ONT You can back up the configuration of the ONT at a certain time for future restoration after you change the settings or reset the ONT. Configuring procedure: Step 1 Log in to the web UI of the ONT. Step 2 Choose Admin >... -
Page 96: Password
Admin Configuring procedure: Step 1 Log in to the web UI of the ONT. Step 2 Choose Admin > Backup/Restore. Step 3 Click Reset. The ONT starts rebooting. Wait until it finishes rebooting, and then you can log in to the ONT again and perform settings. -
Page 97: Firmware Upgrade
Admin 10.6 Firmware upgrade To get new features and improve performance and operating stability, you can upgrade the firmware of the ONT when a new version is available. Configuring procedure: Step 1 Go to www.tendacn.com. Download an applicable firmware of the ONT to your local computer and unzip it. -
Page 98: Acl
Admin 10.7 Access Control List (ACL) is a collection of permit and deny rules that ensure security by blocking unauthorized users from and allowing authorized users to access ONT. To access the page, log in to the web UI of the ONT and choose Admin > ACL. Parameter description Parameter Description... - Page 99 Admin Parameter Description End IP Address It specifies the protocol adopted by the traffic, or the types of traffic. TELNET: Telnet is a protocol that provides a command line interface for communication ⚫ with a remote device or server, sometimes employed for remote management but also for initial device setup like network hardware.
-
Page 100: Time Zone
Admin 10.8 Time Zone On this page, you can change the system time of the ONT, or enable the ONT to update its system time with the Simple Network Time Protocol (SNTP) server. To access the page, log in to the web UI of the ONT and choose Admin > Time Zone. Parameter description Parameter Description... - Page 101 Admin 10.9 TR-069 The Customer Premise Equipment (CPE) WAN Management Protocol (TR-069) allows an ACS (Auto-Configuration Server) to perform auto-configuration, provision, collection, and diagnostics to the ONT from the internet. Generally, it is used by the ISP to manage the ONT. To access the page, log in to the web UI of the ONT and choose Admin >...
-
Page 102: Logout
Admin Parameter Description Authentication It specifies whether to authenticate the connection request sent by the ACS. UserName They specify the user name and password used to authenticate the ACS when it sends the connection request to the CPE. Connection Password Request It specifies the path used to receive the connection request sent by the ACS. -
Page 103: Statistics
Statistics Statistics In this part, you can view the packet statistics of the ports and interfaces of the ONT. Interface statistics This page displays the received and transmitted packets statistics, including the received packets (Rx pkt), received packets error (Rx err), dropped received packets (Rx drop), transmitted packets (Tx pkt), transmitted packets error (Tx err), dropped transmitted packets (Tx drop). -
Page 104: Appendixes
Appendixes Appendixes Configure the computer to obtain an IPv4/IPv6 address automatically Perform the configuration procedure in Windows Windows 8 Windows 7 as required. A computer installed with a wired network adapter is used as an example to describe the procedure. The procedures for configuring computers installed with WiFi network adapters are similar. - Page 105 Appendixes Step 3 Right-click on the connection in use, and then click Properties. Step 4 Double-click Internet Protocol Version 4 (TCP/IPv4) or Internet Protocol Version 6 (TCP/IPv6).
- Page 106 Appendixes Step 5 Select Obtain an IP address automatically and Obtain DNS server address automatically, and click OK. Step 6 Click OK in the Ethernet Properties window. ---End...
-
Page 107: Windows 8
Appendixes A.1.2 Windows 8 Step 1 Right-click in the bottom right corner of the desktop and choose Open Network and Sharing Center. Step 2 Click Ethernet and then Properties. Step 3 Double-click Internet Protocol Version 4 (TCP/IPv4) or Internet Protocol Version 6 (TCP/IPv6). - Page 108 Appendixes Step 4 Select Obtain an IP address automatically and Obtain DNS server address automatically, and click OK. Step 5 Click OK in the Ethernet Properties window. ---End...
-
Page 109: Windows 7
Appendixes A.1.3 Windows 7 Step 1 Click in the bottom right corner of the desktop and choose Open Network and Sharing Center. Step 2 Click Local Area Connection and then Properties. - Page 110 Appendixes Step 3 Double-click Internet Protocol Version 4 (TCP/IPv4) or Internet Protocol Version 6 (TCP/IPv6). Step 4 Select Obtain an IP address automatically and Obtain DNS server address automatically, and click OK. Step 5 Click OK in the Local Area Connection Properties window. ---End...
-
Page 111: Acronyms And Abbreviations
Appendixes Acronyms and abbreviations Acronym or Full Spelling Abbreviation Access control list Auto-Configuration Server Advanced Encryption Standard Application Layer Gateway Access Point Angled Physical Contact Address Resolution Protocol ASCII American Standard Code for Information Interchange BSSID Basic Service Set Identifiers Customer Premise Equipment Central processing unit Clear To Send... - Page 112 Appendixes Acronym or Full Spelling Abbreviation HTTPS Hypertext Transfer Protocol Secure ICMP Internet Control Message Protocol IEEE Institute of Electrical and Electronics Engineers IGMP Internet Group Management Protocol IP Multimedia Subsystem Internet Protocol IPoE Internet Protocol Over Ethernet IPsec Internet Protocol Security IPTV Internet Protocol television IPv4...
- Page 113 Appendixes Acronym or Full Spelling Abbreviation Operating system Peer-to-peer Push Button Configuration Personal Identification Number Passive optical network Point-to-Point Protocol PPPoE Point-to-Point Protocol over Ethernet PPTP Point-to-Point Tunneling Protocol Router Advertisement RADVD Router Advertisement Daemon RDNSS Recursive DNS Server Router Solicitation RSSI Received Signal Strength Indicator Real-time Transport Protocol...
- Page 114 Appendixes Acronym or Full Spelling Abbreviation User Datagram Protocol User interface Unique Local Address UPnP Universal Plug and Play Uniform Resource Identifier Uniform Resource Locator VLAN Virtual Local Area Network Virtual Private Network VoLTE Voice over Long-Term Evolution Wide Area Network Wired Equivalent Privacy WLAN Wireless Local Area Network...
Need help?
Do you have a question about the N300 Wi-Fi xPON ONT and is the answer not in the manual?
Questions and answers