
Subscribe to Our Youtube Channel
Related Manuals for Barazza 1FEVGMC


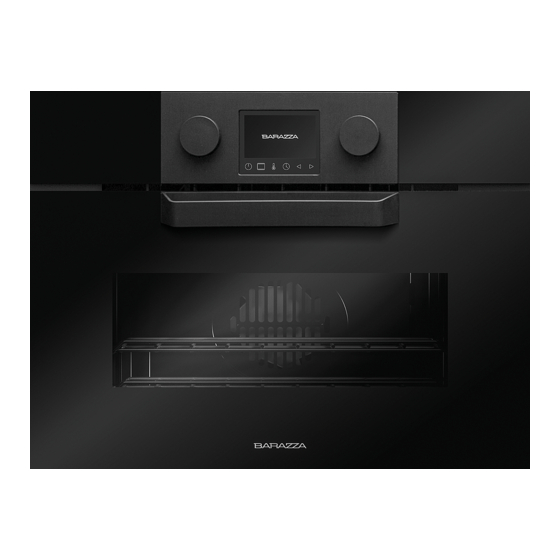
Summary of Contents for Barazza 1FEVGMC
- Page 1 1FEVGMC Instruction manual Manuale d’istruzioni 1FEVSMC 1FEVMMC 1FEVTMC 1FEVEMCN 1FEVMCN...
-
Page 2: Table Of Contents
Contents Safety Information ........................3 Advantages of the microwave oven ..................10 Before first use .......................... 11 Other important instructions ...................... 11 Description of the appliance ...................... 11 Control panel ..........................12 Oven Functions ......................... 12 Initial Settings ........................... 13 Cooking Settings ........................ -
Page 3: Safety Information
Safety Information Before the installation and use of the appliance, carefully read the supplied instructions. The manufacturer is not responsible if an incorrect installation and use causes injuries and damages. Always keep the instructions with the appliance for future reference. Children and Vulnerable People Safety Warning! Risk of suffocation, injury or permanent disability. - Page 4 General Safety • This appliance is intended to be used in household applications and not in hotels, shops, offices and other similar environments. • Internally the appliance becomes hot when in operation. Do not touch the heating elements that are in the appliance. Always use oven gloves to remove or put in accessories or ovenware.
- Page 5 The door window glass is damaged; There is frequent electrical arcing inside the oven even though there is no metal object inside. The oven can only be used again after it has been repaired by a Technical Assistance Service technician. •...
- Page 6 • For toasting, use just the grilling function and watch the oven all the time. It you use a combined function to toast bread it will catch fire in a very short time. • To achieve the best results when warming up small loads (such as a glass of water, a milk mug or a popcorn bag) it is suggested that they are placed on the glass tray and position it at the 1...
- Page 7 • Never remove the mica cover on the ceiling of the oven interior! This cover stops fat and pieces of food damaging the microwave generator. • Do not keep any inflammable object inside the oven as it may burn if the oven is switched on. •...
- Page 8 • WARNING! The appliance is intended to be built in. Please refer to the last pages of this user manual for detailed information on the installation dimensions. Cleaning and Maintenance • WARNING! Cut the power supply before cleaning and maintenance. •...
- Page 9 • WARNING! If the door or door seals are damaged, the appliance must not be operated until it has been repaired by a competent person. • If the power cable is damaged it should be substituted by the manufacturer, authorized agents or technicians qualified for this task in order to avoid dangerous situations.
-
Page 10: Advantages Of The Microwave Oven
Advantages of the microwave oven In a conventional cooker, the heat that is Why the food is heated radiated through the resistances or gas Most foods contain water and the water burners slowly penetrates the foods from the molecules vibrate with the microwaves. outside in. -
Page 11: Before First Use
Before first use There may be traces of fat and other substances in the oven as a result of the manufacturing process. These should be removed using the following procedure: 1. Remove all the packaging from your oven, including the protective plastic, if any. 2. -
Page 12: Control Panel
Control panel Left knob Clock key Display Backward key On/Off key Forward/ OK key Cooking function key Right knob Temperature key Oven Functions Top + Bottom Hot air + Bottom Bottom Hot air Grill + Bottom Defrost Double Grill Microwave Grill Combi Microwave Ventilated Top + Bottom... -
Page 13: Initial Settings
Microwaves Power Levels Microwave power output Food 200W Slow defrosting for delicate foods; keeping food hot Cooking with little heat; boiling rice 400W Rapid defrosting, heating baby food 600W Heating and cooking food Cooking vegetables and food 800W Cooking and heating carefully, Heating and cooking small portions of food 1000W Rapidly heating liquids... -
Page 14: Cooking Settings
Cooking Settings • Press Manual Cooking to confirm. • Rotate the right knob to select the desired power. • Press to confirm. • Rotate the left knob to select the desired time. • Press to confirm. The oven will begin cooking. At any time during the cooking process, you can: •... - Page 15 • Turn the right dial until the symbol NOTE: When the display shows the TURN has been reached. THE PLATE message, open the door, turn • Press to confirm. the food and press to continue. • Turn the right knob to select the desired function.
-
Page 16: Automatic Cooking
Standing time Prog. Food Weight (kg) Time (min) (min) 0.10 – 2.00 2:10 – 43 20 – 30 Meat 0.10 – 2.50 2:20 – 58 20 – 30 Fish 0.10 – 2.00 2 – 40 20 – 30 Frozen Fruit 0.10 –... - Page 17 Prog. Food Weight (kg) Time (min) Ox Meat 0.5 – 5 95 – 241 Lamb Meat 0.5 – 6 66 – 210 Pork Chops 0.5 – 4 38 – 84 White Fish 0.5 – 5 28 – 94 Salmon 0.5 – 5 28 –...
- Page 18 Automatic Cooking Turning food • Turn the oven on by pressing the For some recipes or programs, the message Turn the plate will show button. , food must be • Rotate the left knob to select the turned during cooking. “Automatic cooking”...
-
Page 19: General Settings
Standby mode When the oven is in Standby you can choose if you want the display to show the time or the Barazza logo. • Press to turn on the oven. • Rotate the left knob to select the “General Settings”... -
Page 20: Timer Settings
• Rotate the right knob to select the • Press to confirm. Standby mode setting. • Press to confirm. Veggy mode • Rotate the right knob to choose the Veggy mode is suitable for vegetarians. This clock or the logo. option hides the non-vegetarian recipes on •... -
Page 21: Safety
Programing the timer options • Confirm your choice with the button. • For some of the options, it will be required to program the start or end time. • Press to confirm. • The cooking screen will then be shown again. -
Page 22: Defrosting
Defrosting NOTE: See the tables at the end of the thin, narrow parts defrost fast than the user manual to confirm the different thickest parts at the top. defrosting and standing times (in order to 7. Foods that are rich in fats, such as butter, ensure the food temperature is evenly cottage cheese and cream, should not be distributed) for different types and weights of... -
Page 23: Cooking With The Grill
the cooking time necessary and you must of food. It is advisable to adjust the times and keep a close eye on the cooking process. power levels to each situation. Depending on • It is not possible to heat large quantities the exact characteristics of the food you may need to increase or shorten the cooking of oil (frying) in the microwave. -
Page 24: Accessories
Heat up the grill beforehand for 2 that the container in question is suitable minutes. Unless indicated otherwise, use for microwave use. See the section on the rack. types of ovenware! When the grill is operating, the cavity When the grill is used it is possible that walls and the rack become very hot. -
Page 25: What Type Of Containers May Be Used
What type of containers may be used? • The aluminium containers cannot be Microwave function more than 3 cm high or come in contact For the microwave function, keep in mind with the cavity walls (minimum distance that microwaves are reflected by metal 3 cm). -
Page 26: Cleaning And Maintenance
Cleaning and maintenance WARNING! Disconnect the appliance from Dismantling the side supports the mains power supply before any 1. Remove all accessories from inside the operation. oven. Cleaning the oven exterior and oven 2. Completely loosen the nut at the front of accessories the fastening element (A), pull the Clean... - Page 27 unmounted glass panes could break and 5. Reattach the top seal of the door, making cause injury. sure that the side tabs fit into their housings. Depending on the model, your oven may WARNING! Never switch the oven on if have 1 or 3 panes of glass.
-
Page 28: Troubleshooting
Troubleshooting This section describes some of the most fre- The enamel color has changed or stains quent problems that can affect your oven, have appeared: along with the most common causes and • The chemical composition of some food- possible solutions. stuffs may cause changes in the enamel. -
Page 29: Technical Characteristics
Technical characteristics Specifications • AC Voltage ................(see characteristics plate) • Power required ............... 3500 W • Grill/ Maxigrill power ............... 1400 W/ 2500W • Lower heater power ..............1150 W • Hot air power ................1800 W • Microwave power ..............1850 W •... -
Page 30: Installation
Installation This information is exclusively for the installer Column Installation: responsible assembly electrical connection. The manufacturer will not accept liability for possible damage caused if you install the oven yourself. Before installation • To handle the oven, use the grips at the sides. - Page 31 Oven installation 4. Open the door and insert the plastic plugs supplied with oven into their For all ovens. After the electrical connection respective housings. has been done: 1. Position the oven inside the unit and ensure that the feed cable is not trapped or in contact with parts of the oven that heat up.
-
Page 32: Tables And Suggestions
Tables and Suggestions Ovenware Operating Microwave mode Conventional Combined Type of functions functions Defrost / Cook dish heat Glass and porcelain 1) Domestic, non fire-resistant, may be washed in dishwasher Glazed ceramic Fire-resistant glass and porcelain Ceramic, earthenware dishes unglazed glazed without metallic decorations Earthenware dishes glazed... - Page 33 Defrosting by time Time Standing time Function Quantity (Min.) (Min.) 5-10 5-10 10-12 10-15 Meat (veal, beef, pork) 1000 21-23 20-30 1500 32-34 20-30 2000 43-45 25-35 8-10 10-15 Goulash 1000 17-19 20-30 10-15 Minced meat 10-14 20-30 10-15 Sausages 9-12 15-20 Poultry (portions)
- Page 34 Poultry Temperature Time Quantity Shelf Function Accessory (ºC) (Min.) 190-210 55-60 Duck Tray 1,50kg 170-190 45-55 180-190 10-12 Duck breast Grid 0,40kg 200-210 8-10 170-190 45-50 Duck thighs 2 pieces Tray 160-180 55-60 190-210 55-60 Chicken 1,20kg Tray 170-190 50-55 190-210 25-30 Chicken thighs...
- Page 35 Temperature Time Quantity Function Accessory Shelf (ºC) (Min.) 180-190 50-55 Roast pork Tray 170-190 45-50 180-200 55-60 Pork chops Grid 0,50kg 200-220 190-200 55-60 Pork Shoulder Tray 1,50kgk 190-200 40-50 190-210 60-70 Suckling pig Tray 1,40g 170-190 70-75 190-210 25-30 Pork ribs Tray 0,50kg...
- Page 36 Temperature Time Quantity Function Accessory Shelf (ºC) (Min.) 190-210 15-20 Hake medallions Tray 1,10kg 180-200 10-12 190-200 15-20 Salmon medallions Tray 1,10kg 200-210 10-15 Pizza and Pasta Temperature Time Shelf Function Accessory Quantity (ºC) (Min.) 190-210 30-35 Thick crust pizza Grid 0,60kg 190-200...
- Page 37 Pastry Function Temperature Time Quantity Shelf Accessory (ºC) (Min.) 170-180 50-55 Sponge cake Shallow dish 0,60kg 165-170 170-190 20-25 Leavened dough 0,50kg Shallow dish 170-180 25-30 Puff pastry 0,50kg 180-190 18-20 Tray Cottage cheese pie 0,40kg Tray 180-190 30-35 Cheesecake 0,80kg Tray 180-290...
- Page 38 Indice Informazioni per la sicurezza ....................39 I vantaggi delle microonde ......................46 Prima del primo utilizzo ......................47 Altre istruzioni importanti ......................47 Descrizione dell’apparecchio ....................47 Pannello di controllo........................48 Funzioni del forno ........................48 Impostazioni iniziali ........................49 Impostazioni di cottura ........................
-
Page 39: Informazioni Per La Sicurezza
Informazioni per la sicurezza Leggere attentamente le istruzioni fornite prima di installare e utilizzare l'apparecchiatura. Il produttore non è responsabile se un'installazione ed un uso non corretto dell'apparecchiatura provocano lesioni e danni. Tenere sempre le istruzioni a portata di mano in caso di necessità durante l'utilizzo. Sicurezza dei bambini e delle persone vulnerabili AVVERTENZA! Rischio di soffocamento, lesioni o invalidità... - Page 40 • La pulizia e gli interventi di manutenzione non devono essere eseguiti dai bambini senza supervisione. Sicurezza generali • Questa apparecchiatura è stata pensata per essere usata in applicazioni domestiche e non in hotel, negozi, uffici e altri ambienti simili. •...
- Page 41 • Usare solo utensili adatti all'uso in forno a microonde. • Attenzione! L'apparecchio non deve essere utilizzato se: lo sportello non si chiude correttamente, le cerniere dello sportello sono danneggiate, le superfici di contatto tra sportello e frontale sono danneggiate, il vetro dello sportello è...
- Page 42 • ATTENZIONE! Non riscaldare alcool puro o bevande alcoliche nel forno a microonde. PERICOLO D'INCENDIO! • PRUDENZA! Per evitare che, durante il riscaldamento di piccole quantità di cibo, gli alimenti si riscaldino troppo e magari si infiammino, non selezionare tempi di riscaldamento o livelli di potenza troppo elevati.
- Page 43 • Inserire un bicchiere d'acqua nel forno per verificarne la programmazione. L'acqua assorbe microonde l'apparecchio non si danneggia. • Non coprire o intasare i fori e le fessure d'aerazione. • Posizionare correttamente gli accessori del forno sui binari laterale (vedere la sezione Accessori). •...
- Page 44 Installazione • L’installazione deve rispettare le regolamentazioni correnti. • Nell’installazione elettrica di questo apparecchio è necessario disporre dispositivo consenta separare l’apparecchio dalla rete con un’ampiezza dei contatti di almeno 3 mm in tutti i poli. Per dispositivi di separazione adatti si intendono per es.
- Page 45 • Non usare una pulitrice a vapore per pulire l'apparecchiatura. • Per un corretto funzionamento del forno, le superfici di contatto dello sportello (la parte frontale del vano cottura e la parte interna degli sportelli) devono essere mantenute sempre perfettamente pulite. •...
-
Page 46: I Vantaggi Delle Microonde
I vantaggi delle microonde Nelle normali cucine il calore generato dalle L'attrito che si forma tra le molecole produce resistenze di riscaldamento o dal bruciatore a calore, il quale aumenta la temperatura penetra lentamente nella pietanza dell'alimento, lo scongela, lo cucina o lo dall'esterno verso l'interno. -
Page 47: Prima Del Primo Utilizzo
Prima del primo utilizzo Durante il processo di fabbricazione del forno potrebbero essersi depositati al suo interno resti di grasso o altri residui. Per eliminarli, procedere come indicato di seguito: 1. Rimuovere completamente l'imballaggio, compresa la protezione di plastica, se presente. 2. -
Page 48: Pannello Di Controllo
Pannello di controllo Manopola sinistra Tasto orologio Display Tasto Indietro Tasto On/Off Tasto Avanti/ OK Tasto funzione cottura Manopola destra Tasto temperatura Funzioni del forno Superiore + Inferiore Ventola + Inferiore (Pizza) Inferiore Ventola Grill + Inferiore Scongelare Doppio grill Microonde Grill Microonde Combi... -
Page 49: Impostazioni Iniziali
Livelli di potenza delle microonde Potenza d'uscita microonde Alimenti Scongelare lentamente i cibi delicati; per scongelare e proseguire la 200W cottura a bassa potenza. Cucinare carni, pesce e riso. 400W Scongelare velocemente piccole quantità e cibi per neonati quali, ad es., biberon. -
Page 50: Impostazioni Di Cottura
Impostazioni di cottura • Ruotare Cottura manuale manopola destra selezionare la funzione microonde • Premere per confermare. • Ruotare manopola destra selezionare la potenza desiderata. • Premere per confermare. • Ruotare manopola sinistra selezionare il tempo desiderato. • Premere per confermare. Il forno inizierà... - Page 51 Cucinare con il microonde combi • Premere per confermare. • Accendere il forno premendo il pulsante NOTA: informazioni tempi scongelamento, fare riferimento al capitolo • Ruotare manopola sinistra Scongelamento. selezionare il menu “Cottura manuale”. • Ruotare il quadrante destro fino a NOTA: Quando sul display compare il messaggio “GIRARE IL PIATTO”, aprire lo raggiungere il simbolo...
-
Page 52: Cottura Automatica
scongelamento e di attesa (per garantire che il cibo abbia una temperatura uniforme): Tempo di Progr. Cibo Peso (kg) Tempo (min) attesa (min) 0.10 – 2.00 2:10 – 43 20 – 30 Carne 0.10 – 2.50 2:20 – 58 20 – 30 Pesce 0.10 –... - Page 53 Progr. Cibo Peso (kg) Tempo (min) 76 – 336 Carne di maiale 0.5 - 10 Carne di manzo 0.5 – 5 95 – 241 Carne di agnello 0.5 – 6 66 – 210 Costolette di 0.5 – 4 38 – 84 maiale 0.5 –...
- Page 54 Cottura automatica Girare la pietanza • Accendere il forno premendo il pulsante Per alcune ricette o programmi, comparirà il Girare il piatto messaggio , quindi la • Ruotare manopola sinistra pietanza dovrà essere girata durante la selezionare menu “Cottura cottura. automatica”.
-
Page 55: Impostazioni Generali
Impostazioni generali • Ruotare manopola destra Selezione della lingua selezionare l’impostazione dell’ora. La lingua può essere cambiata in qualsiasi • Premere per confermare. momento. Per cambiare la lingua, procedere • Ruotare manopola destra come segue: selezionare il formato dell’ora. • Premere per confermare. - Page 56 Quando il forno è in Standby si può scegliere manopola sinistra se si preferisce che il display mostri l’ora o il selezionare menu “Impostazioni generali”. logo Barazza. • Ruotare manopola destra selezionare il menù della modalità Demo. • Premere per confermare.
-
Page 57: Impostazioni Del Timer
Impostazioni del timer Prima di iniziare la cottura, il forno propone le crescente. Per programmare una delle seguenti opzioni: impostazioni precedenti, procedere come segue: • Premere il pulsante per accedere al menu delle opzioni del timer. • Ruotare manopola sinistra selezionare tempo cottura... -
Page 58: Sicurezza
Sicurezza Blocco di sicurezza attivare questa funzione, tenere Questa funzione può essere selezionata in premuti contemporaneamente i pulsanti qualsiasi momento durante l’utilizzo del finché non si sente un bip e sullo forno. schermo appare il simbolo . Il pannello di •... -
Page 59: Cucinare Con Le Microonde
necessario rimuoverne solo il coperchio. assolutamente entrare in contatto con gli In caso contrario appoggiare le pietanze altri alimenti. in recipienti adatti alle microonde. 13. Non dimenticarsi che la funzione di 12. Il liquido che si forma, soprattutto durante scongelamento prevede anche un tempo lo scongelamento di pollame, deve di riposo durante il quale l'alimento si essere... -
Page 60: Cuocere Con Il Grill
• doppia quantità = durata raddoppiata 5. Lo sportello del forno può essere aperto in qualsiasi momento. L'apparecchio si • mezza quantità = durata dimezzata spegne automaticamente. Il forno rinizia a 2. Quanto minore sarà la temperatura, tanto funzionare dopo che si è richiuso lo più... -
Page 61: Stoviglie Adatte Per Le Microonde
estrazione accidentale. Queste tacche devono essere collocate nella parte Le altezze per il vassoio sono, cominciando posteriore del forno, rivolte verso il basso. dal basso: 1: Inferiore. 2: Media. 3: Superiore L'altezza 4 è adatte a gratinare e tostare. Per un risultato più uniforme, collocare l’ali- mento quanto più... -
Page 62: Pulizia E Manutenzione
Funzioni combinate alimenti come pollame o carne macinata mentre li si scongela. Se si utilizza le funzioni combinate bisogna • Importante! Il foglio di alluminio non utilizzare stoviglie adatte ad entrambe le due deve toccare le pareti del vano cottura, modalità... - Page 63 ATTENZIONE! Non pulire l’interno del 5. Assicurare il supporto con il dado (D) e forno con apparecchi a vapore o con stringerlo finché resti ben saldo (E). acqua a pressione Non utilizzare neanche spugne o spazzole metalliche, né utensili possano danneggiarne lo smalto.
-
Page 64: Risoluzione Dei Problemi
La lampada da sostituire deve resistere alle alte temperature (fino a 300°C); richiedere il ricambio al servizio di assistenza tecnica. Sostituzione della lampada superiore 3. Rimuovere i vetri dallo sportello. Pulirli sosituire lampadina superiore, con un panno morbido utilizzando un procedere come segue: detergente per vetri o acqua saponata. - Page 65 presenza di elementi estranei di metallo La lampada interna del forno non si (vedi capitolo "Stoviglie adatte" accende: • Sostituire la lampada. nell'opuscolo di cottura guidata). • Assicurarsi che il contenitore non tocchi • Verificare stata installata le pareti del forno. correttamente, secondo istruzioni...
-
Page 66: Caratteristiche Tecniche
Caratteristiche tecniche Specifiche • Tensione CA ............. (vedere la targhetta delle caratteristiche) • Potenza assorbita ................3500 W • Potenza Grill/ Doppio grill ..............1400 W/ 2500W • Potenza Riscaldatore Inferiore ............1150 W • Potenza Aria calda................1800 W • Potenza microonde ................1850 W •... -
Page 67: Installazione
Installazione conseguente surriscaldamento Queste informazioni sono rivolte danneggiamento dell’apparecchio e del esclusivamente all’installatore, in quanto responsabile dell’installazione mobile. • Per evitare questo rischio, è importante collegamento dell’apparecchio alla rete assicurarsi che le misure del mobile e elettrica. fabbricante declina ogni delle aperture praticarvi... - Page 68 Collegamento elettrico L’installatore dovrà verificare che: • La tensione e la frequenza di rete corrispondano a quanto indicato nella targa delle specifiche tecniche. • L’impianto elettrico sia in grado di sopportare la potenza massima indicata nella targa delle specifiche tecniche. •...
-
Page 69: Tabelle E Suggerimenti
Tabelle e Suggerimenti Stoviglie Modo di Microonde funzionamento Funzioni Funzioni Tipo tradizionale combinate Scongelare/ Cuocere stoviglie riscaldare Vetro e porcellana 1) Adatte alla casa, non termoresistenti, sì sì possono essere lavate nella lavastoviglie. Ceramica smaltata sì sì sì sì Vetro termoresistente e porcellana Ceramica e stoviglie in terraglia 2) sì... - Page 70 Tempo di scongelamento Tempo Funzioni (KG) (Min.) 5-10 5-10 10-12 10-15 Carne (maiale, manzo, vitello) 1000 21-23 20-30 1500 32-34 20-30 2000 43-45 25-35 8-10 10-15 Spezzatino 1000 17-19 20-30 10-15 Carne macinata 10-14 20-30 10-15 Salciccia 9-12 15-20 Pollame (a pezzi) 5-10 Pollo 1000...
- Page 71 Pollame Temperatura Tempo Quantità Livello Funzione Recipiente (ºC) (Min.) 190-210 55-60 Anatra Vassoio 1,50kg 170-190 45-55 180-190 10-12 Petto d’anatra Griglia 0,40kg 200-210 8-10 170-190 45-50 Coscia d’anatra 2 pezzi Vassoio 160-180 55-60 190-210 55-60 Pollo 1,20kg Vassoio 170-190 50-55 190-210 25-30 Cosce di pollo...
- Page 72 Temperatura Tempo Quantità Funzione Recipiente Livello (ºC) (Min.) 180-190 50-55 Arrosto di maiale Vassoio 170-190 45-50 180-200 55-60 Costoletta di maiale Griglia 0,50kg 200-220 190-200 55-60 Spalla di maiale Vassoio 1,50kgk 190-200 40-50 190-210 60-70 Maialino da latte Vassoio 1,40g 170-190 70-75 190-210...
- Page 73 Temperatura Tempo Quantità Funzione Recipiente Livello (ºC) (Min.) 180-200 10-12 190-200 15-20 Salmone a fette Vassoio 1,10kg 200-210 10-15 Pizza e pasta Temperatura Tempo Quantità Livello Funzione Recipiente (ºC) (Min.) 190-210 30-35 Pizza alta Griglia 0,60kg 190-200 20-25 190-200 15-20 Pizza bassa Griglia 0,60kg...
- Page 74 Dolci Funzione Temperatura Tempo Quantità Livello Recipiente (ºC) (Min.) 170-180 50-55 Pan di Spagna Stampo 0,60kg 165-170 170-190 20-25 Impasto lievitato 0,50kg Stampo 170-180 25-30 Pasta sfoglia lievitata 0,50kg 180-190 18-20 Vassoio Vassoio Sfoglia al formaggio 0,40kg Vassoio 180-190 30-35 Cheese cake 0,80kg Tray...
- Page 76 1632466 Barazza srl 31025 Sarano di S.Lucia di Piave (TV) ITALIA - Via Risorgimento, 14 T +39 0438 62888F +39 0438 64901 info@barazzasrl.it - barazzasrl.it...
Need help?
Do you have a question about the 1FEVGMC and is the answer not in the manual?
Questions and answers