Table of Contents
Advertisement
Available languages
Available languages
Quick Links
Advertisement
Table of Contents

Related Manuals for Barazza 1FICN9E


Summary of Contents for Barazza 1FICN9E
- Page 1 Instruction manual...
- Page 2 INSTALLATION BUILT -IN OVEN 90x60 • The oven can be installed under a hob or in a column. • The dimensions of the housing for the oven are given in figure 3. • Make sure that surrounding materials are heat-resistant. •...
- Page 3 INSTALLATION BUILT -IN OVEN 90x48 • The oven can be installed under a hob or in a column. • The dimensions of the housing for the oven are given in figure 3. • Make sure that surrounding materials are heat-resistant. •...
- Page 4 INSTALLATION INSTALLATION WARNINGS Built-in under worktop Make sure that the cabinet in the rear/bottom areas has proper opening, of approx 90mm, to let the oven work properly once fully built-in installed. Column installation Make sure that cabinet in the rear/bottom areas has proper opening, of approx 90mm and 50mm at the top areas, to let the oven work properly once fully built-in installed.
- Page 5 INSTALLATION Dear Customer, We thank you and congratulate you on your choice to purchase one of our products. We are confident that this new appliance, built with quality materials, will fully satisfy your requirements. Use of this new equipment is easy, however we invite you to read this manual carefully before installing and using the appliance.
-
Page 6: Warnings
WARNINGS 1.1 Premise 1.4 Precautions • This user manual is an integral part of WARNING: Ensure that the the appliance and must be kept intact appliance is switched off before and within reach of the user throughout replacing the lamp to avoid the the life of the appliance. -
Page 7: Damage To Person
WARNINGS 1.7 Damage to the appliance 1.6 Damage to persons • • Do not use harsh abrasive cleaners WARNING:This appliance and its or sharp metal scrapers to clean the accessible parts become very hot oven door glass, since they scratch during use. -
Page 8: Disposal
WARNINGS 1.8 Disposal This appliance must be disposed of separately from other waste (directives 2002/95/EC, 2002/96/EC, 2003/108/EC). This appliance does not contain substances in quantities such as to be considered hazardous to health and to the environment, in accordance with the current European directives. -
Page 9: Table Of Contents
CONTENTS 1. WARNINGS Premise Product Label Manufacturer liability Precautions Appliance purpose Damage to person Damage to the appliance Disposal 2. INSTALLATION Electrical connection General information Fixed connection Connection with plug and socket For the installer Oven Installation 3. DESCRIPTION Oven description Accessories Using the accessories First use... -
Page 10: Installation
INSTALLATION for disconnection from the supply mains 2.1 Electrical connection having a contact separation in all poles Danger of electrocution that provide full disconnection under Electrical voltage overvoltage category III conditions must Have the electrical connection carried be incorporate in the fixed wiring in out by qualified technical personnel. -
Page 11: Oven Installation
INSTALLATION ATTENTION for oven with Manual Thermostat: If the oven is set up with light function + 0°C and the red light remain slightly turned on, you have to switch the blue cable(neutral) with the brown one(phase) in the plug. 2.6 Oven installation •... - Page 12 INSTALLATION CAUTION To prevent the oven handle from breaking, DO NOT pull the oven by the handle to install it or place it inside the recess. fig.14 fig.14...
-
Page 13: Description
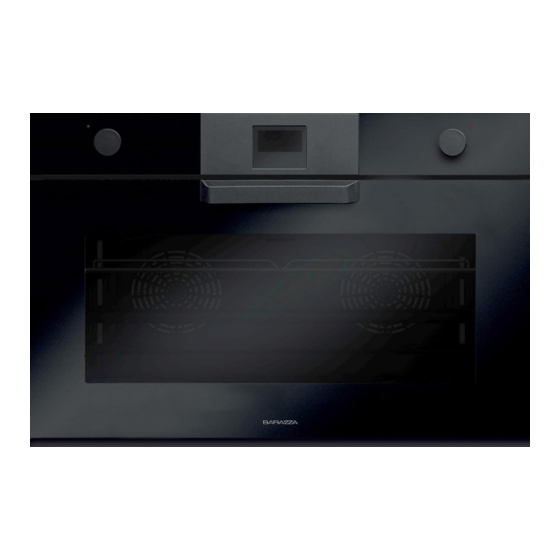
DESCRIPTION 3.1 Oven description 4. Date labels 1. Control Panel 5. Turbo Fan 2. Light 6. Upper Resistance 3. Chromed side grille COMPONENT NAME POWER IN W Upper resistance (top) 1200 W Lower heating element (button) 1800 W 2 FAN circular heating element 3000 W Grill 1800 W... -
Page 14: Accessories
ACCESSORIES 3.2 Available Accessories Rack High deep tray Useful for supporting containers with Usuful for collecting fat from foods food during cooking. placed on the rack above. h=50 mm Rotisserie Low deep tray Useful for grilling large roasts, poultry Usuful for collecting fat from foods and whole fish. -
Page 15: First Use
DESCRIPTION 3.4 First use Removeany protective film from the outside or inside of the appliance, including accessories. Remove the accessories and wash the oven (see pag 49). Set the temperature regulator to the maximum level. (250°C max). Set the function key as upper and lower resistance (and + fan if available). Turn on the oven in this configuration for 30 minutes. -
Page 16: Timer Description
TIMER DESCRIPTION General operation This timer governs the time display (with analog hands) and the operation of the oven(using push knob and indicator icons). Pushing on the knob, you can: adjust the time, program the start time and end of cooking, set the alarm (Minute Minder). Setting the time of day To adjust the clock press the knob briefly 4 times until you get the flashing of the “CLOCK”... - Page 17 TIMER DESCRIPTION automatic manner based on the time scheduled. To program the end of cooking time briefly press 2 times the knob until you get the flashing of “END TIME” icon. To increase or decrease the cooking time, turn knob clockwise or counterclockwise. The flashing of “END TIME” icon continues for some seconds after the last rotation. The program can be confirmed by pressing the knob (at least to minutes of cooking time).
- Page 18 TIMER DESCRIPTION After plugging in or reconnecting to a power source after current decay, “12:00”, icon flashes. Any button press enters the time of day setting menu. Adjust the correct time of day using buttons 1 or 3. Menù botton The menu button cycles through the minute minder - cooking duration - end of time - time of day - buzzer tone adjustment menus.
- Page 19 TIMER DESCRIPTION Cooking timer If the oven is supposed to turn off after a specified duration, cooking timer can be set. It is named as semi-automatic operation. • Press and release button 2 until starts to flash. • Set the cooking duration using buttons 1 and 3, within the range from 1 minute to 23 hours 59 minutes.
- Page 20 TIMER DESCRIPTION Adjusting the buzzer tone • Press button 2 until the “LX” (X=1, 2 or 3) flashes on the right two digits. • Set the tone using buttons 1 and/or 3 to set “L1”, “L2” or “L3”. Note: Default tone is L3. Key lock activation/ deactivation When any adjustment mode is not active, press and hold button 3 about 5 seconds, to activate/deactivate the key lock,...
- Page 21 TIMER DESCRIPTION Mechanical Timer You can adjust up to 120 minute by rotating the mechanical clock button clock wise. • The clock will have the oven work for the set duration and shut it down automatically when the time is up. •...
-
Page 22: Function Description
6 FUNCTION DESCRIPTION TEMPERATURE DIGITAL FUNCTION SWITCH TIMER SELECTOR the product won’t work in this position. turning the knob to the right the switch turns on the Light oven light. mostly used for cooking in one tray. Roasts both Static sides of the food equally, making it crispy. - Page 23 6 FUNCTION DESCRIPTION Some ovens have a rotisserie, in this case the last two functions described on the previous page are different. Grill+ with the use of the rotisserie, the grill function will give Rotisserie a more uniform cooking. Top Heater with the use of the rotisserie, the cooking that was +Grill+Fan already homogeneous thanks to the fan, is optimized.
-
Page 24: Function Description
8 FUNCTION DESCRIPTION TEMPERATURE DIGITAL FUNCTION SWITCH TIMER SELECTOR The 8 function oven uses the same digital timer as the 6-function one. the product won’t work in this position. turning the knob to the right the switch turns on Light the oven light. - Page 25 8 FUNCTION DESCRIPTION the heat produced by top heater and grill, is Top heater + Grill propagated homogeneously by the fan for a + Fan homogeneously cooking. Some ovens have a rotisserie, in this case the last two functions described on the previous page are different.
- Page 26 TECHNICAL SPECIFICATIONS Oven technical specification The oven has been designed to work with monophase 220-240V AC 50/60 electricity. Carefully read the label of the data plate placed on the oven before installation. Top heater 1200 W Bottom heater 1800 W Grill heater 1800 W Cooling fan...
- Page 27 8 FUNCTION DESCRIPTION WITHOUT CIRCULAR RESISTANCE TEMPERATURE DIGITAL FUNCTION SWITCH TIMER SELECTOR the product won’t work in this position. turning the knob to the right the switch turns on Light the oven light. only turbo fans work in this position, circulates the Deicing air at room temperature around frozen food and thaws them.
- Page 28 8 FUNCTION DESCRIPTION Some ovens have a rotisserie, in this case the last two functions described on the previous page are different. Grill + with the use of the rotisserie, the grill function will give a more uniform cooking. Rotisserie Top heater + with the use of the rotisserie, the cooking that was Grill + fan...
- Page 29 8 FUNCTION DESCRIPTION Oven technical specification The oven has been designed to work with monophase 220-240V AC 50/60 electricity. Carefully read the label of the data plate placed on the oven before installation. Top heater 1200 W Bottom heater 1800 W Grill heater 1800 W Cooling fan...
-
Page 30: Function Description
9 FUNCTION DESCRIPTION TEMPERATURE DIGITAL FUNCTION SWITCH TIMER SELECTOR The 9 function oven uses the same digital timer as the 6 function one. the product won’t work in this position. turning the knob to the right the switch turns on Light the oven light. - Page 31 9 FUNCTION DESCRIPTION the heat produced by top heater and grill, is propa- Top heater + gated homogeneously by the fan for a homogeneous- Grill+ Fan ly cooking. Some ovens have a rotisserie, in this case the last two functions described on the previous page are different.
- Page 32 9 FUNCTION DESCRIPTION Oven technical specification The oven has been designed to work with monophase 220-240V AC 50/60 electricity. Carefully read the label of the data plate placed on the oven before installation. Top heater 1200 W Bottom heater 1800 W Grill heater 1800 W Cooling fan...
- Page 33 9 FUNCTION DESCRIPTION FUNCTION Display Cooking status Automatic cooking status Minute minder adjustment status Half automatic cooking adjustment mode Automatic cooking adjustment mode Key lock status Thermostatic control (heating elements) status Temperature set point status Touch buttons Timer Buttons Temperature Buttons Timer Minus Temperature Minus Timer buttons...
- Page 34 9 FUNCTION DESCRIPTION Function description turning the knob to the right the switch turns on the Light oven light. only turbo fans work in this position, circulates the air Deicing at room temperature around frozen food and thaws them. fan and surrounding heater will be activated. Turbo This program also offers more than one food on seve- ral levels, without the transmission of odors.
- Page 35 9 FUNCTION DESCRIPTION Control unit function Power on Upon power on, Timer Display digits are flashing, the oven is inoperative. The selected cooking Function (if any) is shown on the Cooking Function Display. The Temperature Display shows the default Temperature assigned to this function. Press the button or both timer buttons simultaneously to return to the manual mode and activate the oven.
- Page 36 9 FUNCTION DESCRIPTION Minute minder This function is a minute minder alarm independent of oven control. • Press the button once. symbol starts flashing. • Set the desired minute minder duration by pressing the timer to decrease or the timer to increase. The maximum allowed setting is 23 hours 59 minutes. After a few seconds screen will stabilize, flashing will stop, adjustment is completed.
- Page 37 9 FUNCTION DESCRIPTION Automatic cooking Automatic cooking means, that cooking will end automatically according to the set parameters. Half automatic cooking • Cooking will start immediately and goes on for the duration programmed. Select the desired cooking function and adjust (if needed and allowed) the temperature as described before in this document.
- Page 38 9 FUNCTION DESCRIPTION Automatic end of cooking • After cooking ends automatically, will flash on the Timer Display , the heating elements are off, buzzer alarm will sound. Stopping just the alarm sound is possible by any button press. • To active the oven (to energize the heating elements), press the button or both timer buttons simultaneously, in that case...
- Page 39 9 FUNCTION DESCRIPTION Buzzer tone selection Press the timer button for 2 seconds, until the “tonX” (X=1, 2 or 3) appears on the timer display. Every press of the same button thereafter will scroll through all 3 available tones. The last heard tone will be recorded in memory (Factory Setting is Ton 1.).
-
Page 40: Function Description
11 FUNCTION DESCRIPTION Status Time of Pause display the day Lock Timer Temperature Combined Display display display Display: Time of day - Shows the time of day Combined display - Indicates the selected cooking function Temperature display - Indicates the oven temperature set Timer display - Shows the timer status Status display -... - Page 41 11 FUNCTION DESCRIPTION Function description heat, coming simultaneously from above and from below, makes this system suitable for cooking particular types of food. Traditional cooking, also Static called static, is suitable for cooking only one dish at a time. Ideal for any type of roast, bread, stuffed cakes, it is however particularly suitable for fatty meats such as goose and duck.
- Page 42 11 FUNCTION DESCRIPTION the combination of fan-assisted cooking with traditional cooking allows different foods to be Turbo cooked quickly and effectively on several levels, without smells or flavours being transmitted. Ideal for large-volume foods that require intense cooking. the combination of the fan and the circular heating element (incorporated in the rear part of the cooking compartment) allows the cooking of different foods on several levels, provided they...
- Page 43 11 FUNCTION DESCRIPTION Cooking mode Control activation or deactivation The key activates or deactivates the control (regardless of the child block). When the control is deactivated, the screen is completely blank. Pressing the key for 1 second activates the control. The current time of day appears on the display. Note: in the event of a power failure, the current time of day will no longer be correct.
- Page 44 11 FUNCTION DESCRIPTION Modification of the assigned default cooking temperature The temperature setting on the temperature display can be changed by touching the key. The temperature display starts to flash. To set the desired value use in 5 degree steps. Note: to replace the default temperature setting for this function with this temperature set permanently, touch for approximately 5 seconds, until a beep is heard.
- Page 45 11 FUNCTION DESCRIPTION Automatic cooking Automatic cooking means that cooking will end automatically based on the parameters of the cooking function and the temperature selected. Semi-automatic cooking This method is used to start cooking immediately, entering the desired cooking time. Select the desired function and adjust (if necessary) the temperature as described earlier in this document.
- Page 46 11 FUNCTION DESCRIPTION Residual heat indication After cooking has been completed manually or automatically, if the internal temperature of the oven is above 60°C, the ‘down arrow’ on the right side of the heat bars flashes every 2 seconds and also “hot” is shown on the display of the temperature. At this point every one of the 5 heat bars symbolises 60°C. This indication remains on until the oven temperature drops below 60°C.
- Page 47 11 FUNCTION DESCRIPTION Error indications When situations occur that prevent normal operation, the device goes into error mode. The device is in the standby state, but an error code is shown on the time of day display. Even if the error is recovered, this code will remain on the display until key is touched.
- Page 48 11 FUNCTION DESCRIPTION In the case of an error message If these errors cannot be solved by tapping the button, try to disconnect the oven from the mains and connect it again after 2 minutes. If this does not work, contact the nearest service centre. PROGRAMMABLE OPTIONS Acoustic signal There are three acoustic tones that can be selected.
-
Page 49: Cleaning And Maintenance
CLEANING AND MAINTENANCE 9.1 Warnings • As a safety precaution, before proceeding with any cleaning operation of the oven, always unplug the appliance from the mains socket or remove the appli- ance’s power supply line. • It is also recommended to avoid the use of acidic or alkaline substances (lemon juice, vinegar, salt, tomatoes, etc.) •... -
Page 50: Removing The Oven Door
CLEANING AND MAINTENANCE 9.2 Removing the oven door For easier cleaning it is recommended to remove the door and place it on a tea towel. To remove the door proceed as follows: • Open the door completely; • Lift the two levers indicated in figure 10; •... -
Page 51: Internal Glass Cleaning
CLEANING AND MAINTENANCE 9.3 Internal glass cleaning To clean the inside glass door, unscrew the two screws located above the door, figure 12, and carefully remove the glass. To reassemble the glass, insert the glass up to the stop on the bottom, replace the glass fixing bracket and tighten the two screws. fig. 12... -
Page 52: Cooling Fan
CLEANING AND MAINTENANCE 9.4 Third glass cleaning Some ovens have a third glass, located between the ovens door and internal glass. Once the internal glass has been removed, the third glass can be removed in the same way, following the direction of the arrows. fig. 13 3.6 Cooling fan The tangential fan is present both in the ventilated... -
Page 53: Directive 2012/19/Ue (Raee)
DIRECTIVE 2012/19/UE (RAEE) This product complies with the EU Directive 2002/96/EC. The crossed bin symbol shown on the product indicates that the Waste deriving from Electrical and Electronic Equipment (WEEE) must not be discarded in the undifferentiated waste (i.e. together with “mixed urban waste”), but must be managed separately in order to be provided for specific operations for its reuse or for a specific treatment, to remove and dispose of any environmentally harmful substances and to extract the raw materials that can be recycled. - Page 56 ( )مخلفات األجهزة الكهربائية واإللكترونيةUE/2012/19 توجيه .EC/96/2002 هذا المنتج متوافق مع توجيهات االتحاد األوروبي يشير رمز الصندوق الذي يحمل عالمة الخطأ الموضحة على المنتج إلى أنه يجب عدم التخلص من النفايات ) في النفايات غير المتمايزة (أي مع "النفاياتWEEE( الناتجة عن المعدات الكهربائية واإللكترونية الحضرية...
- Page 57 التنظيف والصيانة 9.4 تنظيف الزجاج الثالث .تحتوي بعض األفران على زجاج ثالث، يقع بين باب الفرن والزجاج الداخلي .بمجرد إزالة الزجاج الداخلي، يمكن إزالة الزجاج الثالث بالطريقة نفسها، باتباع اتجاه األسهم 13 الشكل 3.6 مروحة التبريد توجد المروحة المماسية في ك ل ٍ من الفرن المزود بالتهوية والفرن .الساكن...
- Page 58 التنظيف والصيانة 9.3 تنظيف الزجاج الداخلي لتنظيف الباب الزجاجي الداخلي، قم بفك المسمارين الموجودين فوق الباب، الشكل 21، وقم بإزالة الزجاج .بعناية .إلعادة تركيب الزجاج، أدخل الزجاج من أعلى حتى األسفل، واستبدل شريحة تثبيت الزجاج واربط البرغيين 12 الشكل...
- Page 59 التنظيف والصيانة 9.2 إزالة باب الفرن .لسهولة التنظيف، يوصى بإزالة الباب ووضعه على منشفة صغيرة :إلزالة الباب اعمل على النحو التالي افتح الباب بالكامل؛ ارفع الرافعتين المشار إليهما في الشكل 01؛ أغلق الباب بقدر ما تستطيع حتى الوصول إلى أول توقف بسبب الرافعتين المرفوعتين مسب ق ً ا؛ .11قم...
- Page 60 التنظيف والصيانة 9.1 تحذيرات كإجراء وقائي للسالمة، قبل الشروع في أي عملية تنظيف للفرن، قم دائ م ً ا بفصل الجهاز من مقبس التيار .الكهربائي أو أزل خط تزويد الطاقة الخاص بالجهاز ).كما يوصى بتجنب استخدام المواد الحمضية أو القلوية (عصير الليمون، الخل، الملح، الطماطم، إلخ .تجنب...
- Page 61 وصف الفرن المزود بـ 11 وظائف في حالة وجود رسالة خطأ ، فحاول فصل الفرن عن التيار الكهربائي إذا تعذر حل هذه األخطاء عن طريق النقر على زر .وتوصيله مرة أخرى بعد دقيقتين .إذا لم ينجح ذلك، فاتصل بأقرب مركز خدمة الخيارات...
- Page 62 وصف الفرن المزود بـ 11 وظائف مؤشرات الخطأ ،عندما تحدث مواقف تمنع التشغيل العادي، ينتقل الجهاز إلى وضع الخطأ. يكون الجهاز في حالة االستعداد ولكن يعرض رمز خطأ في مكان عرض وقت اليوم. حتى إذا تم إصالح الخطأ، فسيظل هذا الرمز على :.
- Page 63 وصف الفرن المزود بـ 11 وظائف مؤشر الحرارة المتبقية ،بعد انتهاء الطهي اليدوي أو األوتوماتيكي، إذا كانت درجة الحرارة الداخلية للفرن أعلى من 06 درجة مئوية يضيء "السهم لألسفل" على الجانب األيمن من أشرطة الحرارة كل ثانيتين، وتظهر أي ض ً ا كلمة "ساخن" على .شاشة...
- Page 64 وصف الفرن المزود بـ 11 وظائف الطهي األوتوماتيكي .يعني الطهي األوتوماتيكي أن الطهي سينتهي أوتوماتيك ي ً ا وف ق ً ا لمعايير وظيفة الطهي ودرجة الحرارة المحددة الطهي نصف األوتوماتيكي .تستخدم هذه الطريقة لبدء الطهي على الفور، وبإدخال وقت الطهي المطلوب اختر...
- Page 65 وصف الفرن المزود بـ 11 وظائف تعديل درجة حرارة الطهي االفتراضية المخصصة . تبدأ شاشة درجة الحرارة يمكن تغيير إعداد درجة الحرارة على عرض درجة الحرارة عن طريق لمس المفتاح .بخطوات ذات 5 درجات أو في الوميض. من أجل ضبط القيمة المطلوبة استخدم ،ملحوظة: الستبدال...
- Page 66 وصف الفرن المزود بـ 11 وظائف نظام الطهي التحكم في التنشيط أو التعطيل بتنشيطأو إلغاء تنشيط عنصر التحكم (بغض النظر عن قفل حماية الطفل). عند إلغاء تنشيط يقوم المفتاح لمدة 1 ثانية ينشط التحكم. يظهر الوقت الحالي عنصر التحكم، تكون الشاشة فارغة تما م ً ا. الضغط على المفتاح .لليوم...
- Page 67 وصف الفرن المزود بـ 11 وظائف مزيج من الطهي بمساعدة المروحة مع الطهي التقليدي يسمح بطهي تيربو األطعمة المختلفة بسرعة وفعالية على عدة مستويات، دون أن تنتقل الروائح أو النكهات. مثالي لألطعمة ذات الحجم الكبير التي تتطلب .الطهي المكثف يتيح مزيج المروحة وعنصر التسخين الدائري (المدمج في الجزء الخلفي...
- Page 68 وصف الفرن المزود بـ 11 وظائف وصف الوظيفة الحرارة، التي تأتي في وقت واحد من األعلى ومن األسفل، تجعل ،هذا النظام مناس ب ً ا لطهي أنواع معينة من الطعام. الطهي التقليدي ساكن الذي ي ُ طلق عليه أي ض ً ا ساكن، مناسب لطهي طبق واحد فقط في كل مرة.
- Page 69 وصف الفرن المزود بـ 11 وظائف الحالة المفتاح توقف مؤقت وقت اليوم شاشة القفل شاشة شاشة مختلط المؤقت الحرارة شاشة :الشاشة - وقت اليوم يعرض وقت اليوم - عرض جن ب ً ا إلى جنب يشير إلى وظيفة الطهي المحددة - عرض...
- Page 70 وصف الفرن المزود بـ 9 وظائف اختيار نغمة الجرس .=1 أو 2 أو 3) على شاشة المؤقتX( "tonX" لمدة ثانيتين، حتى يظهر اضغط على زر المؤقت سيتم تمرير كل ضغطة على الزر نفسه بعد ذلك خالل جميع النغمات الثالثة المتاحة. سيتم تسجيل آخر نغمة .).Ton 1 تسمع...
- Page 71 وصف الفرن المزود بـ 9 وظائف نهاية أوتوماتيكية للطهي على شاشة العرض المؤقت، وتكون عناصر بعد انتهاء الطهي أوتوماتيك ي ً ا، سوف تومض .التسخين المطفأة، ويصدر صوت التنبيه. يمكن إيقاف صوت التنبيه فقط من خالل أي زر واألزرار أو كال من المؤقت لتنشيط...
- Page 72 وصف الفرن المزود بـ 9 وظائف الطهي األوتوماتيكي .يعني الطهي األوتوماتيكي أن الطهي سينتهي أوتوماتيكي ا ً وف ق ً ا للمعايير المحددة الطهي نصف أوتوماتيكي سيبدأ الطهي على الفور ويستمر للمدة المبرمجة. اختر وظيفة الطهي المرغوب بها واضبط درجة .الحرارة...
- Page 73 وصف الفرن المزود بـ 9 وظائف التذكير بالدقائق .هذه الوظيفة عبارة عن جهاز تنبيه بالدقيقة مستقل عن التحكم في الفرن .يبدأ الرمز في الوميض .مرة واحدة اضغط على زر .في المؤقت للزيادة في المؤقت للتقليل أو اضبط المدة المطلوبة بالدقيقة بالضغط على الحد...
- Page 74 وصف الفرن المزود بـ 9 وظائف وظيفة وحدة التحكم تشغيل الطاقة .عند التشغيل، تومض أرقام شاشة المؤقت، الفرن ال يعمل .يتم عرض وظيفة الطهي المختارة (إن وجدت) على شاشة وظيفة الطهي .توضح شاشة عرض درجة الحرارة درجة الحرارة االفتراضية المخصصة لهذه الوظيفة في...
- Page 75 وصف الفرن المزود بـ 9 وظائف وصف الوظيفة المصباح .من خالل تحويل المقبض إلى اليمين يعمل المفتاح على إضاءة الفرن تعمل فقط مراوح التربو في هذا الوضع، وتقوم بتدوير الهواء في درجة إذابة الثلج .حرارة الغرفة حول الطعام المجمد وإذابته .سيتم...
- Page 76 وصف الفرن المزود بـ 9 وظائف الوظيفة لوحة إظهار حالة الطهي حالة الطهي األوتوماتيكي وضع ضبط التذكير بالدقائق وضع ضبط الطهي النصف آلي وضع ضبط الطهي اآللي وضع قفل المفتاح )وضع التحكم الحراري (عناصر التسخين وضع نقطة ضبط درجة حرارة أزرار...
- Page 77 وصف الفرن المزود بـ 9 وظائف المواصفات الفنية للفرن . 60/50 AC V240/220 تم تصميم الفرن للعمل مع الكهرباء أحادية الطور .اقرأ ملصق لوحة البيانات الموضوعة على الفرن بعناية قبل التركيب 0021 واط السخان العلوي 0081 واط السخان السفلي 0081 واط سخان...
- Page 78 وصف الفرن المزود بـ 9 وظائف سخان علوي + شواية يتم نشر الحرارة الناتجة عن السخان العلوي والشواية بشكل متجانس .بواسطة المروحة من أجل الحصول على طهي متجانس + مروحة تحتوي بعض األفران على مشواة، وفي هذه الحالة تختلف الوظيفتان األخيرتان الموضحتان في الصفحة .السابقة...
- Page 79 وصف الفرن المزود بـ 9 وظائف مفتاح الحرارة المؤقت الرقمي الوظيفة مؤقت مفتاح االختيار .يستخدم الفرن ذو 9 وظائف نفس المؤقت الرقمي الذي يستخدمه الفرن ذو 6 وظائف متوقف عن التشغيل .لن يعمل المنتج في هذا الوضع من خالل تحويل المقبض إلى اليمين يعمل المفتاح على إضاءة المصباح...
- Page 80 وصف الفرن المزود بـ 8 وظائف المواصفات الفنية للفرن . 60/50 AC V240/220 تم تصميم الفرن للعمل مع الكهرباء أحادية الطور .اقرأ ملصق لوحة البيانات الموضوعة على الفرن بعناية قبل التركيب 0021 واط السخان العلوي 0081 واط السخان السفلي 0081 واط سخان...
- Page 81 وصف الفرن المزود بـ 8 وظائف تحتوي بعض األفران على مشواة، وفي هذه الحالة تختلف الوظيفتان األخيرتان الموضحتان في الصفحة .السابقة + شواية .باستخدام أداة التحمير، ستوفر وظيفة الشواء طه ي ً ا أكثر اتسا ق ً ا مشواة + السخان العلوي باستخدام...
- Page 82 وصف الفرن المزود بـ 8 وظائف بدون مقاومة دائرية مفتاح الحرارة المؤقت الرقمي الوظيفة مؤقت مفتاح االختيار متوقف عن التشغيل .لن يعمل المنتج في هذا الوضع من خالل تحويل المقبض إلى اليمين يعمل المفتاح على إضاءة المصباح .الفرن تعمل فقط مراوح التربو في هذا الوضع، وتقوم بتدوير الهواء في إذابة...
- Page 83 المواصفات الفنية المواصفات الفنية للفرن .60/50 AC V240/220 تم تصميم الفرن للعمل مع الكهرباء أحادية الطور .اقرأ ملصق لوحة البيانات الموضوعة على الفرن بعناية قبل التركيب 0021 واط السخان العلوي 0081 واط السخان السفلي 0081 واط سخان الشواية 02 واط مروحة...
- Page 84 وصف الفرن المزود بـ 8 وظائف يتم نشر الحرارة الناتجة عن السخان العلوي والشواية بشكل السخان العلوي + الشواية متجانس بواسطة المروحة من أجل الحصول على طهي + المروحة .متجانس تحتوي بعض األفران على مشواة، وفي هذه الحالة تختلف الوظيفتان األخيرتان الموضحتان في الصفحة .السابقة...
- Page 85 وصف الفرن المزود بـ 8 وظائف مفتاح الحرارة المؤقت الرقمي الوظيفة مؤقت مفتاح االختيار .يستخدم الفرن ذو الثماني (8) وظائف المؤقت الرقمي نفسه الذي يستخدمه الفرن ذو الست (6) وظائف متوقف عن التشغيل .لن يعمل المنتج في هذا الوضع من خالل تحويل المقبض إلى اليمين يعمل المفتاح على إضاءة المصباح...
- Page 86 وصف الفرن المزود بـ 6 وظائف تحتوي بعض األفران على مشواة، وفي هذه الحالة تختلف الوظيفتان األخيرتان الموضحتان في الصفحة .السابقة +شواية .باستخدام أداة التحمير، ستوفر وظيفة الشواء طه ي ً ا أكثر اتسا ق ً ا مشواة السخان العلوي باستخدام...
- Page 87 وصف الفرن المزود بـ 6 وظائف مفتاح الحرارة المؤقت الرقمي الوظيفة مفتاح االختيار متوقف عن التشغيل .لن يعمل المنتج في هذا الوضع المصباح .من خالل تحويل المقبض إلى اليمين يعمل المفتاح على إضاءة الفرن ي ُ ستخدم في الغالب للطهي في صينية واحدة. تحمير كال جانبي الطعام .بشكل...
- Page 88 وصف المؤقت المؤقت الميكانيكي يمكنك ضبط المؤقت حتى 021 دقيقة عن طريق إدارة الساعة الميكانيكية في .اتجاه عقارب الساعة الساعة س ت ُ بقي الفرن يعمل لمدة محددة، وتغلقه أوتوماتيك ي ً ا عندما ينقضي .الوقت المحدد ،ع ي ّ ِ ن الوظيفة، واضبط أزرار درجة الحرارة بعد وضع الوجبة داخل الفرن واضبط...
- Page 89 وصف المؤقت ضبط نغمة الجرس .=1 أو 2 أو 3) على الرقمين في الجهة اليمنىX( "LX" اضغط على الزر 2 حتى يومض ."L3" " أوL2" " أوL1" اضبط النغمة باستخدام الزرين 1 و/أو 3 لتحديد .L3 ملحوظة: النغمة االفتراضية هي تنشيط/إلغاء...
- Page 90 وصف المؤقت مؤقت الطهي إذا كان من المفترض أن يتم إيقاف تشغيل الفرن بعد مدة محددة، يمكن ضبط مؤقت الطهي. وتسمي هذه .العملية التشغيل نصف األوتوماتيكي .في الوميض اضغﻂ على الﺰر 2 وحﺮره حتى تبدأ األيقونة .اضبط مدة الطهي باستخدام الزرين 1 و 3، في نطاق يتراوح من 1 دقيقة إلى 32 ساعة و 95 دقيقة .على...
- Page 91 وصف المؤقت ،"12:00" بعد توصيل مصدر الطاقة أو إعادة التوصيل به بعد اضمحالل التيار، يومض . الضغط علي أي زر يدخلك إلي قائمة اإلعداد الخاصة بالتوقيت اليومي. قم بضبط والرمز .3 الوقت الصحيح من اليوم باستخدام األزرار 1 أو زر القائمة .يتنقل...
- Page 92 وصف المؤقت .أوتوماتيكية بنا ء ً على الوقت المحدد من أجل برمجة نهاية وقت الطهي، اضغط قليال مرتين (2) باستمرار على المقبض حتى تحصل على وميض " "وقت النهاية". من أجل زيادة أو تقليل وقت الطهي، أدر المقبضEND TIME" أيقونة .في...
- Page 93 وصف المؤقت التشغيل العام يتحكم هذا المؤقت في عرض الوقت (بأيدي تمثيلية) وتشغيل الفرن (باستخدام مقبض الضغط وأيقونات المؤشر). عند الضغط على المقبض، يمكنك: ضبط الوقت، برمجة وقت بداية ونهاية الطهي، ضبط المنبه .)( م ُ نبه الدقائق ضبط وقت اليوم من...
- Page 94 الوصف 3.4 االستخدام للمرة األولى .أزل أية طبقات واقية من الجزء الخارجي أو الداخلي للجهاز، بما في ذلك الملحقات .)49 أزل الملحقات واغسل الفرن (انظر صفحة .)اضبط منظم درجة الحرارة على أقصى مستوى. (052° مئوية كحد أقصى .)اضبط مفتاح الوظيفة على المقاومة العلوية والسفلية (و + المروحة إن و ُ جدت .قم...
- Page 95 الملحقات 3.2 الملحقات المتوفرة الرف صينية عميقة عالية ت ُ فيد في تجميع الدهون من األطعمة الموجودة على .ي ُ فيد في إسناد أواني الطعام أثناء الطهي .الرف العلوي االرتفاع= 05 مم المشواة صينية عميقة منخفضة ت ُ فيد في شواء المشويات الكبيرة والدواجن ت...
- Page 96 الوصف 3.1 وصف الفرن 4. ملصقات التاريخ 1. لوحة التحكم 5. مروحة توربو 2. المصباح 6. المقاومة العلوية 3. شبكة جانبية مطلية بالكروم الطاقة بالواط اسم المكون 0021 واط )المقاومة العليا (األعلى 0081 واط )عنصر التسخين السفلي (زر 0003 واط 2 المروحة...
- Page 97 التركيب تنبيه 14 لمنع انكسار مقبض الفرن، ال تقم بسحب الفرن من المقبض لتثبيته أو وضعه داخل التجويف. الشكل 14 الشكل...
- Page 98 التركيب تنبيه بالنسبة للفرن المزود بترموستات يدوي: إذا تم إعداد الفرن بوظيفة الضوء + °0 مئوية وظل الضوء .األحمر مضيئ ا ً قلي ال ً ، فإنه يجب عليك تبديل الكابل األزرق (المحايد) بالكابل البني (الطور) في القابس 2.6 تركيب الفرن .يمكن...
- Page 99 التركيب وف ق ً ا لقواعد األسالك في البلد الذي تم تركيب الجهاز 2.1 التوصيالت الكهربية .فيه خطر الصعق بالكهرباء بالنسبة ألستراليا ونيوزيلندا يجب أن تكون وسيلة الجهد الكهربائي .AS/NZS 3000 الفصل هذه مطابقة للمعيار ينبغي قيام الكوادر الفنية المؤهلة بالتوصيالت يجب...
- Page 100 المحتويات 1. التحذيرات مقدمة ملصق المنتج مسئولية الشركة المصنعة االحتياطات غرض الجهاز األضرار التي قد تلحق باألشخاص تلف الجهاز التخلص من المنتج 2. التركيب التوصيالت الكهربية معلومات عامة التوصيالت الثابتة التوصيل بالقابس والمقبس تعليمات لعامل التركيب تركيب الفرن 3. الوصف وصف...
- Page 101 تحذيرات 1.8 التخلص من المنتج يجب التخلص من الجهاز بشك ل ٍ منفصل عن المخلفات األخرى .)EC، 2002/96/EC، 2003/108/EC/2002/95 (طبق ا ً للتوجيهات ال يحتوي هذا الجهاز على مواد بكميات يمكن اعتبارها خطرة على الصحة والبيئة، وف ق ً ا .للتوجيهات...
- Page 102 تحذيرات 1.7 تلف الجهاز 1.6 األضرار التي قد تلحق باألشخاص ال تستخدم المنظفات الكاشطة القاسية أو تحذير: يصبح هذا الجهاز وأجزائه التي يمكن الكاشطات المعدنية الحادة لتنظيف زجاج باب .الوصول إليها شديدة السخونة أثناء االستخدام الفرن، نظر ً ا ألنها تخدش السطح، مما قد يؤدي .ال...
- Page 103 تحذيرات 1.4 االحتياطات 1.1 مقدمة تحذير: تأكد من إطفاء الجهاز قبل استبدال يعد دليل المستخدم هذا جز ء ً ا ال يتجزأ من الجهاز .المصباح لتجنب الصدمة الكهربائية المحتملة ويجب إبقائه سلي م ً ا وفي متناول المستخدم طوال عمر .ال...
- Page 104 التركيب ،عميلنا العزيز نشكرك ونهنئك على اختيارك شراء أحد منتجاتنا. نحن على ثقة بأن هذا الجهاز الجديد، الذي تم تصنيعه .بمواد عالية الجودة، سوف يلبي متطلباتك تما م ً ا .إن استخدام هذا الجهاز الجديد سهل، ولكننا ندعوك لقراءة هذا الدليل بعناية قبل تثبيت الجهاز واستخدامه .يوفر...
- Page 105 التركيب تحذيرات التركيب مدمج أسفل سطح العمل ،تأكد من أن الخزانة في المنطقتين الخلفية/السفلية تحتوي على فتحة مناسبة ٍ حوالي 09 مم، للسماح للفرن بالعمل بشكل صحيح بمجرد تركيبه بالكامل بشك ل .مدمج تركيب العمود 90 تأكد من أن الخزانة في المناطق الخلفية/السفلية تمتلك فتحة مناسبة، حوالي مم...
- Page 106 التركيب 90x48 فرن مدمج .يمكن تركيب الفرن تحت موقد أو في عمود .3 توجد أبعاد الوحدة الخاصة بتسكين الفرن في الشكل .تأكد من أن المواد المحيطة بالفرن مقاومة للحرارة .قم بمحاذاة الفرن بشك ل ٍ مركزي داخل الخزانة ثم ث ب ّ ِ ته بالمسامير .جميع...
- Page 107 التركيب 60x90 فرن مدمج .يمكن تركيب الفرن تحت موقد أو في عمود .3 توجد أبعاد الوحدة الخاصة بتسكين الفرن في الشكل .تأكد من أن المواد المحيطة بالفرن مقاومة للحرارة .قم بمحاذاة الفرن بشك ل ٍ مركزي داخل الخزانة ثم ث ب ّ ِ ته بالمسامير .جميع...
- Page 108 التعليمات كتيب...
Need help?
Do you have a question about the 1FICN9E and is the answer not in the manual?
Questions and answers