Advertisement
Quick Links
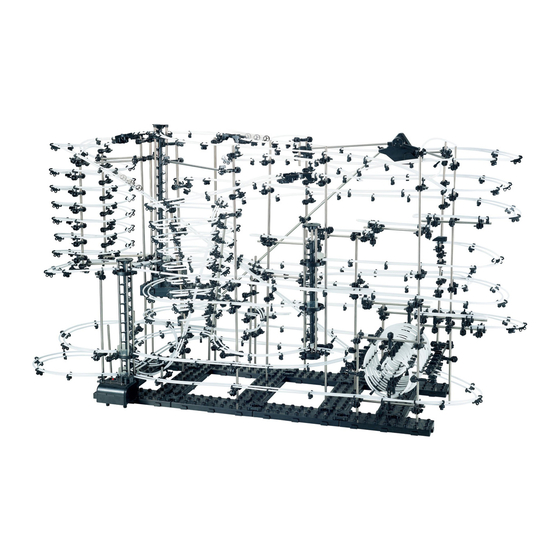
LEVEL 9
PRODUCT AND CONSUMER WARNING
CHOKING HAZARD: This product contains small parts and is not intended for children under 3.
• This product is intended for users 8 years of age and older.
• To avoid choking, keep small parts away from children.
• Use caution—this product contains parts with sharp edges.
• To avoid potential damage to the product, only insert the included marbles into the elevator.
Advertisement

Related Manuals for Spacerails Level 9


Summary of Contents for Spacerails Level 9
- Page 1 LEVEL 9 PRODUCT AND CONSUMER WARNING CHOKING HAZARD: This product contains small parts and is not intended for children under 3. • This product is intended for users 8 years of age and older. • To avoid choking, keep small parts away from children.
-
Page 2: Parts Included
Pen or Marker Rail Coupling Rail Rail Clip Marble 6 AA Batteries (newer models) or 2 C Batteries x 15 76,000 mm x 300 x 12 Ruler (in Centimeters) Seaich Corporation, LLC. All rights reserved. www.seaich.com | Spacerails, LLC. www.spacerails.com Page 2... - Page 3 Attach the arm to the shaft and the shaft Arm Clip and add the Arm Lock. to the base prior to attaching the round receiver side of the Arm Sheath to the See-Saw Arm. Seaich Corporation, LLC. All rights reserved. www.seaich.com | Spacerails, LLC. www.spacerails.com Page 3...
-
Page 4: Base Assembly
Illustration of completed base with all tabs BACK OF BASE locked and Base Holders installed. Approximately 20% of actual size. RIGHT LEFT OF BASE OF BASE FRONT OF BASE BASE ORIENTATION Seaich Corporation, LLC. All rights reserved. www.seaich.com | Spacerails, LLC. www.spacerails.com Page 4... -
Page 5: Elevator Assembly
Step 6: Attach Rail Clips to into position on the support Cover onto the top of the each Elevator Ring as shown. shafts right-side up. elevator assembly. Seaich Corporation, LLC. All rights reserved. www.seaich.com | Spacerails, LLC. www.spacerails.com Page 5... - Page 6 Step 5: Place the Elevator Cover Step 6: Attach Rail Clips to into position on the support onto the top of the elevator each Elevator Ring as shown. shafts right-side up. assembly. Seaich Corporation, LLC. All rights reserved. www.seaich.com | Spacerails, LLC. www.spacerails.com Page 6...
- Page 7 Add Elevator Guards to the right of each Step 6: Attach Rail Rail Clip installed to the bottom two Clips to each Elevator Elevator Rings. Ring as shown. Seaich Corporation, LLC. All rights reserved. www.seaich.com | Spacerails, LLC. www.spacerails.com Page 7...
-
Page 8: Shaft Assembly
The shafts listed below contain no arms and are not included in the drawings. Shafts: I, J, L, M, N, O, W, X, Y, Z, AX, AY, and AZ Seaich Corporation, LLC. All rights reserved. www.seaich.com | Spacerails, LLC. www.spacerails.com Page 8... - Page 9 Shaft A Shaft C Shaft D Shaft F Shaft B Shaft E Shaft G SHAFT TO BASE ORIENTATION BACK FRONT OF BASE OF BASE BASE Seaich Corporation, LLC. All rights reserved. www.seaich.com | Spacerails, LLC. www.spacerails.com Page 9...
- Page 10 Shaft H Shaft P Shaft R Shaft S Shaft T Shaft K Shaft Q Shaft U BACK FRONT OF BASE OF BASE BASE SHAFT TO BASE ORIENTATION Seaich Corporation, LLC. All rights reserved. www.seaich.com | Spacerails, LLC. www.spacerails.com Page 10...
- Page 11 H and K utilize the Arm B connectors to attach to other shafts and are suspended above the base. Arm B See-Saw Arm Arm A Arm C Arm D Seaich Corporation, LLC. All rights reserved. www.seaich.com | Spacerails, LLC. www.spacerails.com Page 11...
- Page 12 110 120 Shaft AL Stair Stunt B Shaft AM 100 120 Shaft AN Shaft AO RIGHT SIDE LEFT SIDE OF BASE OF BASE DOWN SHAFT ORIENTATION STAIRS Seaich Corporation, LLC. All rights reserved. www.seaich.com | Spacerails, LLC. www.spacerails.com Page 12...
- Page 13 Shaft AP Shaft AR Shaft AS Shaft AV Shaft AW Shaft AT Shaft AQ Shaft AU SHAFT TO BASE ORIENTATION BACK FRONT OF BASE OF BASE BASE Seaich Corporation, LLC. All rights reserved. www.seaich.com | Spacerails, LLC. www.spacerails.com Page 13...
- Page 14 OF BASE OF BASE BASE SHAFT TO BASE ORIENTATION Shaft BD RAIL SPLITTERS Shaft BF Step 1: Attach one Rail Clip on each of the Rail Splitter posts. Seaich Corporation, LLC. All rights reserved. www.seaich.com | Spacerails, LLC. www.spacerails.com Page 14...
- Page 15 Power Box in the holes on the Upper Base. Do not attach a Power Box Stand. This elevator is pushed forward and attaches with different posts. Attach posts to the upper base Seaich Corporation, LLC. All rights reserved. www.seaich.com | Spacerails, LLC. www.spacerails.com Page 15...
- Page 16 If you need to move an arm do not force it. Release the Arm Lock reposition arm and return Arm Lock to the locked position. Seaich Corporation, LLC. All rights reserved. www.seaich.com | Spacerails, LLC. www.spacerails.com Page 16...
- Page 17 Target a distance of 15 cm at the bottom of the funnel and 23.5 cm at the top with the bottom approximately 14.5 cm from the base. Seaich Corporation, LLC. All rights reserved. www.seaich.com | Spacerails, LLC. www.spacerails.com Page 17...
- Page 18 Step 2: Take stair stunt part B and move into position so that it can connect to arms S-1, V-3, R-2 and R-1. This is the lower portion of the stair stunt. Stair Stunt A Stair Stunt B Seaich Corporation, LLC. All rights reserved. www.seaich.com | Spacerails, LLC. www.spacerails.com Page 18...
- Page 19 175 cm (qty: 2) 188 cm (qty: 2) 194 cm (qty: 2) 475 cm: (qty 2) 550 cm (qty: 2) 560 cm (qty: 2) 670 cm (qty: 2) Seaich Corporation, LLC. All rights reserved. www.seaich.com | Spacerails, LLC. www.spacerails.com Page 19...
-
Page 20: Installing Rails
Keep incline as smooth as possible to avoid Add the Catch Tray to the pendulum drop losing speed or contact with rails. stunt to make it easier to catch the marbles. Seaich Corporation, LLC. All rights reserved. www.seaich.com | Spacerails, LLC. www.spacerails.com Page 20... - Page 21 Fine Tune: Once each rail section is completed run a Marble down your course and make sure it travels well. Make any adjustments as needed. Do not worry about adjusting the splitter until all rails have been connected. Seaich Corporation, LLC. All rights reserved. www.seaich.com | Spacerails, LLC. www.spacerails.com Page 21...
- Page 22 Rail Clips as shown. This rail cradle will help keep the Marble on the rail. The upper section of the stair step stunt will be completed later. Illustration 1 Illustration 2 Seaich Corporation, LLC. All rights reserved. www.seaich.com | Spacerails, LLC. www.spacerails.com Page 22...
- Page 23 AT-2, AU-2, AQ-1, and then loop up and through AQ-3. Image showing B–Step 2 Image showing B–Step 3, 4, and 5 Image showing C–Step 2 Seaich Corporation, LLC. All rights reserved. www.seaich.com | Spacerails, LLC. www.spacerails.com Page 23...
- Page 24 STEP 2: Attach rail O (86 cm) to the top Elevator Ring of elevator B facing the front. Keeping rail tight connect to arms AV-10, AW-10, and BG-4. Image showing D–Step 1 from back of base Image showing D–Step 2 Seaich Corporation, LLC. All rights reserved. www.seaich.com | Spacerails, LLC. www.spacerails.com Page 24...
- Page 25 Marble onto the pendulum stunt. Make sure that the pendulum arm can move freely and does not catch on the rails. Image showing E–Step 1 Image showing E–Step 2 Seaich Corporation, LLC. All rights reserved. www.seaich.com | Spacerails, LLC. www.spacerails.com Page 25...
- Page 26 STEP 3: Attach rail N (75 cm) to the bottom left Rail Clip of elevator C. Then connect rail through arms AW-3 and AV-2 finishing with the Rail Clip facing the back on elevator A’s second Elevator Ring. Image showing F–Step 1 and 2 Image showing F–Step 3 Seaich Corporation, LLC. All rights reserved. www.seaich.com | Spacerails, LLC. www.spacerails.com Page 26...
- Page 27 BD-1. Funnel should be approximately 18.5 cm at the top and 10 cm at the bottom. After exiting the Funnel continue to arms AV-3, Q-2, and AQ-2. Image showing G–Step 1 Image showing G–Step 2 Seaich Corporation, LLC. All rights reserved. www.seaich.com | Spacerails, LLC. www.spacerails.com Page 27...
- Page 28 Rail Clip to the end and trim rails at different lengths so that the Marble will drop gently onto the rails below. Image showing H–Step 1 Image showing H–Step 2 Seaich Corporation, LLC. All rights reserved. www.seaich.com | Spacerails, LLC. www.spacerails.com Page 28...
- Page 29 AW-6, C-4, R-3, V-2, BE-2 and end at the second Elevator Ring on the right side of elevator B. Image showing I–Step 1 Image showing I–Step 2 Seaich Corporation, LLC. All rights reserved. www.seaich.com | Spacerails, LLC. www.spacerails.com Page 29...
- Page 30 STEP 2: Add attach rail F (21 cm) between the Rail Clip on the top Elevator Ring on the back of elevator A and the Rail Clip on the bottom Elevator Ring on the front of elevator B. Image showing K–Step 1 Image showing K–Step 2 Seaich Corporation, LLC. All rights reserved. www.seaich.com | Spacerails, LLC. www.spacerails.com Page 30...
- Page 31 Image showing K–Step 2 NOTE: Congratulations on completing Spacerails Level 9! Fine tune the rails and see how many marbles you can get going at the same time. If the marbles are coming into the elevator too quickly it may knock other marbles already in the tower out.
- Page 32 Seaich Corporation 1910 West 1040 South Salt Lake City, UT 84104 (833) 732-4242 orders@seaich.com Spacerails LLC www.spacerails.com...
Need help?
Do you have a question about the Level 9 and is the answer not in the manual?
Questions and answers