Advertisement
Quick Links
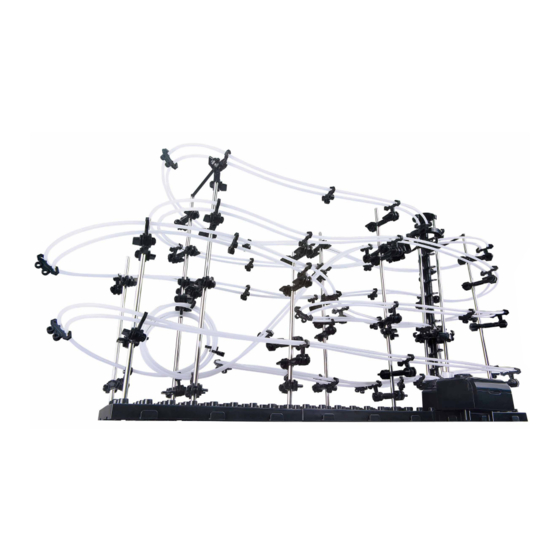
LEVEL 3
PRODUCT AND CONSUMER WARNING
CHOKING HAZARD: This product contains small parts and is not intended for children under 3.
• This product is intended for users 8 years of age and older.
• To avoid choking, keep small parts away from children.
• Use caution—this product contains parts with sharp edges.
• To avoid potential damage to the product, only insert the included marbles into the elevator.
Advertisement

Summary of Contents for Spacerails Level 3
- Page 1 LEVEL 3 PRODUCT AND CONSUMER WARNING CHOKING HAZARD: This product contains small parts and is not intended for children under 3. • This product is intended for users 8 years of age and older. • To avoid choking, keep small parts away from children.
- Page 2 MULTI-VIEW OF FINAL ASSEMBLY LEVEL 3 FRONT BACK Seaich Corporation, LLC. All rights reserved. www.seaich.com | Spacerails, LLC. www.spacerails.com Page 2...
- Page 3 3/4 ANGLE LEFT RIGHT Seaich Corporation, LLC. All rights reserved. www.seaich.com | Spacerails, LLC. www.spacerails.com Page 3...
-
Page 4: Parts Included
Wire Cutters or Utility Scissors Pen or Marker 3 AA Batteries (newer models) or 1 C Battery Base Blocks Base Holder A Base Holder B Ruler (in centimeters) Seaich Corporation, LLC. All rights reserved. www.seaich.com | Spacerails, LLC. www.spacerails.com Page 4... - Page 5 Arm Lock by turning clockwise, position Rail Clip as desired, then secure Arm Lock again. RAIL SPLITTER Prepare Rail Splitter: Attach one Rail Clip to each of the 3 Rail Splitter posts (3 total Rail Clips). Seaich Corporation, LLC. All rights reserved. www.seaich.com | Spacerails, LLC. www.spacerails.com Page 5...
-
Page 6: Elevator Assembly
300 mm support shafts to fill the shaft. Rotate each piece so the the Power Box in the 3 holes shown. track lines up with the piece below it. Seaich Corporation, LLC. All rights reserved. www.seaich.com | Spacerails, LLC. www.spacerails.com Page 6... - Page 7 Elevator Rings as shown above. Elevator Guards help prevent the Marble from falling out because it enters fast. Seaich Corporation, LLC. All rights reserved. www.seaich.com | Spacerails, LLC. www.spacerails.com Page 7...
- Page 8 166 mm down 141 mm 163 mm 136 mm 85 mm Front facing 60 mm 68 mm 34 mm 34 mm 34 mm Shaft 24 mm Bottom Seaich Corporation, LLC. All rights reserved. www.seaich.com | Spacerails, LLC. www.spacerails.com Page 8...
- Page 9 Back Front Shaft Connector Step 3: Insert 1 Shaft Connector into the tops of the C and D shafts to lock them in place. Seaich Corporation, LLC. All rights reserved. www.seaich.com | Spacerails, LLC. www.spacerails.com Page 9...
- Page 10 144 mm facing 124 mm 154 mm 144 mm 109 mm 100 mm 59 mm Back 60 mm facing 50 mm 50 mm 41 mm Shaft bottom Seaich Corporation, LLC. All rights reserved. www.seaich.com | Spacerails, LLC. www.spacerails.com Page 10...
- Page 11 Power Box into the positions shown in the Insert these diagram above. posts into the Power Box Stand base assembly. attaches here. Seaich Corporation, LLC. All rights reserved. www.seaich.com | Spacerails, LLC. www.spacerails.com Page 11...
- Page 12 Illustration of rail lengths is not to scale. Please see the included tri-fold with printed ruler for laying the rail out on a template to measure. 150 cm 270 cm 210 cm 150 cm Seaich Corporation, LLC. All rights reserved. www.seaich.com | Spacerails, LLC. www.spacerails.com Page 12...
- Page 13 Rail Clips between arms, usually one create custom designs using different lengths. between each set of arms, but use as needed. Twisting Rail Clips also changes the angle of the rails. Seaich Corporation, LLC. All rights reserved. www.seaich.com | Spacerails, LLC. www.spacerails.com Page 13...
- Page 14 If your have no more place a Rail Clip before the entry to straighten. spares, place a Rail Clip before or after it at the same angle as the Arm Clip. Seaich Corporation, LLC. All rights reserved. www.seaich.com | Spacerails, LLC. www.spacerails.com Page 14...
- Page 15 Rails entering Rail Splitter: Trim the rails at 90° and alignment, shape, and the two different loop sizes. make sure they are not longer than shown in the image. Also note the placement of Rail Clips. Seaich Corporation, LLC. All rights reserved. www.seaich.com | Spacerails, LLC. www.spacerails.com Page 15...
- Page 16 Go from section to section until you end at the Rail Splitter. After making sure the rails look correct, cut excess rail using scissors. Refer to photo above for how the final cuts should look. Seaich Corporation, LLC. All rights reserved. www.seaich.com | Spacerails, LLC. www.spacerails.com Page 16...
- Page 17 Go from section to section until you end at the Rail Splitter. After making sure the rails look correct, cut excess rail using scissors. Refer to photo above for how the final cuts should look. Seaich Corporation, LLC. All rights reserved. www.seaich.com | Spacerails, LLC. www.spacerails.com Page 17...
- Page 18 Step 9: Starting at Rail Splitter, straighten rails and place a Rail Clip in between each shaft to keep rails evenly spaced as shown by the red triangles above. Go from section to section until you finish between I-3 and H-3 Leave excess rail hanging. Seaich Corporation, LLC. All rights reserved. www.seaich.com | Spacerails, LLC. www.spacerails.com Page 18...
- Page 19 Start by cutting one set of the rails even with each other. Then overlap the other set and cut so they will join evenly. Insert the rail connectors into the ends of one set, then join them with the other set. Seaich Corporation, LLC. All rights reserved. www.seaich.com | Spacerails, LLC. www.spacerails.com Page 19...
- Page 20 Seaich Corporation 1910 West 1040 South Salt Lake City, UT 84104 (833) 732-4242 orders@seaich.com SpaceRails LLC www.spaceRails.com...


Need help?
Do you have a question about the Level 3 and is the answer not in the manual?
Questions and answers