Advertisement
Quick Links
LEVEL 7
PRODUCT AND CONSUMER WARNING
CHOKING HAZARD: This product contains small parts and is not intended for children under 3.
• This product is intended for users 8 years of age and older.
• To avoid choking, keep small parts away from children.
• Use caution – this product contains parts with sharp edges.
• To avoid potential damage to the product, only insert the included marbles into the elevator.
Advertisement

Related Manuals for Spacerails Level 7


Summary of Contents for Spacerails Level 7
- Page 1 LEVEL 7 PRODUCT AND CONSUMER WARNING CHOKING HAZARD: This product contains small parts and is not intended for children under 3. • This product is intended for users 8 years of age and older. • To avoid choking, keep small parts away from children.
- Page 2 PARTS NOT INCLUDED Ruler (Centimeters) 9 AA Batteries (newer models) or 3 Size C Batteries Wire Cutters Pen or Marker Rail Rail Coupling Rail Clip Marble 36,000 mm x150 Seaich Corporation, LLC. All rights reserved. www.seaich.com | Spacerails, LLC. www.spacerails.com Page 2...
-
Page 3: Prepare Components
Step 2: Press Big Base Holders Base in the 3 configurations as and Small Base Holders onto the shown on the following page. base configurations as shown on the following page. Seaich Corporation, LLC. All rights reserved. www.seaich.com | Spacerails, LLC. www.spacerails.com Page 3... - Page 4 Base Level 3: 1 - Double Base Indicated by: Base Level 3 will attach atop of the base level 2, 200mm shafts: D, E, I & J. Seaich Corporation, LLC. All rights reserved. www.seaich.com | Spacerails, LLC. www.spacerails.com Page 4...
-
Page 5: Elevator Assembly
Step 5: Place the Elevator Cover Step 6: Attach Rail Clips onto the over the 3 shafts. For 1:1 ratio on top of the shafts. elevator rings. placement, see the tri-fold. Seaich Corporation, LLC. All rights reserved. www.seaich.com | Spacerails, LLC. www.spacerails.com Page 5... - Page 6 Arm Lock counter-clockwise push into shafts until secure. Arm Lock. To avoid damage, do 90° to secure arm. not force. Specific shafts indicated on pages 11 and 16 by: Seaich Corporation, LLC. All rights reserved. www.seaich.com | Spacerails, LLC. www.spacerails.com Page 6...
- Page 7 1st Floor 2nd Floor 1st Floor Elevator Elevator 2nd Floor 3rd Floor Elevator 2nd Floor 1st Floor Elevator Elevator 3rd Floor Seaich Corporation, LLC. All rights reserved. www.seaich.com | Spacerails, LLC. www.spacerails.com Page 7...
- Page 8 1:1 scale are shown in the tri-fold. 200mm 200mm 86mm 300mm 59mm 102mm 272mm 200mm 55mm 200mm 51mm 90mm 133mm 200mm 78mm 117mm 200mm 144mm 300mm 105mm 264mm Seaich Corporation, LLC. All rights reserved. www.seaich.com | Spacerails, LLC. www.spacerails.com Page 8...
- Page 9 SHAFT PLACEMENT - LEVEL 1A Step 1: Place shafts in the base of Level 1 where the illustration indicates. 1st Floor Elevator BACK FRONT Seaich Corporation, LLC. All rights reserved. www.seaich.com | Spacerails, LLC. www.spacerails.com Page 9...
- Page 10 131mm 193mm 300mm 107mm 146mm 284mm 300mm 268mm 10mm 51mm 81mm 109mm 138mm 167mm 197mm 226mm 255mm 285mm 21mm 200mm 107mm 166mm 300mm 124mm 212mm 65mm 52mm Seaich Corporation, LLC. All rights reserved. www.seaich.com | Spacerails, LLC. www.spacerails.com Page 10...
- Page 11 SHAFT PLACEMENT - LEVEL 1B Step 1: Place shafts in the base of Level 1 where the illustration indicates. 1st Floor Elevator BACK FRONT Seaich Corporation, LLC. All rights reserved. www.seaich.com | Spacerails, LLC. www.spacerails.com Page 11...
- Page 12 123mm 300mm 300mm 227mm 115mm 145mm 300mm 10mm 268mm 22mm 42mm 72mm 101mm 131mm 161mm 190mm 220mm 250mm 280mm 300mm 145mm 167mm 288mm 391mm 200mm 113mm 190mm Seaich Corporation, LLC. All rights reserved. www.seaich.com | Spacerails, LLC. www.spacerails.com Page 12...
- Page 13 SHAFT PLACEMENT - LEVEL 1C Step 1: Place shafts in the base of Level 1 where the illustration indicates. 1st Floor Elevator BACK FRONT Seaich Corporation, LLC. All rights reserved. www.seaich.com | Spacerails, LLC. www.spacerails.com Page 13...
- Page 14 1:1 scale are shown in the tri-fold. Level 2 Shafts 200mm 200mm 48mm 200mm 200mm 300mm 65mm 201mm 278mm Level 3 Shafts 300mm 268mm 300mm 143mm 244mm 300mm 102mm Seaich Corporation, LLC. All rights reserved. www.seaich.com | Spacerails, LLC. www.spacerails.com Page 14...
- Page 15 SHAFT PLACEMENT - LEVEL 2 Step 1: Place shafts in the base of the Level 2 & where the illustration indicates. 2nd Floor 1st Floor Elevator Elevator BACK FRONT Seaich Corporation, LLC. All rights reserved. www.seaich.com | Spacerails, LLC. www.spacerails.com Page 15...
- Page 16 Step 1: Place shafts in the base of the Level 3 & where the illustration indicates. 3rd Floor Elevator 2nd Floor 1st Floor Elevator Elevator BACK FRONT Seaich Corporation, LLC. All rights reserved. www.seaich.com | Spacerails, LLC. www.spacerails.com Page 16...
- Page 17 A poor angle of the rail can stop the Marble, provides the Marble an easy entry into the preventing it from continuing on the track and elevator entrance. successfully entering the elevator. Seaich Corporation, LLC. All rights reserved. www.seaich.com | Spacerails, LLC. www.spacerails.com Page 17...
- Page 18 Before a curve, the rails should be adjusted to A steep decline just before a curve will give the reduce the Marble’s speed. Marble too much speed to be able to successfully make the curve. Seaich Corporation, LLC. All rights reserved. www.seaich.com | Spacerails, LLC. www.spacerails.com Page 18...
- Page 19 The track needs a steep incline to gain speed to While creating multiple loops, keep the outer travel through the loops smoothly. loop larger than the inner loop. Seaich Corporation, LLC. All rights reserved. www.seaich.com | Spacerails, LLC. www.spacerails.com Page 19...
- Page 20 Shaft placement Rail point to proper placement on the on the base attach arm following pages. Arm number Shaft letter Seaich Corporation, LLC. All rights reserved. www.seaich.com | Spacerails, LLC. www.spacerails.com Page 20...
- Page 21 The illustration has been split for installation clarity. 3rd Floor Exit This illustration has been separated into two parts for more clarity. Seaich Corporation, LLC. All rights reserved. www.seaich.com | Spacerails, LLC. www.spacerails.com Page 21...
- Page 22 ASSEMBLE RAILS Continue installing the 2 PCS - 1150cm Step 2: rail, as shown. 1st Floor Entrance 1 Seaich Corporation, LLC. All rights reserved. www.seaich.com | Spacerails, LLC. www.spacerails.com Page 22...
- Page 23 ASSEMBLE RAILS Install 2 PCS - 100cm rail, as shown. Step 3: 2nd Floor Entrance 1st Floor Exit 1 Seaich Corporation, LLC. All rights reserved. www.seaich.com | Spacerails, LLC. www.spacerails.com Page 23...
- Page 24 ASSEMBLE RAILS Install 2 PCS - 100cm rail, as shown. Step 4: 3rd Floor Entrance 2nd Floor Exit Seaich Corporation, LLC. All rights reserved. www.seaich.com | Spacerails, LLC. www.spacerails.com Page 24...
- Page 25 The illustration has been split for installation clarity. 1st Floor Exit 2 This illustration has been separated into two parts for more clarity. Seaich Corporation, LLC. All rights reserved. www.seaich.com | Spacerails, LLC. www.spacerails.com Page 25...
- Page 26 ASSEMBLE RAILS Continue installing the Step 6: 2 PCS - 450cm rail, as shown. [ 10 interlocking Loop section ] 1st Floor Entrance 2 Seaich Corporation, LLC. All rights reserved. www.seaich.com | Spacerails, LLC. www.spacerails.com Page 26...
-
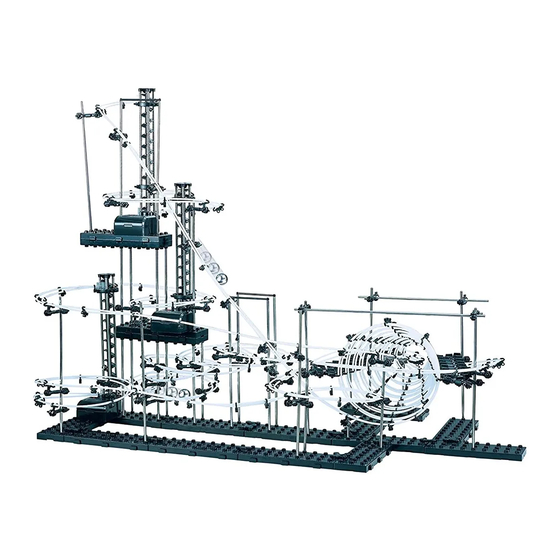
Page 27: Reference Images
REFERENCE IMAGES Refer to these finished rail set images while installing. FRONT SIDE SIDE BACK Seaich Corporation, LLC. All rights reserved. www.seaich.com | Spacerails, LLC. www.spacerails.com Page 27... - Page 28 Seaich Corporation 1910 West 1040 South Salt Lake City, UT 84104 (833) 732-4242 orders@seaich.com Spacerails LLC www.spacerails.com...
Need help?
Do you have a question about the Level 7 and is the answer not in the manual?
Questions and answers