Advertisement
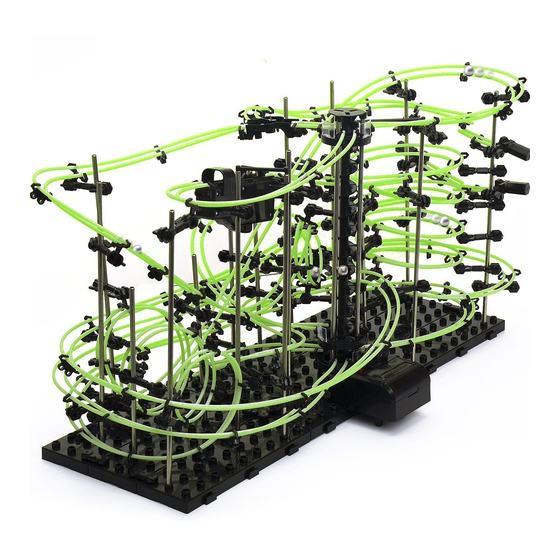
LEVEL 4
PRODUCT AND CONSUMER WARNING
CHOKING HAZARD: This product contains small parts and is not intended for children under 3.
• This product is intended for users 8 years of age and older.
• To avoid choking, keep small parts away from children.
• Use caution—this product contains parts with sharp edges.
• To avoid potential damage to the product, only insert the included marbles into the elevator.
Advertisement
Table of Contents

Summary of Contents for Spacerails LEVEL 4
- Page 1 LEVEL 4 PRODUCT AND CONSUMER WARNING CHOKING HAZARD: This product contains small parts and is not intended for children under 3. • This product is intended for users 8 years of age and older. • To avoid choking, keep small parts away from children.
-
Page 2: Parts Included
Wire Cutters or Utility Scissors Pen or Marker 3 AA Batteries (newer models) or 1 C Battery Rail Clip Rail Coupling Marble Rail 26,000 mm Ruler (in centimeters) Seaich Corporation, LLC. All rights reserved. www.seaich.com | Spacerails, LLC. www.spacerails.com Page 2... -
Page 3: Arm Assembly
To avoid damaging parts, do not move or adjust the Rail Clip while locked in the arm. To move the Rail Clip, release Arm Lock by turning clockwise, position Rail Clip as desired, then secure Arm Lock again. Seaich Corporation, LLC. All rights reserved. www.seaich.com | Spacerails, LLC. www.spacerails.com Page 3... -
Page 4: Base Assembly
Step 2: Press Base Holder A and Base Holder B pieces into the Base blocks for a more secure hold. NOTE: Base Holder B is used here instead of A. Seaich Corporation, LLC. All rights reserved. www.seaich.com | Spacerails, LLC. www.spacerails.com Page 4... -
Page 5: Elevator Assembly
Step 7: Attach an Elevator Guard to Rings over the three shafts. onto the top of the elevator each of the Elevator Rings, then to assembly. the right side of the Rail Clip. Seaich Corporation, LLC. All rights reserved. www.seaich.com | Spacerails, LLC. www.spacerails.com Page 5... -
Page 6: Starter Assembly
This will simplify the positioning of base, Refer to the next page for orientation and arms, shafts, and the rail cut lengths. location of each arm. Seaich Corporation, LLC. All rights reserved. www.seaich.com | Spacerails, LLC. www.spacerails.com Page 6... - Page 7 In later steps the letter of each Shaft and number of each Arm will guide in the installation of the Rails. Illustration is approximately 51% of actual size. All Shaft measurements are in Millimeters. Seaich Corporation, LLC. All rights reserved. www.seaich.com | Spacerails, LLC. www.spacerails.com Page 7...
- Page 8 Step 2 Continued Seaich Corporation, LLC. All rights reserved. www.seaich.com | Spacerails, LLC. www.spacerails.com Page 8...
- Page 9 BACK FRONT Step 4: Attach Shaft Connector (90mm) to Shafts K and N. Attach Shaft Connector (50mm) Start Block to Shafts F and G. Shaft Stand LEFT Seaich Corporation, LLC. All rights reserved. www.seaich.com | Spacerails, LLC. www.spacerails.com Page 9...
- Page 10 5% in scale. Measure carefully and use a tape measure for longer segments. See included insert for rail 45cm measurements in 1:1 scale. 200cm 200cm 45cm 350cm Seaich Corporation, LLC. All rights reserved. www.seaich.com | Spacerails, LLC. www.spacerails.com Page 10...
- Page 11 Elevator Helix to ensure the rails connect smoothly and are free of any bumps, Marble enters the roller coaster smoothly. twists, or kinks. Seaich Corporation, LLC. All rights reserved. www.seaich.com | Spacerails, LLC. www.spacerails.com Page 11...
- Page 12 Make any adjustments as needed. The Loop will need to be adjusted and the rail angles tweaked. Rail A Loop Seaich Corporation, LLC. All rights reserved. www.seaich.com | Spacerails, LLC. www.spacerails.com Page 12...
- Page 13 Step 4: Continue rail in a curve and attach to L-4, then I-3. Curve rail the opposite way and connect to G-2, under the Start Block, and finish at Elevator Exit R-3. Rail B, C, and D See-Saws Seaich Corporation, LLC. All rights reserved. www.seaich.com | Spacerails, LLC. www.spacerails.com Page 13...
- Page 14 Shaft I and J. Curve to connect to Arm L-2, then N-1. Line rail around the outside of the structure to A-1 then D-4, L-3, and P-2. Rail ends above See-Saw Arm. Rail E Rail F and G Seaich Corporation, LLC. All rights reserved. www.seaich.com | Spacerails, LLC. www.spacerails.com Page 14...
- Page 15 Make any adjustments as needed. The spiral will need to be adjusted and the rail angles tweaked. Seaich Corporation, LLC. All rights reserved. www.seaich.com | Spacerails, LLC. www.spacerails.com Page 15...
- Page 16 Seaich Corporation 1910 West 1040 South Salt Lake City, UT 84104 (833) 732-4242 orders@seaich.com Spacerails LLC www.spacerails.com...


Need help?
Do you have a question about the LEVEL 4 and is the answer not in the manual?
Questions and answers