Table of Contents

Related Manuals for Omcan VP-NL-3016-SN


Summary of Contents for Omcan VP-NL-3016-SN
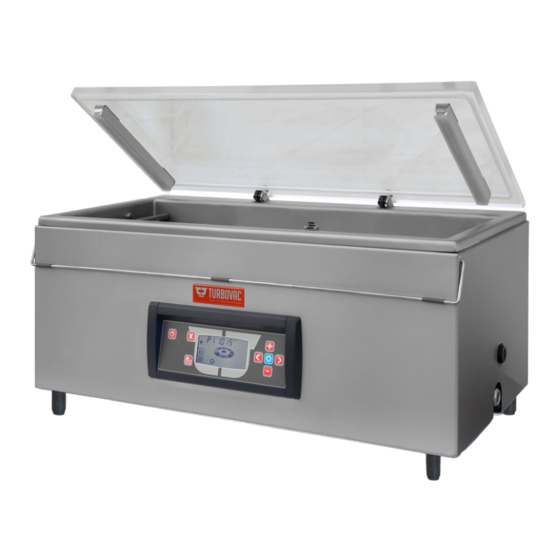
- Page 1 Tabletop Vacuum Packaging Models VP-NL-3016-SN, 3008-SN, 0040-SN, 0050-SN Items 59011, 59012, 59013, 59014 Instruction Manual Revised - 02/25/2022 Toll Free: 1-800-465-0234 Fax: 905-607-0234 Email: service@omcan.com www.omcan.com...
-
Page 2: Table Of Contents
Table of Contents Model VP-NL-3016-SN / Model VP-NL-3008-SN Model VP-NL-0040-SN / Model VP-NL-0050-SN Section Page General Information --------------------------------------------------------------------------- 3 - 4 Safety and Warranty --------------------------------------------------------------------------- 4 - 5 Technical Specifications -------------------------------------------------------------------------- 6 Installation --------------------------------------------------------------------------------------- 6 - 7 Operation --------------------------------------------------------------------------------------- 7 - 14... -
Page 3: General Information
If the package has suffered rough handling, bumps or damage (visible or concealed), please note it on the bill of lading before accepting the delivery and contact Omcan within 24 hours, so we may initiate a claim with the carrier. A detailed report on the extent of the damage caused to the machine must be filled out within three days, from the delivery date shown in the shipping documents. -
Page 4: Safety And Warranty
Si el paquete ha sufrido un manejo de poco cuidado, golpes o daños (visible o oculto) por favor anote en la factura antes de aceptar la entrega y contacte Omcan dentro de las 24 horas, de modo que podamos iniciar una reclamación con la compañia. - Page 5 1 YEAR PARTS AND LABOR WARRANTY Within the warranty period, contact Omcan Inc. at 1-800-465-0234 to schedule an Omcan authorized service technician to repair the equipment locally. Unauthorized maintenance will void the warranty. Warranty covers electrical and part failures, not improper use.
-
Page 6: Technical Specifications
Technical Specifications Model VP-NL-3016-SN VP-NL-3008-SN VP-NL-0040-SN VP-NL-0050-SN Seal Length 12.6” / 320mm 16.5” / 420mm 12.6” / 320mm Vacuum Pump 16 m³ 8 m³ 21 m³ 10 Programmable Control Maximum Product 6.3” / 160mm 7” / 180mm 3.9” / 100mm Height 13”... -
Page 7: Installation
Installation COMPRESSED AIR CONNECTION FOR ADDITIONAL SEALING PRESSURE • Additional sealing pressure is usually recommended for MAP applications only. • The M40-M80 and the L10-L60 models with the option Gas/MAP are standard equipped with a compressed air inlet. • Extra sealing pressure is not necessary and not available for the Table-Top, M10, M20, M30. •... -
Page 8: Operation
Operation OPERATING THE MACHINE WITH ONE-PROGRAM CONTROL SYSTEM On: Turns the machine on: • The machine will start up in the most-recently used program. • The pump of a machine with a transparent cover will start when the cover is closed. Off: Turns the machine off: •... - Page 9 Operation Service Symbol: • After a number of operating hours or packing cycles, the service symbol will briefly appear on the display when the machine is turned on. In addition, the display indicates how many hours or cycles remain before an oil change is required. •...
- Page 10 Operation OPERATING THE MACHINE WITH TEN-PROGRAM CONTROL SYSTEM On: Turns the machine on: • The machine will start up in the most-recently used program. • The pump of a machine with a transparent cover will start when the cover is closed. Off: Turns the machine off: •...
- Page 11 Operation Multi-Functional button: Performs various functions, depending on the active menu: Home menu • No effect while in the PA program. • For programs P1-9, displays the entered values. Settings menu • For specific functions, like soft-air, clean cut seal etc., the button is used to turn the function ON/OFF.
- Page 12 Operation THE ONE-PROGRAM CONTROL SYSTEM PROVIDES ONLY ONE PROGRAM (P1) • There is no memory to store additional values. • The machine starts with the values that were most-recently used. • The pump starts upon closing of the cover and stops when it is reopened. PROGRAMMABLE FUNCTIONS The following function values may be customized for P1: •...
- Page 13 Operation while the cover stays closed and the machine will turn off automatically after about 15 minutes. - These cycles are necessary to cool down the machine and to allow any moisture in the oil of the pump to evaporate. TEN-PROGRAM CONTROL SYSTEM •...
-
Page 14: Maintenance
Operation 8. Press the menu button to save the entered values and to return to the Home menu. TURNING PROGRAM FUNCTIONS ON/OFF The following functions can be turned ON/OFF for each program P1-P9: Vacuum Plus: on/off, in seconds. Gassing: on/off, in seconds or in mbar (only with sensor). Clean Cut Controlled (CCC) Seal: on/off, in seconds. - Page 15 Maintenance • After passing the service limit, the display will indicate the negative number of excess operating hours or cycles. VACUUM PUMP To protect the vacuum pump, proper maintenance is important. Carry out the following tasks carefully: • Check the vents and clean as necessary before turning on the machine to assure proper cooling of the pump.
- Page 16 Maintenance SEAL BEAMS AND COUNTER BEAMS To achieve a quality seal, it is necessary that the seal beam and counter beam are in good condition. 1. Clean the seal and counter beams daily with a dry cloth. 2. Replace the Teflon tape on the seal beam if damaged and replace the sealing wire if kinked. 3.
- Page 17 Maintenance NOTES • After removal of the wires, check the strips of fiber glass for damage; replace if necessary. • Check the condition of the tensioning springs at both ends of the seal beam; replace if necessary. • Using the seal beam without the springs may cause the sealing wires to break. •...
- Page 18 Maintenance APPLYING TEFLON TAPE TO SEAL BEAM 1. Position the new Teflon tape on the seal beam and cut out the corners. 2. Remove the protective backing from the Teflon tape. 3. Apply the new tape to the seal beam; the tape has an adhesive strip on both sides. 4.
-
Page 19: Troubleshooting
Troubleshooting Fault/Symptom Possible Cause Remedy Machine does not work. The machine is not plugged in. Plug the machine into the electrical outlet. The ground fault safety in the Check the electrical panel. electrical panel has tripped. A fuse in the electrical panel is Check the electrical panel. - Page 20 Troubleshooting The machine does not seal. The bag is not correctly positioned Adjust the bag position. over the sealing beam. The sealing wire is broken. Replace the sealing wire. The thermal safety of the power Wait until the safety resets, which supply was tripped.
-
Page 21: Parts Breakdown
Parts Breakdown Model VP-NL-3016-SN Overall 59011 Model VP-NL-3008-SN 59012... - Page 22 Parts Breakdown Model VP-NL-3016-SN Vacuum Chamber 59011 Model VP-NL-3008-SN 59012...
- Page 23 Parts Breakdown Model VP-NL-3016-SN 59011 Model VP-NL-3008-SN 59012...
- Page 24 Parts Breakdown Model VP-NL-3016-SN Hinge 59011 Model VP-NL-3008-SN 59012...
- Page 25 Parts Breakdown Model VP-NL-3016-SN Air Valve 59011 Model VP-NL-3008-SN 59012...
- Page 26 Parts Breakdown Model VP-NL-3016-SN Transformer 59011 Model VP-NL-3008-SN 59012...
- Page 27 Parts Breakdown Model VP-NL-3016-SN Control Panel 59011 Model VP-NL-3008-SN 59012...
- Page 28 Parts Breakdown Model VP-NL-3016-SN Overall 59011 Model VP-NL-3008-SN 59012 Item No. Description Position Item No. Description Position Item No. Description Position Flat Washer M6 D9021 A2 for 59011, Valve 2/2 MA-222-003-P27-SAH 24 for 65833 T3 Bodemplaat for 59011, 59012 27786...
- Page 29 Parts Breakdown Model VP-NL-3016-SN Vacuum Chamber 59011 Model VP-NL-3008-SN 59012 Item No. Description Position Item No. Description Position Item No. Description Position Elbow Brass for Gaspipe for 59011, Slotted Cheese Head Screw M3x16 A2 AI909 T3 Vacuumbak Gas for 59011, 59012...
- Page 30 Parts Breakdown Model VP-NL-3016-SN Air Valve 59011 Model VP-NL-3008-SN 59012 Item No. Description Position Item No. Description Position Item No. Description Position M5x20 Hexagon Socket Set Screw DIN Blindplaat Combi-Ventiel for 59011, AI896 Knie M5 4mm for 59011, 59012 AI900...
- Page 31 Parts Breakdown Model VP-NL-0040-SN Overall 59013...
- Page 32 Parts Breakdown Model VP-NL-0040-SN Vacuum Chamber 59013...
- Page 33 Parts Breakdown Model VP-NL-0040-SN Seal Lid 59013...
- Page 34 Parts Breakdown Model VP-NL-0040-SN Hinge 59013...
- Page 35 Parts Breakdown Model VP-NL-0040-SN Air Valve 59013...
- Page 36 Parts Breakdown Model VP-NL-0040-SN Transformer 59013...
- Page 37 Parts Breakdown Model VP-NL-0040-SN Control Panel 59013...
- Page 38 Parts Breakdown Model VP-NL-0040-SN Overall 59013 Item No. Description Position Item No. Description Position Item No. Description Position AI881 Pomp 021 for 59013 27796 Sticker Oil for 59013 65838 Din Rail D 1Fase for 59013 Slott.Rais.Counter.Head Screw M4x10 35039 Y Connectingpiece 6mm for 59013 27794 Sticker Machinetype for 59013 27789...
- Page 39 Parts Breakdown Model VP-NL-0040-SN Seal Lid 59013 Item No. Description Position Item No. Description Position Item No. Description Position Sil.Profile Lidgasket 8mm 60 SH/25MTR Acryltape Dubbelzijdig 25mm, L=20mm AI891 Siliconenhouder T4 for 59013 35105 AI892 for 59013 for 59013 Acryltape Dubbelzijdig 25mm L60mm 62750 45626 Lid for Cover T4 for 59013...
- Page 40 Parts Breakdown Model VP-NL-0040-SN Control Panel 59013 Item No. Description Position Item No. Description Position Item No. Description Position Grommet 16mm (283 1600 599 99) for 65753 Cap Wide Holder 04-Control for 59013 65755 65740 Cap Small Holder 04-Control for 59013 59013 Grommet 20mm (283 1600 599 99) for Houder Groot - PCB-HV Sensor for...
- Page 41 Parts Breakdown Model VP-NL-0050-SN Overall 59014...
- Page 42 Parts Breakdown Model VP-NL-0050-SN Vacuum Chamber 59014...
- Page 43 Parts Breakdown Model VP-NL-0050-SN Seal Lid 59014...
- Page 44 Parts Breakdown Model VP-NL-0050-SN Hinge 59014...
- Page 45 Parts Breakdown Model VP-NL-0050-SN Air Valve 59014...
- Page 46 Parts Breakdown Model VP-NL-0050-SN Switch Box 59014...
- Page 47 Parts Breakdown Model VP-NL-0050-SN Control Panel 59014...
- Page 48 Parts Breakdown Model VP-NL-0050-SN Overall 59014 Item No. Description Position Item No. Description Position Item No. Description Position Slott.Rais.Counter.Head Screw M4x10 65864 Omkasting T5 for 59014 65870 Dekselsluiting E-163 for 59014 27789 DIN7985 A2 for 59014 Elma Afdekknop 040-3020 Zwart for AI921 21m3 Vacuum Pump for 59014 65846...
- Page 49 Parts Breakdown Model VP-NL-0050-SN Seal Lid 59014 Item No. Description Position Item No. Description Position Item No. Description Position Acryltape Dubbelzijdig 25mm L60mm AI925 Vacuumdeksel T5 for 59014 62750 AI915 Siliconenhouder T3 for 59014 for 59014 Sil.Profile Lidgasket 8mm 60 SH/25MTR Clamping Spring Silicone Holder for Silicone T-Profiel 40 Shore One Meter 35105...
- Page 50 Parts Breakdown Model VP-NL-0050-SN Switch Box 59014 Item No. Description Position Item No. Description Position Item No. Description Position 65704 Din-Rail 380mm for 59014 15771 Closed Contactor 24VAC for 59014 65710 Embr AB193-ED1*P for 59014 Combi-Trafo P200/460V-S24/32V for 15792 35687 Wire Clamp 2.5-2/2 AN for 59014 35318 Wireclamp 6-2/2 AN for 59014...
-
Page 51: Electrical Schematics
Electrical Schematics Model VP-NL-3016-SN 59011 Model VP-NL-3008-SN 59012... - Page 52 Electrical Schematics Model VP-NL-0040-SN 59013...
- Page 53 Electrical Schematics Model VP-NL-0050-SN 59014...
-
Page 54: Notes
Notes ________________________________________________________________________________________ ________________________________________________________________________________________ ________________________________________________________________________________________ ________________________________________________________________________________________ ________________________________________________________________________________________ ________________________________________________________________________________________ ________________________________________________________________________________________ ________________________________________________________________________________________ ________________________________________________________________________________________ ________________________________________________________________________________________ ________________________________________________________________________________________ ________________________________________________________________________________________ ________________________________________________________________________________________ ________________________________________________________________________________________ ________________________________________________________________________________________ ________________________________________________________________________________________ ________________________________________________________________________________________ ________________________________________________________________________________________ ________________________________________________________________________________________ ________________________________________________________________________________________ ________________________________________________________________________________________ ________________________________________________________________________________________ ________________________________________________________________________________________ ________________________________________________________________________________________... -
Page 55: Warranty Registration
Warranty Registration Thank you for purchasing an Omcan product. To register your warranty for this product, complete the information below, tear off the card at the perforation and then send to the address specified below. You can also register online by visiting: Merci d’avoir acheté... - Page 56 Since 1951 Omcan has grown to become a leading distributor of equipment and supplies to the North American food service industry. Our success over these many years can be attributed to our commitment to strengthen and develop new and existing relationships with our valued customers and manufacturers.
Need help?
Do you have a question about the VP-NL-3016-SN and is the answer not in the manual?
Questions and answers