Table of Contents
Advertisement
Quick Links
Advertisement
Table of Contents

Related Manuals for Omcan VP-NL-0004-SN


Summary of Contents for Omcan VP-NL-0004-SN
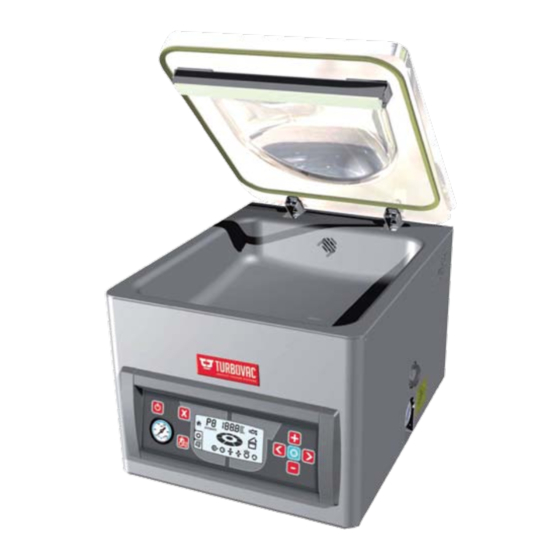
- Page 1 Tabletop Vacuum Packaging Models VP-NL-0004-SN, 0008-SN, 0016-SN, 0021-SN, 0016-LN Items 59006, 59007, 59008, 59009, 59010 Instruction Manual Revised - 10/06/2023 Toll Free: 1-800-465-0234 Fax: 905-607-0234 Email: service@omcan.com www.omcan.com...
-
Page 2: Table Of Contents
Table of Contents Model VP-NL-0004-SN / Model VP-NL-0008-SN / Model VP-NL-0016-SN Model VP-NL-0021-SN / Model VP-NL-0016-LN Section Page General Information --------------------------------------------------------------------------- 3 - 4 Safety and Warranty --------------------------------------------------------------------------- 4 - 5 Technical Specifications -------------------------------------------------------------------------- 6 Installation --------------------------------------------------------------------------------------- 6 - 7... -
Page 3: General Information
If the package has suffered rough handling, bumps or damage (visible or concealed), please note it on the bill of lading before accepting the delivery and contact Omcan within 24 hours, so we may initiate a claim with the carrier. A detailed report on the extent of the damage caused to the machine must be filled out within three days, from the delivery date shown in the shipping documents. -
Page 4: Safety And Warranty
Si el paquete ha sufrido un manejo de poco cuidado, golpes o daños (visible o oculto) por favor anote en la factura antes de aceptar la entrega y contacte Omcan dentro de las 24 horas, de modo que podamos iniciar una reclamación con la compañia. - Page 5 1 YEAR PARTS AND LABOR WARRANTY Within the warranty period, contact Omcan Inc. at 1-800-465-0234 to schedule an Omcan authorized service technician to repair the equipment locally. Unauthorized maintenance will void the warranty. Warranty covers electrical and part failures, not improper use.
-
Page 6: Technical Specifications
Technical Specifications 11” VACUUM PACKAGING MACHINES Model VP-NL-0004-SN VP-NL-0008-SN Seal Length 11” / 280mm Vacuum Pump 4 m³ 8 m³ 10 Programmable Control Maximum Product 4.3” / 110mm Height Useful Chamber Size 12.2” x 11” x 4.3” / 310 x 279 x 110mm Power Consumption 0.4 - 0.5 kW... -
Page 7: Installation
Installation Never operate the machine when the oil level is low. It is recommended to change the oil at least every 2 months. TURNING ON MACHINE • If so equipped, like some mobile and double-chamber models, turn on the main power switch on the back of the machine. -
Page 8: Operation
Operation packing cycle. • The actual vacuum pressure is indicated by the analog vacuum gauge. PLUG AND PLAY • When turning on the machine for the first time: - Running time of the vacuum pump is pre-set at 30-40 seconds and the sealing time at 2 seconds. Vacuum is indicated on the analog vacuum gauge. - Page 9 Operation Menu button: • Confirms and saves the entered values for vacuum and sealing times. • Returns to the home menu. When turning off the machine with the button, the symbol will start blinking: • The pump will stop after about 4 seconds. •...
- Page 10 Operation • When operating a packaging machine with a sensor-based program, the actual vacuum pressure is digitally shown on the LCD display in mbar (standard setting) or in % vacuum. PLUG AND PLAY • When turning on a sensor-based machine for the first time, it will start up in the PA program AUTOMATIC. This is a pre-set factory program with 5 mbar of vacuum and 2 seconds of sealing time.
- Page 11 Operation Adjust program values and turn functions ON/OFF: • Forward or back; adjusted values are saved right away. • Increases or decreases function values. • Turns functions ON/OFF; specific functions, like soft-air, clean cut seal, etc., are turned either on or off. •...
- Page 12 Operation PROGRAMMING THE MACHINE ONE-PROGRAM CONTROL SYSTEM • The one-program control system is standard on the S20, S30, S40, S50, M10, M30 (with 21m pump). • The one-program control system is time-based. • The ten-program control system (time or sensor) is optional for these models, except for S20. The ONe-PrOgrAm CONTrOL SySTem PrOVIdeS ONLy ONe PrOgrAm (P1) •...
- Page 13 Operation TURNING OFF MACHINE 1. Turn the machine off by pressing the button. 2. The symbol on the display will start blinking. 3. Push the button a second time and the pump will stop immediately. 4. If no action is taken the pump turns off after 4 seconds. 5.
-
Page 14: Maintenance
Operation 2. Push the menu button to access the settings menu. 3. All functions for the selected program are indicated at the bottom of the display. 4. Push the button to select the blinking function to be adjusted. 5. Adjust the value of the selected function with the button. - Page 15 Maintenance ATTENTION Observe the recommended service intervals. Overdue maintenance may lead to costly repairs and overhauls, and may void the equipment warranty. • After reaching a programmed number of operating hours or packing cycles, the service symbol will briefly appear on the display when the machine is started up. In addition, the display will indicate how many hours or cycles remain before an oil change is required.
- Page 16 NOTE Collect the oil to have it processed and recycled according to the locally applicable regulations. Note: hydraulic oil to be used is Omcan item 15713. SEAL BEAMS AND COUNTER BEAMS To achieve a quality seal, it is necessary that the seal beam and counter beam are in good condition.
- Page 17 Maintenance ALUMINUM/STAINLESS STEEL SEAL BEAM REMOVE THE SEALING AND CUTTING WIRES AS FOLLOWS: 1. Remove the old wires by pulling them loose from the seal beam contacts. 2. Loosen the clamp screws and remove the seal beam from the U-profile. 3.
- Page 18 Maintenance 3. Position the wires across the beam. 4. Fasten mounting plates; tighten screws. 5. Carefully clamp the beam in a bench vice. 6. Pull the wires as tightly as possible with a pair of pliers. 7. Secure the mounting plates with the screws. NOTES •...
-
Page 19: Troubleshooting
Maintenance VACUUM HOSES AND TUBES • Check the vacuum hoses and tubes for kinks, tears and porosity; replace if necessary. Troubleshooting Fault/Symptom Possible Cause Remedy Machine does not work. The machine is not plugged in. Plug the machine into the electrical outlet. - Page 20 Troubleshooting There is not enough gas in the The bag is too small. Select a bigger bag. bag. The programmed gas level is too Increase the gas level value. low. The bag is not correctly positioned Adjust the bag position. over the gas outlets.
-
Page 21: Parts Breakdown
Parts Breakdown Model VP-NL-0004-SN Overall 59006 Model VP-NL-0008-SN 59007... - Page 22 Parts Breakdown Model VP-NL-0004-SN Vacuum Chamber 59006 Model VP-NL-0008-SN 59007...
- Page 23 Parts Breakdown Model VP-NL-0004-SN 59006 Model VP-NL-0008-SN 59007...
- Page 24 Parts Breakdown Model VP-NL-0004-SN Hinge 59006 Model VP-NL-0008-SN 59007...
- Page 25 Parts Breakdown Model VP-NL-0004-SN Air Valve 59006 Model VP-NL-0008-SN 59007...
- Page 26 Parts Breakdown Model VP-NL-0004-SN Sealbeam 59006 Model VP-NL-0008-SN 59007...
- Page 27 Parts Breakdown Model VP-NL-0004-SN Transformer 59006 Model VP-NL-0008-SN 59007...
- Page 28 Parts Breakdown Model VP-NL-0004-SN Transformer 59006 Model VP-NL-0008-SN 59007...
- Page 29 Parts Breakdown Model VP-NL-0004-SN Control Panel 59006 Model VP-NL-0008-SN 59007...
- Page 30 Parts Breakdown Model VP-NL-0004-SN Overall 59006 Model VP-NL-0008-SN 59007 Item No. Description Position Item No. Description Position Item No. Description Position Sealbeam Standard Compact Complete Clamping Plate Pump T1 T2-4m3 for 15884 AI831 65749 M6 Hex Nut Din 985 for 59006, 59007...
- Page 31 Parts Breakdown Model VP-NL-0004-SN Hinge 59006 Model VP-NL-0008-SN 59007 Item No. Description Position Item No. Description Position Item No. Description Position Locking Plate Hinge Part for 59006, Gas Spring 0814MF 350N for 59006, AI852 Hinge T2 for 59006, 59007 AI853...
- Page 32 Parts Breakdown Model VP-NL-0004-SN Transformer 59006 Model VP-NL-0008-SN 59007 Item No. Description Position Item No. Description Position Item No. Description Position Rail JMV35SL 7 Hole 173mm for 59006, Fuse Keram.5x20 2.5A Delay for 59006, AC744 15772 Contactor 24Vac for 59006, 59007...
- Page 33 Parts Breakdown Model VP-NL-0016-SN Overall 59008 Model VP-NL-0021-SN 59009 Model VP-NL-0016-LN 59010...
- Page 34 Parts Breakdown Model VP-NL-0016-SN Vacuum Chamber 59008 Model VP-NL-0021-SN 59009 Model VP-NL-0016-LN 59010...
- Page 35 Parts Breakdown Model VP-NL-0016-SN Seal Lid 59008 Model VP-NL-0021-SN 59009 Model VP-NL-0016-LN 59010...
- Page 36 Parts Breakdown Model VP-NL-0016-SN Hinge 59008 Model VP-NL-0021-SN 59009 Model VP-NL-0016-LN 59010...
- Page 37 Parts Breakdown Model VP-NL-0016-SN Air Valve 59008 Model VP-NL-0021-SN 59009 Model VP-NL-0016-LN 59010...
- Page 38 Parts Breakdown Model VP-NL-0016-SN Transformer 59008 Model VP-NL-0021-SN 59009 Model VP-NL-0016-LN 59010...
- Page 39 Parts Breakdown Model VP-NL-0016-SN Control Panel 59008 Model VP-NL-0021-SN 59009 Model VP-NL-0016-LN 59010...
- Page 40 Parts Breakdown Model VP-NL-0016-SN Overall 59008 Model VP-NL-0021-SN 59009 Model VP-NL-0016-LN 59010 Item No. Description Position Item No. Description Position Item No. Description Position Slott.Rais.Counter.Head Screw M4x10 AI880 Pump 016 for 59008, 59009, 59010 27796 Sticker Oil for 59008, 59009, 59010 27789 DIN7985 A2 for 59008, 59009, 59010 Vac Pump 021-336 110/115-1-60 for...
- Page 41 Parts Breakdown Model VP-NL-0016-SN Vacuum Chamber 59008 Model VP-NL-0021-SN 59009 Model VP-NL-0016-LN 59010 Item No. Description Position Item No. Description Position Item No. Description Position T4-LL Vacuum Tray for 59008, 59009, Spring Washer DIN 127 - A4 for 59008, Micro Switch MV3003L for 59008, AI883 65776 15775...
- Page 42 Parts Breakdown Model VP-NL-0016-SN Air Valve 59008 Model VP-NL-0021-SN 59009 Model VP-NL-0016-LN 59010 Item No. Description Position Item No. Description Position Item No. Description Position M5x20 Hexagon Socket Set Screw DIN Blind Plate Combi Valve for 59008, AI896 Knee M5 4mm for 59008, 59009, 59010 AI900 AI904 916 for 59008, 59009, 59010...
-
Page 43: Electrical Schematics
Electrical Schematics Model VP-NL-0004-SN 59006 Model VP-NL-0008-SN 59007... - Page 44 Electrical Schematics Model VP-NL-0016-SN 59008 Model VP-NL-0021-SN 59009 Model VP-NL-0016-LN 59010...
-
Page 45: Notes
Notes ________________________________________________________________________________________ ________________________________________________________________________________________ ________________________________________________________________________________________ ________________________________________________________________________________________ ________________________________________________________________________________________ ________________________________________________________________________________________ ________________________________________________________________________________________ ________________________________________________________________________________________ ________________________________________________________________________________________ ________________________________________________________________________________________ ________________________________________________________________________________________ ________________________________________________________________________________________ ________________________________________________________________________________________ ________________________________________________________________________________________ ________________________________________________________________________________________ ________________________________________________________________________________________ ________________________________________________________________________________________ ________________________________________________________________________________________ ________________________________________________________________________________________ ________________________________________________________________________________________ ________________________________________________________________________________________ ________________________________________________________________________________________ ________________________________________________________________________________________ ________________________________________________________________________________________... - Page 46 Notes ________________________________________________________________________________________ ________________________________________________________________________________________ ________________________________________________________________________________________ ________________________________________________________________________________________ ________________________________________________________________________________________ ________________________________________________________________________________________ ________________________________________________________________________________________ ________________________________________________________________________________________ ________________________________________________________________________________________ ________________________________________________________________________________________ ________________________________________________________________________________________ ________________________________________________________________________________________ ________________________________________________________________________________________ ________________________________________________________________________________________ ________________________________________________________________________________________ ________________________________________________________________________________________ ________________________________________________________________________________________ ________________________________________________________________________________________ ________________________________________________________________________________________ ________________________________________________________________________________________ ________________________________________________________________________________________ ________________________________________________________________________________________ ________________________________________________________________________________________ ________________________________________________________________________________________...
-
Page 47: Warranty Registration
Warranty Registration Thank you for purchasing an Omcan product. To register your warranty for this product, complete the information below, tear off the card at the perforation and then send to the address specified below. You can also register online by visiting: Merci d’avoir acheté... - Page 48 Since 1951 Omcan has grown to become a leading distributor of equipment and supplies to the North American food service industry. Our success over these many years can be attributed to our commitment to strengthen and develop new and existing relationships with our valued customers and manufacturers.
Need help?
Do you have a question about the VP-NL-0004-SN and is the answer not in the manual?
Questions and answers