
Related Manuals for Omcan VP-CN-0749


Summary of Contents for Omcan VP-CN-0749
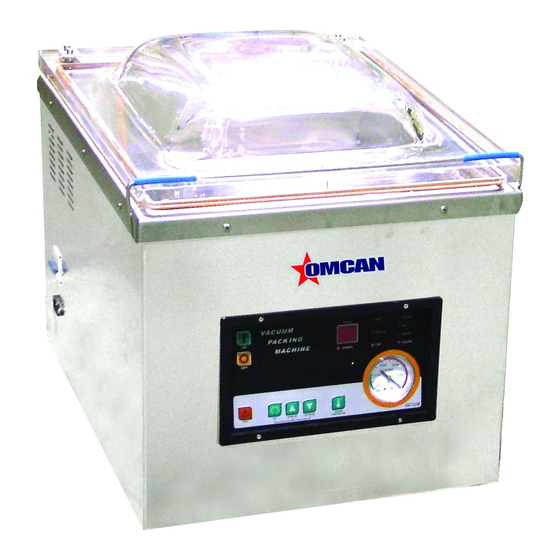
- Page 1 Vacuum Packaging Machines Models VP-CN-0749, 1066 Items 19481, 19482 Instruction Manual Revised - 12/07/2018 Toll Free: 1-800-465-0234 Fax: 905-607-0234 Email: service@omcan.com www.omcan.com...
-
Page 2: Table Of Contents
Table of Contents Model VP-CN-0749 / Model VP-CN-1066 Section Page General Information --------------------------------------------------------------------------- 3 - 4 Safety and Warranty --------------------------------------------------------------------------- 4 - 5 Technical Specifications -------------------------------------------------------------------------- 6 Installation --------------------------------------------------------------------------------------- 6 - 7 Operation ----------------------------------------------------------------------------------------- 7 - 8 Maintenance ----------------------------------------------------------------------------------- 8 - 11... -
Page 3: General Information
If the package has suffered rough handling, bumps or damage (visible or concealed), please note it on the bill of lading before accepting the delivery and contact Omcan within 24 hours, so we may initiate a claim with the carrier. A detailed report on the extent of the damage caused to the machine must be filled out within three days, from the delivery date shown in the shipping documents. -
Page 4: Safety And Warranty
Si el paquete ha sufrido un manejo de poco cuidado, golpes o daños (visible o oculto) por favor anote en la factura antes de aceptar la entrega y contacte Omcan dentro de las 24 horas, de modo que podamos iniciar una reclamación con la compañia. - Page 5 1 YEAR PARTS AND LABOR BENCH WARRANTY Within the warranty period, contact Omcan Inc. at 1-800-465-0234 to schedule a drop off to either an Omcan authorized service depot in the area, or to an Omcan Service warehouse to repair the equipment.
-
Page 6: Technical Specifications
610 x 464 x 508mm Item Number 19481 19482 Omcan carries all size of vacuum packaging bags for the above models. Installation PREPARATION BEFORE USE 1. Before operation, please read through the user guide about each operation rule and safety precaution. -
Page 7: Installation
Installation shown after setting is done. Otherwise, operation of this machine cannot be function if the setting is not on this mode. 2. Press the setting button, the indicator lamp of vacuum lights to enter into the setting state of vacuum timing. Press the upward or downward key to increase or decrease vacuum time in the range of 0-99 seconds. -
Page 8: Operation
Operation NOTES: • Silicone rubber strip come with one side nerving and the other for letter and number inserting. It will have embossed effect on sealing surface. • Please do not run the machine without any vacuum bag attach. Otherwise, the heating element will have higher wear and tear. -
Page 9: Maintenance
Maintenance 3. Pull the plastic parts out from the two sides of sealing bar by hand, then tear off the sealing tape. 4. Remove the forcing screws from the two sides of sealing bar by Allen key, then take out the heating wire. 5. - Page 10 Maintenance 8. Take a sealing tape at proper length and sticker it on the heating wire. 9. Cut the remaining sealing tape on the two sides enable to fold it. 10. Put plastic parts on the two sides of sealing bar. 11.
- Page 11 Maintenance 12. Connect the cable of complete sealing bar to the pin, then put the sealing bar back to vacuum chamber to finish the installation. FILLING THE OIL Note: Only perform this procedure on a flat, stable surface. 1. Unscrew the side board by removing the single screw at the bottom middle of the side board. 2.
-
Page 12: Troubleshooting
REFERENCE Item Number Model Number Description Manufacturer Model Number Vacuum Packaging Machine 15.25” x 11” x 19481 VP-CN-0749 DZ260/PD 3.25” / 387 x 279 x 83mm Chamber Size Vacuum Packaging Machine 19.75” 19482 VP-CN-1066 x 16.25” x 4.5” / 502 x 413 x 114mm... -
Page 13: Parts Breakdown
Parts Breakdown Model VP-CN-0749 19481 Model VP-CN-1066 19482... - Page 14 Parts Breakdown Model VP-CN-0749 19481 Item No. Description Position Item No. Description Position Item No. Description Position 67581 Lid for 260/PD 67590 Control Panel for 260/PD 67599 Power Switch for 260/PD 67582 Lid Gasket for 260/PD 67591 Filter for 260/PD...
-
Page 15: Electrical Schematics
Electrical Schematics Model VP-CN-0749 19481 Model VP-CN-1066 19482 Code Description Code Description KA0~3 Four in One Relay Heating Wire (R1-2) KA1~3 Three in One Relay Lid Switch (Travel Switch) Contactor Working Transformer Contactor Sealing Transformer Radiator Fan Sealing Valve Pump Motor... -
Page 16: Notes
Notes ________________________________________________________________________________________ ________________________________________________________________________________________ ________________________________________________________________________________________ ________________________________________________________________________________________ ________________________________________________________________________________________ ________________________________________________________________________________________ ________________________________________________________________________________________ ________________________________________________________________________________________ ________________________________________________________________________________________ ________________________________________________________________________________________ ________________________________________________________________________________________ ________________________________________________________________________________________ ________________________________________________________________________________________ ________________________________________________________________________________________ ________________________________________________________________________________________ ________________________________________________________________________________________ ________________________________________________________________________________________ ________________________________________________________________________________________ ________________________________________________________________________________________ ________________________________________________________________________________________ ________________________________________________________________________________________ ________________________________________________________________________________________ ________________________________________________________________________________________ ________________________________________________________________________________________... - Page 17 Notes ________________________________________________________________________________________ ________________________________________________________________________________________ ________________________________________________________________________________________ ________________________________________________________________________________________ ________________________________________________________________________________________ ________________________________________________________________________________________ ________________________________________________________________________________________ ________________________________________________________________________________________ ________________________________________________________________________________________ ________________________________________________________________________________________ ________________________________________________________________________________________ ________________________________________________________________________________________ ________________________________________________________________________________________ ________________________________________________________________________________________ ________________________________________________________________________________________ ________________________________________________________________________________________ ________________________________________________________________________________________ ________________________________________________________________________________________ ________________________________________________________________________________________ ________________________________________________________________________________________ ________________________________________________________________________________________ ________________________________________________________________________________________ ________________________________________________________________________________________ ________________________________________________________________________________________...
-
Page 18: Notes
Notes ________________________________________________________________________________________ ________________________________________________________________________________________ ________________________________________________________________________________________ ________________________________________________________________________________________ ________________________________________________________________________________________ ________________________________________________________________________________________ ________________________________________________________________________________________ ________________________________________________________________________________________ ________________________________________________________________________________________ ________________________________________________________________________________________ ________________________________________________________________________________________ ________________________________________________________________________________________ ________________________________________________________________________________________ ________________________________________________________________________________________ ________________________________________________________________________________________ ________________________________________________________________________________________ ________________________________________________________________________________________ ________________________________________________________________________________________ ________________________________________________________________________________________ ________________________________________________________________________________________ ________________________________________________________________________________________ ________________________________________________________________________________________ ________________________________________________________________________________________ ________________________________________________________________________________________... -
Page 19: Warranty Registration
Warranty Registration Thank you for purchasing an Omcan product. To register your warranty for this product, complete the information below, tear off the card at the perforation and then send to the address specified below. You can also register online by visiting: Merci d’avoir acheté... - Page 20 Since 1951 Omcan has grown to become a leading distributor of equipment and supplies to the North American food service industry. Our success over these many years can be attributed to our commitment to strengthen and develop new and existing relationships with our valued customers and manufacturers.
Need help?
Do you have a question about the VP-CN-0749 and is the answer not in the manual?
Questions and answers