Table of Contents
Advertisement
Quick Links
Advertisement
Table of Contents

Related Manuals for HIKVISION DS-KD9403-E6


Summary of Contents for HIKVISION DS-KD9403-E6
- Page 1 Video Intercom Face Recognition Door Station User Manual...
- Page 2 WITHOUT LIMITATION, MERCHANTABILITY, SATISFACTORY QUALITY, OR FITNESS FOR A PARTICULAR PURPOSE. THE USE OF THE PRODUCT BY YOU IS AT YOUR OWN RISK. IN NO EVENT WILL HIKVISION BE LIABLE TO YOU FOR ANY SPECIAL, CONSEQUENTIAL, INCIDENTAL, OR INDIRECT DAMAGES,...
- Page 3 Video Intercom Face Recognition Door Station User Manual CONNECTION WITH THE USE OF THE PRODUCT, EVEN IF HIKVISION HAS BEEN ADVISED OF THE POSSIBILITY OF SUCH DAMAGES OR LOSS. YOU ACKNOWLEDGE THAT THE NATURE OF THE INTERNET PROVIDES FOR INHERENT SECURITY RISKS, AND HIKVISION SHALL NOT TAKE ANY...
- Page 4 Video Intercom Face Recognition Door Station User Manual Symbol Conventions The symbols that may be found in this document are defined as follows. Symbol Description Indicates a hazardous situation which, if not avoided, will or Danger could result in death or serious injury. Indicates a potentially hazardous situation which, if not Caution avoided, could result in equipment damage, data loss,...
- Page 5 Video Intercom Face Recognition Door Station User Manual Safety Instruction Warning All the electronic operation should be strictly compliance with the electrical safety ● regulations, fire prevention regulations and other related regulations in your local region. Please use the power adapter, which is provided by normal company. The power ●...
- Page 6 Video Intercom Face Recognition Door Station User Manual Do not leave the battery in an extremely high temperature surrounding ● environment, which may result in an explosion or leakage of flammable liquid or gas. Do not subject the battery to extremely low air pressure, which may result in an ●...
- Page 7 Video Intercom Face Recognition Door Station User Manual Regulatory Information FCC Information Please take attention that changes or modification not expressly approved by the party responsible for compliance could void the user's authority to operate the equipment. FCC compliance: This equipment has been tested and found to comply with the limits for a Class B digital device, pursuant to part 15 of the FCC Rules.
- Page 8 Video Intercom Face Recognition Door Station User Manual EU Conformity Statement This product and - if applicable - the supplied accessories too are marked with "CE" and comply therefore with the applicable harmonized European standards listed under the EMC Directive 2014/30/EU, RE Directive 2014/53/EU,the RoHS Directive 2011/ 65/EU 2012/19/EU (WEEE directive): Products marked with this symbol...
- Page 9 Video Intercom Face Recognition Door Station User Manual l'appareil ne doit pas produire de brouillage, et l'utilisateur de l'appareil doit accepter tout brouillage radioélectrique subi, même si le brouillage est susceptible d'en compromettre le fonctionnement. Under Industry Canada regulations, this radio transmitter may only operate using an antenna of a type and maximum (or lesser) gain approved for the transmitter by Industry Canada.
-
Page 10: Table Of Contents
Video Intercom Face Recognition Door Station User Manual Contents 1 About this Manual ..................1 2 Appearance ....................2 2.1 Door Station ...................... 2 2.2 Door Station with Keypad Module ..............3 2.3 Door Station with Fingerprint Module .............. 5 3 Terminal and Wiring Description .............. - Page 11 Video Intercom Face Recognition Door Station User Manual 7 Local Configuration ................... 21 7.1 Quick Configuration ..................21 7.2 Authentication via Admin ................26 7.3 Network Parameters Settings ................27 7.3.1 Edit Wired Network Parameters ............. 27 7.3.2 Cloud Service Settings ................28 7.4 Device No.
- Page 12 Video Intercom Face Recognition Door Station User Manual 8.2.2 Unlock by Face ..................42 8.2.3 Unlock by Presenting Card ..............42 8.2.4 Unlock by QR Code ................. 42 9 Remote Configuration via Web ..............44 9.1 Live View ......................44 9.2 User Management ..................
- Page 13 Video Intercom Face Recognition Door Station User Manual 10.2.3 Add Device via IP segment ..............82 10.2.4 Add Devices in Batch ................82 10.2.5 Add Device Via EHome ................. 83 10.3 Local Configuration via Client Software ............83 10.4 Device Management ..................83 10.5 Live View .......................
-
Page 14: About This Manual
Video Intercom Face Recognition Door Station User Manual 1 About this Manual Get the manual and related software from or the official website (http:// www.hikvision.com). Product Model Door Station DS-KD9403-E6... -
Page 15: Appearance
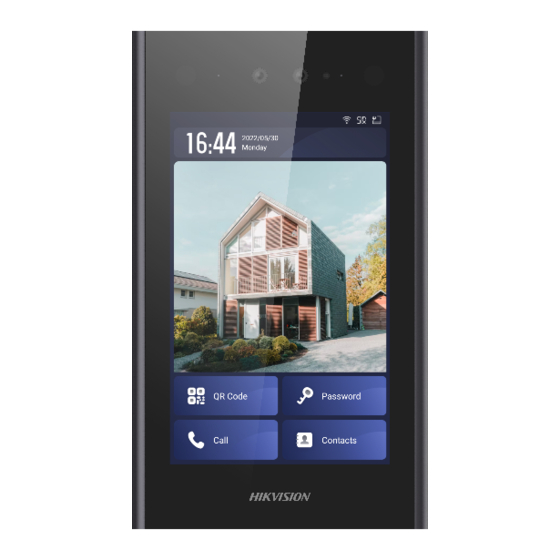
Video Intercom Face Recognition Door Station User Manual 2 Appearance 2.1 Door Station Note Refers to the specific model for the appearance of the device. Figure 2-1 Door Station Table 2-1 Appearance Description Description Description Wiring Terminal Ambient Light Sensor Network Interface TAMPER Analog &... -
Page 16: Door Station With Keypad Module
Video Intercom Face Recognition Door Station User Manual Description Description Note The debugging port is used for debugging only. Microphone MicroUSB Interface Note Micro USB interface is used for debugging only. Camera TF Card Slot 2.2 Door Station with Keypad Module Note Refers to the specific model for the appearance of the device. - Page 17 Video Intercom Face Recognition Door Station User Manual Figure 2-2 Door Station with Keypad Module Table 2-2 Appearance Description Description Description Wiring Terminal Button Network Interface TAMPER Analog & RS-485 Interface 10 Loudspeaker IR Supplement Light Debugging Port Note The debugging port is used for debugging only.
-
Page 18: Door Station With Fingerprint Module
Video Intercom Face Recognition Door Station User Manual Description Description Camera TF Card Slot Ambient Light Sensor 2.3 Door Station with Fingerprint Module Note Refers to the specific model for the appearance of the device. Figure 2-3 Door Station with Fingerprint Module Table 2-3 Appearance Description Description Description... - Page 19 Video Intercom Face Recognition Door Station User Manual Description Description Analog & RS-485 Interface 10 TAMPER IR Supplement Light Loudspeaker Microphone Debugging Port Note The debugging port is used for debugging only. Camera MicroUSB Interface Ambient Light Sensor TF Card Slot...
-
Page 20: Terminal And Wiring Description
Video Intercom Face Recognition Door Station User Manual 3 Terminal and Wiring Description Door station can be wired to alarm input interface, alarm input interface, door lock, door contact and so on. Figure 3-1 Terminal and Wiring Description... -
Page 21: Installation
Video Intercom Face Recognition Door Station User Manual 4 Installation 4.1 Install Door Station Note Gang box is required for the installation of door station. ● The power supply the door station supports is 12 VDC. Please make sure your ●... - Page 22 Video Intercom Face Recognition Door Station User Manual Mounting Plate Figure 4-1 Mounting Plate Note The dimension of the mounting plate is 233 mm (W) × 112.4 mm (H) × 21 mm (D).
-
Page 23: Surface Mounting
Video Intercom Face Recognition Door Station User Manual Gang Box Figure 4-2 Gang Box Note The dimension of the gang box is 236.9 mm (W) × 128.4 mm (H) × 40.8 ● mm (D). The installation hole should be bigger than the actual size. The suggested ●... -
Page 24: Flush Mounting
Video Intercom Face Recognition Door Station User Manual Note Do not touch the SD card slot and other devices during the process of plugging ● in and unplugging the power interface. Apply Silicone sealant among the joints between the device and the wall ●... -
Page 25: Install Door Station With Sub Module
Video Intercom Face Recognition Door Station User Manual Figure 4-4 Flush Mounting 4.2 Install Door Station with Sub Module Note Gang box is required for the installation of door station. ● The power supply the door station supports is 12 VDC. Please make sure your ●... - Page 26 Video Intercom Face Recognition Door Station User Manual Mounting Plate Figure 4-5 Mounting Plate Note The dimension of the mounting plate is 233 mm (W) × 112.4 mm (H) × 21 mm (D).
-
Page 27: Surface Mounting
Video Intercom Face Recognition Door Station User Manual Gang Box Figure 4-6 Gang Box Note The dimension of the gang box is 312.9 mm (W) × 128.4 mm (H) × 40.8 ● mm (D). The installation hole should be bigger than the actual size. The suggested ●... -
Page 28: Flush Mounting
Video Intercom Face Recognition Door Station User Manual Steps 1. Loosen splice set screws, and separate the host from the keypad module. Paste the mounting template on the wall according to the installation location requirements. Drill holes according to the location of the screw holes of the drill template, and install the expansion bolts into the screw holes. - Page 29 Video Intercom Face Recognition Door Station User Manual wall, insert the gang box into the installation hole, and mark the gang box screw holes' position with a marker. 2. Take out the gang box. Drill 4 holes according to the marks on the wall, and insert the expansion sleeves into the screw holes.
-
Page 30: Sub Module Description
Video Intercom Face Recognition Door Station User Manual 5 Sub Module Description Both keypad module and fingerprint module are supported by the door station. Select a sub module according to your actual needs. Figure 5-1 Keypad Module Figure 5-2 Fingerprint Module After installation, power on the device. -
Page 31: Activation
Video Intercom Face Recognition Door Station User Manual 6 Activation 6.1 Activate Device Locally You are required to activate the device first by settings a strong password for it before you can use the device. Steps 1. Power on the device to enter the activation page automatically. 2. -
Page 32: Activate Device Via Client Software
Video Intercom Face Recognition Door Station User Manual Caution In order to improve the network security, the set password must be from 8 to 16 digits, and be a combination of at least two or more types of numbers, lowercase letters, uppercase letters, and special characters. -
Page 33: Activate Device Via Web
Video Intercom Face Recognition Door Station User Manual Note When the device is not activated, the basic operation and remote operation of ● device cannot be performed. You can hold the Ctrl or Shift key to select multiple devices in the online ●... -
Page 34: Local Configuration
Video Intercom Face Recognition Door Station User Manual 7 Local Configuration 7.1 Quick Configuration After activating the device, the quick configuration page will pop up automatically. Steps 1. Select the system language and tap NEXT. Figure 7-1 Select Language 2. Set network parameters and tap NEXT. - Set the IP address, Subnet Mask and Gateway manually. - Page 35 Video Intercom Face Recognition Door Station User Manual Figure 7-2 Network Parameters Settings 3. Set password reset method and tap NEXT. - Enter the Reserved Email address, then you can reset the admin password by email. Note On the security questions settings page, you can tap Change to Reserved Email to modify the password reset method.
- Page 36 Video Intercom Face Recognition Door Station User Manual Figure 7-3 Password Reset by Setting Reserved Email Address - Tap Change to Security Question. Select 3 security questions from deficiency list and enter the answers of the questions, then you can reset the password by answering security questions.
- Page 37 Video Intercom Face Recognition Door Station User Manual Figure 7-4 Password Reset by Setting Security Questions 4. Enable the cloud service functions and create a verification code. Tap NEXT.
- Page 38 Video Intercom Face Recognition Door Station User Manual Figure 7-5 Cloud Service 5. Select theme of the system.
-
Page 39: Authentication Via Admin
Video Intercom Face Recognition Door Station User Manual Figure 7-6 Theme Settings 6. Tap FINISH. 7.2 Authentication via Admin You can configure the parameters of the device on the menu page. You should authenticate to enter the menu. If you want to authenticate via face/card/fingerprints, you should add administrator first. -
Page 40: Network Parameters Settings
Video Intercom Face Recognition Door Station User Manual Figure 7-7 Menu Page 7.3 Network Parameters Settings The device support wired network, wireless network and cloud service settings. Note Only parts of the devices support the wireless network, please refers to the actual device for detailed information. -
Page 41: Cloud Service Settings
Video Intercom Face Recognition Door Station User Manual Steps 1. On the menu, tap Network → Wired Network to enter the settings page. Figure 7-8 Wired Network Settings 2. Edit the wired network parameters. - Edit the wired network parameters manually. - Enable DHCP, and the system will get the parameters automatically. -
Page 42: Device No. Settings
Video Intercom Face Recognition Door Station User Manual Figure 7-9 Cloud Service Settings 2. Slide to enable the function. 3. Edit the Cloud Service Address and create a Verification Code. 4. Tap √ to save the settings. 7.4 Device No. Settings Configure the No. -
Page 43: User Management
Video Intercom Face Recognition Door Station User Manual Figure 7-10 Local Configuration 2. Edit Community No., Building No., Unit No., Floor No. and No. according to the actual needs. 7.5 User Management On the user management page, you can add new users, configure the user's room information, card information, face information, and fingerprint information. -
Page 44: Call Settings
Video Intercom Face Recognition Door Station User Manual 1) Tap Card, and tap + to enter the add card page. 2) Enter the card No. manually or present the card in the card presenting area to obtain the card No. 3) Tap OK to enable the settings. -
Page 45: Forget Admin Password
Video Intercom Face Recognition Door Station User Manual Figure 7-11 Local Configuration 2. Tap Shortcut Key to select call mode. Calling Menu Select call mode as Calling Menu. On the main page, tap call button to enter the calling page. Call Specified Room Select call mode as Call Specified Room and set the Specified Room No.. -
Page 46: System Settings
Video Intercom Face Recognition Door Station User Manual Admin password is used for authenticating to enter the local configuration menu. If you forget the password, you can change it by entering security questions' answers. Steps 1. Hold the main page to enter the authentication page. Figure 7-12 Authentication Page 2. -
Page 47: Adjust Brightness
Video Intercom Face Recognition Door Station User Manual Before You Start Authenticate and enter the menu first. Refers to Authentication via Admin for details. Steps 1. On the menu, tap Local Configuration to enter the settings page. Figure 7-13 Local Configuration 2. -
Page 48: Keypad Sound Settings
Video Intercom Face Recognition Door Station User Manual Figure 7-14 Local Configuration 2. Adjust the brightness of the device. - Enable the Auto Screen Brightness, the device will adjust the brightness according to the environment automatically. - Edit the number to adjust the brightness manually. 7.8.3 Keypad Sound Settings Authenticate and enter the menu first. -
Page 49: Theme Settings
Video Intercom Face Recognition Door Station User Manual Before You Start Authenticate and enter the menu first. Refers to Authentication via Admin for details. Steps 1. On the menu, tap Local Configuration to enter the settings page. 2. Slide to enable the function. 7.8.5 Theme Settings Select theme of the system to make the device user friendly. -
Page 50: Device Information
Video Intercom Face Recognition Door Station User Manual Figure 7-15 Local Configuration 2. Restore the device. Restore to Default Settings Tap Restore to Default Settings to reset all parameters, except IP address, subnet mask and default gateway, to the default settings. Restore to Factory Settings Tap Restore to Factory Settings to restore all parameters to default settings. - Page 51 Video Intercom Face Recognition Door Station User Manual Steps 1. On the menu, tap About to enter the page. Figure 7-16 About 2. You can view the device model, system version, App version and open source software licenses. 3. Optional: Scan the QR code to add the device to mobile client.
-
Page 52: Local Operation
Video Intercom Face Recognition Door Station User Manual 8 Local Operation 8.1 Call from the Device Door station supports calling users or management center. 8.1.1 Call Resident Call Resident from Main/Sub Door Station Figure 8-1 Call Resident On the main page, tap to enter the calling page. - Page 53 Video Intercom Face Recognition Door Station User Manual Note Both the main and sub door station support the elevator control function, ● that is, after calling the residents successfully, tap the unlock button on the indoor station, the elevator will automatically arrive at the floor where the door station is located, and the permission of the floor where the household is located will be opened (The elevator calling will take effect only after the elevator control is configured and the corresponding...
-
Page 54: Call Center
Video Intercom Face Recognition Door Station User Manual Call Resident from Outer Door Station On the main page of the outer door station, tap Call to enter the calling page. Enter Phase No. + # + Building No. + # + Unit No. + # + Room No., and tap Call again to call residents. -
Page 55: Unlock By Face
- Login to the App Store, enter Hikvision Cloud Management in the search box, download and install the iOS version of the mobile client software. - Log in to Hikvision's official website, and click Help → Download → Tools and And Software , download and install the Android version of the mobile client... - Page 56 Video Intercom Face Recognition Door Station User Manual Note Operating environment of Hikvision Cloud Management iOS System: iOS 6.0 and above. ● Android System: Android 4.0 and above. ● Here takes Android system as an example. 2. Register user accounts according to the prompts, and login to the client software.
-
Page 57: Remote Configuration Via Web
Video Intercom Face Recognition Door Station User Manual 9 Remote Configuration via Web 9.1 Live View In the browser address bar, enter the IP address of the device, and press the Enter key to enter the login page. Enter the user name and password and click Login to enter the Live View page. Or you can click Live View to enter the page. -
Page 58: Device Management
Video Intercom Face Recognition Door Station User Manual Figure 9-2 Add User 1) Enter Person ID, Name, Floor No.andRoom No.. Select Level. 2) Configure Start Time and End Time. 3) Check Administrator and the person added will be able to log in by face recognition. - Page 59 Video Intercom Face Recognition Door Station User Manual You can manage the linked device on the page. Click Device Management to enter the settings page. Figure 9-3 Device Management Add Device Click Add to add the indoor station or sub door station. Enter the ●...
-
Page 60: Parameters Settings
Video Intercom Face Recognition Door Station User Manual Upgrade Click Timing Upgrade, click to Enable Upgrading Device Automatically and configure Start Time and End Time. The devices will upgrade automatically at the set time. Click Upload Updating Package, select Upgrade File and click Browse to upload upgrading package. -
Page 61: Local Settings
Video Intercom Face Recognition Door Station User Manual Click Configuration to set the parameters of the device. Remote configuration in iVMS-4200 and Batch Configuration Tool is the same as that in Web. Here takes the configuration in web for example. Note Run the browser, click →... -
Page 62: System Parameters
Video Intercom Face Recognition Door Station User Manual Note Only IE and Google browsers support saving path settings. Other browsers default to the C drive download path. Please refer to the actual device page for more details. 9.4.2 System Parameters Follow the instructions below to configure the system settings, include System Settings, Maintenance, Security, and User Management, etc. - Page 63 Video Intercom Face Recognition Door Station User Manual Figure 9-4 Basic Information Click View QR Code, and you can use the mobile client to scan to add the device. You can view the quantities of added users, face pictures and cards in Capacity.
- Page 64 Video Intercom Face Recognition Door Station User Manual Enable NTP, set the Server Address, NTP Port and Interval. ● Enable Manual Time Sync., set the time manually or check the Sync. with ● computer time. Click Save to enable the settings. About Click About to enter the page.
- Page 65 Video Intercom Face Recognition Door Station User Manual Restore All Click Restore All to reset all the parameters, except the IP parameters and user information, to the default settings. Unlink APP Account Click Unlink APP Account to unlink the account from the mobile client. Export Parameters 1.
- Page 66 Video Intercom Face Recognition Door Station User Manual Steps 1. Click Security → Security Service to enter the settings page. Figure 9-6 Security Service 2. On the page, you can enable SSH, ADB remote control and HTTP according to your actual needs.
- Page 67 Video Intercom Face Recognition Door Station User Manual Steps 1. Select Certificate Type from the drop-list. 2. Click Browser and select the certificate files from the PC. 3. Click Install. Import Communication Certificates Steps 1. Select Certificate Type from drop-list. 2.
-
Page 68: Network Settings
Video Intercom Face Recognition Door Station User Manual 9.4.3 Network Settings TCP/IP Settings TCP/IP settings must be properly configured before you operate the device over network. The device supports IPv4. Steps 1. Click Network → Basic Settings → TCP/IP to enter the settings page. Figure 9-7 TCP/IP Settings 2. - Page 69 Video Intercom Face Recognition Door Station User Manual Steps 1. Click Network → Basic Settings → Port to enter the settings page. 2. Set the ports of the device. HTTP Port The default port number is 80, and it can be changed to any port No. which is not occupied.
- Page 70 Video Intercom Face Recognition Door Station User Manual Figure 9-8 SIP Settings 2. Check Enable VOIP Gateway. 3. Configure the SIP parameters. 4. Click Save to enable the settings. FTP Settings Steps 1. Click Network → Advanced → FTP to enter the settings page.
- Page 71 Video Intercom Face Recognition Door Station User Manual Figure 9-9 FTP Settings 2. Check Enable FTP. 3. Select Server Type. 4. Input the Server IP Address and Port. 5. Configure the FTP Settings, and the user name and password are required for the server login.
- Page 72 Video Intercom Face Recognition Door Station User Manual 8. Click Save to enable the settings. Platform Access Platform access provides you an option to manage the devices via platform. Steps 1. Click Configuration → Network → Advanced Settings → Platform Access to enter the settings page.
-
Page 73: Video & Audio Settings
Video Intercom Face Recognition Door Station User Manual Click Configuration → Network → Advanced → HTTP Listening to enter the settings page. Figure 9-11 HTTP Listening Settings Enter the parameters according to the page and click Save to enable the function. Capture Network Packet Click Network →... - Page 74 Video Intercom Face Recognition Door Station User Manual Figure 9-12 Video Parameters 2. Select the Stream Type. 3. Configure the video parameters. Stream Type Select the stream type to main stream or sub stream. Video Type Select the stream type to video stream, or video & audio composite stream. The audio signal will be recorded only when the Video Type is Video &...
- Page 75 Video Intercom Face Recognition Door Station User Manual Set the max. bitrate from 32 to 16384 Kbps. The higher value corresponds to the higher video quality, but the better bandwidth is required. Video Encoding The device supports H.264. I Frame Interval Set I Frame Interval from 1 to 400.
-
Page 76: Display Settings
Video Intercom Face Recognition Door Station User Manual 9.4.5 Display Settings Configure the image adjustment, backlight settings and other parameters in display settings. Steps 1. Click Image → Display Settings to enter the display settings page. Figure 9-14 Display Settings 2. -
Page 77: Event Settings
Video Intercom Face Recognition Door Station User Manual Figure 9-15 Day/Night Switch Auto Select Day/Night Switch as Auto, and set the Sensitivity. The device will switch between Day Mode and Night Mode automatically according to the environment. Daytime Select Day/Night Switch as Daytime. The device will keep the mode as daytime. - Page 78 Video Intercom Face Recognition Door Station User Manual Steps 1. Click Event → Motion to enter the settings page. Figure 9-16 Motion Detection 2. Slide Enable Motion Detection to enable the function. 3. Click Draw Area. Click and drag the mouse on the live video to draw a motion detection area.
- Page 79 Video Intercom Face Recognition Door Station User Manual 5. Click on the time bar and drag the mouse to select the time period. Click Save to save the settings. Delete Schedule Click Delete to delete the current arming schedule. 6. Click Linkage Method to enable the linkages. Notify Surveillance Center Send an exception or alarm signal to the remote management software when an event occurs.
- Page 80 Video Intercom Face Recognition Door Station User Manual Figure 9-17 Event Linkage 2. Select the Major Type as Device Event or Door Event. 3. Select the Minor Type. - For device event, select Minor Type as Tampering Alaem, Fire Input Alarm or Fire Input Resume.
-
Page 81: Card Security
Video Intercom Face Recognition Door Station User Manual 9.4.7 Card Security Click General → Card Security to enter the settings page. Figure 9-18 Card Security Slide to enable card encryption parameters. Click Save to enable the settings. 9.4.8 Intercom Settings Device No. - Page 82 Video Intercom Face Recognition Door Station User Manual 3. Click Save to enable the device number configuration. Note For main door station (D series or V series), the serial No. is 0. ● For sub door station (D series or V series), the serial No. cannot be 0. Serial No. ●...
- Page 83 Video Intercom Face Recognition Door Station User Manual Figure 9-21 Password Settings 2. Click +Add to create a password. 1) Create a password. 2) Check to select unlock permission. 3) Optional: Enter the remarks of the password. 3. Click OK to save the password. Call Settings Click Intercom →...
- Page 84 Video Intercom Face Recognition Door Station User Manual Figure 9-22 Ringtone Settings Note Available Audio Format: WAV、AAC, Size: Less than 600 KB, Sample Rate: 8000Hz, Mono. Call Priority Enter a short description of your task here (optional). Before You Start Enter the prerequisites here (optional).
-
Page 85: Access Control Settings
Video Intercom Face Recognition Door Station User Manual Note The higher the level, the ealier the device to be called. After the call time is over, the next level of call is triggered. Number Settings Steps 1. Click Intercom → Number Settings , and you can view the No., room No., and SIP number. - Page 86 Video Intercom Face Recognition Door Station User Manual Figure 9-24 Door Parameters 2. Select Door No., and edit the Name. 3. Set Open Duration. When the time to open over the open duration you set, the door will be locked again. 4.
- Page 87 Video Intercom Face Recognition Door Station User Manual Figure 9-25 Elevator Control 2. Check to enable elevator control function. 3. Select an Elevator No., and select an elevator controller type for the elevator. 4. Select Interface Type. Note If you select Interface Type as RS-485, you only need to enter Negative Floor Capacity.
-
Page 88: Smart Settings
Video Intercom Face Recognition Door Station User Manual Note Up to 4 elevator controllers can be connected to one door station. ● Up to 10 negative floors can be added. ● Make sure the interface types of elevator controllers, which are connected to ●... - Page 89 Video Intercom Face Recognition Door Station User Manual Figure 9-27 Smart Settings Table 9-1 Face Capture Advanced Parameters Parameter Description Face Anti- s poofing Enable face anti-spoofing to detect real people face for recognition. Live Face After enabling face anti- s poofing function, you can set the Detection Security matching security level when performing live face Level...
- Page 90 Video Intercom Face Recognition Door Station User Manual Parameter Description When the face recognition time exceed the value you set, Face Recognition the recognition will be determined as a timeout operation. Timeout Value Note You can input the number from 1 to 20. ECO Settings After enabling the ECO mode, the device will use the IR camera to authenticate faces in the low light or dark...
-
Page 91: Theme Settings
Video Intercom Face Recognition Door Station User Manual Figure 9-28 Area Configuration Drag the frame or enter the digits behind the parameters to adjust the size of the recognition area. 9.4.11 Theme Settings Set the advertisement on the main page of the device. Steps 1. - Page 92 Video Intercom Face Recognition Door Station User Manual Figure 9-29 Theme Settings 2. Check to enable screen saving function. 3. Set the advertisement theme. 1) Click + Add Theme. 2) Create a theme name, and select the advertisement body as picture or Video. 3) Click Save.
- Page 93 Video Intercom Face Recognition Door Station User Manual 7. Optional: Slide to enable show custom content and edit custom content. The custom content displays on the main page of the device. 8. Click Save.
-
Page 94: Remote Configuration Via Client Software
Video Intercom Face Recognition Door Station User Manual 10 Remote Configuration via Client Software You can set Video Intercom system and manage video intercom products including indoor station, door station and main station via iVMS-4200 client software. 10.1 Edit Device Network Parameters Before You Start Before configuring the device remotely, make sure that the device is activated. -
Page 95: Add Device Via Ip Address
Video Intercom Face Recognition Door Station User Manual 4. Enter the device Name, User Name, Password, and click Add. Note Only when the doorphone is added to the client software, you can remotely ● configure the indoor station. Only online devices with the same user name and activation password can ●... -
Page 96: Add Device Via Ehome
Video Intercom Face Recognition Door Station User Manual 4. Select the file and click Add to import. Note The file format for batch import is .csv format. 10.2.5 Add Device Via EHome Steps 1. In the device list area, click Add to pop up the device adding dialog box. 2. -
Page 97: Live View
Video Intercom Face Recognition Door Station User Manual You can add device, modify device, delete device, perform remote configuration, etc. in device management page. The specific method is similar to web configuration . For details, please refer to the iVMS-4200 client user manual. Note When adding a third-party door station encoding device, the client only supports ●... -
Page 98: Add Person
Video Intercom Face Recognition Door Station User Manual 10.7.1 Add Person Steps 1. On the main page of the client, click Person Management to enter the person information configuration page. 2. Select an organization in the organization list and click Add on the person panel to pop up the adding person dialog. -
Page 99: Modify And Delete Person
Video Intercom Face Recognition Door Station User Manual 3) Click Start to Scan to add the fingerprint. 4) Click Add to save the fingerprint. Note Only some models of the devices support fingerprint function, please refer to the specific product. 6. -
Page 100: Get Person Information
Video Intercom Face Recognition Door Station User Manual Note Click Download Template for Importing Person to download the template. ● The import template contains the following information: person name, gender, ● department code, certificate type, certificate number, phone number and address. -
Page 101: Permission Settings
Video Intercom Face Recognition Door Station User Manual 2. Click Settings to set issue card paramrters. - If you set issue card Mode as Local, you need to set Card Issuer, Card Type and Card No., and enable Buzzer and M1 Card Encryption and click OK to issue card. - Page 102 Video Intercom Face Recognition Door Station User Manual You can call residents on the video intercom page, and the residents can also call the client software through the indoor station. The door station can also call the client software. Steps 1.
-
Page 103: Search Video Intercom Information
Video Intercom Face Recognition Door Station User Manual Note One video intercom device can only connect with one client software. ● The maximum ring duration can be set from 15 s to 60 s. ● The maximum speaking duration between the client software and indoor ●... -
Page 104: Upload Arming Information
Video Intercom Face Recognition Door Station User Manual You can set the information type as all, advertising Information, property information, alarm information or notice information according to your needs. Time Set the start time and end time of a time period to search the logs. 3. -
Page 105: Communication Matrix And Device Command
A. Communication Matrix and Device Command Communication Matrix Scan the following QR code to get the device communication matrix. Note that the matrix contains all communication ports of Hikvision access control and video intercom devices. Figure A-1 QR Code of Communication Matrix Device Command Scan the following QR code to get the device common serial port commands. - Page 106 UD27981B...
Need help?
Do you have a question about the DS-KD9403-E6 and is the answer not in the manual?
Questions and answers