Table of Contents
Advertisement
Quick Links
Advertisement
Table of Contents

Related Manuals for HIKVISION DS-KD9203 Series


Summary of Contents for HIKVISION DS-KD9203 Series
- Page 1 Video Intercom Face Recognition Door Station User Manual...
- Page 2 ● Products described in this Document, which may include licenses obtained from third parties. Any part of the Document, including text, pictures, graphics, etc., belongs to Hikvision. No part ● of this Document may be excerpted, copied, translated, or modified in whole or in part by any means without written permission.
- Page 3 Video Intercom Face Recognition Door Station User Manual PRODUCT, EVEN IF HIKVISION HAS BEEN ADVISED OF THE POSSIBILITY OF SUCH DAMAGES OR LOSS. YOU ACKNOWLEDGE THAT THE NATURE OF THE INTERNET PROVIDES FOR INHERENT SECURITY ● RISKS, AND HIKVISION SHALL NOT TAKE ANY RESPONSIBILITIES FOR ABNORMAL OPERATION, PRIVACY LEAKAGE OR OTHER DAMAGES RESULTING FROM CYBER-ATTACK, HACKER ATTACK, VIRUS INFECTION, OR OTHER INTERNET SECURITY RISKS;...
- Page 4 Video Intercom Face Recognition Door Station User Manual Symbol Conventions The symbols that may be found in this document are defined as follows. Symbol Description Indicates a hazardous situation which, if not avoided, will or could Danger result in death or serious injury. Indicates a potentially hazardous situation which, if not avoided, could Caution result in equipment damage, data loss, performance degradation, or...
- Page 5 Video Intercom Face Recognition Door Station User Manual Safety Instruction Warning All the electronic operation should be strictly compliance with the electrical safety regulations, ● fire prevention regulations and other related regulations in your local region. Please use the power adapter, which is provided by normal company. The power consumption ●...
- Page 6 Video Intercom Face Recognition Door Station User Manual Improper use or replacement of the battery may result in hazard of explosion. Replace with the ● same or equivalent type only. Dispose of used batteries according to the instructions provided by the battery manufacturer.
- Page 7 Video Intercom Face Recognition Door Station User Manual Regulatory Information EU Conformity Statement This product and - if applicable - the supplied accessories too are marked with "CE" and comply therefore with the applicable harmonized European standards listed under the EMC Directive 2014/30/EU, the RoHS Directive 2011/65/EU 2012/19/EU (WEEE directive): Products marked with this symbol cannot be disposed of as unsorted municipal waste in the European Union.
- Page 8 Video Intercom Face Recognition Door Station User Manual Conformément à la réglementation d'Industrie Canada, le présent émetteur radio peut fonctionner avec une antenne d'un type et d'un gain maximal (ou inférieur) approuvé pour l'émetteur par Industrie Canada. Dans le but de réduire les risques de brouillage radioélectrique à l'intention des autres utilisateurs, il faut choisir le type d'antenne et son gain de sorte que la puissance isotrope rayonnée équivalente (p.i.r.e.) ne dépasse pas l'intensité...
-
Page 9: Table Of Contents
Video Intercom Face Recognition Door Station User Manual Contents Chapter 1 About this Manual ...................... 1 Chapter 2 Appearance ........................ 2 Chapter 3 Terminal and Wiring Description ................. 6 3.1 Terminal Description ......................6 3.2 Wiring Description ......................... 7 3.2.1 Door Lock Wiring ......................7 3.2.2 Exit Button Wiring ...................... - Page 10 Video Intercom Face Recognition Door Station User Manual 6.3.2 Unlock by Presenting Card ..................20 6.3.3 Unlock by Fingerprint ....................21 6.3.4 Unlock by Face ......................21 Chapter 7 Remote Configuration via Web ................. 22 7.1 Live View ..........................22 7.2 User Management .......................
- Page 11 Video Intercom Face Recognition Door Station User Manual 8.6.1 Add Person ........................50 8.6.2 Modify and Delete Person ..................51 8.6.3 Import and Export Person Information ............... 51 8.6.4 Get Person Information from Device ................52 8.6.5 Change Person to Other Organization ................ 52 8.6.6 Issue Card in Batch ......................
-
Page 12: Chapter 1 About This Manual
Video Intercom Face Recognition Door Station User Manual Chapter 1 About this Manual Get the manual and related software from or the official website (http://www.hikvision.com). Product Model Door Station DS-KD9203 Series Scan the QR code to get the User Manual for detailed information. -
Page 13: Chapter 2 Appearance
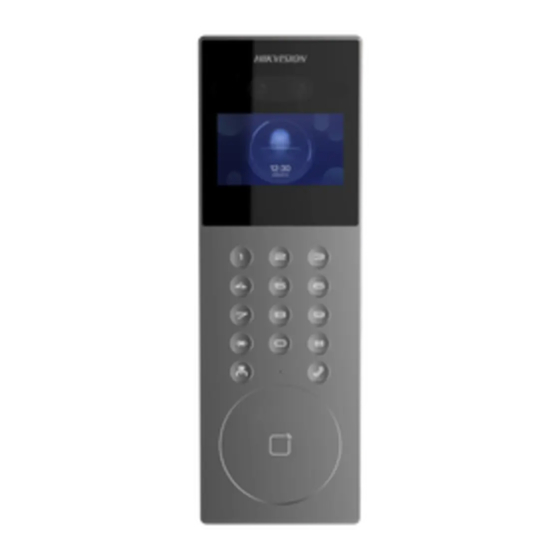
Video Intercom Face Recognition Door Station User Manual Chapter 2 Appearance Door Station without Fingerprint Module Figure 2-1 Appearance of Door Station without Fingerprint Module... - Page 14 Video Intercom Face Recognition Door Station User Manual Table 2-1 Description Description Camera IR Supplement Light Screen Loudspeaker Buttons Microphone Card Reading Area TAMPER...
- Page 15 Video Intercom Face Recognition Door Station User Manual Door Station with Fingerprint Module Figure 2-2 Appearance of Door Station with Fingerprint Module Table 2-2 Description Description Camera IR Supplement Light Screen Loudspeaker...
- Page 16 Video Intercom Face Recognition Door Station User Manual Description Buttons Microphone Card Reading Area/ Fingerprint Recognition Module TAMPER...
-
Page 17: Chapter 3 Terminal And Wiring Description
Video Intercom Face Recognition Door Station User Manual Chapter 3 Terminal and Wiring Description 3.1 Terminal Description Figure 3-1 Terminal Description Table 3-1 Description Name Terminal Description Network Interface Network Signal Input ALARM IN SEN1 Door Contact Input 1 SEN2 Door Contact Input 2 BTN1 Exit Button Input 1... -
Page 18: Wiring Description
Video Intercom Face Recognition Door Station User Manual Name Terminal Description Door Lock Relay Output 1(Normally Open) Grounding Door Lock Relay Output 2(Normally Close) COM2 Common Interface 2 Door Lock Relay Output 2(Normally Open) Grounding Power Supply DC 12 V 12 VDC Power Input Note Alarm input interface cannot be edited. -
Page 19: Exit Button Wiring
Video Intercom Face Recognition Door Station User Manual Note Terminal NC1/COM1 is set as default for accessing electric bolt. Terminal NO1/COM1 is set as ● default for accessing electric strike. To connect electric lock in terminal NO2/COM2/NC2, it is required to set the output of terminal ●... - Page 20 Video Intercom Face Recognition Door Station User Manual Figure 3-4 Door Contact Wiring...
-
Page 21: Chapter 4 Installation
Video Intercom Face Recognition Door Station User Manual Chapter 4 Installation Note Make sure the device in the package is in good condition and all the assembly parts are included. ● The power supply the door station supports is 12 VDC. Please make sure your power supply ●... -
Page 22: Gang Box
Video Intercom Face Recognition Door Station User Manual 4.1 Gang Box Figure 4-1 Dimension of the Gang Box Note The dimension of the gang box is 364 mm (W) × 118 mm (H) × 40 mm (D). ● The installation hole should be bigger than the actual size. The suggested dimension of the ●... -
Page 23: Flush Mounting With Gang Box
Video Intercom Face Recognition Door Station User Manual 4.2 Flush Mounting with Gang Box Steps 1. Cave an installation hole in the wall. Pull the cable out from the wall. Note The suggested dimension of the installation hole is 364.3 mm (W) × 118.6 mm (H) × 40.2 mm ●... - Page 24 Video Intercom Face Recognition Door Station User Manual Figure 4-2 Flush Mounting with Gang Box...
-
Page 25: Chapter 5 Activation
Video Intercom Face Recognition Door Station User Manual Chapter 5 Activation 5.1 Activate Device Locally You are required to activate the device first by settings a strong password for it before you can use the device. Steps 1. Power on the device to enter the activation page automatically. 2. -
Page 26: Activate Device Via Client Software
Video Intercom Face Recognition Door Station User Manual 4. After selection, press # to finish activation. 5.2 Activate Device via Client Software You can only configure and operate the door station after creating a password for the device activation. Default parameters of door station are as follows: Default IP Address: 192.0.0.65. - Page 27 Video Intercom Face Recognition Door Station User Manual Steps 1. Power on the device, and connect the device to the network. 2. Enter the IP address into the address bar of the web browser, and click Enter to enter the activation page.
-
Page 28: Chapter 6 Local Operation
Video Intercom Face Recognition Door Station User Manual Chapter 6 Local Operation 6.1 Local Configuration When entering configuration page, the button is used as follows. Table 6-1 Button Description Button Description Button Description Previous Next Exit/Back 6.1.1 Edit Network Parameters After activating, you should edit the network parameters. -
Page 29: Add Residents
Video Intercom Face Recognition Door Station User Manual Door Station Settings Edit the parameters of the door station (including but not limited to, community No., building No., floor No., room No. and device mode). Steps 1. Configure the parameters according to the actual needs. Note Outer door station can only edit the Community No., Project No. -
Page 30: About
Video Intercom Face Recognition Door Station User Manual Add Users You can add cards, permissions and room No. for the users. Steps 1. Select +Add, and press # to enter the adding page. 2. Edit the room No. 3. Add cards. 1) Switch to the card and press # or present cards on the card reading area to add. -
Page 31: Call Center
Video Intercom Face Recognition Door Station User Manual Enter 【Community No. + Building No. + # + Unit No. + # + Room No.】 and press call button to call resident. Note When Unit No. is one, it can be omitted. When Unit No. is omitted, Community No. must be omitted at the same time. -
Page 32: Unlock By Fingerprint
Video Intercom Face Recognition Door Station User Manual 6.3.3 Unlock by Fingerprint Note Make sure you have added the fingerprint to the device. ● Fingerprint function may vary with different modules. Please refer to the actual devices. ● Put your finger on the finger recognition module to unlock. 6.3.4 Unlock by Face Note Make sure you have added your face picture to the device. -
Page 33: Chapter 7 Remote Configuration Via Web
Video Intercom Face Recognition Door Station User Manual Chapter 7 Remote Configuration via Web 7.1 Live View In the browser address bar, enter the IP address of the device, and press the Enter key to enter the login page. Enter the user name and password and click Login to enter the Live View page. Or you can click Live View to enter the page. -
Page 34: Device Management
Video Intercom Face Recognition Door Station User Manual 7.3 Device Management You can manage the linked device on the page. Click Device Management to enter the settings page. Add Device Click Add to add the indoor station or sub door station. Enter the parameters and click OK to ●... -
Page 35: System Settings
Video Intercom Face Recognition Door Station User Manual 7.4.1 System Settings Follow the instructions below to configure the system settings, include System Settings, Maintenance, Security, and User Management, etc. Click System to enter the settings page. Basic Information Click System Settings → Basic Information to enter the settings page. On the page, you can edit Device Name and Device No. - Page 36 Video Intercom Face Recognition Door Station User Manual Reboot: Click Reboot to reboot the device. ● Restore ● Click Restore to reset all the parameters, except the IP parameters and user information, to the default settings. Default Click Default to restore all parameters to default settings. Export parameters: ●...
-
Page 37: Network Settings
Video Intercom Face Recognition Door Station User Manual Figure 7-3 Online Users Click Refresh to get the present information. Arming/Disarming Information Click User Management → Arming/Disarming Information to view the information. Click Refresh to get the present information. 7.4.2 Network Settings TCP/IP Settings TCP/IP settings must be properly configured before you operate the device over network. - Page 38 Video Intercom Face Recognition Door Station User Manual Figure 7-4 TCP/IP Settings 2. Configure the network parameters. - Check DHCP, the device will get the parameters automatically. - Set the IPv4 Address, IPv4 Subnet Mask and IPv4 Default Gateway manually. 3.
- Page 39 Video Intercom Face Recognition Door Station User Manual Figure 7-5 Port Settings 2. Set the ports of the device. HTTP Port The default port number is 80, and it can be changed to any port No. which is not occupied. HTTPS Port The default port number is 443, and it can be changed to any port No.
- Page 40 Video Intercom Face Recognition Door Station User Manual Note To lower the risk of information leakage, you are suggested to enable SNMP v3 instead of SNMP v1 or v2. 3. Check the check box of Enable SNMPv3 to set the SNMPv3 parameters. 4.
- Page 41 Video Intercom Face Recognition Door Station User Manual Figure 7-6 FTP Settings...
-
Page 42: Video & Audio Settings
Video Intercom Face Recognition Door Station User Manual 2. Check Enable FTP. 3. Select Server Type. 4. Input the Server IP Address and Port. 5. Configure the FTP Settings, and the user name and password are required for the server login. 6. - Page 43 Video Intercom Face Recognition Door Station User Manual Figure 7-7 Video Parameters 2. Select the Stream Type. 3. Configure the video parameters. Stream Type Select the stream type to main stream or sub stream. Video Type Select the stream type to video stream, or video & audio composite stream. The audio signal will be recorded only when the Video Type is Video &...
- Page 44 Video Intercom Face Recognition Door Station User Manual Select the resolution of the video output. Bitrate Type Select the bitrate type to constant or variable. Video Quality When bitrate type is selected as Variable, 6 levels of video quality are selectable. Frame Rate Set the frame rate.
-
Page 45: Display Settings
Video Intercom Face Recognition Door Station User Manual Select the stream type to main stream or sub stream. Audio Encoding The device support G.711ulaw and G.711 alaw. 3. Adjust the Input Volume and Output Volume. Note Available range of volume: 0 to 10. 4. -
Page 46: Event Settings
Video Intercom Face Recognition Door Station User Manual Saturation Saturation describes the colorfulness of the image color, which ranges from 1 to 100. Sharpness Sharpness describes the edge contrast of the image, which ranges from 1 to 100. 4. Set the Day/Night Mode. Figure 7-10 Day/Night Mode - Set Day Mode or Night Mode manually. - Page 47 Video Intercom Face Recognition Door Station User Manual Steps 1. Click Event → Motion to enter the settings page. Figure 7-11 Motion Detection 2. Slide Enable Motion Detection to enable the function. 3. Click Draw Area. Click and drag the mouse on the live video to draw a motion detection area. Click Save to save the settings.
- Page 48 Video Intercom Face Recognition Door Station User Manual Adjust Sensitivity Move the slider to set the sensitivity of the detection. 4. Click Arming Schedule to edit the arming schedule. 5. Click on the time bar and drag the mouse to select the time period. Click Save to save the settings.
- Page 49 Video Intercom Face Recognition Door Station User Manual Figure 7-12 Event Linkage...
-
Page 50: Intercom Settings
Video Intercom Face Recognition Door Station User Manual 2. Select the Major Type as Device Event or Door Event. 3. Select the type of the Normal Linkage for the event. 4. Click Save to enable the settings. 7.4.6 Intercom Settings Device ID Configuration Steps 1. -
Page 51: Access Control Settings
Video Intercom Face Recognition Door Station User Manual Linked Network Settings Steps 1. Go to Intercom → Session Settings to enter the settings page. 2. Set Register Number and Registration Password. 3. Set Main Station IP and VideoIntercom Server IP. 4. - Page 52 Video Intercom Face Recognition Door Station User Manual Figure 7-14 Permission Password 2. Select the password type. 3. Change the password. 4. Set the number of doorphone. 5. Click Save to enable the settings. Door Parameters Steps 1. Click Access Control → Door Parameters to enter the settings page.
- Page 53 Video Intercom Face Recognition Door Station User Manual Figure 7-15 Door Parameters 2. Select the door and edit the door name. 3. Set Relay Reverse. 4. Set Open Duration. 5. Click Save to enable the settings. Card Security Go to Access Control → Card Security to enter the settings page. Slide to enable card encryption parameters and CPU card reading content.
- Page 54 Video Intercom Face Recognition Door Station User Manual Figure 7-16 Elevator Control 2. Check to enable elevator control function. 3. Select an Elevator No., and select an elevator controller type for the elevator. 4. Set the Negative Floor. 5. Select the Interface Type as RS-485 or Network Interface. And enable the elevator control. - If you select RS-485, make sure you have connected the door station to the elevator controller with RS-485 wire.
-
Page 55: Smart Settings
Video Intercom Face Recognition Door Station User Manual Figure 7-17 RS-485 Settings 2. Select the No. 3. Select the working mode. 4. Click Save to enable the settings. 7.4.8 Smart Settings Biometrics Settings Adjust the face recognition parameters and fingerprint parameters according to your needs. Steps 1. - Page 56 Video Intercom Face Recognition Door Station User Manual Table 7-1 Face Capture Advanced Parameters Parameter Description Face Anti- s poofing Enable face anti-spoofing to detect real people face for recognition. Live Face Detection After enabling face anti- s poofing function, you can set the matching Security Level security level when performing live face authentication.
- Page 57 Video Intercom Face Recognition Door Station User Manual Parameter Description Set the matching threshold when authenticating via ECO mode 1:N matching mode. The larger the value, the smaller the false accept rate and the larger the false rejection rate. Note You can input the number from 1 to 100.
-
Page 58: Chapter 8 Configuration Via Client Software
Video Intercom Face Recognition Door Station User Manual Chapter 8 Configuration via Client Software 8.1 Edit Network Parameters To operate and configure the device via LAN (Local Area Network), you need connect the device in the same subnet with your PC. You can edit network parameters via iVMS-4200 client software. Steps 1. - Page 59 Video Intercom Face Recognition Door Station User Manual Figure 8-1 Add to the Client...
-
Page 60: Add Device By Ip Address
Video Intercom Face Recognition Door Station User Manual 8.2.2 Add Device by IP Address Steps 1. Click +Add to pop up the adding devices dialog box. 2. Select IP/Domain as Adding Mode. 3. Enter corresponding information. 4. Click Add. 8.2.3 Add Device by IP Segment You can add many devices at once whose IP addresses are among the IP segment. -
Page 61: Modify And Delete Organization
Video Intercom Face Recognition Door Station User Manual 1) You can add multiple levels of organizations according to the actual needs. 2) Then the added organization will be the sub-organization of the upper-level organization. Note Up to 10 levels of organizations can be created. 8.5.2 Modify and Delete Organization You can select the added organization and click to modify its name. -
Page 62: Modify And Delete Person
Video Intercom Face Recognition Door Station User Manual 2) Click Add face to upload the photo. Note The picture should be in *.jpg format. Click Upload Select the person picture from the local PC to upload it to the client. Click Take Phone Take the person's photo with the PC camera. -
Page 63: Get Person Information From Device
Video Intercom Face Recognition Door Station User Manual Steps 1. Exporting Person: You can export the added persons' information in Excel format to the local PC. 1) After adding the person, you can click Export Person to pop up the following dialog. 2) Click ... -
Page 64: Issue Card In Batch
Video Intercom Face Recognition Door Station User Manual Steps 1. Select the person in the list and click Change Organization. 2. Select the organization to move the person to. 3. Click OK to save the settings. 8.6.6 Issue Card in Batch You can issue multiple cards for the person with no card issued in batch. - Page 65 Video Intercom Face Recognition Door Station User Manual Figure 8-2 Issue Card in Batch 2. Click Settings.
- Page 66 Video Intercom Face Recognition Door Station User Manual Figure 8-3 Card Settings 3. Select Card Type and Card No. Type. 4. Click OK to save the settings. Result After issuing the card to the person, the person and card information will display in the Person(s) with Card Issued list.
-
Page 67: Permission Settings
Video Intercom Face Recognition Door Station User Manual 8.6.7 Permission Settings Add Permissions Steps 1. On the main page, click AccessControlInfo → Access Group to enter the page. 2. Click +Add to pop up the adding dialog box. 3. Configure the parameters. 1) Enter the Name of the permission. -
Page 68: Receive Call From Door Station
Video Intercom Face Recognition Door Station User Manual 8.7.1 Receive Call from Door Station Steps 1. Select the client software in the device page to start calling the iVMS-4200 Client Software and an incoming call dialog will pop up in the client software. 2. -
Page 69: Search Video Intercom Information
Video Intercom Face Recognition Door Station User Manual 5. Click View to select the picture. 6. Click Send. Note Up to 63 characters are allowed in the Subject field. ● Up to 6 pictures in the JPGE format can be added to one notice. And the maximum size of one ●... - Page 70 Video Intercom Face Recognition Door Station User Manual Device Type Click ˅ to unfold the drop-down list and select the device type as Indoor Station, Door Station, Outer Door Station or Analog Indoor Station. Or select All Devices to search logs with all device types.
-
Page 71: Appendix A. Appendix
Video Intercom Face Recognition Door Station User Manual Appendix A. Appendix Tips When Collecting/Comparing Face Picture Keep your expression naturally when collecting or comparing face pictures. ● Do not wear hat, sunglasses, or other accessories that can affect the facial recognition function. ●... - Page 72 UD35069B...
Need help?
Do you have a question about the DS-KD9203 Series and is the answer not in the manual?
Questions and answers