
Related Manuals for Nacra 500 MK2


Summary of Contents for Nacra 500 MK2
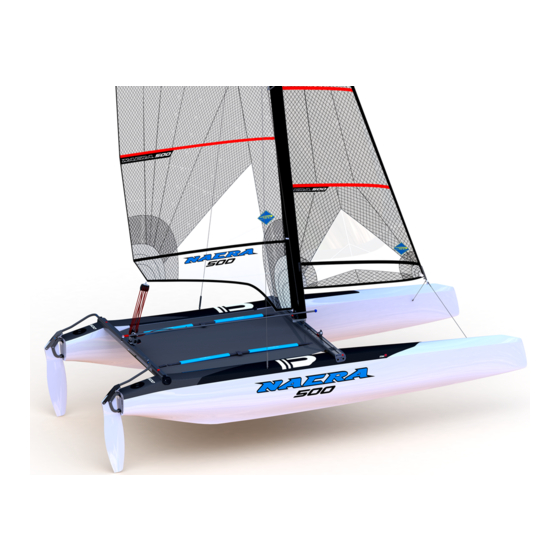
- Page 1 500 MK2 ASSEMBLY MANUAL CAREFULLY READ THIS MANUAL BEFORE OPERATING YOUR NACRA.
-
Page 2: About Nacra Sailing
About Nacra Sailing Since 1975 Nacra has always been about empowering sailors. Getting the best out of yourself and your team with Nacra supplying the equipment. Reaching new heights and pushing your boundaries, that’s Nacra Sailing! Nacra & Performance Sails are based in The Netherlands. -
Page 3: Welcome
Besides manuals, we have an extensive dealer network around the world. Naturally, these Nacra dealers know everything there is to know about your Nacra and can provide you with the best service possible. So please call your dealer in your region for any servicing needs. Make sure that only genuine spares are used for your Nacra to ensure optimal performance. -
Page 4: Icon Reading Guide
Icon reading guide Grease part with watertight lithium-based grease Do not exceed the recommended 30 Nm, over Safety remark tightening the bolts results in damaged threads. Assemble in the shown order Measure... -
Page 5: Glossery
Glossery Rudder - controls direction of boat Crossbar - connects both tiller arms Tiller arm - connects rudder to crossbar Traveller sheet - controls traveller position Main sheet - controls the power of the sail Helmsman - controls steering and main sail Mainsail - main power source of the catamaran Jibsheet... - Page 6 Trim sheet Trimsheet Conditions Mast Jib block Mast Diamond forstay wind strength position on state rake* tension tension beam 3 to knots 5,2° 170kg 100kg inboard to 12 knots 5,2° 190kg 100kg inboard 12 to 18 knots 5,6° 220kg 100kg middle 18 to 25 knots 5,6°...
-
Page 7: Table Of Contents
Adjustable trapeze wires (optional) Parts 500mk2 Sport Cunningham system 14.1. Arrival of parts 14.2. Rigbox 7.1. Cunningham 1:8 14.3. Rigbox assembly kits Spinnaker system 14.4. Line Lengths 14.5. CONNECT WITH YOUR LOCAL NACRA DEALER 8.1. Divisible bowsprit 8.2. Snufferbag 8.3. Spinnaker halyard... -
Page 9: Setup
Setup Setting up the boat after purchase or long time storage... -
Page 10: Basic Platform Assembly
Basic platform assembly... -
Page 12: Beam Assembly Threaded
1.1. Beam assembly threaded Tools needed: - Torque wrench - 5/16 or 8 mm hex socket - Grease Steel Glassfiber Space the hulls aproximately 2.5m parralel from each other. Use the cardboard cradles or cattrax to support the hulls. Take time to align the crossbars ! Place both crossbars. - Page 13 You can use the supplied 8mm allen key to tension the bolts. Do not exceed the recommended 30 Nm, over tightening the bolts results in damaged threads.
-
Page 14: Front Crossbar Pre-Bend
- Wrench 22mm or 7/8 inch - Wrench 19mm or 1/2 inch 15mm Nacra front beams are delivered with pre bend right from the factory. However, this should be checked. • There should always be a pre-bend on the front crossbar. -
Page 15: Trampoline Track On Hull
1.3. Trampoline track on hull Tools needed: - Torque wrench - 5/16 or 8 mm hex socket - Dishwasher soap Rear lace line Slide the front of the trampoline into the track of the front beam. The front top has a pocket opening in the middle. - Page 16 For the last bit of pulling you can use a rope through the rear trampoline rod. Do not use the grommets in the trampoline. As these can rip your trampoline. Tension the trampoline bolts according to the platform assembly chapter. Make a small bowline in the port end of the rope.
-
Page 17: Trampoline Tensioning Rear Lacing
1.4. Trampoline tensioning rear lacing Make sure the trampoline is in the middle of the catamaran. Tools needed: - Long nose plier - Wrench or screwdriver A well tensioned trampoline is paramount to its longevity and your comfort on the boat. A correctly tensioned trampoline is tight enough to stand on without much deflection. -
Page 18: Bridle With Connector
1.5. Bridle with connector 500mk2 only 20mm 1/2 x 1/4 Mount the bridle wires on the bridle connector. Use the clevis pins 1/2 x 1/4. Connect the bridle to the bridle pins. If you are installing a spinnaker kit also do the following steps. -
Page 19: Quick Righting Line 500Mk2
1.6. Quick righting line 500mk2 20mm righting line shockcord Attach the shockcord with a bowline to the starboard Then through the ring attached to the shock cord. aft trampoline lashing under the trampoline. Back to the front cross beam, through the eyelet. Feed the other end of the shockcord through the Make an eight knot in the end of the righting line. -
Page 20: Basic Mast Assembly
Basic mast assembly... -
Page 22: Diamond Wires
2.1. Diamond wires It is preferable to place the mast on supports while Tools needed: building the mast. - Wrench 17mm 1/2 x 1/4 - Long nose plier - Grease - Self-amalgamating tape Take the brass fitting from the rigbox kit diamond adjuster and the diamond wires. -
Page 23: Fixed Spreaders
2.2. Fixed Spreaders Tools needed: - Long nose plier 3/16 x 5/8 -Self-amalgamating tape Assemble the two spreader bars using the clevis pins 3/16 Take the spreader tip cover and a monel-wire piece. Wind x 5/8. the wire around the spreader arm and put the two ends through the cover. - Page 24 Slide the diamond wires into the slots of the spreaders. • Make sure the diamond wire is completely in the slot! Twist the wire ends around each side of the diamond wire. Twist the two ends into each other. First perform Chapter Diamond tension before continuing the next steps.
-
Page 25: Diamond Tension
2.3. Diamond tension Tools needed: - Wrench 17 mm - wire tension gauge Put tension on the diamond wires by tensioning the diamond adjuster bolt with a wrench size 17mm. Use the “loose” tension, or an equivalent gauge to measure the tension on the diamond wires. -
Page 26: Forestay Full Battened Jib
2.4. Forestay full battened jib - 3mm allen key or T20 torx rigging kit standard jib - Self-amalgamating tape If you a hoisting jib instead of a furling jib install your Mount the forestay cleat on the mast. forestay as follows: Assemble the forestay for the jib as shown in the images below: Make sure the stainless steel jib halyard feeds through... -
Page 27: Forestay Furling Jib
2.5. Forestay furling jib rigging kit furling jib Tools needed: - Self-amalgamating tape If you own a furling jib instead of a hoisting jib install your forestay as follows: Make sure the stainless steel jib halyard feeds through the top block. -
Page 28: Fixing The Stays
2.6. Fixing the stays 8mm 5/16 Tools needed: - Long nose plier - Self-amalgamating tape Use the shackle 8mm 5/16, 2 nylon washers, the shrouds Tape the monel wire piece using the self amalgamating and forestay. tape. Install them as shown in the picture. The forestay must be Cut the excess wire and bend it back through the hole located in the middle. -
Page 29: Mainsail Setup
Mainsail setup... -
Page 30: Main Halyard
3.1. Main halyard Main halyard If you have a spinnaker, do chapter spinnaker halyard Make sure the line goes through both eyelets of the first. main halyard swivel hook! thread the main halyard through the middle sheave in the mastbase. Knot a figure 8 knot at the bottom of the mast. Make a figure 8 knot 20 cm below the other end of the main halyard. -
Page 31: Mainsheet 1:8
3.2. Mainsheet 1:8 Main sheet... -
Page 32: Jib Setup
Jib setup... -
Page 33: Bridle With Furler
4.1. Bridle with furler 1/2 x 1/4 Mount the stay adjuster with eye on top of the furler with the eye pointed aft. Mount the wheel to the lowest eye in the stay adjuster. Mount the furler on top of the bridle connector. - Page 34 furling rope FXB cleat Mount the cleat on starboard using the mounting plate. Make sure the cleat is parallel to the front crossbar before tightening the screws. Furl the rope manually by turning the outer part of the furling base. Thread the end of the rope through the furling cleat on the front crossbar.
-
Page 35: Jib Sheet 1 To
4.2. Jib sheet 1 to 2 Jib sheet Take two 32mm blocks and connect them using a shackle. Thread through the port cleat from aft to forward. Knot to the starboard cleat on the front crossbar Through the other 32mm block. Lead through one of the two 32mm blocks. -
Page 36: Rudders
Rudders... -
Page 37: Kick Up Rudder
5.1. Kick up rudder Tools needed: - Wrench 7/16 or 11mm - Flat screwdriver - Grease - Adjustable spannner Put the boat on a high support or a trailer to align the Assemble the upper and lower casting on the rudderblade. rudders high enough to lock down the rudders. - Page 38 Push the casting all the way down and check if the retainer clip is over the casting. Place the tiller crossbar in between the arms. • Check if the connector for the tiller extension is on top. Lower the blades and lock both systems. Take the philips screw out of the tillerarm.
-
Page 39: Kick Up Rudder Sensitivity Adjustment
5.2. Kick up rudder sensitivity adjustment Tools needed: Kick-up systems are not fail-safe systems. Meaning, - Wrench 7/16 or 11mm the system is designed for easy handling. They are not - Adjustable spanner designed to allow for beaching your catamaran without manually pulling your rudders up. -
Page 40: Rudder Alignment
5.3. Rudder alignment Tools needed: Rudder alignment determines the majority of how - Phillips head screwdriver your boat feels on the water. - Measurement tape Alignment does require milimeter precision! Take - 3mm drill the time to do this right or ask your dealer for help. Measure the distance between the leading edges of the rudder blade (see A in the illustration below) and compare this length with the distance between the trailing edges... - Page 41 Make sure the rubber rod length (from tiller crossbar end to tiller arm end) is the same on both sides. Check the alignment measurements from step 1. Adjust if needed. Pre-drill through the holes in the tillerbar of the detached Phillips head screws with the 3mm drill.
-
Page 42: Trapeze Setup
Trapeze setup... -
Page 43: Trapeze Shockcord Through Trampoline
6.1. Trapeze shockcord through trampoline shockcord Knot a bowline in the trapeze shockcord and feed the other end through the trampoline eye shown in A. Pull the shockcord underneath the trampoline to the lashing in the opposite rear corner. Knot the shockcord to the lashing. Repeat steps 1 to 3 for the opposite side of the boat. -
Page 44: Trapeze Wires Steel
6.2. Trapeze wires steel Tools needed: - Long nose plier - Self amalgamating tape 6mm 1/4 Use the shackle 6mm 1/4, 2x nylon washers and the trapeze ropes or wires. Put the shackle through the center hole. Install trapeze wires on each side. •... -
Page 45: Can't Miss Trapeze Wires (Optional)
6.3. Can’t miss trapeze wires (optional) Trapeze line 2x Lace one end of the line through both holes of the stop block. Then over the middle of the block and through the loop just created. Feed the line back through the same loop but don’t pull it through entirely. -
Page 46: Adjustable Trapeze Wires (Optional)
6.4. Adjustable trapeze wires (optional) Tools needed: - 3mm allen key Connect the shackle to the top of the cam cleat. Feed the longer line through the bottom hole of the cam cleat and tie of with a figure 8 knot. Feed the other end of this longer line through the trapeze block and back up through the cam cleat. -
Page 47: Cunningham System
Cunningham system... -
Page 48: Cunningham 1:8
7.1. Cunningham 1:8 16mm main downhaul Install the harken swivel cleats on the mast Thread the cunningham line as shown in the using clevis pins and rings. The clevis pins fit images. tightly. Hang the 16mm double blocks with the hook towards the mast on the diamond wires. -
Page 49: Spinnaker System
Spinnaker system... -
Page 50: Divisible Bowsprit
8.1. Divisible bowsprit bowsprit aft bowsprit fwd 1x Click the two bowsprit halfs into each other. Make sure both halfs connect snugly. -
Page 51: Snufferbag
8.2. Snufferbag Tools needed: - Allen tool size 3 Use the bow sprit, snuffer ring and snufferbag and the allen tool size 3. Install the snufferbag on the spipole using the velcro band. Or fold the bag into the ring for storage. Slide the snufferbag into the slot of the snuffer ring. -
Page 52: Spinnaker Halyard
8.3. Spinnaker halyard Bale line Bale up line Spinnaker halyard Tape the ends of the bale line to slide easily through Feed the spinnaker halyard through the starboard the pre-drilled holes! spreaders. Take the spin bale line and a carbo 29 mm T2 block. Feed one end of the spin bale line through the pre-drilled holes in the mast and tie a figure 8 knot. -
Page 53: Spinnaker Halyard Furler
8.4. 500mk2 furling Spinnaker halyard Furler bale line bale up line spinnaker halyard Feed one end of the spinnaker halyard through the Knot the line to the 29mm halyard block. Use tape to pull starboard spreaders. the line through the hole as shown. Feed the line through the halyard block from the mast outward. - Page 54 The halyard line should look like this overview. Tie the remaining line off at the bottom of the mast. Tape all sharp edges and rings.
-
Page 55: Spinnaker Snuffer System 500Mk2
8.5. Spinnaker snuffer system 500MK2 500mk2 snuffer Tools needed: - 3mm allen key - Flat head screw driver - Phillips head screwdriver Overview blocks... - Page 56 5.1. Spinnaker sheet ratchet block on hull 57mm Mount the strap eyes on the hull. Attach the 57 mm carbo ratchmatic single spinnakerblocks on the strap eyes on the hull. 5.2. Spinnaker sheet blocks 40mm front crossbar trampoline Take out the screws plastic screws from the front crossbar. Mount the eyestraps to the front crossbar using socket head bolts and nylon washers.
- Page 57 5.3. Spinnaker sheet rings trampoline Tie a 15mm ring to one end of the shockcord. 15mm Feed the shockcord from above through the eyelet located on the side of the trampoline. Pull the shockcord to the other side and feed it through shockcord the eyelet from below.
- Page 58 5.5. Spinnaker halyard forward ring trampoline 15mm Loop a rope through the two grommets positioned in the front of the trampoline. Then feed it through a ring on top. Repeat steps 1 and 2, two or three times. Tie the ends of the rope together. 5.6.
- Page 59 5.7. Spinnaker external tack one line system Knot the tack line to the eyestrap on the underside of the bowsprit. lead the line through the double block. And back through the block on the forward end of the bowsprit. shockcord Tie the line temporarily to the bowsprit.
-
Page 60: Spinnaker System Furling
8.6. Spinnaker system furling Tools needed: - Flat head screwdriver - Phillips head screwdriver - Allen key 3mm Continuous line furler(32464) - T20 torx 6.1. Overview... - Page 61 6.2. Spinnaker sheet ratchet block on hull Mount the strap eyes on the hull. 57mm Attach the 57 mm carbo ratchmatic single spinnakerblocks on the strap eyes on the hull. 6.3. Spinnaker sheet blocks 40mm front crossbar trampoline Take out the screws plastic screws from the front crossbar. Mount the eyestraps to the front crossbar using socket head bolts and nylon washers.
- Page 62 6.4. Spinnaker halyard cleat on mast Install the spinnaker cleat base on the mast. With the long end pointing upwards. Install the 40mm carbo pivoting lead block. The sheave should be on the top side. The cleat is facing upwards. If the cleat is not facing down.
- Page 63 6.6. Spinnaker furler 15mm Parts: furler bottom with furling rope and rings, cleat with mounting plate, shockcord furler cord shockcord Lay the continous furlingline out as shown in the overview. make sure that the furler is facing upwards. Take the fairlead of the cleat using a T20 torx bit. Lay the inboard furling rope in the cleat and remount the fairlead.
-
Page 64: Rigging
Rigging Rigging the boat to get ready for sailing... -
Page 66: Setting The Mast
Setting the mast... -
Page 67: Preparation
9.1. Preparation Place the mast with care on the trampoline with the masttrack down, support the back of the mast to prevent it from scratching! Check if the rigging and the shackles are connected on the mast as shown in Fixing the stays. Check if the shrouds and trapeze lines are in the right order before raising the mast! -
Page 68: Preparation Shroud Adjuster
9.2. Preparation shroud adjuster Attach the shroud adjuster to the shroud eye and the corresponding stay. For both sides of the catamaran. Make sure the shroud adjuster is at its maximum length! Slide the cap over the shroud adjuster Check if the shrouds and trapeze lines are in the right order before raising the mast! -
Page 69: Preparation Trapeze Non-Adjustable
9.3. Preparation trapeze non-adjustable Pull the loop of the trapeze cord over its own line, creating a new loop. pull the newly created loop over the knot in the bitter end of the trapeze rope. Tighten the loop Check if the shrouds and trapeze lines are in the right order before raising the mast! -
Page 70: Preparation Trapeze Adjustable
9.4. Preparation trapeze adjustable Tools needed: - Allen key size 3 Install the adjustable trapeze with the shackle to the trapeze line. Use the 3mm Allen key. Check the adjustable trapeze chapter to assemble the trapeze system. Knot the adjustable trapeze line to the trapeze shockcords. -
Page 71: Raising The Mast
9.5. Raising the mast Tools needed: - Self-amalgamating tape Before raising the mast the boat should be steady on level ground. If the surface is not level, point both 5.1. Checklist bows downhill. If the boat is on a trailer be sure it is tied down and the trailer tongue is secure to the hitch! Mast placed on trampoline with the spreaders... - Page 72 - Person 1 Holds the mast up with one spreader arm facing downwards, so the mastfoot doesn’t hit the crossbar. - Person 2 Places the mastbase on the mastball. STEP 1 Mount the mast pin and splitrings in the mastfoot. - Person 1 Walks forward lifting the mast and hand over the mast to 2.
- Page 73 - Person 1 Grabs the trapeze lines located at the front crossbar. - Person 1 Pulls the mast by hanging easily on the trapeze lines. - Person 2 Pushes the mast upwards, still making sure the mastfoot doesn’t hit the crossbar. STEP 5 - Person 1 Holds the mast forward pulling on the trapeze lines.
-
Page 74: Adjusting The Stays
9.6. Adjusting the stays Tools needed: - Cable tension gauge - Trimsheet Take the load of the stay using the trapeze. Connect or adjust the stay to the correct high hole or setting. Information on the correct setting can be found in the trimsheet for this boat Check the tension on a stay without plastic sleave using a cable tension gauge, adjust if needed. -
Page 75: Mainsail Rigging
Mainsail rigging... -
Page 76: Batten Tensioner
10.1. Batten tensioner Tools needed: - hex key 4mm Parts: Batten tensioner set Assemble the batten tensioner Insert in the sail and place the loop over the hooks and bridge. Place the batten tensioner over the batten. Tighten the batten just until a little tension is on the batten. -
Page 77: Top Batten
10.2. Top batten Tools needed: - hex no. 5 Insert the top batten into the sail with the thin part of the batten first. Review the chapter on batten tensioning to tension the batten correctly. The top batten can be taken out after sailing to make rolling the sail easier. -
Page 78: Traveler System Without Splittail
10.3. Traveler system without splittail Make a knot in the mainsheet. Feed the end through the traveler cleat and eye. Move the traveler car to the side, a few centimeters away from the red traveler stop, and replace the knot from step 1 towards the cleat on the traveler, making sure the car is not able to hit the (security) end stop. -
Page 79: Raising The Mainsail
10.4. Raising the mainsail Roll the mainsail from bottom to top. Hoist the mainsail with the mainhalyard. Hoist the mainsail until you reach the masthook. Gently pull down to hook the mainhalyard ring into the masthook. Attach the mainhalyard ring to the sail. The knot must be on the mast side. -
Page 80: Jib Rigging
Jib rigging... -
Page 81: Hoisting The Furling Jib 500Mk2
11.1. Hoisting the furling jib 500MK2 Connect the top of the jib to the shackle connected Hoist the jib fully. to the stainles steel halyard. Thread the 4mm line through the wheel on the Detach the 3mm line from the shackle and hoist stay adjuster, back through the eye on the hoist the jib little by little. -
Page 82: Hoisting The Fully Battened Jib 500Mk2
11.2. Hoisting the fully battened jib 500MK2 Connect the top of the jib to the shackle connected Hoist the jib fully . to the stainles steel halyard. Thread the 4mm line through the mast mounted Detach the 3mm line from the shackle and hoist camcleat’s block. -
Page 83: Furling The Furling Jib
11.3. Furling the furling jib If the furling rope is correctly coiled in the furling base, you can simply pull the furling rope to furl the jib. Make sure there is a little pressure in the jib to ensure propper furling. -
Page 84: Jib Cunningham Non Adjustable
11.4. Jib cunningham non adjustable Connect the tack of the jib to the bottom hole in the stay adjuster using a shackle. -
Page 85: Jib Sheet 1 To 2 Hook In
11.5. Jib sheet 1 to 2 hook in Attach the shackle of the 1 to 2 jib sheet to the eye on the clew of the jib. Make sure the sheet does not cross over itself to prevent chafing. -
Page 86: Cunningham 1 To 8 Non Continous With Shockcord
11.6. Cunningham 1 to 8 non continous with shockcord Take the mouseline on the front beam and pull until you find the attached shock cord. Tie one end of the cunningham line to the shock cord. Repeat for the opposing side of the boat. Untie the mouseline from both sides. -
Page 87: Cunningham 1 To 8
11.7. Cunningham 1 to 8 Hook the two hooks from the cunningham system into the mainsail tack eye or lashing. Make sure the hook is pointing aft to prevent scratching. -
Page 88: Spinnaker Rigging
Spinnaker rigging... -
Page 89: Bowsprit Divisible Snuffer
12.1. Bowsprit divisible snuffer snuffer ring tension Slide the bowsprit over the bowsprit pin on the front Knot the snufferline with a bowline around the pole and crossbar. insert it in the slot of the ring. The line goes in the slot on the front of the snuffer ring! Install the bowsprit to the bridle connector The other end must be tied on the ring at the bridle. -
Page 90: Bowsprit Divisible Furler
12.2. Bowsprit divisible furler Slide the bowsprit over the bowsprit pin on the front Attach the spinnaker furler base to the eyestrap on the crossbar. front of the bowsprit. Make sure the furling line is on top of the bridle wires. Install the bowsprit to the bridle connector Push the bowsprit gently down in order to install the bowsprit bridle line on the bridle pin. -
Page 91: Spinnaker Snuffer System 500Mk2
12.3. Spinnaker snuffer system 500MK2 spin halyard spin tack spin sheet... - Page 92 Spinnaker halyard Feed the spinnaker halyard(blue in the overview) coming from the mast block from aft to forward through the aft port block on the bowsprit. Feed the forward end through the double block. Feed it back up through the starboard aft block on the bowsprit.
- Page 93 Spinnaker tack Attach one end of the tack to the eyestrap on the bowsprit using a bowline. Thread the loose end through the double block and back to the forward block on the bowsprit. Attach this end to the tack of the spinnaker. Spinnaker sheet Knot the middle of the spinnaker sheet to the spinnaker clew using a cow’s hitch.
-
Page 94: Spinnaker Furling System Rigging
12.4. Spinnaker furling system rigging spin halyard spin tack spin sheet... - Page 95 Spinnaker halyard Attach the top of the spinnaker sheet to the furler top. Spinnaker tack Attach the spinnaker tack to the furler base on the spinnaker pole. Spinnaker sheet Knot the middle of the spinnaker sheet to the clew of the spinnaker using a cow hitch Make sure the sheet goes in front of the forestay and the spinnaker is not twisted.
- Page 96 Thread one end of the spinnaker sheet through one of the outboard spinnaker blocks. Then through both the return blocks fixated on the front crossbar. Feed the same end through the other outboard block. Hoist the spinnaker using the spinnaker halyard. Put the remainder of the halyard away in the trampoline bag.
-
Page 97: After Sails
After Sails Storage, Maintainance and Repairs. -
Page 98: Lowering The Mainsail
12.5. Lowering the mainsail Un-tread the tack and cunningham from the sail and remove the DS battens. Pull on the mainhalyard to raise the mainsail. Twist the mast 60 degrees while still having tension on the mainhalyard. Lift Twist Pull the mainsail down. Pull Gently lower the mainsail starting at the foot of the sail. -
Page 99: Lowering The Jib
12.6. Lowering the jib jib halyard mouse line If you have a furling jib, unfurl the jib. Take the 4mm halyard line out of the cleat and block. Detach the sheet from the jib. Attach the 3mm hoisting line to the 4mm line. To lower the jib, uncleat the jib halyard from the cleat and Take the shackle off the tack of the jib. - Page 100 Lower the sail while taking the hanks of the sail. If possible, roll the sail while lowering to avoid creases. When the sail is down, detatch the shackle from the top. Tie the top shackle to the loose end of the 3mm line and tie away the line away from the mast.
-
Page 101: Lowering The Furling Spinnaker
12.7. Lowering the furling spinnaker Unfurl the spinnaker, don’t put tension on the sheets. Uncleat the spinnaker halyard and drop the spinnaker. A second person can put the spinnaker into the spinnaker bag starting from the middle of the foot of the sail. -
Page 102: Lowering The Mast
12.8. Lowering the mast CAUTION: Check for overhead wires and be sure the area behind the boat is clear of people! A mast that comes in contact with electrical power lines can cause serious injury or death! - Person 1 Hangs backward lowering the mast. - Person 2 Lowers the mast with one spreaderarm facing Detach the bowsprit if installed. -
Page 103: Notes
NOTES 103. -
Page 104: Maintenance
These areas could cause serious mast failure and sail damage. • Avoid storing your Nacra for long periods of time with the rigging tensioned to race settings ( very tight.) • Periodically check for and replace frayed, worn, or kinked wires, shock cord, and lines. -
Page 105: Repair
Rudder system lower (1 hull) 31868 Rudder blade Nacra 460/500/570/580 (2014 and up) 30759 Trampoline Nacra 500 MKII 31859 Trampoline tie rod 8mm 186cm Nacra 500 Mk II 40014 Rigbox Nacra 500 MkII 30176 Mast Nacra 500 MKII (excl blocks) 106. - Page 106 40211 Rigbox kit crossbars Nacra 500 Mk II 40198 Rigbox kit misc Nacra 500 MKII 40199 Rigbox Kit spreader attachment Nacra 500 Mk II 40126 Rigbox kit diamond adjuster Nacra 15/F16 MKII/Nacra 17 32207-2 Shroud Nacra 15/500 Mk II 32208...
-
Page 107: Rigbox Assembly Kits
Bolt crossbar front UNC 3/8 x 4.1/2 SOCKET 31117 Washer crossbar ss 31113 Washer fiberglass 31457 Allen tool size 5/16 31697 Nacra grease Rigbox kit spreader attachment - 40198 Article number Description Quantity 31624 Clevis pin 3/16 x 5/8 WL 30524... - Page 108 Rigbox kit diamond adjuster - 40126 Article number Description Quantity 31701 Brass fitting diamond adjuster SMALL 30187 Bolt diamond adjuster 31117 Washer crossbar ss 31113 Washer fiberglass 30356 Pin mast step Cunningham system 1:8 - 31180 Article number Description Quantity 30649 Double block 16mm Harken 30705...
- Page 109 Minimal: 4 cm Rigbox kit adjustable trapeze - 40127 Article number Description Quantity 31707 Shackle D 5mm hex 30923 Clam cleat cl253 adjustable trapeze 30692 Trapeze block (black) 30681 Trapeze ring race 30938 Trapeze stop 110.
- Page 110 Clevis pin 1/4 x 1/2 WL 30553 Split ring ss 31458 D-shackle 5mm 30312 Ring with shackle main halyard 30640 Single fixed block assymetric carbo 29mm Harken 30841 Shackle Jib Clew ss 30837 Snapshackle 31698 Bridle connector for Nacra 15/F16/17/F20c 30702 Ring 3x20mm ss 111.
-
Page 111: Line Lengths
Red/black Righting line black Trapeze line blue Trapeze shock cord black Righting line shock cord black 30927 Linepackage spi snuffer Nacra 500 Mk II Size Colour Units Mt per Boat Spinnaker sheet White / black 14,5 Halyard shock cord black... - Page 112 CONNECT WITH YOUR 14.5. LOCAL NACRA DEALER Your local Nacra dealer is there to empower you - our customer. Please take advantage of the many services that authorized Nacra dealers can provide: • New Nacra fully assembled • Nacra parts and accessories •...
Need help?
Do you have a question about the 500 MK2 and is the answer not in the manual?
Questions and answers