Table of Contents
Advertisement
Quick Links
SERVICE
A3 Color Copier
Refer to the service manual in the GSPN (see the rear cover) for more information.
A3 Color Copier
MultiXpress X4 series
SL-X4300LX / SL-X4250LX /
SL-X4220RX
(Ver 1.47)
MANUAL
1. Precautions
2. Product Specifications and Description
3. Disassembly and Reassembly
4. Troubleshooting
5. Connection Diagram
6. Reference Information
Contents
Advertisement
Table of Contents
Troubleshooting

Related Manuals for Samsung MultiXpress X4 Series


Summary of Contents for Samsung MultiXpress X4 Series
- Page 1 A3 Color Copier MultiXpress X4 series SL-X4300LX / SL-X4250LX / SL-X4220RX (Ver 1.47) SERVICE MANUAL A3 Color Copier Contents 1. Precautions 2. Product Specifications and Description 3. Disassembly and Reassembly 4. Troubleshooting 5. Connection Diagram 6. Reference Information Refer to the service manual in the GSPN (see the rear cover) for more information.
-
Page 2: Table Of Contents
Imaging Unit ....................2 − 35 2.5.2.2. Drum drive ....................2 − 36 2.5.2.3. Developer Unit ..................... 2 − 37 2.5.3. ITB (Intermediate Transfer Belt) Unit................2 − 39 2.5.3.1. ITB Unit overview ..................2 − 39 Copyright© 1995-2017 SAMSUNG. All rights reserved. - Page 3 2.11.3. RADF Drive System ....................2 − 79 2.11.3.1. RADF Original Pick-Up Assembly ..............2 − 80 2.11.3.2. RADF Registration (Regi) Drive Assembly ............2 − 81 2.11.3.3. RADF Feed Drive Assembly ................2 − 82 Copyright© 1995-2017 SAMSUNG. All rights reserved.
- Page 4 Developer Unit ..................... 3 − 10 3.2.2.3. ITB Cleaner ....................3 − 12 3.2.2.4. ITB Unit...................... 3 − 12 3.2.2.5. Fuser unit ....................3 − 14 3.2.2.6. Transfer roller....................3 − 14 3.2.2.7. Pick-Up_Reverse_Forward roller ..............3 − 16 Copyright© 1995-2017 SAMSUNG. All rights reserved.
- Page 5 3.3.27. DSDF Unit......................... 3 − 47 3.3.27.1. DSDF board ....................3 − 49 3.3.27.2. DSDF main motor ..................3 − 50 3.3.27.3. DSDF paper length sensor................3 − 51 3.3.28. RADF Unit ........................ 3 − 53 Copyright© 1995-2017 SAMSUNG. All rights reserved.
- Page 6 3.3.35.19. Paper Support Motor..................3 − 102 3.3.35.20. Paper Support Home Sensor ................3 − 103 3.3.35.21. Ejector Motor Assy..................3 − 105 3.3.35.22. Main Paddle Motor..................3 − 108 3.3.35.23. Main Paddle Home Sensor ................3 − 109 Copyright© 1995-2017 SAMSUNG. All rights reserved.
- Page 7 4.5.4.2. Jam Count ....................4 − 29 4.5.4.3. Part Replacement Count ................. 4 − 30 4.5.5. Diagnostics ........................ 4 − 31 4.5.5.1. Engine Diagnostics..................4 − 31 4.5.5.2. Fax Diagnostics .................... 4 − 37 Copyright© 1995-2017 SAMSUNG. All rights reserved.
- Page 8 4.6.10. C7–xxxx (Waste toner container error) ................4 − 127 4.6.11. C8–xxxx (Developer error)..................4 − 128 4.6.12. C9–xxxx (Transfer roller error) ..................4 − 133 4.6.13. H1–xxxx (Optional tray error)..................4 − 135 4.6.14. H2–xxxx (Inner Finisher error) ..................4 − 148 Copyright© 1995-2017 SAMSUNG. All rights reserved.
- Page 9 Adjusting the Scan Top Skew ..................4 − 309 4.10. SPDS (Smart Printer Diagnostic System) Application ..............4 − 311 4.10.1. SPDS App Installation and Login ................. 4 − 312 4.10.1.1. SPDS App Installation ................. 4 − 312 Copyright© 1995-2017 SAMSUNG. All rights reserved. viii...
- Page 10 5.10. Connection Diagram (FAX_DUAL NW_FDI)................5 − 11 Reference Information..........................6 − 1 6.1. Tools for Troubleshooting......................6 − 1 6.2. Glossary...........................6 − 3 6.3. Model Name and Code .......................6 − 9 6.4. Document Revision List......................6 − 10 Copyright© 1995-2017 SAMSUNG. All rights reserved.
-
Page 11: Precautions
High voltages and lasers inside this product are dangerous. This product should only be serviced by a factory trained service technician. 2) Use only Samsung replacement parts. There are no user serviceable parts inside the product. Do not make any unauthorized changes or additions to the product as these could cause the product to malfunctions and create an electric shocks or fire hazards. -
Page 12: Caution For Safety
Exposed cables could cause an electric shock. Replace the damaged power cable immediately, do not reuse or repair the damaged cable. Some chemicals can attack the coating on the power cable, weakening the cover or exposing cables causing fire and shock risks. Copyright© 1995-2017 SAMSUNG. All rights reserved. - Page 13 Take care not to cut or damage the power cable or plugs when moving the machine. 9) Use caution during thunder or lightning storms. Samsung recommends that this machine be disconnected from the power source when such weather conditions are expected. Do not touch the machine or the power cord if it is still connected to the wall socket in these weather conditions.
-
Page 14: Handling Precautions
1.2.4. Assembly and Disassembly precautions 1) Replace parts carefully and always use Samsung parts. Take care to note the exact location of parts and also cable routing before dismantling any part of the machine. Ensure all parts and cables are replaced correctly. Please carry out the following procedures before dismantling the product or replacing any parts. -
Page 15: Disregarding This Warning May Cause Bodily Injury
5) Do not install the printer on a sloping or unstable surface. After installation, double check that the printer is stable. Copyright© 1995-2017 SAMSUNG. All rights reserved. -
Page 16: Esd Precautions
9) Minimize bodily motions when handling unpackaged replacement ESDs. Normal motions, such as the brushing together of clothing fabric and lifting one’s foot from a carpeted floor, can generate static electricity sufficient to damage an ESD. Copyright© 1995-2017 SAMSUNG. All rights reserved. -
Page 17: Product Specifications And Description
Memory • 4GB (2GB for Android OS) Document Feeder • DSDF (Dual Scan Document Feeder) : X4300LX, X4250LX • RADF (Reverse Automatic Document Feeder) : X4220RX • • 10.1 inch Touch Color LCD • Copyright© 1995-2017 SAMSUNG. All rights reserved. -
Page 18: Specifications
Less than 0 W X4300LX : Less than 2.034 Wh • X4250LX : Less than 1.580 Wh • X4220RX : Less than 1.438 Wh • Default Sleep Delay Time 2 min Max. Sleep Delay Time 60 min Copyright© 1995-2017 SAMSUNG. All rights reserved. - Page 19 • X4250LX : 6,000 pages Recommended Monthly Print Volume • X4220RX : 5,000 pages • • X4300LX : 120,000 pages Max Monthly Duty Cycle • X4250LX : 110,000 pages X4220RX : 100,000 pages • Copyright© 1995-2017 SAMSUNG. All rights reserved.
-
Page 20: Print Specifications
64 bit) / Windows 7 (32 / 64 bit) / 2008 Server R2 (64 bit) / Windows 8 (32 / 64 Client OS Support Windows bit) / Windows 8.1 (32 / 64 bit) / Windows Server 2012 (64 bit) / Windows Server 2012 R2 (64 bit) Copyright© 1995-2017 SAMSUNG. All rights reserved. - Page 21 Except page / Barcode / Eco / Poster / Glossy / Watermark / Tray Priority setting / Print Features Auto tray setting / Tray Protection / USB print / Secure PDF print / Google Cloud print Copyright© 1995-2017 SAMSUNG. All rights reserved.
-
Page 22: Scan Specification
Up to 4,800 x 4,800 dpi Scan Destinations Email / FTP / SMB / HDD / USB / WSD / PC Multi Destinations Communication Protocol SMTP(IPv4, IPv6, SSL/TLS) / FTP(IPv4, IPv6) / SMB(IPv4, IPv6) / WSD / T4Net Copyright© 1995-2017 SAMSUNG. All rights reserved. - Page 23 2. Product Specifications and Description Item Specification Max. 297 x 437 mm (11.7" x 17.2") Scan Size Platen Max. 297 x 437 mm (11.7" x 17.2") Scan Original Types Text / Text & Photo / Photo Copyright© 1995-2017 SAMSUNG. All rights reserved.
-
Page 24: Copy Specification
ID Copy / N-up / Booklet / Image Repeat / Auto Fit / Book Copy / Poster Copy / Watermark / Image Overlay / Stamp / Covers / Job Build / Preview / Erase Edge / Image Shift / Image Adjustment / Background Adjustment Copyright© 1995-2017 SAMSUNG. All rights reserved. -
Page 25: Fax Specification
Yes (Selectable in Tech Mode) Pause Auto Redial Last Number Fax Features Redial Distinctive Ring Caller ID External Phone Yes(First Line) Interface Fax Forward to E-Mail Fax to PC Broadcasting Delayed Fax Color Fax Copyright© 1995-2017 SAMSUNG. All rights reserved. - Page 26 2. Product Specifications and Description Item Specification Tx/Rx Journal Confirmation 2 Types Available (With Image TCR / Without Image TCR) Report & List Print Auto Dial List System Data List 2-10 Copyright© 1995-2017 SAMSUNG. All rights reserved.
-
Page 27: Paper Handling Specification
/ Letterhead / Thick / Cotton / Colored / Archive / Thin Glossy/Heavy weight/ Envelope/ Label Multipurpose Tray 16~47lb (60 to 176 g/m²): Simplex, Duplex Envelope(75~90 g/m²) Media weight Label(120~150 g/m²): Simplex • Paper Empty Detect: Yes Sensing • Paper Size Detect: Yes Copyright© 1995-2017 SAMSUNG. All rights reserved. 2-11... -
Page 28: Software And Solution Specification
Easy Color Windows / Mac Manager Easy Document Windows Creator Net PC Fax Windows / Mac Application Direct Printing Windows Utility Easy Deployment Windows Manager Easy Eco Driver Windows Universal Printer Windows Driver 2-12 Copyright© 1995-2017 SAMSUNG. All rights reserved. - Page 29 Yes (IPv4 Filtering / IPv6 Filtering / MAC Filtering) Filtering HDD Overwrite (Standard) HDD Overwrite (Max. Overwrites) Security Secure Print Encrypted Secure Print Encrypted PDF Mode (Encrypted Scanning) IP Sec Smart Card Authentication Copyright© 1995-2017 SAMSUNG. All rights reserved. 2-13...
-
Page 30: Supplies
@ A4/Letter LEF , 2 pages/job , Color Waste Toner Container CLT-W808 Approx 33,700 pages Ratio(C30% : M70%) , Simplex Mode , 5% Coverage NOTE • Depending on the print pattern and job mode used, the consumable’s lifespan may differ. 2-14 Copyright© 1995-2017 SAMSUNG. All rights reserved. -
Page 31: Maintenance Parts
PM Kit Model Code Components Fuser Unit x 1 • SL-PMK501X Universal Tray (Pick up) Roller x 3 • • ITB x 1 SL-PMK502X • ITB Cleaner x 1 Transfer roller x 1 • Copyright© 1995-2017 SAMSUNG. All rights reserved. 2-15... - Page 32 This model includes SL-DPX501. SL-FIN701B NOTE To install this finisher, SL-DPX501 is required. 2,250-sheet Booklet Finisher SL-FIN702B NOTE This model is for only US. This model includes SL-DPX501. Second Exit Unit SL-DPX501 Job Separator SL-JSP500S 2-16 Copyright© 1995-2017 SAMSUNG. All rights reserved.
- Page 33 This model is for SL-FIN70xH & SL-FIN70xB. SL-HPU701S NOTE Swedish 4 hole (For Sweden) This model is for SL-FIN70xH & SL-FIN70xB. Working Table (Large) SL-WKT101 Working Table CLX-WKT101 Wireless/NFC Kit SL-NWE001X BLE/NFC Kit SL-NWE002X Copyright© 1995-2017 SAMSUNG. All rights reserved. 2-17...
- Page 34 H/W Install Detect: Yes • Paper Empty & Low Level Detect: Yes Sensing Paper Type Detect: No • Paper Size Detect: Yes • Dimension 566 x 610 x 265 mm (22.3" x 24" x 10") 2-18 Copyright© 1995-2017 SAMSUNG. All rights reserved.
- Page 35 440 x 105 x 75mm (17.3x4.1x3.0 inch) (WxDxH) Weight 1.2kg (2.65lb.) Model Name SL-HPU501F Type 2/4 hole punch Punch Kit (2/4 Paper weight 256gsm (68.3lb.) hole) Dimension 440 x 105 x 75mm (17.3x4.1x3.0 inch) (WxDxH) Weight 1.2kg (2.65lb.) Copyright© 1995-2017 SAMSUNG. All rights reserved. 2-19...
- Page 36 EAP-TTLS, EAP-TLS BLE/NFC Kit Wi-Fi WPS(Wi-Fi Protected Setup™) compatible Wi-Fi Direct™ compatible NFC Pro (Active type) Bluetooth 4.0 Low Energy (Bluetooth Smart) (Bluetooth Low *Compatible with both Android and iOS based device Energy) 2-20 Copyright© 1995-2017 SAMSUNG. All rights reserved.
-
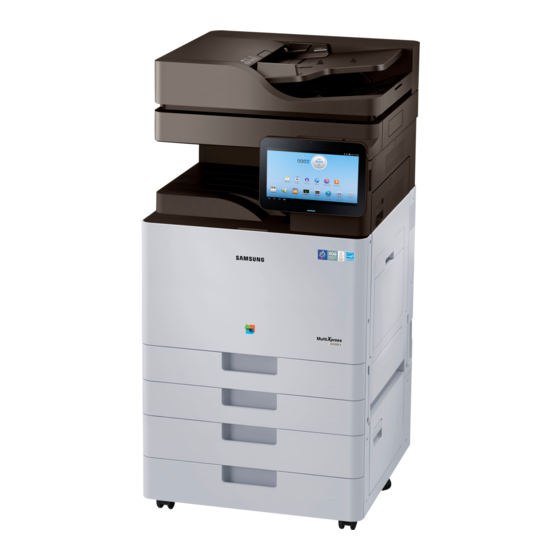
Page 37: Machine External View
DSDF (X4300/X4250) / RADF (X4220) input tray DSDF (X4300/X4250) / RADF (X4220) output tray Control panel Multi-purpose tray Power-switch Power receptacle Standard tray (tray 1) Standard tray (tray 2) Front door Paper output tray Copyright© 1995-2017 SAMSUNG. All rights reserved. 2-21... - Page 38 2. Product Specifications and Description 2) Front view 2 Scanner glass White sheet Multi-purpose tray paper width guide Multi-purpose tray USB port 2-22 Copyright© 1995-2017 SAMSUNG. All rights reserved.
- Page 39 2. Product Specifications and Description Rear view Output support tray Control board cover USB port USB printer port Network port FDI (Optional) cover Fax1 (Optional) port cover Fax2 (Optional) port cover Copyright© 1995-2017 SAMSUNG. All rights reserved. 2-23...
- Page 40 2. Product Specifications and Description Inner view LSU window cleaning stick Waste toner container Toner Cartridges Imaging units 2-24 Copyright© 1995-2017 SAMSUNG. All rights reserved.
-
Page 41: Feeding System
The feeding system picks up a paper from the cassette or MP tray and transports it to the machine inside. It mainly consists of the pick up unit, registration unit, transfer roller Assy, Exit unit. Copyright© 1995-2017 SAMSUNG. All rights reserved. 2-25... -
Page 42: Main Components And Functions
Tray 4 pick up / reverse / forward rollers (Option) Roller Invert MP Tray pick up / reverse / forward rollers Roller Duplex1 Tray 1 feed roller Roller Duplex2 Tray 2 feed roller 2-26 Copyright© 1995-2017 SAMSUNG. All rights reserved. - Page 43 This roller transports the paper sent from the forward/reverse roller to the registration roller. • Registration roller This roller aligns the leading edge of the paper and transports the paper to the transfer roller Assy. Copyright© 1995-2017 SAMSUNG. All rights reserved. 2-27...
- Page 44 Tray2 paper empty detection sensor Detects tray2 paper empty Tray2 upper limit detection sensor Detects tray2 upper limit Tray2 paper feed jam detection sensor Detects Feed2 jam Tray3 paper size detection sensor (Option) Detects tray3 paper size 2-28 Copyright© 1995-2017 SAMSUNG. All rights reserved.
- Page 45 Drives the knock up plate Tray3 Pickup & Lift Motor Drives the pickup roller Drives the knock up plate Tray4 Pickup & Lift Motor Drives the pickup roller Drives the knock up plate Copyright© 1995-2017 SAMSUNG. All rights reserved. 2-29...
-
Page 46: Cassette (Tray 1,2,3,4)
Plain paper : A5, A4, A3, B5, B4, Letter, 11"×17"(Ledger), Statement, Legal 4) Weight : plain paper 60 ~ 216 g/m² 5) Plate knock up lift type : Lift Motor + Up Limit Sensor 2-30 Copyright© 1995-2017 SAMSUNG. All rights reserved. -
Page 47: Pick-Up Unit
NOTE The Pick-Up Unit1 and Pick-Up Unit2 can’t be swapped over. Pick–Up Unit1 Pick–Up Unit2 Copyright© 1995-2017 SAMSUNG. All rights reserved. 2-31... -
Page 48: Registration Unit
The registration(Regi.) roller is driven by the Regi./MP motor. The Regi. clutch is located between the Regi. clutch and Regi./MP motor, and it controls ON/OFF of the registration roller in order to match paper and an image on the drum at the predetermined registration point. 2-32 Copyright© 1995-2017 SAMSUNG. All rights reserved. -
Page 49: Mpf(Multi-Purpose Feeder) Unit
MP tray. This machine uses an FRR (Feed and Reverse Roller) system for feeding paper. The friction between the reverse roller[D] and forward roller[E] separates the top sheet of paper from the stack. Copyright© 1995-2017 SAMSUNG. All rights reserved. 2-33... -
Page 50: Image Creation
7) Cleaning and quenching for transfer belt : The cleaning brush and blade clean the belt surface. The grounding roller inside the transfer belt unit removes the remaining charge on the belt. 2-34 Copyright© 1995-2017 SAMSUNG. All rights reserved. -
Page 51: Imaging Unit
Drum units are exchangeable. The diameter of the drum is 30 mm (circumference: about 94.2 mm). The developing gap between a drum and the corresponding magnetic roller cannot be adjusted. The CRUM is the sub part of the Drum unit. It stores the count information and several data. Copyright© 1995-2017 SAMSUNG. All rights reserved. 2-35... -
Page 52: Drum Drive
The BLDC motor maintains the constant speed. So, the speed sync for each color depends on the BLDC motor without the additional device. Phase sync for each OPC runout prints the pattern on the ITB and is adjusted by the data automatically. 2-36 Copyright© 1995-2017 SAMSUNG. All rights reserved. -
Page 53: Developer Unit
The developer in each unit is supplied to the magnetic(development) roller[A] by the two mixing augers[B]. The diameter of the magnetic roller is 16 mm. Each Developer unit has a TC(Toner Concetration) sensor[C]. They are used for controlling the operating range of toner density. ■ Developer Circulation Copyright© 1995-2017 SAMSUNG. All rights reserved. 2-37... - Page 54 During development job If the developer unit is stored at temperature above 50°C (122°F), it does not works normally. The toner in developer unit is easy to harden at temperature above 50°C (122°F). 2-38 Copyright© 1995-2017 SAMSUNG. All rights reserved.
-
Page 55: Itb (Intermediate Transfer Belt) Unit
One photo sensor controls the position of the first transfer roller. ITB (Intermediate Transfer Belt) 1st Transfer Roller ITB Drive Roller Tension Roller Photo sensor Cleaning Blade ACR sensor 2nd Transfer Roller Toner Collection Auger Drum Unit Copyright© 1995-2017 SAMSUNG. All rights reserved. 2-39... -
Page 56: Transfer Belt Drive
2. Product Specifications and Description 2.5.3.2. Transfer belt drive The ITB drive motor[A] drives the transfer belt[B] by using gears and the ITB drive roller[C]. 2-40 Copyright© 1995-2017 SAMSUNG. All rights reserved. -
Page 57: Transfer Belt Cleaning
The film[D] on the ITB cleaner protects against toner contamination. The driving power by driver roller is transferred to the tension roller[E] and the toner collection auger gear[F] drives the gear[G], and collects the toner. Copyright© 1995-2017 SAMSUNG. All rights reserved. 2-41... -
Page 58: Fuser Unit
4) NC Sensor NC sensors (non-contact type thermistors), located near the center and the end of the fusing belt, control the temperature of the fusing belt. 2-42 Copyright© 1995-2017 SAMSUNG. All rights reserved. -
Page 59: Fuser Unit Drive
When the thermostat is triggered, it must be replaced (as well as the other damaged parts in the fuser unit). 2.6.2. Fuser Unit drive The fuser motor[A] drives the pressure roller[B] through the gear train. The fusing belt[C] pressurized by the pressure roller[B] is rotated by driving it. Copyright© 1995-2017 SAMSUNG. All rights reserved. 2-43... -
Page 60: Fuser Unit Temperature Control
If one of the thermostat temperatures becomes higher than 195°C, it opens and cuts power to the fusing lamp. If the other thermostat temperature becomes higher than 195°C, it also opens and cuts power to the fusing lamp. 2-44 Copyright© 1995-2017 SAMSUNG. All rights reserved. -
Page 61: Loop Control
When paper passes between OPC Nip and Fuser Nip, the fuser unit controls paper loop level. ■ Loop Control The fuser unit detects the signal for photo sensor 1,2 and decides paper loop level. And it controls motor speed as paper loop level. Copyright© 1995-2017 SAMSUNG. All rights reserved. 2-45... -
Page 62: Laser Scanning Unit (Lsu)
Also, the LSU has a skew adjustment function which adjusts the scanning line and the shutter device to protect the glass on the LSU optical path from the contamination. LD PBA Shutter P/Mirror Motor PD PBA F1 Lens F2 Lens Skew Adjust Assy 2-46 Copyright© 1995-2017 SAMSUNG. All rights reserved. -
Page 63: Laser Scanning Optical Path
This is adjusted at the factory. The primary scanning line slope by the machine difference is adjusted by skew adjustment in the LSU. Reflecting mirrors [B] on each color path adjust the curvature of primary scanning. This is adjusted at the factory. Copyright© 1995-2017 SAMSUNG. All rights reserved. 2-47... -
Page 64: Laser Synchronizing Detectors
Hsync. The arrow in the above diagram shows the data scanning direction for each color. Black (& Cyan) and Yellow (& Magenta) use the same polygon motor scanning in opposite directions. 2-48 Copyright© 1995-2017 SAMSUNG. All rights reserved. -
Page 65: Automatic Line Position Adjustment
The transfer belt-cleaning unit cleans the transfer belt after the patterns are measured. • KK, CC, MM, YY: Spaces between two lines of the same color. • KC, KM, KY: Spaces between a black line and each color line. Copyright© 1995-2017 SAMSUNG. All rights reserved. 2-49... - Page 66 1) When the machine detects a new drum unit or developer unit, line position adjustment is automatically performed. ITB replaced : 1) When the machine detects a new ITB or other ITB, SVC engineer have to execute the adjustment manually. 2-50 Copyright© 1995-2017 SAMSUNG. All rights reserved.
- Page 67 Skew adjustment assembly[A] consists of the worm gear[1] for adjustment and worm gear[2]. When ACR executes, it detects and adjusts the scanning line slope manually. Skew adjustment assembly[A] for magenta, cyan, and yellow adjusts the skew angle of the F2 lens[B]. This mechanism corrects main scan skew. Copyright© 1995-2017 SAMSUNG. All rights reserved. 2-51...
-
Page 68: Shutter Mechanism
• Shutter off : Printing is impossible. Shutter door is closed. Waste toner container is not installed. • Shutter on : Printing is possible. Shutter door is opened. Waste toner container is installed. 2-52 Copyright© 1995-2017 SAMSUNG. All rights reserved. -
Page 69: Drive System
(Reverse driving at CST Lift driving) Toner supply Toner transfer in toner cartridge driving Duct OPC / DEVE BLDC OPC/DEVE driving BLDC ITB driving T1 Dis/En PM-STEP T1 Dis/Engage Waste toner container PM-STEP Waste toner container leveling Copyright© 1995-2017 SAMSUNG. All rights reserved. 2-53... -
Page 70: Main Drive Unit (Opc_Deve_Itb_T1_Disengage_Engage)
2. Product Specifications and Description 2.8.2. Main Drive Unit (OPC_DEVE_ITB_T1_Disengage_Engage) Front View Rear View 2-54 Copyright© 1995-2017 SAMSUNG. All rights reserved. -
Page 71: Pick Up Drive
Pick-up : rotating (Pick-up input) / counter rotating (Cst LIFT input) • 1 Step → rotating → 2 Gear (Pick-up driving) • 1 Step → counter rotating → 3 Gear → 4 Gear → 5 Gear → 6 Gear (CST Lift driving) Copyright© 1995-2017 SAMSUNG. All rights reserved. 2-55... -
Page 72: Regi_Mp Drive
1 BLDC → 2 Gear → 3 Gear → 4 Clutch / Gear (Regi. driving) • • 1 BLDC → 2 Gear → 5 Gear → 6 Gear → 7 Clutch / Gear (MP driving) 2-56 Copyright© 1995-2017 SAMSUNG. All rights reserved. -
Page 73: Feed Drive
2. Product Specifications and Description 2.8.5. Feed Drive Power Train Feed : HB-STEP driving 1 HB-STEP → 2 Gear → 3 Gear (Feed1 driving) • 1 HB-STEP → 2 Gear → 4 Gear (Feed2 driving) • Copyright© 1995-2017 SAMSUNG. All rights reserved. 2-57... -
Page 74: Fuser_Exit Drive
1 BLDC → Rotation→ 2 Gear → 3 Gear (Fuser driving) • 1 BLDC → Counter rotation → 4 Gear → 5 Gear → 6 Gear (Fuser pressure mode driving) 7 PM STEP → 8 Gear (Exit driving) • 2-58 Copyright© 1995-2017 SAMSUNG. All rights reserved. -
Page 75: Waste Toner Container Drive
1 DC Motor → 2 Gear RDCN SUPPLY → 5 Gear DUCT (DUCT driving) • 1 DC Motor → 2 Gear RDCN SUPPLY → 3 Gear SUPPLY IDLE → 4 Gear SUPPLY (Bottle driving) Copyright© 1995-2017 SAMSUNG. All rights reserved. 2-59... -
Page 76: Scanner System
HR(Half Rate) carriage: Transfers the reflected light from the FR carriage to the lens. • Imaging module: Make an image on CCD HR carriage moves at half distance and half speed of FR carriage. This principle keeps a regular gap between the original and imaging lens. 2-60 Copyright© 1995-2017 SAMSUNG. All rights reserved. - Page 77 4) The optical image is generated to the electrical signal by the CCD sensor. To make a stable image, the gap between original and lens must be kept. For this, HR carriage moves at half distance and half speed of FR carriage. Copyright© 1995-2017 SAMSUNG. All rights reserved. 2-61...
- Page 78 Image scan of the main scanning direction is performed by CCD sensor. CCD sensor consist of approx. 7500 pixel. Image scan of sub scanning direction is performed by FR carriage and HR carriage. The carriage is moved by the wire driven the scan motor. Scan resolution is 600dpi. 2-62 Copyright© 1995-2017 SAMSUNG. All rights reserved.
-
Page 79: Scanning System Components
To scan the original on scan glass, two carriages driven the motor moves at a regular speed. The motor drives the timing belt, pulley, and wire. The wire pulley rolls and releases the wire to move carriage. The scanner consists of the scan glass, FR carriage, HR carriage, Imaging unit, and Driving unit. Copyright© 1995-2017 SAMSUNG. All rights reserved. 2-63... - Page 80 White LED emits the white light. The heat sink assembled to the PBA prevents a heat deterioration. • Reflection holder This reflects the passed light through Light-guide. 2) Mirror #1 This changes the direction of reflected light at a 90 degree angle. 2-64 Copyright© 1995-2017 SAMSUNG. All rights reserved.
- Page 81 4) Wire driving To move the carriage stably, the wire is assembled in the front and rear position of the scanner. Pulley rolls and release the wire to move the FR carriage and HR carriage. Copyright© 1995-2017 SAMSUNG. All rights reserved. 2-65...
- Page 82 Scanner drive system uses the step motor to move the carriage. It controls the position and constant speed. The motor power is transferred to the wire through timing belt and pulley. 7) Timing Belt Timing belt has the regular sawtooth and transfers the motor power to the pulley. 2-66 Copyright© 1995-2017 SAMSUNG. All rights reserved.
- Page 83 This makes the scan module detect the base for white color. Before every scan-job, scan module reads the shading sheet to scan image as same color and brightness. If it is contaminated, the vertical image can be created. Copyright© 1995-2017 SAMSUNG. All rights reserved. 2-67...
- Page 84 2. Product Specifications and Description 2-68 Copyright© 1995-2017 SAMSUNG. All rights reserved.
-
Page 85: Caution For Moving The Scanner
When moving the machine, tighten the scan locking screw to prevent the damage of the carriage. 1) Check if the FR carriage is located to the home position. 2) Remove the screw cap. 3) Tighten the M3×8 screw to fix the FR carriage. Copyright© 1995-2017 SAMSUNG. All rights reserved. 2-69... -
Page 86: Dual Scan Document Feeder(Dsdf) For X4300 And X4250
Simplex White-Bar Supports a stable scanning. Scan Out roller Feeds an original before duplex scanning. D-CIS module Scans a back page of original. Exit roller Transfers a scanned original to the exit tray. 2-70 Copyright© 1995-2017 SAMSUNG. All rights reserved. -
Page 87: Electrical Parts Location
2. Product Specifications and Description 2.10.2. Electrical parts location Copyright© 1995-2017 SAMSUNG. All rights reserved. 2-71... - Page 88 PHOTO-INTERRUPTER(SCAN OUT) 0604-001381 ADF-PBA CONTACT IMAGE SENSOR 0609-001558 MAIN PBA PHOTO-INTERRUPTER(EXIT) 0604-001394 ADF-PBA PHOTO-INTERRUPTER(SCAN IN) 0604-001381 ADF-PBA PHOTO-INTERRUPTER(REGI) 0604-001394 ADF-PBA PHOTO-INTERRUPTER(FEED OUT) 0604-001394 ADF-PBA PHOTO-INTERRUPTER(COVER OPEN) 0604-001394 ADF-PBA PHOTO-INTERRUPTER(PICKUP) 0604-001394 ADF-PBA PHOTO-INTERRUPTER(DETECT) 0604-001394 ADF-PBA 2-72 Copyright© 1995-2017 SAMSUNG. All rights reserved.
-
Page 89: Dsdf Drive System
BLDC motor is used for picking up original and pick up is controlled by the clutch. • Step motor is used for the original registration. • BLDC motor is used for feeding a original. Copyright© 1995-2017 SAMSUNG. All rights reserved. 2-73... -
Page 90: Dsdf Original Pick-Up Assembly
2) Checks the original width size. 3) Holds the original not to be moved in paper path before pick up driving. 4) Starts pick up driving. 5) Separates an original by the reverse roller. 2-74 Copyright© 1995-2017 SAMSUNG. All rights reserved. -
Page 91: Dsdf Original Regi. Drive
2) After the regi sensor is on, regi motor rotates. 3) After the transferred original passes the regi. actuator, the regi sensor is off and the regi motor stops. Copyright© 1995-2017 SAMSUNG. All rights reserved. 2-75... -
Page 92: Original Scanning And Feed-Out Drive
3) Simplex white-bar functions to prevent the wrinkle and background. 4) When original passes the scan out actuator, duplex scan starts. 5) Duplex white-bar functions to prevent the wrinkle and background. 6) Original is transferred to exit tray. 2-76 Copyright© 1995-2017 SAMSUNG. All rights reserved. -
Page 93: Reverse Automatic Document Feeder(Radf) For X4220
Exit roller Sends an original to the exit tray and forms the duplex reverse path. Feed in roller Feeds an original before scanning. Feed out roller Transfers a scanned original to the exit roller. Copyright© 1995-2017 SAMSUNG. All rights reserved. 2-77... -
Page 94: Electrical Parts Location
PHOTO-INTERRUPTER(Detect) 0604-001393 PBA-ADF PHOTO-INTERRUPTER(Exit) 0604-001393 PBA-ADF PHOTO-INTERRUPTER(Duplex) 0604-001393 PBA-ADF PHOTO-INTERRUPTER(Scan) 0604-001381 PBA-ADF CLUTCH-ELECTRIC (Regi) JC66-00994B PBA-ADF BLDC-MOTOR JC31-00156A PBA-ADF CLUTCH-ELECTRIC (Pick Up) JC47-00033A PBA-ADF PHOTO-INTERRUPTER 0604-001393 PBA-ADF (Cover) SOLENOID-PICK UP (Cover) JC33-00032A PBA-ADF 2-78 Copyright© 1995-2017 SAMSUNG. All rights reserved. -
Page 95: Radf Drive System
A BLDC motor drives the system for simplex and duplex job. • The Pick up and Regi clutch control the driving on/off. • The Cam type gear and solenoid is used for duplex reverse. Copyright© 1995-2017 SAMSUNG. All rights reserved. 2-79... -
Page 96: Radf Original Pick-Up Assembly
Then, the pick-up roller moves down and contacts an original in the tray. • When the Registration sensor detects the paper, the pick up clutch stops. • When the Detect-Sensor detects that the tray is empty, the motor stops and the machine enters stand-by status. 2-80 Copyright© 1995-2017 SAMSUNG. All rights reserved. -
Page 97: Radf Registration (Regi) Drive Assembly
The Regi drive uses the CLUTCH-ELECTRIC to drive the Registration Roller and transfer the paper to ROLLER FEED. The Registration Roller aligns the leading edge of the original. When original is placed in the Nip, the roller is rotated for alignment. The CLUTHC-ELETRIC repeats on/off to align each paper. Copyright© 1995-2017 SAMSUNG. All rights reserved. 2-81... -
Page 98: Radf Feed Drive Assembly
The ROLLER-FEED and ROLLER-M IDLE SCF make the feeding force by using a spring pressure method. The Motor transfers the paper through interlocking the Roller-Feed in and the Roller-Feed out. At scan, the Motor is driven continually to maintain stable paper transfer. 2-82 Copyright© 1995-2017 SAMSUNG. All rights reserved. -
Page 99: Radf Exit Drive Assembly
To keep the pressure of the Exit Roller, the ROLLER-EXIT_IDLE is pressurized by spring. At duplex mode, when it is rotated inversely, it make the space between rollers to protect the jam. The space between rollers is adjusted by LINK-EXIT_IDLE and SHAFT-EXIT_IDLE. Copyright© 1995-2017 SAMSUNG. All rights reserved. 2-83... -
Page 100: Original Return Drive
At Duplex Mode, when the motor rotates inversely, the solenoid is on and the GEAR-CAM OUTER and GEAR-EXIT are driven. When the GEAR-EXIT rotates, the solenoid drives the GEAR-CAM and it makes the space between the Roller-Exit and Idle Roller. 2-84 Copyright© 1995-2017 SAMSUNG. All rights reserved. -
Page 101: Hardware Configuration
A MICOM at the main controller controls the fuser lamp on/off and system power according to an optimized energy-saving algorithm for optimal efficiency. It also communicates with the OPE Controller through the USB 2.0 protocol to display the system information on LCD. Copyright© 1995-2017 SAMSUNG. All rights reserved. 2-85... - Page 102 The HVPS board generates high-voltage channels and controls it. The FDB board controls the fuser lamp On/Off. The SMPS board generates the 5V, 24V for system power. 2-86 Copyright© 1995-2017 SAMSUNG. All rights reserved.
- Page 103 2. Product Specifications and Description Circuit Board Locations The following diagrams show the locations of the printer circuit boards: Copyright© 1995-2017 SAMSUNG. All rights reserved. 2-87...
-
Page 104: Main Controller (Main Board)
The main processor (Dual Core 1GHz CPU) controls video, engine, UI display and communicates the various devices. The HDD is connected to the main controller by SATA cable and to the other device (ADF, DCF, Finisher, Modem) by UART. 1) Main Controller Diagram 2-88 Copyright© 1995-2017 SAMSUNG. All rights reserved. - Page 105 DCF I/F MODEM JOINT FDI I/F SIDE COVER COLOR FRONT GIGA N/W RJ45 PICKUP OPC SENSOR USB HOST 1 / 2 PH DRIVER FINISHER USB DEVICE ID SENSOR • Information Part Code : JC92-02742A Copyright© 1995-2017 SAMSUNG. All rights reserved. 2-89...
- Page 106 Part Code : JC92-02743A (for Dual Fax) / JC92-02743B (for Single Fax) Part Name : PBA-FAX JOINT • Connection Main PBA I/F connector Modem Card I/F connector (1st) Modem Card I/F connector (2nd) 2-90 Copyright© 1995-2017 SAMSUNG. All rights reserved.
- Page 107 FAX JOINT I/F connector TEL Line I/F connector External Phone I/F connector 2) 2nd Modem • Information Part Code : JC92-02559A PBA name : PBA-FAX CARD • Connection FAX JOINT I/F connector TEL Line I/F connector Copyright© 1995-2017 SAMSUNG. All rights reserved. 2-91...
- Page 108 The Dual Network board as a option is used to make Dual Network environment. It provides 2nd Network Port. • Information Part Code : JC92-02741A PBA name : PBA-NPC • Connection GIGA N/W RJ45 Main PBA I/F connector 2-92 Copyright© 1995-2017 SAMSUNG. All rights reserved.
-
Page 109: Ope Hub Pba
PBA Name : PBA-OPE HUB • Connection MAIN Board I/F Connector OPE Unit I/F Connector Power Input Connector OPE Unit Power Speaker External USB Host Slot External USB Host Slot WLAN / NFC Copyright© 1995-2017 SAMSUNG. All rights reserved. 2-93... -
Page 110: Smps (Switching Mode Power Supply) Board
DC 5V : 55W / DC 5VS : 30W / DC 24V : 432W • Information 110V 220V Part Code JC44-00093D JC44-00100D Part Name SMPS Type 5 V1 SMPS Type 5 V2 • Connection INPUT_AC OUTPUT_24V1/2/3/4/5/6 (to Main PBA) SMPS Enable OUTPUT_5V1/2/3/4/S1/S2 (to Main PBA) 2-94 Copyright© 1995-2017 SAMSUNG. All rights reserved. - Page 111 Power 24V Ground +24V2 Power +GND 24V Ground +24V3 Power 24V Ground +24V4 Power 24V Ground DC Output Connector (CN4) PIN Assign PIN Name Description +5V1 Power 5V Ground +5V2 Power 5V Ground Copyright© 1995-2017 SAMSUNG. All rights reserved. 2-95...
-
Page 112: Fuser Drive Board (Fdb)
This board supplies the voltage to Fuser AC, Heater, Main board. • Information 110V 220V SEC CODE JC44-00210C JC44-00211C PBA NAME FDB V1 FDB V2 • Connection Heater I/F Fuser AC FDB I/F Type 5 Main S/W Inlet Heater S/W 2-96 Copyright© 1995-2017 SAMSUNG. All rights reserved. -
Page 113: Hvps Board
Part Code : JC44-00212B Part Name : HVPS • Connection Description PIN NAME ASSIGN Output Voltage ITHV Y/M/C/K Output Voltage FUSER Output Voltage Output Voltage Output Voltage DEV Y Output Voltage MHV Y Copyright© 1995-2017 SAMSUNG. All rights reserved. 2-97... - Page 114 Output signal ADC_MHV3 PWM signal PWM_I THV1 PWM signal PWM_I THV2 PWM signal PWM_I THV3 PWM signal PWM_DEV_DC1 PWM signal PWM_DEV_DC2 PWM signal PWM_DEV_DC3 Output signal ADC_HVPS_24V Output signal ADC_THV_P nEN signal NEN_THV 2-98 Copyright© 1995-2017 SAMSUNG. All rights reserved.
- Page 115 2. Product Specifications and Description Description PIN NAME PIN ASSIGN PWM signal PWM_THV PWM signal PWM_SAW PWM signal PWM_FUSER_BIAS PWM signal PWM_MHV0 PWM signal PWM_AC_FREQ nEN signal NEN_AC0 PWM signal PWM_AC_VPP0 PWM signal PWM_ITHV0 PWM signal PWM_DEV_DC0 Copyright© 1995-2017 SAMSUNG. All rights reserved. 2-99...
-
Page 116: Eraser Pba
Part Name : PBA-FUSER 2.12.8. Waste Sensor PBA The Waste Sensor PBA detects the waste toner level inside the waste toner container. • Information • Part Code : JC92–02471A • Part Name : WASTE SENSOR RX 2-100 Copyright© 1995-2017 SAMSUNG. All rights reserved. -
Page 117: Crum Pba
2.12.11. Toner CRUM Joint PBA The Toner CRUM Joint PBA is the interface PBA between the toner cartridge and the machine. • Information Part Code : JC92–02164A • • Part Name : TONER CRUM I/F Copyright© 1995-2017 SAMSUNG. All rights reserved. 2-101... -
Page 118: Paper Size Sensor Pba
2. Product Specifications and Description 2.12.12. Paper Size sensor PBA The paper size sensor PBA is used for sensing paper size of tray. Information • Part Code : JC92-02622A • Part Name : PBA-PAPER SIZE SENSOR • 2-102 Copyright© 1995-2017 SAMSUNG. All rights reserved. -
Page 119: Ope Unit
The A31s has a GPU(SGX544MP2), which supports the Graphic Accelationfor better UI. • Information Part Code : JC97–04499A Part Name : OPE • Connection USB host in OPE Hub PBA Input POWER Connector in OPE Hub PBA Copyright© 1995-2017 SAMSUNG. All rights reserved. 2-103... -
Page 120: Cassette Heater
The Cassette Heater is located at the bottom of the cassette where it improves paper handling quality and print quality by heightening internal cassette temperature in very humid environments. NOTE • For tray 1,2, cassette heater is installed in factory or optional depending on country. • For tray 3,4, cassette heater is optional. 2-104 Copyright© 1995-2017 SAMSUNG. All rights reserved. -
Page 121: Dcf Unit
Forward Roller (Cassette 3) Retard Roller (Cassette 4) Retard Roller (Cassette 3) Pickup Roller (Cassette 4) Pickup Roller (Cassette 3) Cassette 4 Pickup Assembly 2) Paper path Tray3 paper path Tray4 paper path Copyright© 1995-2017 SAMSUNG. All rights reserved. 2-105... - Page 122 Tray4 feed sensor 0604-001381 CN6 16 to 18 Tray4 limit sensor 0604-001393 CN6 13 to 15 Tray4 paper empty sensor 0604-001393 CN6 10 to 12 Door open sensor JC39-01696A CN3 1 to 2 2-106 Copyright© 1995-2017 SAMSUNG. All rights reserved.
- Page 123 Limit_DCF1_IHCF Tray3 Paper Limit signal Feed_DCF1_IHCF Tray3 Feed signal P_Size_DCF2 Tray4 Paper Size analog signal nP_Empty_DCF2 Tray4 Paper Empty signal Limit_DCF2 Tray4 Paper Limit signal Feed_DCF2 Tray4 Feed signal nDoor_open Door open signal Copyright© 1995-2017 SAMSUNG. All rights reserved. 2-107...
- Page 124 Limit_DCF1_IDCF This sensor detects whether the paper is at pickup position or not. Limit_DCF2_DCF Feed_DCF1_IDCF This sensor detects the leading edge of the paper that is passing on the feed roller. Feed_DCF2_DCF 2-108 Copyright© 1995-2017 SAMSUNG. All rights reserved.
- Page 125 This board has 2 LEDs. The left LED is for checking 5V power supply and the right LED is checking the micom operation. Copyright© 1995-2017 SAMSUNG. All rights reserved. 2-109...
- Page 126 7) Plug and jack location list Connector Connection Number Download tool I/F(Minicube) Debug I/F Cover open Switch (24V interlock Switch) USB I/F EMPTY/LIFT/FEED(Tray3,4) Sensor FEED / PICKUP3,4 Motor Interface with Main Papersize sensor(Tray3,4) 2-110 Copyright© 1995-2017 SAMSUNG. All rights reserved.
-
Page 127: Inner Finisher
Paper Exit roller Tamper Home_R Sensor Turning Knob Eject Home Sensor Jam Door Open Sensor 2) Paper Path Finisher Main Tray – Staple / offset / Punch Finisher Top Tray – Stack only Copyright© 1995-2017 SAMSUNG. All rights reserved. 2-111... - Page 128 Photo- Interrupter (0604-001415) Tamper Position Sensor_Rear Photo- Interrupter (0604-001415) Paper Holder Position Sensor Photo- Interrupter (0604-001415) Tray Home Position Sensor Photo- Interrupter (0604-001415) Tamper Position Sensor_Front Photo- Interrupter (0604-001415) Main Paddle Position Sensor 2-112 Copyright© 1995-2017 SAMSUNG. All rights reserved.
- Page 129 EJECTOR_1_Motor Mabuchi EJECTOR_2_Motor JC31-00149A Tamper_Motor_Front JC31-00149A Tamper_Motor_Rear JC31-00149A Paper Support Tray Motor JC31-00149A Main Paddle Motor JC31-00169A Exit Motor JC31-00149A Traverse Motor TDS-10SL Paper Holder Solenoid 4) Block Diagram 5) PBA Connection Information Copyright© 1995-2017 SAMSUNG. All rights reserved. 2-113...
- Page 130 CN10 : Traverse Mid Sensor CN8 : Debug CN2 : REAR I/F CN7 : FRONT I/F CN6 : Stacker Switch CN9 : Solenoid CN4 : Ejector & Supporter I/F CN5 : Main I/F 2-114 Copyright© 1995-2017 SAMSUNG. All rights reserved.
-
Page 131: Disassembly And Reassembly
3.1.1. Precautions when assembling and disassembling • Use only approved Samsung spare parts. Ensure that part number, product name, any voltage, current or temperature rating are correct. Failure to do so could result in damage to the machine, circuit overload, fire or electric shock. -
Page 132: Releasing Plastic Latches
Many of the parts are held in place with plastic latches. The latches break easily; release them carefully. To remove such parts, press the hook end of the latch away from the part to which it is latched. Copyright© 1995-2017 SAMSUNG. All rights reserved. -
Page 133: Maintenance
2. Take out the LSU window cleaning tool that is located on the front cover. 4. Slowly pull out and push the cleaning tool. 5. Repeat step 4 at least 5 times for each LSU window. Copyright© 1995-2017 SAMSUNG. All rights reserved. -
Page 134: Cleaning The Transfer Roller
1. Open the side cover. 2. Clean the transfer roller[A] by using a soft cloth. 3.2.1.3. Cleaning the scan glass 1. Open the DSDF(or RADF) Unit. 2. Clean the scan glass[A] by using a soft cloth. Copyright© 1995-2017 SAMSUNG. All rights reserved. -
Page 135: Cleaning The Dsdf White Bar_Cis
3. Disassembly and Reassembly 3.2.1.4. Cleaning the DSDF white bar_CIS 1. Open the DSDF Unit. 2. Clean the DSDF white bar and CIS by using a soft cloth. Copyright© 1995-2017 SAMSUNG. All rights reserved. -
Page 136: Cleaning The Ctd Sensor
3. Close the side cover. 4. Enter the SVC mode. Select “CTD Sensor Cleaning”. (Diagnostics > Image Management > Auto Tone Adjustment > CTD Sensor Cleaning) 5. When appearing the confirm pop-up menu, select “Yes” button on screen. Copyright© 1995-2017 SAMSUNG. All rights reserved. -
Page 137: Cleaning The Paper Dust Stick
HOLDER DUST) will need to be cleaned after a specified number of paper is printed out. • Cleaning cycle : 33,700 pages 1. Open the front door. 2. Remove the waste toner container. 4. Remove the paper dust. Copyright© 1995-2017 SAMSUNG. All rights reserved. - Page 138 3. Disassembly and Reassembly 5. Insert the paper dust stick back. 6. Install the waste toner container until it locks in place. 7. Close the front door. Ensure that the cover is securely closed. Copyright© 1995-2017 SAMSUNG. All rights reserved.
-
Page 139: Replacing The Maintenance Part
When installing the initial drum unit, remove the Cap-Dummy OPC after turning the locking lever counterclockwise. 2. Turn the locking lever counterclockwise. 3. Hold the drum unit and take it out. 4. Install new drum unit. Copyright© 1995-2017 SAMSUNG. All rights reserved. -
Page 140: Developer Unit
6. Open the Deve cover after releasing 5 hooks. 4. Remove the bracket[A] after removing 2 screws. Unplug the connector. NOTE When opening the Deve cover unit, the angle of opening must be kept below 90 degrees. 3-10 Copyright© 1995-2017 SAMSUNG. All rights reserved. - Page 141 8. Close the Deve unit cover. Tear the SEAL-MAG LEAK[B] and the blue tape. And then, remove the NOTE CAP-ADR DEVE[C]. TC calibration will start. Please wait until warm-up operation is completed. 9. Install the new developer unit. Copyright© 1995-2017 SAMSUNG. All rights reserved. 3-11...
-
Page 142: Itb Cleaner
2. Loosen a screw. (Note : Less than torque 6kgf.cm) 3.2.2.4. ITB Unit 1. Remove the ITB cleaner. (Refer to 3.2.2.3) 4. Release the left stopper. 2. Open the side cover. 3. Release the right stopper. 3-12 Copyright© 1995-2017 SAMSUNG. All rights reserved. - Page 143 6. Remove 2 screws. 8. Before install the new ITB unit, align the CAM position. (Align 2 arrows) 9. Install the new ITB unit. And then install the ITB cleaner. (Note : Less than torque 6kgf.cm) Copyright© 1995-2017 SAMSUNG. All rights reserved. 3-13...
-
Page 144: Fuser Unit
2. Remove the BRACKET-FUSER SUPPORT after removing 1 screw. NOTE The product manufactured before Jun.2015 has not the BRACKET-FUSER SUPPORT. 3. Remove the fuser unit after removing 2 screws. 3.2.2.6. Transfer roller 1. Open the side cover. 3-14 Copyright© 1995-2017 SAMSUNG. All rights reserved. - Page 145 3. Disassembly and Reassembly 2. Hold and release the both sides of the transfer roller. Copyright© 1995-2017 SAMSUNG. All rights reserved. 3-15...
-
Page 146: Pick-Up_Reverse_Forward Roller
3. Enter SVC mode. Select the menu. (Information > Supply Status > Field Replacement Unit). Push “Reset” button to reset the current count to 0. 3-16 Copyright© 1995-2017 SAMSUNG. All rights reserved. -
Page 147: Mp Pick Up_Reverse_Forward Roller
4. Enter SVC mode. Select the menu. (Information > Supply Status > Field Replacement Unit). Push “Reset” button to reset the current count to 0. Copyright© 1995-2017 SAMSUNG. All rights reserved. 3-17... -
Page 148: Dsdf Pick-Up Roller Assy
4. Remove the both E-ring of the pick up Assy. 2. Remove 5 screws. 5. Release the pick up roller Assy after releasing the Bush. 3. Release the pick up Assy cover after removing the spring and unplugging the connector. 3-18 Copyright© 1995-2017 SAMSUNG. All rights reserved. -
Page 149: Dsdf Reverse Roller
4. Release the DSDF rear cover. bottom of the DSDF unit. 5. Remove the pick up Assy. 2. Open the DSDF-open cover. Remove 8 screws. 6. Remove the reverse roller cover. 3. Release the DSDF front cover. Copyright© 1995-2017 SAMSUNG. All rights reserved. 3-19... - Page 150 3. Disassembly and Reassembly 7. Release the reverse roller Assy. 3-20 Copyright© 1995-2017 SAMSUNG. All rights reserved.
-
Page 151: Radf Pick Up Roller Assy
3. Disassembly and Reassembly 3.2.2.11. RADF pick up roller Assy 1. Open the RADF-open cover. 3. Release the RADF pick up roller Assy. 2. Pull down the shaft holder. Copyright© 1995-2017 SAMSUNG. All rights reserved. 3-21... -
Page 152: Radf Reverse Roller Assy
3. Disassembly and Reassembly 3.2.2.12. RADF reverse roller Assy 1. Open the RADF-open cover. 3. Release the RADF reverse roller Assy. 2. Remove the RADF reverse roller cover. 3-22 Copyright© 1995-2017 SAMSUNG. All rights reserved. -
Page 153: Replacing The Main Svc Part
1. Remove the left-top cover. 2. Remove the left cover after removing 10 screws. 3.3.2. Rear Cover 1. Remove 5 screw-caps and 5 screws. 2. Remove the rear cover after removing 4 screws. Copyright© 1995-2017 SAMSUNG. All rights reserved. 3-23... -
Page 154: Hvps Board
2. Remove 8 screws. Release the middle hook. 3.3.4. Temperature_Humidity Sensor 1. Remove the left cover. (Refer to 3.3.1) 3. Remove 1 screw. Unplug the sensor connector. And release the temperature-humidity sensor. 2. Remove 3 screws. 3-24 Copyright© 1995-2017 SAMSUNG. All rights reserved. -
Page 155: Lsu
3. Remove 2 screws. Unplug the temperature sensor connector. And release the bracket. CAUTION If you yank the LSU, the LSU harness may be damaged. 5. Unplug the LSU harness from the left. Remove the LSU. Copyright© 1995-2017 SAMSUNG. All rights reserved. 3-25... -
Page 156: Ope Unit
1. Open the side cover. 4. Remove the front-top cover. 2. Remove 2 screw-caps and 2 screws. 5. Remove 5 screw-caps and 5 screws. 3. Remove 1 screw. 6. Lift up and release the scan front cover. 3-26 Copyright© 1995-2017 SAMSUNG. All rights reserved. - Page 157 3. Disassembly and Reassembly 7. Remove the scan hinge cover. 8. Remove 2 screws. Then release the OPE Assy. Copyright© 1995-2017 SAMSUNG. All rights reserved. 3-27...
-
Page 158: Main Board
Shading Test for ADF(DSDF) Unit must be carried out, after replacing the main board. (Refer to 4.5.5.3) 3.3.8. SMPS Fan 1. Remove the rear cover. (Refer to 3.3.2) 2. Unplug the connector. Remove 1 screw. And then remove the SMPS fan. 3-28 Copyright© 1995-2017 SAMSUNG. All rights reserved. -
Page 159: Smps Board
2. Unplug the connector. Remove 4 screws. And then remove the SMPS cover. CAUTION When replacing the FDB board, please wait 5 minutes after unplugging the power cord, then replace it. You can get a shock by the electric discharge. Copyright© 1995-2017 SAMSUNG. All rights reserved. 3-29... -
Page 160: Fuser-Duct Fan
3.3.12. Main board shield 1. Remove the rear cover. (Refer to 3.3.2) 2. Unplug all connectors on the main board. 3. Remove the main board shield after removing 4 screws. 3-30 Copyright© 1995-2017 SAMSUNG. All rights reserved. -
Page 161: Main Drive Unit
3.3.14. Fuser_Exit Drive unit 1. Remove the rear cover. (Refer to 3.3.2) 2. Remove the Fuser-Duct fan. (Refer to 3.3.11.) 3. Unplug 2 motor connectors. Remove 3 screws. And then remove the Fuser/Exit Drive unit. Copyright© 1995-2017 SAMSUNG. All rights reserved. 3-31... -
Page 162: Pick-Up Drive Unit
2. Unplug the connector. Remove 3 screws. And then Pick-up Drive unit1. 3.3.16. Feed Drive unit 1. Remove the rear cover. (Refer to 3.3.2) 2. Unplug the connector. Remove 3 screws. And then remove the Feed Drive Unit. 3-32 Copyright© 1995-2017 SAMSUNG. All rights reserved. -
Page 163: Regi_Mp Drive Unit
3. Unplug the connector. Remove 3 screws. And then remove the Toner supply drive unit. NOTE • To remove K Toner supply drive unit, first remove the main drive unit. • The toner supply drive units are exchangeable. Copyright© 1995-2017 SAMSUNG. All rights reserved. 3-33... -
Page 164: Waste Toner Container Drive Unit
3. Remove the inner cover after removing 8 screws. 3.3.20. Auto Size sensor 1. Remove all cassettes. See the machine inside. 2. Unplug the connector. Remove 2 screws. And then remove the sensor. 3-34 Copyright© 1995-2017 SAMSUNG. All rights reserved. -
Page 165: Exit Unit
3. Disassembly and Reassembly 3.3.21. Exit Unit 1. Open the side cover. Unplug the Exit unit connector. 2. Remove the Exit unit after removing 3 screws. Copyright© 1995-2017 SAMSUNG. All rights reserved. 3-35... -
Page 166: Side Unit
2. Unplug the side unit connector. CAUTION The spring tension for right stopper is strong. When releasing it, be careful not to hurt yourself. 4. Release the left stopper. 5. Remove the Side Unit. 3-36 Copyright© 1995-2017 SAMSUNG. All rights reserved. -
Page 167: Fuser Out Sensor
1. Remove 2 screws from the both sides. Lift up the 3. Separate the Cover-side exit after removing 3 screws. Cover-side exit. 4. Remove the Fuser out sensor after unplugging the connector. 2. Remove the Cover-side exit after unplugging the connector. Copyright© 1995-2017 SAMSUNG. All rights reserved. 3-37... -
Page 168: Duplex Sensor And Curl Sensor
3. Disassembly and Reassembly 3.3.22.2. Duplex sensor and Curl sensor 1. Remove the transfer roller Assy. 3. Remove the Duplex sensor [A] and Curl sensor [B]. 2. Remove 1 screw. Turn over the Guide-TR Upper. 3-38 Copyright© 1995-2017 SAMSUNG. All rights reserved. -
Page 169: Mp Unit
1. Remove the Harness-Cover [A] after removing 2 4. Remove 3 screws. screws. 5. Remove 1 screw. 2. Remove the Harness-Cover Lower [B] after removing 2 screws. 6. Remove 2 screws. 3. Remove 1 screws. Stand the stopper. Copyright© 1995-2017 SAMSUNG. All rights reserved. 3-39... - Page 170 3. Disassembly and Reassembly 7. Remove 4 screws. 10. Remove 2 screws. 8. Remove the Cover-Side Guide Feed[C]. 11. Unplug the connectors. 9. Lift up the Cover-Side Duplex Lower. 12. Remove the Cover-MP Front. 3-40 Copyright© 1995-2017 SAMSUNG. All rights reserved.
- Page 171 16. Remove the gear [C] after removing the E-ring. 14. Remove the MP Unit. 17. Remove the Bush[D] after removing the E-ring. 15. Remove the MP-cover base. 18. Remove the Bracket-Solenoid after removing 1 screw. Copyright© 1995-2017 SAMSUNG. All rights reserved. 3-41...
- Page 172 3. Disassembly and Reassembly 19. Release the MP bracket pick-up after removing 4 20. Remove the MP solenoid after removing 2 screws. screws. 3-42 Copyright© 1995-2017 SAMSUNG. All rights reserved.
-
Page 173: Pick-Up Unit And Empty_Level Sensor
2. Remove the Pick-up Unit1,2 after removing 2 screws and unplugging the connector. NOTE Before removing the pick up unit 1 (upper), remove the feed unit. 3. Release the sensor after unplugging the connector. (Empty sensor[A], Level sensor[B]) Copyright© 1995-2017 SAMSUNG. All rights reserved. 3-43... -
Page 174: Feed Sensor 1
3. Disassembly and Reassembly 3.3.24. Feed sensor 1 1. Remove the Side Unit. (Refer to 3.3.22) 3. Remove the Feed sensor after unplugging connector. 2. Remove the sensor cover after removing 2 screws. 3-44 Copyright© 1995-2017 SAMSUNG. All rights reserved. -
Page 175: Feed Unit And Feed Sensor 2
1. Remove the Side Unit. (Refer to 3.3.22) 4. Remove the feed sensor after unplugging the connector. 2. Remove the Feed Unit[A] after removing 1 screw. 3. Remove the bracket[B] after removing 3 screws. Copyright© 1995-2017 SAMSUNG. All rights reserved. 3-45... -
Page 176: Registration Unit
1. Remove the Side Unit. (Refer to 3.3.23) 4. Remove the Regi. sensor after unplugging the connector. 2. Remove the Regi.unit [A] after removing 2 screws. 3. Remove the bracket[B] after removing 3 screws. 3-46 Copyright© 1995-2017 SAMSUNG. All rights reserved. -
Page 177: Dsdf Unit
5. Unplug the DSDF harness from the scan joint board. 2. Remove 4 screws. Then release the rear cover. 3. Remove 1 screw. Unplug the DSDF harness from the 6. Open the DSDF unit. Remove 2 screws. main board. Copyright© 1995-2017 SAMSUNG. All rights reserved. 3-47... - Page 178 3. Disassembly and Reassembly 7. Lift up and release the DSDF unit. NOTE Shading Test for DSDF Unit must be carried out, after replacing the DSDS unit. (Refer to 4.5.5.3) 3-48 Copyright© 1995-2017 SAMSUNG. All rights reserved.
-
Page 179: Dsdf Board
3. Release the DSDF rear cover. of the DSDF. And close the DSDF unit. 4. Unplug all harness on the DSDF board. Remove 4 2. Open DSDF-open cover. Remove 2 screws. screws. And release the DSDF board. Copyright© 1995-2017 SAMSUNG. All rights reserved. 3-49... -
Page 180: Dsdf Main Motor
DSDF. And close the DSDF unit. the harness guide. 2. Open DSDF-open cover. Remove 2 screws. 5. Remove 5 screws. Release the DSDF main motor while pulling the harness guide. 3. Release the DSDF rear cover. 3-50 Copyright© 1995-2017 SAMSUNG. All rights reserved. -
Page 181: Dsdf Paper Length Sensor
5. Open the DSDF unit. Remove 1 screw from the bottom 2. Open DSDF-open cover. Remove 2 screws. of the DSDF. And close the DSDF unit. 3. Release the DSDF front cover. 6. Open DSDF-open cover. Remove 2 screws. Copyright© 1995-2017 SAMSUNG. All rights reserved. 3-51... - Page 182 10. Release the stacker. 8. Remove 1 screw. 11. Remove 4 screws. Then remove the stacker lower. 9. Unplug the stacker connector from the DSDF board. 12. Remove the paper length sensor after unplugging the connector. 3-52 Copyright© 1995-2017 SAMSUNG. All rights reserved.
-
Page 183: Radf Unit
1. Remove the RADF connector cover. 3. Open the RADF Unit. Remove 2 screws securing both hinge units. 2. Remove 1 screw. Unplug the RADF harness. 4. Lift up and release the RADF Unit. Copyright© 1995-2017 SAMSUNG. All rights reserved. 3-53... -
Page 184: Radf Board
1. Open the RADF Unit. Remove 2 screws from the 3. Unplug all harness. Remove 4 screws. And release the bottom of the RADF Unit. RADF board. 2. Remove the RADF rear cover. 3-54 Copyright© 1995-2017 SAMSUNG. All rights reserved. -
Page 185: Radf Stacker
4. Remove 1 screw. bottom of the RADF Unit. 5. Unplug the stacker harness. 2. Open the RADF-Open cover. Then, release the linker. 6. Release the RADF stacker. 3. Remove the RADF front cover. Copyright© 1995-2017 SAMSUNG. All rights reserved. 3-55... -
Page 186: Scanner Unit(Platen Unit)
2. Remove 6 screw-caps and 6 screws. Then release the scan-rear cover. 5. Remove 3 screw-caps and 3 screws. Then release the scan-right cover. 3. Remove 5 screw-caps and 5 screws. Then release the scan-front cover. 6. Unplug the scan cables. 3-56 Copyright© 1995-2017 SAMSUNG. All rights reserved. - Page 187 3. Disassembly and Reassembly 7. Remove 3 screws from the left. 9. Lift up and release the platen unit. 8. Remove 2 screws from the right. Copyright© 1995-2017 SAMSUNG. All rights reserved. 3-57...
-
Page 188: Scan Glass
5. Remove 3 screw-caps and 3 screws. Then release the scan-right cover. 3. Remove 5 screw-caps and 5 screws. Then release the scan-front cover. 6. Remove 2 screw-caps and 2 screws. 3-58 Copyright© 1995-2017 SAMSUNG. All rights reserved. - Page 189 3. Disassembly and Reassembly 7. Remove the scan glass. Copyright© 1995-2017 SAMSUNG. All rights reserved. 3-59...
-
Page 190: Led Lamp Module
3. Disassembly and Reassembly 3.3.29.2. LED Lamp Module 1. Remove the scan glass. (Refer to 3.3.30.1) 4. Remove 4 screws. Then, release the LED lamp module. 2. Remove the transparent tape. 3. Unplug the flat cable. 3-60 Copyright© 1995-2017 SAMSUNG. All rights reserved. -
Page 191: Scan Imaging Unit
Do not loosen the screws marked by green X. 5. Open the connector flip. And then, unplug the flat cable. NOTE Be careful not to contaminate the scan glass. 3. Remove 5 screws. And then, release the CCD shield. Copyright© 1995-2017 SAMSUNG. All rights reserved. 3-61... - Page 192 7. Match the value between the lens number and the scale. lens number of the new Scan Imaging Unit. And then, assemble the 2 spring plates with screw. 8. Reassemble the CCD shield. 3-62 Copyright© 1995-2017 SAMSUNG. All rights reserved.
- Page 193 3. Disassembly and Reassembly 9. Reassemble the scan glass. Copyright© 1995-2017 SAMSUNG. All rights reserved. 3-63...
-
Page 194: Scan Joint Board
3. Disassembly and Reassembly 3.3.29.4. Scan Joint Board 1. Unplug all harness. Remove 4 screws. And release the scan joint board. 3-64 Copyright© 1995-2017 SAMSUNG. All rights reserved. -
Page 195: Aps Sensor
3.3.29.5. APS Sensor 1. Remove the scan glass. (Refer to 3.3.30.1) 4. Unplug the harness. 2. Remove the joint board cover. 5. Release the APS sensor after removing 2 screws. 3. Remove 1 screw. Copyright© 1995-2017 SAMSUNG. All rights reserved. 3-65... -
Page 196: Adf White Sponge
4. Open the ADF unit. And then, rub the surface of the 2. Place the white sponge on the platen glass and align it white sponge. with top and left line. NOTE Recommendation of Gap : 0.5~1 mm 3-66 Copyright© 1995-2017 SAMSUNG. All rights reserved. -
Page 197: Side Cover Open Switch
3. Disassembly and Reassembly 3.3.31. Side Cover Open Switch 1. Remove the rear cover. Remove 1 screw securing the 2. Remove the micro-switch. sensor. Copyright© 1995-2017 SAMSUNG. All rights reserved. 3-67... -
Page 198: Front Cover Open Switch
2. Remove 2 screw-caps and 2 screws. 5. Open the front cover. Remove all toner cartridges. 6. Remove 8 screws. Then release the front-inner cover. 3. Remove 1 screw. 7. Remove the cover open switch. 3-68 Copyright© 1995-2017 SAMSUNG. All rights reserved. -
Page 199: Hdd (Hard Disk Drive)
1. Remove 2 screw-caps and 2 screws. 3. Remove the COVER-EXIT REAR after removing 4 screws. 2. Remove the Exit Tray. 4. Remove 4 screws. Unplug the cable. And remove the HDD Assy. 5. Install the new HDD Assy. Copyright© 1995-2017 SAMSUNG. All rights reserved. 3-69... -
Page 200: Dcf (Double Cassette Feeder)
3. Disassembly and Reassembly 3.3.34. DCF (Double Cassette Feeder) 3.3.34.1. DCF main board 1. Remove the Bracket Rear Cover after removing 5 2. Unplug all connectors. Remove 4 screws. And release screws. the DCF main board. 3-70 Copyright© 1995-2017 SAMSUNG. All rights reserved. -
Page 201: Dcf Feed Motor
Feed Drive unit. 3.3.34.3. DCF Pick Up Motor 1. Remove the Bracket Rear Cover after removing 5 2. Unplug the pick up motor connector. Remove 2 screws. screws. And release the DCF pick up motor. Copyright© 1995-2017 SAMSUNG. All rights reserved. 3-71... -
Page 202: Finisher
3. Disassembly and Reassembly 3.3.35. Finisher 3.3.35.1. Entrance Sensor 1) Remove 3 screws. Then, remove the rear cover. 2) Remove the E-Ring. Remove the shaft. And, unplug the connector. 3) Remove the sheet. 3-72 Copyright© 1995-2017 SAMSUNG. All rights reserved. - Page 203 4) Remove the E-Ring and Washer. Then, remove the Punch Dummy. 5) Remove 4 screws. Then, remove the Punch Dummy cover. 6) Remove the screw. Unplug the connector. And release the sensor bracket. Copyright© 1995-2017 SAMSUNG. All rights reserved. 3-73...
-
Page 204: Entrance Motor
7) Remove 1 screw. Then, remove the sensor. 3.3.35.2. Entrance Motor 1) Remove the Front Cover and Rear Cover. 2) Remove 2 screws. Then, remove the Assy Guide Middle / Assy Cover Top Tray. 3-74 Copyright© 1995-2017 SAMSUNG. All rights reserved. - Page 205 3) Remove the E-Ring(front), Bush, E-Ring(rear), As Pulley T33 S2M, Bush, Belt, Spring. Then, remove the Guide Reverse and Roller Feed. 4) Remove 6 screws. Then, remove the Guide Middle Lower. NOTE Be careful not to damage the sensor. Copyright© 1995-2017 SAMSUNG. All rights reserved. 3-75...
- Page 206 3. Disassembly and Reassembly 5) Remove 2 screws. 6) Open the clamps. Unplug the connector. Then, remove the Motor Ent Sub Assy. 7) Remove 2 screws. Then, remove the motor. 3-76 Copyright© 1995-2017 SAMSUNG. All rights reserved.
-
Page 207: Exit Sensor
3. Disassembly and Reassembly 3.3.35.3. Exit Sensor 1) Follow the step 1~4 in Exit Motor disassembly. (Refer to 3.3.34.2.) 2) Remove the Exit Sensor by releasing the hook. Copyright© 1995-2017 SAMSUNG. All rights reserved. 3-77... -
Page 208: Exit Motor
1) Remove the Front Cover. 2) Remove 2 screw. Unplug the motor connector. And, release the Motor Exit Sub Assy. 3) Remove 2 screws. Then, remove the Exit Motor from the Bkt Motor Feed Exit. 3-78 Copyright© 1995-2017 SAMSUNG. All rights reserved. -
Page 209: Sub Paddle Shaft Sub Assy
1) Open the Cover Top Tray Sub Assy. Then, remove 1 screw securing the Sub Paddle Shaft Sub Assy. 2) Remove 4 screws securing the Guide Harness. 3) Remove the E-Ring. Then, remove the Pulley. Copyright© 1995-2017 SAMSUNG. All rights reserved. 3-79... - Page 210 3. Disassembly and Reassembly 4) Remove the E-Ring. Then, remove the Bush. 5) Lift up and release the Sub Paddle Shaft Sub Assy. 3-80 Copyright© 1995-2017 SAMSUNG. All rights reserved.
-
Page 211: Front Jogger Motor
3.3.35.6. Front Jogger Motor 1) Follow the step 1~2 in Exit Motor disassembly. (Refer to 3.3.34.2.) 2) Remove 4 screws. Then, remove the tray. 3) Remove the Tray Assy by rotating the Worm Gear. Copyright© 1995-2017 SAMSUNG. All rights reserved. 3-81... - Page 212 3. Disassembly and Reassembly 4) Remove 4 screws. Then, remove the PBA cover. 5) Remove 4 screws from both sides. 6) Unplug 2 connectors. Then, remove the Shield Stacker Assy. 3-82 Copyright© 1995-2017 SAMSUNG. All rights reserved.
- Page 213 7) Remove 1 screw. Unplug the connector. And, remove the Main Paddle Home Sensor Sub Assy. 8) Remove 3 screws. Unplug the connector. And, release the Motor Paddle Sub Assy. 9) Remove 3 screws. Then, remove the Duct B. Copyright© 1995-2017 SAMSUNG. All rights reserved. 3-83...
- Page 214 10) Remove 3 screws. Unplug 2 connectors. And, release the Motor Paddle Sub Assy. 11) Follow the step 1~5 in Paddle Shaft Sub Assy disassembly. (Refer to 3.3.34.5.) 12) Remove the E-Ring, Actuator Home Paddle, Timing Pulley S2M48T, and Paddle Cam. 3-84 Copyright© 1995-2017 SAMSUNG. All rights reserved.
- Page 215 3. Disassembly and Reassembly 13) Remove the E-Ring and Bush. 14) Remove the Main Paddle A Unit / B Unit. Then, remove the shaft. 15) Remove 4 screws. Copyright© 1995-2017 SAMSUNG. All rights reserved. 3-85...
- Page 216 3. Disassembly and Reassembly 16) Unplug the connector. Then, pull the Tamper Front Sub Assy up and release it. 17) Remove 2 screws. Unplug the connector. And, release the motor. 3-86 Copyright© 1995-2017 SAMSUNG. All rights reserved.
-
Page 217: Front Jogger Home Sensor
3.3.35.8. Rear Jogger Motor 1) Follow the step 1~8 in Front Jogger Motor disassembly. (Refer to 3.3.34.6.) 2) Follow the step 11~14 in Front Jogger Motor disassembly. (Refer to 3.3.34.6.) 3) Remove 4 screws. Copyright© 1995-2017 SAMSUNG. All rights reserved. 3-87... - Page 218 3. Disassembly and Reassembly 4) Unplug 2 connectors. Then, remove the Tamper Rear Sub Assy. 5) Remove 2 screws. Unplug the connector. And, release the Tamper Rear Sub Assy. 3-88 Copyright© 1995-2017 SAMSUNG. All rights reserved.
-
Page 219: Rear Jogger Home Sensor
3. Disassembly and Reassembly 3.3.35.9. Rear Jogger Home Sensor 1) Follow the step 1~4 in Rear Jogger Motor disassembly. (Refer to 3.3.34.8.) 2) Unplug the connector. Then, remove the Rear Jogger Home Sensor. Copyright© 1995-2017 SAMSUNG. All rights reserved. 3-89... -
Page 220: Stapler
1) Follow the step 1~2 in Exit Motor disassembly. (Refer to 3.3.34.4.) 2) Remove 1 screw. Unplug 2 connectors. And, remove the Stapler Unit. 3) Remove 2 screws. Then, remove the Stapler Unit from the Bkt ST. 3-90 Copyright© 1995-2017 SAMSUNG. All rights reserved. -
Page 221: Traverse Home Sensor
1) Follow the step 1~4 in Entrance Motor disassembly. (Refer to 3.3.34.2.) 2) Follow the step 1~5 in Su Paddle Shaft Sub Assy disassembly. (Refer to 3.3.34.5.) 3) Remove 2 screws from the front. 4) Remove 2 screws from the rear. Copyright© 1995-2017 SAMSUNG. All rights reserved. 3-91... - Page 222 3. Disassembly and Reassembly 5) Unplug the connector. Then, remove the Bkt Stay Sub Assy. 6) Remove 4 screws from the front. 3-92 Copyright© 1995-2017 SAMSUNG. All rights reserved.
- Page 223 3. Disassembly and Reassembly 7) Remove 1 screw. 8) Unplug 4 connectors. Open the 6 clamps. And, unplug the FFC cable. 9) Remove the Assy. Then, release the sensor. Copyright© 1995-2017 SAMSUNG. All rights reserved. 3-93...
-
Page 224: Traverse Motor
1) Follow the step 1~4 in Entrance Motor disassembly. (Refer to 3.3.34.2.) 2) Remove 3 screws. Unplug the motor connector. And, release the Traverse Motor Assy. 3) Remove 2 screws. Then, release the motor. 3-94 Copyright© 1995-2017 SAMSUNG. All rights reserved. -
Page 225: Stacker Motor
2) Remove 2 screws. Unplug the connector. And, release the Stacker Motor. 3.3.35.14. Stacker Encoder Sensor 1) Follow the step 1~10 in Front Jogger Motor disassembly. (Refer to 3.3.34.6.) 2) Remove 1 screw. Remove the shaft. And, release the sensor. Copyright© 1995-2017 SAMSUNG. All rights reserved. 3-95... -
Page 226: Stacker Lower Limit Switch
3.3.35.15. Stacker Lower Limit Switch 1) Follow the step 1~10 in Front Jogger Motor disassembly. (Refer to 3.3.34.6.) 2) Remove 1 screw. 3) Open 3 clamps. Unplug the connector. And, release the sensor. 3-96 Copyright© 1995-2017 SAMSUNG. All rights reserved. -
Page 227: Stack Beam Sensor
3.3.35.16. Stack Beam Sensor 1) Follow the step 1~6 in Front Jogger Motor disassembly. (Refer to 3.3.34.6.) 2) Remove 2 screws from both sides of the Shield Stacker Assy. Remove the bracket. And, remove the sensor. Copyright© 1995-2017 SAMSUNG. All rights reserved. 3-97... -
Page 228: Stack Position Sensor
3.3.35.17. Stack Position Sensor 1) Follow the step 1~2 in Stacker Lower Limit Switch disassembly. (Refer to 3.3.34.15.) 2) Remove the E-Ring, GEAR-RACK PINION, Bush, and PIN-PARALLEL. 3) Remove the SHAFT-STACKER DRIVE and BUSH-3D. 3-98 Copyright© 1995-2017 SAMSUNG. All rights reserved. - Page 229 3. Disassembly and Reassembly 4) Remove the Spring. Then, remove the Shaft holder. 5) Unplug the connector. Then, remove the sensor. Copyright© 1995-2017 SAMSUNG. All rights reserved. 3-99...
-
Page 230: Paper Holding Lever Solenoid
3.3.35.18. Paper Holding Lever Solenoid 1) Follow the step 1~10 in Front Jogger Motor disassembly. (Refer to 3.3.34.6.) 2) Remove 1 screw. Then, release the Stacker Lower Limit Sensor Assy. 3) Remove 2 screws. 3-100 Copyright© 1995-2017 SAMSUNG. All rights reserved. - Page 231 3. Disassembly and Reassembly 4) Unplug 2 connectors. Then, release the Solenoid Assy. 5) Remove 2 screws. Then, remove the solenoid. Copyright© 1995-2017 SAMSUNG. All rights reserved. 3-101...
-
Page 232: Paper Support Motor
1) Follow the step 1~5 in Stack Position Sensor disassembly. (Refer to 3.3.34.17.) 2) Remove 4 screws. Unplug 2 connectors. And, remove the Ejector Sub Assy. 3) Remove 2 screws. Unplug the connector. And, release the Paper Support Motor. 3-102 Copyright© 1995-2017 SAMSUNG. All rights reserved. -
Page 233: Paper Support Home Sensor
3.3.35.20. Paper Support Home Sensor 1) Follow the step 1~2 in Paper Support Motor disassembly. (Refer to 3.3.34.19.) 2) Remove 1 screw. 3) Release the shaft while pulling the Bush to the direction of arrow. Copyright© 1995-2017 SAMSUNG. All rights reserved. 3-103... - Page 234 3. Disassembly and Reassembly 4) Release the Paper Support with attention for pinion. 5) Remove the sensor from the Paper Support. 3-104 Copyright© 1995-2017 SAMSUNG. All rights reserved.
-
Page 235: Ejector Motor Assy
3. Disassembly and Reassembly 3.3.35.21. Ejector Motor Assy 1) Follow the step 1~3 in Paper Support Home Sensor disassembly. (Refer to 3.3.34.20.) 2) Remove the Bush. Then, pull and release the shaft. 3) Remove 1 screw. Copyright© 1995-2017 SAMSUNG. All rights reserved. 3-105... - Page 236 3. Disassembly and Reassembly 4) Remove the E-Ring and washer. Release 2 belts. And, remove 1 screw. 5) Remove the belt. Then, remove 1 screw. 3-106 Copyright© 1995-2017 SAMSUNG. All rights reserved.
- Page 237 3. Disassembly and Reassembly 6) Unplug the motor connector. Then, release the motor Assy. Copyright© 1995-2017 SAMSUNG. All rights reserved. 3-107...
-
Page 238: Main Paddle Motor
3. Disassembly and Reassembly 3.3.35.22. Main Paddle Motor 1) Remove the Front Cover.(Refer to 3.3.34.4.) 2) Remove 3 screws. Unplug the connector. And release the Motor Assy. 3) Remove 2 screws. Then, release the motor. 3-108 Copyright© 1995-2017 SAMSUNG. All rights reserved. -
Page 239: Main Paddle Home Sensor
1) Remove the Front Cover. (Refer to 3.3.34.4.) 2) Remove 1 screw. Open the clamp. And, remove the Main Paddle Home Sensor Sub Assy. 3) Remove the Main Paddle Home Sensor from the bracket. Copyright© 1995-2017 SAMSUNG. All rights reserved. 3-109... -
Page 240: Main Paddle
3. Disassembly and Reassembly 3.3.35.24. Main Paddle 1) Open the Cover Top Tray Sub Assy. Then, remove the Main Paddle A Unit and Main Paddle B Unit. 3-110 Copyright© 1995-2017 SAMSUNG. All rights reserved. -
Page 241: Ejector Assy
3. Disassembly and Reassembly 3.3.35.25. Ejector Assy 1) Follow the step 1~6 in Ejector Motor disassembly. (Refer to 3.3.34.21.) 2) Remove 2 screws. 3) Unplug the harness. Then, remove the Ejector Assy. Copyright© 1995-2017 SAMSUNG. All rights reserved. 3-111... -
Page 242: Punch Dust Full Sensor
1) Follow the step 1~4 in Entrance Motor disassembly. (Refer to 3.3.34.2.) 2) Remove 1 screw. Unplug the connector. Then, remove the Punch Dust Full Sensor Sub Assy. 3) Remove 1 screw. Then, remove the Punch Dust Full Sensor. 3-112 Copyright© 1995-2017 SAMSUNG. All rights reserved. -
Page 243: Door Switch
3.3.35.27. Door Switch 1) Follow the step 1~4 in Entrance Sensor disassembly. (Refer to 3.3.34.1.) 2) Remove 3 screws. Then, remove the frame. 3) Remove 2 screws. Unplug the connector. And, remove the Door Switch. Copyright© 1995-2017 SAMSUNG. All rights reserved. 3-113... -
Page 244: Top Door Switch
1) Follow the step 1~6 in Front Jogger Motor disassembly. (Refer to 3.3.34.6) 2) Remove 1 screw. 3) Unplug the connector. Then, remove the switch Assy. 4) Remove 2 screws. Then, release the sensor. 3-114 Copyright© 1995-2017 SAMSUNG. All rights reserved. -
Page 245: Card Reader Or Nfc Kit Installation
3. Attach the double-sided tape to the bottom of Card Reader or NFC Kit. NOTE If the Working table is not installed, install its lower first. 2. Remove the Table-Upper. 4. Install the Card Reader or NFC Kit on Table-Lower. Copyright© 1995-2017 SAMSUNG. All rights reserved. 3-115... - Page 246 5. Connect the cable between the OPE-HUB PBA and 8. Attach the Tag label on the Working Table. Card Reader(or NFC Kit). NOTE 6. Assemble the Table-Upper. Refer to below for Tag label position. 7. Assemble 2 screws. 3-116 Copyright© 1995-2017 SAMSUNG. All rights reserved.
-
Page 247: Installing The Card Reader Or Nfc Kit Inside Cover-Scan Front
1. Open the side cover. 4. Remove the front-top cover. 2. Remove 2 screw-caps and 2 screws. 5. Lift up and release the Cover-Scan Front. 3. Remove 1 screw. 6. Remove the Cover-Scan Front. Copyright© 1995-2017 SAMSUNG. All rights reserved. 3-117... - Page 248 Reader or NFC Kit. OPE-HUB PBA and Card Reader(or NFC Kit). And, arrange the cable. 8. Install the Card Reader or NFC Kit on the front of Platen. 10. Assemble the Cover-Scan Front. 3-118 Copyright© 1995-2017 SAMSUNG. All rights reserved.
- Page 249 11. Assemble 5 screws and 5 Screw-caps. 14. Remove 1 screw. 15. Close the side cover. 12. Assemble the front-top cover. 16. Attach the Tag label on the Cover-Scan Front. 13. Remove 2 screws. Copyright© 1995-2017 SAMSUNG. All rights reserved. 3-119...
- Page 250 3. Disassembly and Reassembly NOTE Refer to below for Tag label position. 3-120 Copyright© 1995-2017 SAMSUNG. All rights reserved.
-
Page 251: Troubleshooting
Then, confirmation window appears. Power LED Shows the power status of your machine. CAUTION When you use the display screen, use your finger only. The screen may be damaged with a sharpen pen or anything else. Copyright© 1995-2017 SAMSUNG. All rights reserved. -
Page 252: Display Screen And Useful Buttons
To pan, touch and hold a selected icon, then move the device to the left or right to reposition it to another page. For example: Move icons on your home screens or application menus to another page. Main Screen Copyright© 1995-2017 SAMSUNG. All rights reserved. -
Page 253: Home Screen Overview
This machine initially has four application menus available in main home screen. If you want to using all application menus and widgets, tap icon. Then sweep the screen left or right to access the other menus and widgets. Copyright© 1995-2017 SAMSUNG. All rights reserved. -
Page 254: Customizing Your Home Screen
5) Drag the shortcut to a desired position on the screen and release it. To move to a different page, drag the shortcut to the edge of the screen until the screen scrolls to the desired page. [ Deleting a shortcut ] 1) Touch and hold a shortcut until it becomes movable. Copyright© 1995-2017 SAMSUNG. All rights reserved. - Page 255 • Home Screen : Set the wallpaper for the Home Screen. • Login Screen : Set the wallpaper for the Login Screen. • Home and Login Screen : Set the wallpaper for both screens. Copyright© 1995-2017 SAMSUNG. All rights reserved.
-
Page 256: Notification Bar
In addition to notifications, this panel also provides quick and ready access to separate device functions. These can be quickly activated or deactivated by toggling them on or off. The following functions can either be activated (green) or deactivated (gray): ECO, Wi-Fi, NFC, Log in, Setup and darkness setting. Copyright© 1995-2017 SAMSUNG. All rights reserved. -
Page 257: Understanding The Leds
The toner cartridge life, imaging unit, or waste toner container is near the end of its life. Order • a new toner cartridge, imaging unit, or waste toner container. You can temporarily improve print quality by redistributing the toner. Copyright© 1995-2017 SAMSUNG. All rights reserved. -
Page 258: Updating Firmware
6) The installation window will list the files on the USB drive. Touch the name of the firmware file to select it. 7) Press the “OK” button after selecting the file. 8) Once the installation is complete, “OK” button will be activated. Press “OK” button. Copyright© 1995-2017 SAMSUNG. All rights reserved. -
Page 259: Updating From The Network
1) Go to the SyncThruWeb Service (SWS) main home page. Login as Admin in Sync Thru Web Service. NOTE Login using the Administrator ID and Password established during initial machine setup. 2) Click on Maintenance > Application Management > Application > Add. Copyright© 1995-2017 SAMSUNG. All rights reserved. - Page 260 5) After uploading the f/w file on MFP, validation information will appear. Check the [Overwrite] check-box if you want to force the firmware update even if the firmware version to be installed is lower or same with the currently installed firmware in the device. Press [OK] to start the firmware upgrade. 4-10 Copyright© 1995-2017 SAMSUNG. All rights reserved.
- Page 261 4. Troubleshooting 6) The firmware update will start. 7) Once the installation is complete, the machine power-off and power-on automatically. Copyright© 1995-2017 SAMSUNG. All rights reserved. 4-11...
-
Page 262: Jam Removal
Original paper jam in front of scanner 1) Remove any remaining pages from the ADF. 3) Gently remove the jammed paper from the ADF. 2) Open the ADF cover. 4) Close the ADF cover. 4-12 Copyright© 1995-2017 SAMSUNG. All rights reserved. - Page 263 If you do not see paper in this area, go to the next step. If you do not see paper in this area, go to the next step. 6) Close ADF cover and ADF input tray. Copyright© 1995-2017 SAMSUNG. All rights reserved. 4-13...
- Page 264 4. Troubleshooting 7) Open the ADF. 8) Grasp the misfed paper, and remove the paper from the feed area by carefully pulling it using both hands. 9) Close the ADF. 4-14 Copyright© 1995-2017 SAMSUNG. All rights reserved.
-
Page 265: Clearing Paper Jams
5) Insert tray 1 or 2 back into the machine until it locks into place. Printing automatically resumes. Close the right door. If you do not see paper in this area, go to the next step. Copyright© 1995-2017 SAMSUNG. All rights reserved. 4-15... - Page 266 Printing automatically resumes. Paper jam in the multi-purpose tray 1) If the paper is not feeding properly, pull the paper out 2) Open and close the front door to resume printing. of the machine. 4-16 Copyright© 1995-2017 SAMSUNG. All rights reserved.
- Page 267 Paper jam inside the machine (Jam feed 3, Jam feed 4) 1) Open the right bottom door of the dual cassette feeder. 2) Remove the jammed paper by gently pulling it straight out. 3) Close the dual cassette feeder right bottom door. Copyright© 1995-2017 SAMSUNG. All rights reserved. 4-17...
- Page 268 The fuser area is hot. Take care when removing paper from the machine. 1) Open the right door. 3) Close the fuser cover and the right door. 4-18 Copyright© 1995-2017 SAMSUNG. All rights reserved.
- Page 269 2) Open and close the front door. Printing automatically resumes. If this paper jam persists, make sure the bin full sensor is unfolded. The bin full sensor is located in front of the output tray. Copyright© 1995-2017 SAMSUNG. All rights reserved. 4-19...
-
Page 270: Service Mode (Tech Mode)
1) Press "Power button“ until the pop up will be displayed. 2) Press pop-up area except “Cancel” and “Turn Off” button until the password window will be displayed. 3) Enter “1934” and press the “Done” button. 4-20 Copyright© 1995-2017 SAMSUNG. All rights reserved. -
Page 271: Service Mode Menu Tree
Fax Diagnostics (Line 2) Print Reports P.4–27 Auto Color Registration Job Duty Auto Toning History Full Auto Color Registration ID Calibration History Maintenance Toner Event RTF Format Export Reports XML Format P.4–28 PDF Format Copyright© 1995-2017 SAMSUNG. All rights reserved. 4-21... - Page 272 P.4–29 Scan Jam Scan Jam Exit Jam Maintenance Duplex Regi Jam Counts Duplex Scan Jam Duplex Exit Jam Toner Cartridge Imaging Unit Development Unit Part Replacement Transfer P.4–30 Count Fuser Roller ADF Roller 4-22 Copyright© 1995-2017 SAMSUNG. All rights reserved.
- Page 273 [1~5] : 5* Auto Color Registration P.4–53 Execute Now Normal Image Auto Tone Adjustment Activation P.4–54 Management Full Normal Auto Tone Adjustment Full P.4–55 CTD Sensor Cleaning Print Test Skew Pattern P.4–56 Patterns Copyright© 1995-2017 SAMSUNG. All rights reserved. 4-23...
- Page 274 Cache Hibernation P.4–62 CREATE NEW Paper Low Warning P.4–62 Message Imaging Unit Off / On Part Development Unit Off / On Replacement P.4–62 Fuser Off / On Alert Transfer Unit Off / On 4-24 Copyright© 1995-2017 SAMSUNG. All rights reserved.
- Page 275 Type A Type B P.4–63 Type C EIUL P.4–63 Continent Dealer ID P.4–63 Branch Dealer ID Envelope 90 degrees P.4–64 Rotate 180 degrees Yellow Drain Drain Cyan Drain P.4–654 Magenta Drain Black Drain Copyright© 1995-2017 SAMSUNG. All rights reserved. 4-25...
-
Page 276: Information
Maximum life : This shows the max capacity of the selected item. The technician can edit the default warning value within the given threshold. Selecting some items will enable the reset button to reset the current count to 0 after replacing the unit. 4-26 Copyright© 1995-2017 SAMSUNG. All rights reserved. -
Page 277: Software Version
Auto Toning History Full Auto Color Registration ID Calibration History Maintenance Toner Event Auto Color Registration • Information > Print Reports > Auto Color Registration This report lists last 10 Auto Color Registration results. Copyright© 1995-2017 SAMSUNG. All rights reserved. 4-27... -
Page 278: Export Reports
If “Fail” count is not zero, the image density sensor needs to be checked. 4.5.3.7. Export Reports • Information > Export Reports This menu exports report to usb stick. Configuration, Error Information, Supplies Information, Usage Counter Reports are exported as the form of selected format. 4-28 Copyright© 1995-2017 SAMSUNG. All rights reserved. -
Page 279: Maintenance Counts
Level 1 Level 2 Pick-up Jam Feed Jam Print Jam Duplex Jam Exit Jam Feed Jam Regi Jam Scan Jam Scan Jam Exit Jam Duplex Regi Jam Duplex Scan Jam Duplex Exit Jam Copyright© 1995-2017 SAMSUNG. All rights reserved. 4-29... -
Page 280: Part Replacement Count
Auto Sensing Transfer Transfer Roller Count Clear Tray 1 Roller Count Clear Tray 2 Roller Count Clear Roller Tray 3 Roller Count Clear Tray 4 Roller Count Clear ADF Roller ADF Roller Count Clear 4-30 Copyright© 1995-2017 SAMSUNG. All rights reserved. -
Page 281: Diagnostics
109-0170 Cooldown Mode idling Time4 Narrow Paper idling Time4(~205℃) 150/0 109-0180 Cooldown Mode idling Time5 Narrow Paper idling Time5(205~℃) 150/0 Distant from hsync to lsync (multi-hsync) 112-0120 Manual Color Regi X-offset Yellow 200 / 0 for yellow Copyright© 1995-2017 SAMSUNG. All rights reserved. 4-31... - Page 282 Users can select a maximum of 3 routines at the same time. After selecting one or multiple routines, pressing the “OK” button will open the test window that lists selected routines. Users can start/stop a desired test routine. Verification Specification Reference 4-32 Copyright© 1995-2017 SAMSUNG. All rights reserved.
- Page 283 Detects whether auto size3 sensor of tray1 is high or low. 102-0050 T1 Stack Height Sensor Detects if paper in tray1 is elevated to the sensor. 102-0060 T1 Paper Low Sensor Detects when the stack height of tray1 is less than 25%. Copyright© 1995-2017 SAMSUNG. All rights reserved. 4-33...
- Page 284 Black MHV bias voltage on at normal drive level 105-0070 Black MHV Bias Read Black Detect what the MHV value is on the MHV Roller 106-0030 Black Dev Bias Black Dev bias voltage on at normal drive level 4-34 Copyright© 1995-2017 SAMSUNG. All rights reserved.
- Page 285 Rear Jog Home Sensor Detect Rear Jog Home position 113-0190 Support Finger Home Sensor Detect Support-Finger Home position 113-0200 Ejector Home Sensor Detect Ejector Home position 113-0210 Ejector Encoder Sensor Detect Ejector Encoder sensor Copyright© 1995-2017 SAMSUNG. All rights reserved. 4-35...
- Page 286 Low Staple Sensor Detect Staple Low 113-0270 Paper Detector Sensor Detect paper in stapler area 113-0280 Finisher Door Switch Detect Finsher Door Open or Close 113-0300 Duplex Paper Sensor Deetct Duplex Paper feeding from IOT. 4-36 Copyright© 1995-2017 SAMSUNG. All rights reserved.
-
Page 287: Fax Diagnostics
Adjust TCF duration (ms) 1500 20-800 Modem Speed Select Modem Start Speed 20-810 Fax Transmission Level Adjust Fax Transmission Level (dBm) Country Value 20-830 Auto Dial Timeout Adjust Auto Dial Timeout (second) Country Value Copyright© 1995-2017 SAMSUNG. All rights reserved. 4-37... - Page 288 21-999 Fax Line Setting Fax Test Line Setting(Dual Fax) 21-800 Modem Speed Line2 Select Modem Start Speed for Line 2 This item shall be displayed only when Dual Line Fax Kit is Installed. 4-38 Copyright© 1995-2017 SAMSUNG. All rights reserved.
- Page 289 Emits V.34 7200 bps Line1 On / Off 20-052 V.34 9600 bps Line1 Emits V.34 9600 bps Line1 On / Off 20-053 V.34 12000 bps Line1 Emits V.34 12000 bps Line1 On / Off Copyright© 1995-2017 SAMSUNG. All rights reserved. 4-39...
- Page 290 Emits V.34 9600 bps Line2 On / Off 21-053 V.34 12000 bps Line2 Emits V.34 12000 bps Line2 On / Off 21-054 V.34 14400 bps Line2 Emits V.34 14400 bps Line2 On / Off 4-40 Copyright© 1995-2017 SAMSUNG. All rights reserved.
- Page 291 Emits V.34 28800 bps Line2 On / Off 21-061 V.34 31200 bps Line2 Emits V.34 31200 bps Line2 On / Off 21-062 V.34 33600 bps Line2 Emits V.34 33600 bps Line2 On / Off Copyright© 1995-2017 SAMSUNG. All rights reserved. 4-41...
-
Page 292: Scanner Diagnostics
3) Check if RESULTS on the sheet is OK. NOTE • When executing DSDF shading, use only shading sheet(JC63-05055A). • Shading Test for ADF Unit must be carried out, after replacing the DSDF unit or main board. 4-42 Copyright© 1995-2017 SAMSUNG. All rights reserved. - Page 293 05-0001 Retard Roller Count 05-0010 Document Duplex Reverse Point 05-0030 Simplex Regi Value(Regi1) 05-0040 Duplex Regi Value(Regi2) 05-0050 Width Guide Max Value Depends on ADF 05-0060 Width Guide Min Value Depends on ADF Copyright© 1995-2017 SAMSUNG. All rights reserved. 4-43...
- Page 294 Document Regi1 Motor Forward Start/Stop 05-0162 Document Regi1 Motor Backward Start/Stop 05-0190 Document Width Guide ADC Sensor 10Bit (0~1023) 05-0210 Document Jig Test Low Speed Simplex Start/Stop 05-0220 Document Jig Test Low Speed Duplex Start/Stop 4-44 Copyright© 1995-2017 SAMSUNG. All rights reserved.
- Page 295 4. Troubleshooting DSDF RADF Code Name Value (X4300/4250) (X4220) 05-0230 Document Jig Test High Speed Simplex Start/Stop 05-0240 Document Jig Test High Speed Duplex Start/Stop Copyright© 1995-2017 SAMSUNG. All rights reserved. 4-45...
-
Page 296: Adjustment
7) Press “OK” button. Automatic scanning will occur . 8) The system will automatically calculate the proper value based on scanning result of the test pattern. 9) The new values are set to the system. 4-46 Copyright© 1995-2017 SAMSUNG. All rights reserved. - Page 297 3) Print out the test pattern and check if the image is moved as you want. If not, repeat stpe2. • Diagnostics > Adjustment > Print Adjustment > Print Test Patterns This menu is to print out the test pattern manually. Copyright© 1995-2017 SAMSUNG. All rights reserved. 4-47...
- Page 298 Simplex Leading Edge • Simplex Side Edge • Duplex Leading Edge • Duplex Side Edge 3) Print out the test pattern and check if the image is moved as you want. If not, repeat stpe2. 4-48 Copyright© 1995-2017 SAMSUNG. All rights reserved.
- Page 299 6) To check the magnification, compare the length of line “c” of the chart to the scanned image. NOTE Specification • a,b : 10, ± 1.5 mm • c: 190, ± 1.5 mm Copyright© 1995-2017 SAMSUNG. All rights reserved. 4-49...
- Page 300 9) To check the magnification, compare the length of line “c” of the chart to the scanned image. NOTE Specification • a,b : 10, ± 1.5 mm • c: 190, ± 1.5 mm 4-50 Copyright© 1995-2017 SAMSUNG. All rights reserved.
- Page 301 6) To check the magnification, compare the length of line “c” of the chart to the copy. NOTE Specification • a,b : 10, ± 1.5 mm • c: 190, ± 1.5 mm NOTE After executing ADF adjustment, the shading test must be executed. (Refer to 4.5.5.3. Scanner Diagnostics.) Copyright© 1995-2017 SAMSUNG. All rights reserved. 4-51...
- Page 302 9) To check the magnification, compare the length of line “c” of the chart to the copy. NOTE Specification • a,b : 10, ± 1.5 mm • c: 190, ± 1.5 mm NOTE After executing ADF adjustment, the shading test must be executed. (Refer to 4.5.5.3. Scanner Diagnostics.) 4-52 Copyright© 1995-2017 SAMSUNG. All rights reserved.
-
Page 303: Acs (Auto Color Sensing)
Specification [Color coverage] • Level 1 : 0.01 % Level 2 : 0.05 % • Level 3 : 0.1 % • Level 4 : 0.25 % • Level 5 : 0.5 % • Copyright© 1995-2017 SAMSUNG. All rights reserved. 4-53... -
Page 304: Image Management
Range : 100 ~ 5000 • Default : 500 • Inner Temperature • Range : 1 ~ 10 Default : 4 • LSU Temperature • Range : 1 ~ 10 • Default : 3 • 4-54 Copyright© 1995-2017 SAMSUNG. All rights reserved. - Page 305 Time Left Alone: The system executes Full TRC Control when the system returns from a power save mode and the rest time exceeds the configured value. Verification Print out a test job and make sure the image quality has recovered. Copyright© 1995-2017 SAMSUNG. All rights reserved. 4-55...
-
Page 306: Print Test Patterns
After cleaning CTD/ACR sensor, execute this menu. 4.5.5.7. Print Test Patterns • Diagnostics > Print Test Patterns > Skew Pattern The skew pattern stored in the machine will be printed out as the size you select. 4-56 Copyright© 1995-2017 SAMSUNG. All rights reserved. -
Page 307: Service Functions
For example, the total use of 100 A4 impressions and 100 A3 impressions will become 200 impressions if the configuration is set to “1 Count Up” while the total will be 300 impression if the configuration is set to “2 Count Up”. Copyright© 1995-2017 SAMSUNG. All rights reserved. 4-57... -
Page 308: Network Port
7) Once it is completed, the message will be displayed. Then restore the debug log level to ”JOB STATUS”. NOTE If the system log size become considerably huge, it will take longer time to copy to the plugged memory. 8) Check is the Log file is created in the USB memory. 4-58 Copyright© 1995-2017 SAMSUNG. All rights reserved. -
Page 309: Network Packet Capture
Show the file size captured 2) Export Capture File • Export button Export network packet capture file to USB memory stick 3) Delete Capture File • Delete button Clear network packet capture file in a device Copyright© 1995-2017 SAMSUNG. All rights reserved. 4-59... -
Page 310: System Recovery
In case of selecting Network option : This page contains two sections : Configure device IP address a) Device IP: IP address for the device b) Gateway IP: Gateway IP address for the device 4-60 Copyright© 1995-2017 SAMSUNG. All rights reserved. - Page 311 If the system initialization is not executed, enter the svc mode and execute “Full memory clear”. If not, the machine may not work normally. 9) Execute the firmware update using the one ROM FW file after system initialization. This work is a must for all FW module level. Copyright© 1995-2017 SAMSUNG. All rights reserved. 4-61...
-
Page 312: Tr Control Mode
Create New Image : Make the new Hibernation system image. When you enable the hibernation mode, you can use this menu. 4.5.6.12. Paper Low Warning Message • Service Functions > Paper Low Warning Message This function enables / disables the warning message of the paper low status. 4-62 Copyright© 1995-2017 SAMSUNG. All rights reserved. -
Page 313: Part Replacement Alert
The device supports only user's own email address for scan to email. [PCL6] The device prints as original 1 dot line without 2 dot line compensation. [PCL5] The device ignores paper size command in PRN and prints as paper size in tray. Copyright© 1995-2017 SAMSUNG. All rights reserved. 4-63... -
Page 314: Dealer Id
The device shall store confidential/store print without image processing. The device shall print line even though that has less than 1 dot. 4.5.6.17. Dealer ID • Service Functions > Dealer ID The SFE functions related to the dealer will be enable. 4-64 Copyright© 1995-2017 SAMSUNG. All rights reserved. -
Page 315: Envelope Rotate
This menu is recovering toner density. The device print grayed image after operating over 500 low coverage images. This menu support to set 10 levels. This function shall provide the setting options as follows: • Off (default) • • Yellow [1~10] • Cyan [1~10] • Magenta [1~10] • Black [1~10] Copyright© 1995-2017 SAMSUNG. All rights reserved. 4-65... -
Page 316: Error Code And Troubleshooting
Load MP with [Letter], [Plain] paper ► Symptom Paper in tray is not matched to the machine paper setting. ► Troubleshooting method 1) Check and change the paper setting of the corresponding tray properly. 4-66 Copyright© 1995-2017 SAMSUNG. All rights reserved. -
Page 317: 61-1111 (Hibernation Fail)
Booting Failure: #61-1111. Turn off then on. Call for service if the problem persists ► Symptom Hibernation image creation is failed. ► Troubleshooting method 1) Turn the machine on with a normal booting. 2) Enter the SVC mode. Select “Hibernation On” again. Copyright© 1995-2017 SAMSUNG. All rights reserved. 4-67... -
Page 318: A1-Xxxx (Motor Error)
ACR Shutter Motor Failure: #A1-4410. Turn off then on. Call for service A1–4410 P.4–85 if the problem persists Motor Failure: #A1-5212. Turn off then on. Call for service if the problem A1-5212 P.4–86 persists 4-68 Copyright© 1995-2017 SAMSUNG. All rights reserved. - Page 319 Motor Failure: #A1-5512. Turn off then on. Call for service if the problem A1-5512 P.4–92 persists Motor Failure: #A1-5513. Turn off then on. Call for service if the problem A1-5513 P.4–92 persists Copyright© 1995-2017 SAMSUNG. All rights reserved. 4-69...
- Page 320 5) If the connection is OK, turn the machine on. Enter SVC mode. Select motor test. (Diagnostics > Engine Diagnostics > Engine Test Routines > 100–0000) Check the motor operation. a) If the motor is not operational, 4-70 Copyright© 1995-2017 SAMSUNG. All rights reserved.
- Page 321 If the control signal is abnormal, replace the main board(JC92-02742A). b) If the motor is operational, • Check the Pin Num 8. If the value is abnormal, replace the main board. If the value is normal, replace the harness. Copyright© 1995-2017 SAMSUNG. All rights reserved. 4-71...
- Page 322 5) If the connection is OK, turn the machine on. Enter SVC mode. Select motor test. (Diagnostics > Engine Diagnostics > Engine Test Routines > 100–0120) Check the motor operation. a) If the motor is not operational, 4-72 Copyright© 1995-2017 SAMSUNG. All rights reserved.
- Page 323 If the control signal is abnormal, replace the main board(JC92-02742A). b) If the motor is operational, • Check the Pin Num 8. If the value is abnormal, replace the main board. If the value is normal, replace the harness. Copyright© 1995-2017 SAMSUNG. All rights reserved. 4-73...
- Page 324 5) If the connection is OK, turn the machine on. Enter SVC mode. Select motor test. (Diagnostics > Engine Diagnostics > Engine Test Routines > 100–0450) Check the motor operation. a) If the motor is not operational, 4-74 Copyright© 1995-2017 SAMSUNG. All rights reserved.
- Page 325 If the control signal is abnormal, replace the main board(JC92-02742A). b) If the motor is operational, • Check the Pin Num 8. If the value is abnormal, replace the main board. If the value is normal, replace the harness. Copyright© 1995-2017 SAMSUNG. All rights reserved. 4-75...
- Page 326 5) If the connection is OK, turn the machine on. Enter SVC mode. Select the yellow OPC motor test. (Diagnostics > Engine Diagnostics > Engine Test Routines > 100–0041) Check the motor operation. a) If the motor is not operational, 4-76 Copyright© 1995-2017 SAMSUNG. All rights reserved.
- Page 327 If the control signal is abnormal, replace the main board(JC92-02742A). b) If the motor is operational, • Check the Pin Num 8. If the value is abnormal, replace the main board. If the value is normal, replace the harness. Copyright© 1995-2017 SAMSUNG. All rights reserved. 4-77...
- Page 328 5) If the connection is OK, turn the machine on. Enter SVC mode. Select the magenta OPC motor test. (Diagnostics > Engine Diagnostics > Engine Test Routines > 100–0042) Check the motor operation. a) If the motor is not operational, 4-78 Copyright© 1995-2017 SAMSUNG. All rights reserved.
- Page 329 If the control signal is abnormal, replace the main board(JC92-02742A). b) If the motor is operational, • Check the Pin Num 8. If the value is abnormal, replace the main board. If the value is normal, replace the harness. Copyright© 1995-2017 SAMSUNG. All rights reserved. 4-79...
- Page 330 5) If the connection is OK, turn the machine on. Enter SVC mode. Select the cyan OPC motor test. (Diagnostics > Engine Diagnostics > Engine Test Routines > 100–0043) Check the motor operation. a) If the motor is not operational, 4-80 Copyright© 1995-2017 SAMSUNG. All rights reserved.
- Page 331 If the control signal is abnormal, replace the main board(JC92-02742A). b) If the motor is operational, • Check the Pin Num 8. If the value is abnormal, replace the main board. If the value is normal, replace the harness. Copyright© 1995-2017 SAMSUNG. All rights reserved. 4-81...
- Page 332 5) If the connection is OK, turn the machine on. Enter SVC mode. Select the black OPC motor test. (Diagnostics > Engine Diagnostics > Engine Test Routines > 100–0044) Check the motor operation. a) If the motor is not operational, 4-82 Copyright© 1995-2017 SAMSUNG. All rights reserved.
- Page 333 If the control signal is abnormal, replace the main board(JC92-02742A). b) If the motor is operational, • Check the Pin Num 8. If the value is abnormal, replace the main board. If the value is normal, replace the harness. Copyright© 1995-2017 SAMSUNG. All rights reserved. 4-83...
- Page 334 3) If there is a motor noise or the motor is not operational normally, check the following : a) Remove the rear cover. Check if the T1 engage motor in the main drive unit is defective. i) Rotate the motor manually. 4-84 Copyright© 1995-2017 SAMSUNG. All rights reserved.
- Page 335 2) Check if the ACR shutter harness is connected correctly. 3) If the ACR shutter is in overload status while motor operation, replace the ACR shutter module. If not, check the drive unit or circuit board. Copyright© 1995-2017 SAMSUNG. All rights reserved. 4-85...
- Page 336 4) If the motor is not operational, measure the yellow motor power with DVM. a) If 24V power is generated, replace the yellow toner supply motor(JC93-00446A). b) If 24V power is not generated, 4-86 Copyright© 1995-2017 SAMSUNG. All rights reserved.
- Page 337 4. Troubleshooting • Measure the 24V power on the SMPS board. If the SMPS board(JC44-00100D (220V) / JC44-00093D (110V)) is defective, replace it. • If the SMPS board is normal, replace the main board(JC92-02742A). Copyright© 1995-2017 SAMSUNG. All rights reserved. 4-87...
- Page 338 4) If the motor is not operational, measure the magenta motor power with DVM. a) If 24V power is generated, replace the magenta toner supply motor(JC93-00446A). b) If 24V power is not generated, 4-88 Copyright© 1995-2017 SAMSUNG. All rights reserved.
- Page 339 4. Troubleshooting • Measure the 24V power on the SMPS board. If the SMPS board(JC44-00100D (220V) / JC44-00093D (110V)) is defective, replace it. • If the SMPS board is normal, replace the main board(JC92-02742A). Copyright© 1995-2017 SAMSUNG. All rights reserved. 4-89...
- Page 340 4) If the motor is not operational, measure the cyan motor power with DVM. a) If 24V power is generated, replace the cyan toner supply motor(JC93-00446A). b) If 24V power is not generated, 4-90 Copyright© 1995-2017 SAMSUNG. All rights reserved.
- Page 341 4. Troubleshooting • Measure the 24V power on the SMPS board. If the SMPS board(JC44-00100D (220V) / JC44-00093D (110V)) is defective, replace it. • If the SMPS board is normal, replace the main board(JC92-02742A). Copyright© 1995-2017 SAMSUNG. All rights reserved. 4-91...
- Page 342 4) If the motor is not operational, measure the black motor power with DVM. a) If 24V power is generated, replace the black toner supply motor(JC93-00446A). b) If 24V power is not generated, 4-92 Copyright© 1995-2017 SAMSUNG. All rights reserved.
- Page 343 4. Troubleshooting • Measure the 24V power on the SMPS board. If the SMPS board(JC44-00100D (220V) / JC44-00093D (110V)) is defective, replace it. • If the SMPS board is normal, replace the main board(JC92-02742A). Copyright© 1995-2017 SAMSUNG. All rights reserved. 4-93...
-
Page 344: A2-Xxxx (Fan Error)
Fan Failure: #A2-2321. Open the door, then close it. Call for service if the P.4–95 problem persists A2-2323 Fan Failure: #A2-2323. Open the door, then close it. Call for service if the P.4–95 problem persists 4-94 Copyright© 1995-2017 SAMSUNG. All rights reserved. - Page 345 4) If the connection is OK, Enter SVC mode and execute fan test. (Diagnostics > Engine Diagnostics > Engine Test Routines) • 100-0260 : SMPS Fan Run • 109-0040 : Fuser Fan Run Copyright© 1995-2017 SAMSUNG. All rights reserved. 4-95...
- Page 346 If the Lock signal is 0V continually, check the harness. If the harness is OK, replace the main board. • If the signal value is different from the table above, replace the fan. 4-96 Copyright© 1995-2017 SAMSUNG. All rights reserved.
-
Page 347: A3-Xxxx (Sensor Error)
P.4–101 persists A3-3412 Sensor Failure: #A3-3412. Turn off then on. Call for service if the problem P.4–101 persists A3-4114 The ACR sensor is dirty. Please clean it with soft cloth or paper P.4–98 Copyright© 1995-2017 SAMSUNG. All rights reserved. 4-97... - Page 348 5) When pop up appears, select the “Yes” button. NOTE a) CTD sensor calibration will start. Then “CTD sensor failure” error will be solved b) If you don’t execute the CTD sensor cleaning in SVC mode, error message persists. 4-98 Copyright© 1995-2017 SAMSUNG. All rights reserved.
- Page 349 4) Install the fuser unit after replacing the thermistor. 5) If the error persists, replace the fuser unit (JC91-01209A(220V) / JC91–01210A (110V)). 6) If the error persists after replacing fuser unit, replace the main board(JC92–02742A). Copyright© 1995-2017 SAMSUNG. All rights reserved. 4-99...
- Page 350 A3–3212 : Inner temperature sensor is in open status. 1) Open the side cover. Check the connection. • If the connection is OK, replace the photo sensor (1404-001417). 2) If the sensor is normal, replace the main board(JC92-02742A). 4-100 Copyright© 1995-2017 SAMSUNG. All rights reserved.
- Page 351 1) Remove the left cover. (Refer to 3.3.4 Temperature Sensor) Unplug and reconnect the sensor harness. If the error persists, replace the sensor(JC93-00486A). 2) If the harness and sensor are normal, replace the main board (JC92-02742A). Copyright© 1995-2017 SAMSUNG. All rights reserved. 4-101...
-
Page 352: C1-Xxxx (Toner Cartridge Error)
Black Toner Cartridge Failure: #C1-5311. Install black toner cartridge again P.4–113 C1-5411 Black toner cartridge is not installed. Install it P.4–114 C1-5413 Shake black toner cartridge P.4–114 C1-5512 Black toner cartridge is not compatible. Check users guide P.4–114 4-102 Copyright© 1995-2017 SAMSUNG. All rights reserved. - Page 353 The yellow toner cartridge is at the end of its life. ► Troubleshooting method 1) Open the front cover. 2) Remove the yellow toner cartridge. 3) Install the new yellow toner cartridge. 4) Close the front cover. Copyright© 1995-2017 SAMSUNG. All rights reserved. 4-103...
- Page 354 2) Remove the yellow toner cartridge. Shake the toner cartridge horizontally to distribute the toner evenly inside the cartridge. 3) Check if the toner supply pipe is blocked. If it is closed, open it. 4) Close the front cover. 4-104 Copyright© 1995-2017 SAMSUNG. All rights reserved.
- Page 355 ► Error message Yellow toner cartridge is not compatible. Check users guide. ► Symptom Yellow toner cartridge is not compatible. ► Troubleshooting method 1) Replace the yellow toner cartridge with a new one. Copyright© 1995-2017 SAMSUNG. All rights reserved. 4-105...
- Page 356 The magenta toner cartridge is at the end of its life. ► Troubleshooting method 1) Open the front cover. 2) Remove the magenta toner cartridge. 3) Install the new magenta toner cartridge. 4) Close the front cover. 4-106 Copyright© 1995-2017 SAMSUNG. All rights reserved.
- Page 357 2) Remove the magenta toner cartridge. Shake the toner cartridge horizontally to distribute the toner evenly inside the cartridge. 3) Check if the toner supply pipe is blocked. If it is closed, open it. 4) Close the front cover. Copyright© 1995-2017 SAMSUNG. All rights reserved. 4-107...
- Page 358 ► Error message Magenta toner cartridge is not compatible. Check users guide. ► Symptom Magenta toner cartridge is not compatible. ► Troubleshooting method 1) Replace the magenta toner cartridge with a new one. 4-108 Copyright© 1995-2017 SAMSUNG. All rights reserved.
- Page 359 The cyan toner cartridge is at the end of its life. ► Troubleshooting method 1) Open the front cover. 2) Remove the cyan toner cartridge. 3) Install the new cyan toner cartridge. 4) Close the front cover. Copyright© 1995-2017 SAMSUNG. All rights reserved. 4-109...
- Page 360 2) Remove the cyan toner cartridge. Shake the toner cartridge horizontally to distribute the toner evenly inside the cartridge. 3) Check if the toner supply pipe is blocked. If it is closed, open it. 4) Close the front cover. 4-110 Copyright© 1995-2017 SAMSUNG. All rights reserved.
- Page 361 ► Error message Cyan toner cartridge is not compatible. Check users guide. ► Symptom Cyan toner cartridge is not compatible. ► Troubleshooting method 1) Replace the cyan toner cartridge with a new one. Copyright© 1995-2017 SAMSUNG. All rights reserved. 4-111...
- Page 362 The black toner cartridge is at the end of its life. ► Troubleshooting method 1) Open the front cover. 2) Remove the black toner cartridge. 3) Install the new black toner cartridge. 4) Close the front cover. 4-112 Copyright© 1995-2017 SAMSUNG. All rights reserved.
- Page 363 2) Remove the black toner cartridge. Shake the toner cartridge horizontally to distribute the toner evenly inside the cartridge. 3) Check if the toner supply pipe is blocked. If it is closed, open it. 4) Close the front cover. Copyright© 1995-2017 SAMSUNG. All rights reserved. 4-113...
- Page 364 ► Error message Black toner cartridge is not compatible. Check users guide. ► Symptom Black toner cartridge is not compatible. ► Troubleshooting method 1) Replace the black toner cartridge with a new one. 4-114 Copyright© 1995-2017 SAMSUNG. All rights reserved.
-
Page 365: C3-Xxxx (Drum Unit Error)
P.4–122 C3-5411 Black Imaging unit is not installed. Install it P.4–123 C3-5414 Black Imaging Unit Failure: #C3-5414. Install imaging unit again P.4–123 C3-5512 Black imaging unit is not compatible. Check users guide P.4–123 Copyright© 1995-2017 SAMSUNG. All rights reserved. 4-115... - Page 366 (Refer to 3.2.2.1. Drum Unit) 4) Install the new yellow drum unit. 5) Clean the LSU window. (Refer to 3.2.1.2. Cleaning the LSU window) 6) Install the waste toner container. 7) Close the front cover. 4-116 Copyright© 1995-2017 SAMSUNG. All rights reserved.
- Page 367 2) Remove the waste toner container. 3) Remove the yellow drum unit. Check if the drum unit is compatible with the machine. 4) If the drum unit is not a samsung genuine, replace it with a new one. Copyright© 1995-2017 SAMSUNG. All rights reserved.
- Page 368 (Refer to 3.2.2.1. Drum Unit) 4) Install the new magenta drum unit. 5) Clean the LSU window. (Refer to 3.2.1.2. Cleaning the LSU window) 6) Install the waste toner container. 7) Close the front cover. 4-118 Copyright© 1995-2017 SAMSUNG. All rights reserved.
- Page 369 2) Remove the waste toner container. 3) Remove the magenta drum unit. Check if the drum unit is compatible with the machine. 4) If the drum unit is not a samsung genuine, replace it with a new one. Copyright© 1995-2017 SAMSUNG. All rights reserved.
- Page 370 (Refer to 3.2.2.1. Drum Unit) 4) Install the new cyan drum unit. 5) Clean the LSU window. (Refer to 3.2.1.2. Cleaning the LSU window) 6) Install the waste toner container. 7) Close the front cover. 4-120 Copyright© 1995-2017 SAMSUNG. All rights reserved.
- Page 371 2) Remove the waste toner container. 3) Remove the cyan drum unit. Check if the drum unit is compatible with the machine. 4) If the drum unit is not a samsung genuine, replace it with a new one. Copyright© 1995-2017 SAMSUNG. All rights reserved.
- Page 372 (Refer to 3.2.2.1. Drum Unit) 4) Install the new black drum unit. 5) Clean the LSU window. (Refer to 3.2.1.2. Cleaning the LSU window) 6) Install the waste toner container. 7) Close the front cover. 4-122 Copyright© 1995-2017 SAMSUNG. All rights reserved.
- Page 373 2) Remove the waste toner container. 3) Remove the black drum unit. Check if the drum unit is compatible with the machine. 4) If the drum unit is not a samsung genuine, replace it with a new one. Copyright© 1995-2017 SAMSUNG. All rights reserved.
-
Page 374: C5-Xxxx (Itb Unit Error)
(INFORMATION > Supply Status > Field Replacement Unit > TRANSFER) 6) Select “ITB”. The “RESET” button will be activated. Click “RESET” to clear the ITB count. 7) Exit SVC mode by pushing the home button. 4-124 Copyright© 1995-2017 SAMSUNG. All rights reserved. - Page 375 Prepare new transfer belt unit. ► Symptom The life of the ITB cleaner has expired. ► Troubleshooting method 1) Turn the machine off. 2) Replace the ITB cleaner. 3) Turn the machine on. Copyright© 1995-2017 SAMSUNG. All rights reserved. 4-125...
-
Page 376: C6-Xxxx (Fuser Unit Error)
/ JC91–01210A (110V)). CAUTION The temperature gets high in the vicinity of the fuser unit. When replacing it, you may get burned. Before replacing it, make sure that fuser unit has cooled. 4-126 Copyright© 1995-2017 SAMSUNG. All rights reserved. -
Page 377: C7-Xxxx (Waste Toner Container Error)
Waste toner container is not installed. Install it. ► Symptom The waste toner container is not installed. ► Troubleshooting method 1) Open the front cover. 2) Remove and reinstall the waste toner container. 3) Close the front cover. Copyright© 1995-2017 SAMSUNG. All rights reserved. 4-127... -
Page 378: C8-Xxxx (Developer Error)
Black Developer Failure: #C8-5210. Turn off then on P.4–132 C8-5310 Black Developer Failure: #C8-5310. Install black developer unit again P.4–132 C8-5313 Black Developer Failure: #C8-5313. Turn off then on. Please call for service P.4–132 if the problem persists 4-128 Copyright© 1995-2017 SAMSUNG. All rights reserved. - Page 379 5) Turn the machine off then on. 6) If the problem persists, remove and reinstall the yellow developer unit. 7) If the problem persists, replace the yellow developer unit. (Refer to 3.2.2.2. Developer Unit) Copyright© 1995-2017 SAMSUNG. All rights reserved. 4-129...
- Page 380 5) Turn the machine off then on. 6) If the problem persists, remove and reinstall the magenta developer unit. 7) If the problem persists, replace the magenta developer unit. (Refer to 3.2.2.2. Developer Unit) 4-130 Copyright© 1995-2017 SAMSUNG. All rights reserved.
- Page 381 5) Turn the machine off then on. 6) If the problem persists, remove and reinstall the cyan developer unit. 7) If the problem persists, replace the cyan developer unit. (Refer to 3.2.2.2. Developer Unit) Copyright© 1995-2017 SAMSUNG. All rights reserved. 4-131...
- Page 382 5) Turn the machine off then on. 6) If the problem persists, remove and reinstall the black developer unit. 7) If the problem persists, replace the black developer unit. (Refer to 3.2.2.2. Developer Unit) 4-132 Copyright© 1995-2017 SAMSUNG. All rights reserved.
-
Page 383: C9-Xxxx (Transfer Roller Error)
(INFORMATION > Supply Status > Field Replacement Unit > TRANSFER) 6) Select “T2 Roller”. The “RESET” button will be activated. Click “RESET” to clear the T2 Roller count. 7) Exit the SVC mode by pushing the home button. Copyright© 1995-2017 SAMSUNG. All rights reserved. 4-133... - Page 384 1) Open the side cover. 2) Remove and reinstall the second transfer roller. (Refer to 3.2.2.6. Transfer roller) 3) Close the side cover. 4) If the problem persists, replace the HVPS board(JC44–00212A). (Refer to 3.3.3. HVPS board) 4-134 Copyright© 1995-2017 SAMSUNG. All rights reserved.
-
Page 385: H1-Xxxx (Optional Tray Error)
Input System Failure: #H1-1453. Pull tray 4 out and insert it P.4–145 H1-1454 Paper is empty in tray 4. Load paper P.4–144 H1-5323 Tray door is open. Close the door P.4–146 H1-5330 DCF Failure: #H1-5330. Check internal DCF connection P.4–147 Copyright© 1995-2017 SAMSUNG. All rights reserved. 4-135... - Page 386 Remove the DCF pick up unit1. Check if the feed sensor cable is connected correctly. b) Check if the sensor cable on DCF board is connected correctly. c) If the connection is OK, replace the feed sensor(0604-001381). d) Install the DCF pick up unit1. 4-136 Copyright© 1995-2017 SAMSUNG. All rights reserved.
- Page 387 7) Check the DCF pick up motor. a) Check if the DCF pick up motor cable is connected correctly. b) If the connection is OK, replace the DCF pick up drive unit(JC93-00442A). (Refer to 3.3.33.3 DCF Pick Up Motor) Copyright© 1995-2017 SAMSUNG. All rights reserved. 4-137...
- Page 388 3) Check if the auto size sensor cable is connected correctly. Unplug and reconnect it. 4) If the connection is OK, replace the auto size sensor(JC93-00018A). 5) If the problem persists, replace the DCF board(JC92-02453A). (Refer to 3.3.33.1. DCF Main Board) 4-138 Copyright© 1995-2017 SAMSUNG. All rights reserved.
- Page 389 Check if the photo sensor in the DCF pick up unit1 is contaminated. If so, clean it. c) If the photo sensor(0604-001393) is defective, replace it. d) If the actuator(JC66-03199A) is defective, replace it. Copyright© 1995-2017 SAMSUNG. All rights reserved. 4-139...
- Page 390 7) If the problem persists, check the following. a) Remove the DCF pick up unit1. b) Check if the photo sensor in the DCF pick up unit1 is contaminated, clean it. c) If the photo sensor(0604-001393) is defective, replace it. 4-140 Copyright© 1995-2017 SAMSUNG. All rights reserved.
- Page 391 5) If the problem persists after checking step 3~4, check the following : a) Remove the DCF pick up unit2. Check if the sensor and actuator are assembled correctly. b) When pushing the pickup lever, check if the pick up rollers are down. Copyright© 1995-2017 SAMSUNG. All rights reserved. 4-141...
- Page 392 7) Check the DCF pick up motor. a) Check if the DCF pick up motor cable is connected correctly. b) If the connection is OK, replace the DCF pick up drive unit(JC93-00442A). (Refer to 3.3.33.3 DCF Pick Up Motor) 4-142 Copyright© 1995-2017 SAMSUNG. All rights reserved.
- Page 393 3) Check if the auto size sensor cable is connected correctly. Unplug and reconnect it. 4) If the connection is OK, replace the auto size sensor(JC93-00018A). 5) If the problem persists, replace the DCF board(JC92-02453A). (Refer to 3.3.33.1. DCF Main Board) Copyright© 1995-2017 SAMSUNG. All rights reserved. 4-143...
- Page 394 Check if the photo sensor in the DCF pick up unit2 is contaminated. If so, clean it. c) If the photo sensor(0604-001393) is defective, replace it. d) If the actuator(JC66-03199A) is defective, replace it. 4-144 Copyright© 1995-2017 SAMSUNG. All rights reserved.
- Page 395 Remove the DCF pick up unit2. b) Check if the photo sensor in the DCF pick up unit2 is contaminated. If so, clean it. c) If the photo sensor(0604-001393) is defective, replace it. Copyright© 1995-2017 SAMSUNG. All rights reserved. 4-145...
- Page 396 Check if I/L-Switch(HARNESS-DCF COVER OPEN)(JC39–01696A) is not operating normally. If it is defective, replace it. b) If the I/L Switch is OK, replace the DCF board(JC92–02453A). (Refer to 3.3.33.1. DCF Main Board) 4-146 Copyright© 1995-2017 SAMSUNG. All rights reserved.
- Page 397 3) Check if the interface connector is connected to the DCF board. If the interface connector(JC39–01690A) is defective, replace it. 4) If the problem persists, replace the DCF board. (Refer to 3.3.33.1. DCF Main Board) Copyright© 1995-2017 SAMSUNG. All rights reserved. 4-147...
-
Page 398: H2-Xxxx (Inner Finisher Error)
Finisher Failure: #H2-6323. Check finisher. Call for service if the problem P.4–157 persists H2-6324 Finisher Failure: #H2-6324. Check finisher. Call for service if the problem P.4–157 persists H2-6331 Finisher Failure: #H2-6331. Check finisher. Call for service if the problem P.4–157 persists 4-148 Copyright© 1995-2017 SAMSUNG. All rights reserved. - Page 399 Finisher Failure: #H2-6711. Check finisher P.4–167 H2-6712 Finisher Failure: #H2-6712. Check finisher P.4–167 H2-6713 Finisher Failure: #H2-6713. Check finisher P.4–167 H2-6714 Finisher Failure: #H2-6714. Check finisher P.4–167 H2-6715 Finisher Failure: #H2-6715. Check finisher P.4–168 Copyright© 1995-2017 SAMSUNG. All rights reserved. 4-149...
- Page 400 Finisher Failure: #H2-6742. Check finisher P.4–178 H2-6743 Finisher Failure: #H2-6743. Check finisher P.4–178 H2-6744 Staple cartridge not install. Install it P.4–179 H2-6A50 Finisher Failure: #H2-6A50. Check finisher P.4–180 H2-6A63 Staple cartridge is empty. Replace it P.4–180 4-150 Copyright© 1995-2017 SAMSUNG. All rights reserved.
- Page 401 Finisher is pulled out. / Finisher is not installed correctly. ► Troubleshooting method 1) Check if the finisher cable is connected to the copier. 2) Remove and reinstall the finisher. 3) If the problem persists, replace the finisher main board. Copyright© 1995-2017 SAMSUNG. All rights reserved. 4-151...
- Page 402 Make sure gear set can rotate smoothly. b) Make sure each gear is not broken. c) Replace the gear set. 4) Does finisher Ejector1 motor work well? a) Check the Ejector 1 motor belt. b) Replace Ejector 1 Motor. 4-152 Copyright© 1995-2017 SAMSUNG. All rights reserved.
- Page 403 4) Does finisher Ejector2 motor work well? a) Check the Ejector 2 motor belt (6602-003636). b) Replace Ejector2 Motor (JC90-01335A). 5) Check if any debris existed. Please make sure to remove any debris. Copyright© 1995-2017 SAMSUNG. All rights reserved. 4-153...
- Page 404 Check the Paper Holding Lever Solenoid. If you need, replace the solenoid. d) Check the paper holder return spring. If you need, replace the spring(JC61-07269A). 4) Check if any debris existed. Please make sure to remove any debris. 4-154 Copyright© 1995-2017 SAMSUNG. All rights reserved.
- Page 405 Make sure gear set can rotate smoothly. b) Make sure each gear is not broken. c) Replace the gear set. 4) Check if any debris existed. Please make sure to remove any debris. Copyright© 1995-2017 SAMSUNG. All rights reserved. 4-155...
- Page 406 Make sure finisher stapler motor cable is connected well to the main board connector. c) Replace the finisher stapler. (JC81-07917A) d) Replace the finisher main board. 5) Check if any debris(staple) existed. Please make sure to remove any debris. 4-156 Copyright© 1995-2017 SAMSUNG. All rights reserved.
- Page 407 Make sure gear set. If you can see the broken gear, replace the gear. v) Check the traverse motor, If you need, replace the stapler traverse motor. c) Check if any debris existed. Please make sure to remove any debris. Copyright© 1995-2017 SAMSUNG. All rights reserved. 4-157...
- Page 408 Stapler cover or Jam cover open and close.( It’s the Finisher Initializing) c) If fault persists, power Off/Power On. d) If necessary, replace the punch unit. 3) Check if any debris existed. Please make sure to remove any debris. 4-158 Copyright© 1995-2017 SAMSUNG. All rights reserved.
- Page 409 Check the punch interrupt sensor position. d) Check the punch motor’s encoder position. e) If the punch does not move, change the punch module. 3) Check if any debris existed. Please make sure to remove any debris. Copyright© 1995-2017 SAMSUNG. All rights reserved. 4-159...
- Page 410 Make sure hopper’s sensor cable is connected well to the main board connector. c) Check the interrupt sensor position. d) Check the hopper’s plug position. 3) Check if any debris existed. Please make sure to remove any debris. 4-160 Copyright© 1995-2017 SAMSUNG. All rights reserved.
- Page 411 Make sure gear set can rotate smoothly. b) Make sure each gear is not broken. c) Replace the gear set. (JC81-07637A / JC81-07636A) 5) Check if any debris existed. Please make sure to remove any debris. Copyright© 1995-2017 SAMSUNG. All rights reserved. 4-161...
- Page 412 4) Does finisher Ejector2 motor work well? a) Check the Ejector 2 motor belt. (6602-003636) b) Replace Ejector2 motor. (JC90-01335A) 5) Check if any debris existed. Please make sure to remove any debris. 4-162 Copyright© 1995-2017 SAMSUNG. All rights reserved.
- Page 413 Check the punch interrupt sensor position. d) Check the punch motor’s encoder position. e) If the punch does not move, change the punch module. 3) Check if any debris existed. Please make sure to remove any debris. Copyright© 1995-2017 SAMSUNG. All rights reserved. 4-163...
- Page 414 Make sure finisher input sensor cable is connected well to the main board connector. c) Replace the finisher input sensor. (0604-001381 / 0604-001415) d) Replace the finisher main board. (JC92-02774A) 3) Check if any debris existed. Please make sure to remove any debris. 4-164 Copyright© 1995-2017 SAMSUNG. All rights reserved.
- Page 415 Make sure transport motor cable is connected well to the motor connector. b) Make sure transport motor cable is connected well to the finisher main board. c) Replace the transport motor. d) Replace the finisher main board. Copyright© 1995-2017 SAMSUNG. All rights reserved. 4-165...
- Page 416 Make sure the main paddle motor cable is connected well to the motor connector. b) Make sure the main paddle motor cable is connected well to the main board connector. c) Replace the main paddle motor. 4-166 Copyright© 1995-2017 SAMSUNG. All rights reserved.
- Page 417 Make sure the belt is tight on the correct position, if it has the belt. d) Make sure each gear is not broken. e) Check home position sensor. f) Replace the Eject-sub Assy. Copyright© 1995-2017 SAMSUNG. All rights reserved. 4-167...
- Page 418 Make sure the rear jogger motor cable is connected well to the motor connector. b) Make sure the rear jogger motor cable is connected well to the finisher main board. c) Replace the rear jogger motor. d) Replace the finisher main board. 4-168 Copyright© 1995-2017 SAMSUNG. All rights reserved.
- Page 419 Make sure the front jogger motor cable is connected well to the motor connector. b) Make sure the front jogger motor cable is connected well to the finisher main board. c) Replace the front jogger motor. d) Replace the finisher main board. Copyright© 1995-2017 SAMSUNG. All rights reserved. 4-169...
- Page 420 Staple unit can not work stapling because paper is too thick. ► Troubleshooting method 1) Check the paper specification for stapling. If it is not proper, replace the paper. 2) Check the staple unit. If necessary, replace it. 4-170 Copyright© 1995-2017 SAMSUNG. All rights reserved.
- Page 421 Finisher Failure: #H2-672x. Check finisher. ► Symptom Paper can not be moved to stapling position. ► Troubleshooting method 1) Remove and reassemble the staple unit. 2) Check the staple unit. If necessary, replace it. Copyright© 1995-2017 SAMSUNG. All rights reserved. 4-171...
- Page 422 Make sure finisher input sensor cable is connected well to the sensor connector. b) Make sure finisher input sensor cable is connected well to the main board connector. c) Replace the finisher input sensor(JC90-01301A). d) Replace the finisher main board(JC92-02774A). 4-172 Copyright© 1995-2017 SAMSUNG. All rights reserved.
- Page 423 Make sure gear set can rotate smoothly. b) Make sure each gear is not broken. c) If you need, replace the stapler assembly. 4) Check if any debris(staple) existed. Please make sure to remove any debris. Copyright© 1995-2017 SAMSUNG. All rights reserved. 4-173...
- Page 424 Make sure finisher input sensor cable is connected well to the sensor connector. b) Make sure finisher input sensor cable is connected well to the main board connector. c) Replace the finisher stapler(JC81-07917A). d) Replace the finisher main board. 4-174 Copyright© 1995-2017 SAMSUNG. All rights reserved.
- Page 425 Finisher Failure: #H2-6734. Check finisher ► Symptom Stapler initialization is failed. ► Troubleshooting method 1) Remove and reassemble the staple unit. 2) If necessary, replace the staple unit. 3) If necessary, replace the finisher main board. Copyright© 1995-2017 SAMSUNG. All rights reserved. 4-175...
- Page 426 Make sure finisher top tray motor cable is connected well to the main board connector. c) Replace the finisher main tray motor. d) Replace the finisher main board. 4) Check if any debris(staple)existed. Please make sure to remove any debris. 4-176 Copyright© 1995-2017 SAMSUNG. All rights reserved.
- Page 427 Make sure gear set can rotate smoothly. b) Make sure each gear is not broken. c) Replace the gear set. (JC81-07637A / JC81-07636A) 6) Check if any debris existed. Please make sure to remove any debris. Copyright© 1995-2017 SAMSUNG. All rights reserved. 4-177...
- Page 428 Make sure gear set can rotate smoothly. b) Make sure each gear is not broken. c) Replace the gear set. (JC81-07637A / JC81-07636A) 6) Check if any debris existed. Please make sure to remove any debris. 4-178 Copyright© 1995-2017 SAMSUNG. All rights reserved.
- Page 429 Make sure finisher input sensor cable is connected well to the main board connector. c) Replace the finisher stapler cartridge. (JC81-07408A) d) Replace the finisher stapler. (JC81-07917A) e) Replace the finisher main board. 3) Check if any debris(staple)existed. Please make sure to remove any debris. Copyright© 1995-2017 SAMSUNG. All rights reserved. 4-179...
- Page 430 Make sure finisher input sensor cable is connected well to the sensor connector. b) Make sure finisher input sensor cable is connected well to the main board connector. c) Replace the finisher stapler(JC81-07917A). d) Replace the finisher main board. 4-180 Copyright© 1995-2017 SAMSUNG. All rights reserved.
- Page 431 Paper jam at the top of duplex path P.4–190 M3-1411 Paper jam in exit area P.4–191 M3-1413 Check whether the pieces of paper remain in the paper path P.4–191 M3-1414 Paper jam in exit area P.4–191 Copyright© 1995-2017 SAMSUNG. All rights reserved. 4-181...
- Page 432 Check if the harness of pickup unit and feed sensor are connected correctly. 5) If the problem persists, check the pickup unit1. a) Remove the pickup unit and check the actuator and photo-sensor. 4-182 Copyright© 1995-2017 SAMSUNG. All rights reserved.
- Page 433 Push the pickup-lever and check if it operates correctly. 6) If the problem persists, replace the pickup drive unit(JC93–00422A) or Pickup unit1(JC93-00511A). (Refer to 3.3.15. Pick-up Drive unit) (Refer to 3.3.24. Pick-up Unit and Sensor) Copyright© 1995-2017 SAMSUNG. All rights reserved. 4-183...
- Page 434 Check if the harness of pickup unit and feed sensor are connected correctly. 5) If the problem persists, check the pickup unit2. a) Remove the pickup unit2 and check the actuator and photo-sensor. 4-184 Copyright© 1995-2017 SAMSUNG. All rights reserved.
- Page 435 Push the pickup-lever and check if it operates correctly. 6) If the problem persists, replace the pickup drive unit2(JC93–00422A) or Pickup unit1(JC93-00512A). (Refer to 3.3.15. Pick-up Drive unit) (Refer to 3.3.24. Pick-up Unit and Sensor) Copyright© 1995-2017 SAMSUNG. All rights reserved. 4-185...
- Page 436 Enter SVC mode. Execute Regi./MP motor test. b) Remove the rear cover. c) Check if the motor harness is connected correctly. d) If the problem occurs, replace the Regi/MP Drive Unit(JC93–00443A). (Refer to 3.3.17. Regi_MP Drive unit) 4-186 Copyright© 1995-2017 SAMSUNG. All rights reserved.
- Page 437 If the feed motor operation is normal, check the feed 1 sensor. e) If the sensor operation is abnormal, check the harness. f) If the connection is OK, replace the feed sensor(0604-001381). (Refer to 3.3.25. Feed sensor) Copyright© 1995-2017 SAMSUNG. All rights reserved. 4-187...
- Page 438 If the feed motor operation is normal, check the feed 2 sensor. e) If the sensor operation is abnormal, check the harness. f) If the connection is OK, replace the feed sensor 2 (0604-001381). (Refer to 3.3.26. Feed Unit) 4-188 Copyright© 1995-2017 SAMSUNG. All rights reserved.
- Page 439 If the motor operation is normal, check the regi. sensor. e) If the sensor operation is abnormal, check the harness. f) If the connection is OK, replace the regi. sensor (0604-001381). (Refer to 3.3.27. Registration Unit) Copyright© 1995-2017 SAMSUNG. All rights reserved. 4-189...
- Page 440 (Refer to 3.3.27. Registration Unit) b) Check the sensors in the Side Unit. If the harness is normal, replace the defective sensor (0604-001393 (Refer to 3.3.22.1. Fuser out sensor / 3.3.22.2. Duplex sensor and Curl sensor) 4-190 Copyright© 1995-2017 SAMSUNG. All rights reserved.
- Page 441 Remove the JOB-SEPARATOR. Check if the photo sensor is assembled correctly. c) Check if ACTUATOR-EXIT is assembled correctly. If the ACTUATOR-EXIT (JC66-02533A) is deformed or broken, replace it. d) If the photo sensor(0604-001393) is defective, replace it. Copyright© 1995-2017 SAMSUNG. All rights reserved. 4-191...
- Page 442 P.4–198 M1-5612 Paper is empty in MP tray. Load paper P.4–199 M3-2230 Paper in output bin is full. Remove printed paper P.4–200 M3-2430 Paper in output bin is full. Remove printed paper P.4–200 4-192 Copyright© 1995-2017 SAMSUNG. All rights reserved.
- Page 443 3) Check if foreign substance or paper is inside the space between Tray1,2. If so, please remove it. 4) If the problem persists, check that the auto size sensor is connected properly. (Refer to 3.3.20. Auto Size sensor) 5) If the problem persists, replace the main board(JC92–02452A). Copyright© 1995-2017 SAMSUNG. All rights reserved. 4-193...
- Page 444 3) Check if foreign substance or paper is inside the space between Tray1,2. If so, please remove it. 4) If the problem persists, check that the auto size sensor is connected properly. (Refer to 3.3.20. Auto Size sensor) 5) If the problem persists, replace the main board(JC92–02452A). 4-194 Copyright© 1995-2017 SAMSUNG. All rights reserved.
- Page 445 8) If the problem persists, check the pickup unit1. (Refer to 3.3.24. Pick-Up Unit and Sensor) a) Check if the photo sensor in the pickup unit1 is defective. b) If the sensor(0604–001393) is defective, replace it. Copyright© 1995-2017 SAMSUNG. All rights reserved. 4-195...
- Page 446 8) If the problem persists, check the pickup unit2. (Refer to 3.3.24. Pick-Up Unit and Sensor) a) Check if the photo sensor in the pickup unit2 is defective. b) If the sensor(0604–001393) is defective, replace it. 4-196 Copyright© 1995-2017 SAMSUNG. All rights reserved.
- Page 447 (Refer to 3.3.24. Pick-Up Unit and Sensor) c) If the photo sensor is contaminated, clean it. d) If the photo sensor is defective, replace it(0604–001393). e) If the actuator is defective, replace it(JC66-03199A). Copyright© 1995-2017 SAMSUNG. All rights reserved. 4-197...
- Page 448 (Refer to 3.3.24. Pick-Up Unit and Sensor) c) If the photo sensor is contaminated, clean it. d) If the photo sensor is defective, replace it(0604–001393). e) If the actuator is defective, replace it(JC66-03199A). 4-198 Copyright© 1995-2017 SAMSUNG. All rights reserved.
- Page 449 2) If paper is loaded but error message has not disappeared, check the following : (Refer to 3.3.22.3. MP unit) a) If the photo sensor is contaminated, clean it. b) If the photo sensor is defective, replace it(0604–001393). c) If the actuator is defective, replace it(JC66-03217A). Copyright© 1995-2017 SAMSUNG. All rights reserved. 4-199...
- Page 450 1) Remove the paper from output bin tray or inner tray. 2) If this error ccurs continually, check the following. a) Check if the bin-full sensor and actuator is assembled correctly. b) Check if the bin-full sensor(0604–001393) is defective. 4-200 Copyright© 1995-2017 SAMSUNG. All rights reserved.
- Page 451 Supplying and mixing toner to yellow developer unit. Please wait… P.4-213 S2-3323 Supplying and mixing toner to magenta developer unit. Please wait... P.4-213 S2-3324 Supplying and mixing toner to cyan developer unit. Please wait... P.4-213 Copyright© 1995-2017 SAMSUNG. All rights reserved. 4-201...
- Page 452 The IPv6 address assigned to wireless LAN conflicts with that of other system. P.4-221 Check it S7-1110 Engine System Failure: #S7-1110. Turn off then on P.4-222 S7-1210 Engine System Failure: #S7-1110. Turn off then on P.4-222 S7-2110 Fuser Failure: #S7-2110. Turn off then on P.4-222 4-202 Copyright© 1995-2017 SAMSUNG. All rights reserved.
- Page 453 (Refer to 3.3.2 Rear Cover) 5) Replace the main board(JC92-02742A). (Refer to 3.3.7 Main Board) NOTE Insert the MSOK to the new main board. 6) Assemble the rear cover. Turn the machine on. Copyright© 1995-2017 SAMSUNG. All rights reserved. 4-203...
- Page 454 Remove the fax holder from the main board. c) Measure the voltage of the battery. If the battery is normal, the measured value is over 3V. 3) If the battery is normal, replace the main board(JC92-02742A). 4-204 Copyright© 1995-2017 SAMSUNG. All rights reserved.
- Page 455 (Refer to 3.3.2 Rear Cover) 4) Replace the main board(JC92-02742A). (Refer to 3.3.7 Main Board) NOTE Insert the MSOK to the new main board. 5) Assemble the rear cover. Turn the machine on. Copyright© 1995-2017 SAMSUNG. All rights reserved. 4-205...
- Page 456 1) Check if the HDD is installed correctly. a) Remove the rear cover. (Refer to 3.3.2 Rear Cover) b) Check if the HDD cable is connected correctly. 2) If the problem persists, replace the HDD(JC59–00035A). (Refer to 3.3.32 HDD) 4-206 Copyright© 1995-2017 SAMSUNG. All rights reserved.
- Page 457 1) Enter SVC mode. Select “System Recovery” in Service Function menu. (Refer to 4.4.6.8 System Recovery) 2) Execute hard disk format and firmware re-installation. (Refer to 4.3. Updating Firmware) 3) If the problem persists, replace the HDD(JC59–00035A). (Refer to 3.3.32 HDD) Copyright© 1995-2017 SAMSUNG. All rights reserved. 4-207...
- Page 458 1) Enter SVC mode. Select “Hard Disk Maintenance” in Service Function menu. (Refer to 4.4.6.2 Hard Disk Maintenance) 2) Execute hard disk format. 3) If the problem persists, replace the HDD(JC59–00035A). (Refer to 3.3.32 HDD) 4-208 Copyright© 1995-2017 SAMSUNG. All rights reserved.
- Page 459 1) Remove the rear cover. (Refer to 3.3.2 Rear Cover) 2) Check if the MSOK is inserted correctly. Remove and reinstall it. 3) If the problem persists, contact technical support to obtain help. Copyright© 1995-2017 SAMSUNG. All rights reserved. 4-209...
- Page 460 1) Check if the green LED of the network port is on. 2) If not, unplug and reconnect the network cable. 3) If the problem persists, replace the main board(JC92-02742A). (Refer to 3.3.7 Main Board) 4-210 Copyright© 1995-2017 SAMSUNG. All rights reserved.
- Page 461 The USB device chip is defective. ► Troubleshooting method 1) Turn the machine off then on. 2) If the problem persists, turn the machine off again. 3) Replace the OPE hub board. 4) Turn the machine on. Copyright© 1995-2017 SAMSUNG. All rights reserved. 4-211...
- Page 462 ► Troubleshooting method 1) Execute “ACR calibration” manually. (Machine Setup > General Settings > Image Management > Auto Color Registration) 2) Clean the ACR sensor. 3) If the problem persists, replace the main board(JC92-02742A). 4-212 Copyright© 1995-2017 SAMSUNG. All rights reserved.
- Page 463 1) Close the front cover correctly. 2) Check if the cover open sensor connector is connected properly. Reconnect it. 3) If the sensor is defective, replace it. (Refer to 3.3.30. Side Cover Open Switch.) Copyright© 1995-2017 SAMSUNG. All rights reserved. 4-213...
- Page 464 2) If the problem persists, check the followings. • Check if the ACR sensor is contaminated or defective. Clean the ACR sensor or replace it. • Remove and reinstall the ITB unit. If the problem persists, replace the ITB unit. 4-214 Copyright© 1995-2017 SAMSUNG. All rights reserved.
- Page 465 4) Check if the home position sensor cable is connected correctly. 5) Remove the scan rear cover. Check if all cables on scan joint board are connected correctly. 6) If the connection is OK, replace the scan joint board. Copyright© 1995-2017 SAMSUNG. All rights reserved. 4-215...
- Page 466 3) Remove the scan rear cover. Check if the connector on scan joint board is connected correctly. 4) Remove the ADF rear cover. Check if the connector on ADF board is connected correctly. 5) If the connection is OK, replace the ADF board. 4-216 Copyright© 1995-2017 SAMSUNG. All rights reserved.
- Page 467 Fax System Failure: #S4-3111. Install fax modem card again ► Symptom Fax card is not installed properly. / Fax card is defective. ► Troubleshooting method 1) Remove and reinstall the fax card. 2) If the fax card is defective, replace it. Copyright© 1995-2017 SAMSUNG. All rights reserved. 4-217...
- Page 468 Insert USB memory stick which has recovery one rom and execute recovery(HDD format). • Check if the problem disappears after system recovery(format complete). If yes, go to step 4). If no, go to step 5)-d). 4) Execute the firmware update. 4-218 Copyright© 1995-2017 SAMSUNG. All rights reserved.
- Page 469 Replace the OPE board with new one. d) It seems that HDD or main board has some problem. Please replace HDD or main board with new one and check if the problem disappears. Copyright© 1995-2017 SAMSUNG. All rights reserved. 4-219...
- Page 470 1) Check if the green LED of the network port is on. 2) If not, unplug and reconnect the network cable. 3) If the problem persists, replace the main board(JC92-02742A). (Refer to 3.3.7 Main Board) 4-220 Copyright© 1995-2017 SAMSUNG. All rights reserved.
- Page 471 2) Select “Networking Setting”. 3) “Log-In”. 4) Select “TCP/IP”. 5) Select the proper item for your machine. 6) Select “IP Setting”. 7) Select the proper item for your machine. 8) Change the IP address. Copyright© 1995-2017 SAMSUNG. All rights reserved. 4-221...
- Page 472 ► Troubleshooting method 1) Turn the machine off. Re-install the fuser unit, then turn the machine on. 2) If the problem persists, replace the Fuser unit(JC91-01209A(220V) / JC91–01210A (110V)). (Refer to 3.2.2.5 Fuser unit) 4-222 Copyright© 1995-2017 SAMSUNG. All rights reserved.
- Page 473 Fuser Failure: #U1-2335. Turn off then on P.4-224 U1-2337 Fuser Failure: #U1-2337. Turn off then on P.4-224 U1-233A Fuser Failure: #U1-233A. Turn off then on P.4-224 U1-233D Fuser Failure: #U1-233D. Turn off then on P.4-224 Copyright© 1995-2017 SAMSUNG. All rights reserved. 4-223...
- Page 474 Check if the Halogen lamp (110V : 4713-001630 / 220V : 4713–001631) is broken or disconnected. b) Check if the AC connection of the Halogen lamp is disconnected or contaminated. c) Check if the thermostat(4712-001098) is disconnected. 4-224 Copyright© 1995-2017 SAMSUNG. All rights reserved.
- Page 475 Check if the fuser-motor is abnormal via SVC mode. 4) If the problem persists, replace the Fuser unit(JC91-01209A(220V) / JC91–01210A (110V). 5) If the problem persists, replace the pressure control unit or cam-motor or Main board(JC92-02742A). Copyright© 1995-2017 SAMSUNG. All rights reserved. 4-225...
- Page 476 U2-6143 LSU Failure: #U2-6143. Turn off then on. Call for service if the problem P.4-228 persists U2–6210 LSU Failure: #U1-6210. Turn off then on. Call for service if the problem P.4-229 persists 4-226 Copyright© 1995-2017 SAMSUNG. All rights reserved.
- Page 477 If the LSU motor does not makes a sound, i) Turn the machine off and open the side cover. Unplug and reconnect the LSU cable. Check that the LSU motor make a sound after turning the machine on. Copyright© 1995-2017 SAMSUNG. All rights reserved. 4-227...
- Page 478 3) If the problem persists, check the following : a) Turn the machine off and open the side cover. Unplug and reconnect the LSU cable. Print a demo page to check that the machine operates normally. 4-228 Copyright© 1995-2017 SAMSUNG. All rights reserved.
- Page 479 Check if the LSU harness is connected correctly. b) If the LSU harness is OK, check the LSU installation status. c) If the LSU installation is OK, replace the LSU. d) If the LSU is OK, replace the main board. Copyright© 1995-2017 SAMSUNG. All rights reserved. 4-229...
- Page 480 Original paper jam in the exit area of scanner P.4–234 U3-3614 Original paper jam in the exit area of scanner P.4–234 U3-3713 Original paper jam in the exit area of scanner P.4–234 U3-4210 Top door of scanner is open P.4–235 4-230 Copyright© 1995-2017 SAMSUNG. All rights reserved.
- Page 481 Check if the spring is deformed. If the spring is defective, replace it(6107–003581). 3) Check If the regi sensor is OK, check the scan sensor and scan actuator. If their operation is abnormal, replace the defective part. Copyright© 1995-2017 SAMSUNG. All rights reserved. 4-231...
- Page 482 3) If the regi sensor is OK, check the scan 1 sensor and reflect film. • If the scan 1 sensor is defective, replace it(0604–001381). • If the reflect film is contaminated, clean it. 4-232 Copyright© 1995-2017 SAMSUNG. All rights reserved.
- Page 483 3) If the regi sensor is OK, check the scan 2 sensor and exit sensor. • If the scan 2 sensor is defective, replace it(0604–001381). • If the exit sensor is defective, replace it(6107–003581). Copyright© 1995-2017 SAMSUNG. All rights reserved. 4-233...
- Page 484 2) If the regi sensor is OK, check the scan 2 sensor and exit sensor. • If the scan 2 sensor is defective, replace it(0604–001381). • If the exit sensor is defective, replace it(6107–003581). 4-234 Copyright© 1995-2017 SAMSUNG. All rights reserved.
- Page 485 2) If the problem persists, check the cover open sensor. a) Open the DSDF cover. Remove the spring. b) Remove 4 screws. c) Check if the sensor connector is connected correctly. If the sensor is defective, replace it(0604–001393). Copyright© 1995-2017 SAMSUNG. All rights reserved. 4-235...
- Page 486 The first step is to generate prints using printable pages embedded in the printer on laser paper. The paper should be from an unopened ream that has been acclimated to room temperature and you should ensure that genuine Samsung Toner is installed in the printer.
- Page 487 For checking the reproduction of small text White Gap pattern For checking color to color, color to mono white gap Rulers For checking the magnification error (unit : cm) Rulers For checking the magnification error (unit : inch) Copyright© 1995-2017 SAMSUNG. All rights reserved. 4-237...
- Page 488 How to analysis the defect image See the next flow chart. 1) According to the part remain life, cause can vary. Check the part remain life. 2) Check the defect whether periodic or not. 4-238 Copyright© 1995-2017 SAMSUNG. All rights reserved.
- Page 489 (Refer to 3.2.2.3.) Scanner unit is contaminated. Wipe the contaminated part surface with a soft cloth. • Scan glass contamination. (Refer to 3.3.29.4.) • Mirror contamination. CAUTION • CCD sensor contamination. Fragile parts! Copyright© 1995-2017 SAMSUNG. All rights reserved. 4-239...
- Page 490 The Carrier of Developer unit is insufficient. Replace the Developer Unit. Check the toner remain. • • Check the toner layer on Roller-Magnetic of Developer Unit is uniform or not. (Refer to 3.3.2.2.) 4-240 Copyright© 1995-2017 SAMSUNG. All rights reserved.
- Page 491 Cause Action The path of laser beam is blocked. Clean the LSU window. Foreign substance is on the LSU window. (Refer to 3.2.1.2.) OPC is scratched. Replace the Drum Unit. (Refer to 3.2.2.1.) Copyright© 1995-2017 SAMSUNG. All rights reserved. 4-241...
- Page 492 CR is scratched. (Refer to 3.3.2.1.) Horizontal periodic black band.(CR, 37.7mm) Replace the Drum Unit. • CR is inferior in quality. (Refer to 3.3.2.1.) OPC is damaged. Replace the Drum Unit. (Refer to 3.3.2.1.) 4-242 Copyright© 1995-2017 SAMSUNG. All rights reserved.
- Page 493 OPC is damaged by high voltage in a short time. (Refer to 3.3.2.1.) Horizontal periodic light/dark band (Roller-magnetic, Replace the Developer Unit. 31.4mm) (Refer to 3.2.2.2.) • Roller-magnetic is inferior in quality. V-groove of Roller-magnetic surface is not • uniform. Copyright© 1995-2017 SAMSUNG. All rights reserved. 4-243...
- Page 494 Voltage of OPC is abnormally low. Check the T1 connection in HVPS. • T1 Voltage is abnormally high. Check if T1–roller spring in ITB is connected correctly. Replace HVPS board. (Refer to 3.3.3.) 4-244 Copyright© 1995-2017 SAMSUNG. All rights reserved.
- Page 495 • (Refer to 3.3.3.) TC down and Toner spills Replace developer unit. (Refer to 3.2.2.2.) Toner spills by Eraser. Check if Eraser is contaminated. Replace Drum Unit or Developer Unit. (Refer to 3.2.2.2.) Copyright© 1995-2017 SAMSUNG. All rights reserved. 4-245...
- Page 496 Check if the connection between T2 high voltage terminal and HVPS THV terminal is correct. Check if the connection of HVPS and ITB is correct. If not, replace HVPS or ITB. HVPS operates abnormally. Replace HVPS (Refer to 3.3.3.) 4-246 Copyright© 1995-2017 SAMSUNG. All rights reserved.
- Page 497 Check if the skew is occurs at the cassette or feeding rollers. Adjust the skew manually. (Refer to 4.7.) Belt surface is contaminated. Remove the ITB. If the surface of the belt is contaminated, clean it with soft cloth. Copyright© 1995-2017 SAMSUNG. All rights reserved. 4-247...
- Page 498 Under 1 mm periodic jitter or horizontal bands has Check if the LSU is assembled correctly. If not, remove occurred. and tighten the screws. (Refer to 3.3.5.) If the problem persists, replace LSU (Refer to 3.3.5.) 4-248 Copyright© 1995-2017 SAMSUNG. All rights reserved.
- Page 499 Clean or replace the contaminated roller. contaminated or worn out. (Refer to 3.2.2.7.) If the skewed image occurs for copy job, check the ADF Reinstall the ADF(DSDF or RADF) unit. installation. Adjust ADF skew. (Refer to 4.8.) Copyright© 1995-2017 SAMSUNG. All rights reserved. 4-249...
- Page 500 Replace the HVPS board or Main board or LSU. Check if the connection between scan joint board and Reconnect the harness. main board is OK. If the connection is OK, replace the main board. 4-250 Copyright© 1995-2017 SAMSUNG. All rights reserved.
- Page 501 The problem persists, replace Fuser unit. Paper is wrapped on the Heating roller. Remove a wrapped paper and print the demo page. If there are some problems on the printout, replace Fuser unit. Copyright© 1995-2017 SAMSUNG. All rights reserved. 4-251...
- Page 502 (Refer to 3.2.2.6.) Fuser Unit Are the fuser belt and pressure roller Clean the fuser belt and pressure roller. dirty? Check the pressure roller surface is Replace Fuser unit. damaged or scratched. (Refer to 3.2.2.5.) 4-252 Copyright© 1995-2017 SAMSUNG. All rights reserved.
- Page 503 7) Load the chart on platen glass. (Horizontal direction) 8) Start scan. 9) When the scan complete window appears, select “OK”. 10) Execute “FullTRC” : [Adjustment] -> [Tone Adjustment] -> [Auto Tone Adjustment] -> *Full + Execute Now Copyright© 1995-2017 SAMSUNG. All rights reserved. 4-253...
- Page 504 1) Select [Adjustment] -> [Tone Adjustment] -> [Cancel Setting Standard Tone]. 2) When the cancel setting standard toner will be appeared, select “OK”. 3) Select “FullTRC” : [Adjustment] -> [Tone Adjustment] -> [Auto Tone Adjustment] -> *Full + Execute Now 4-254 Copyright© 1995-2017 SAMSUNG. All rights reserved.
- Page 505 When the brightness is changed in comparison to previous image. • When there is the difference of the color among the same models. NOTE If the problem persists after executing the setting standard tone, find another causes. Copyright© 1995-2017 SAMSUNG. All rights reserved. 4-255...
- Page 506 6) Decrease the value for each color and see whether the symptom disappears. In this case, [-4] was applied and solved the blur. 7) As there can be variation for each device, change T1, T2 and observe the results. 4-256 Copyright© 1995-2017 SAMSUNG. All rights reserved.
- Page 507 Rotate the ‘R’ screw 90 degrees in a clockwise direction. (This is the -1.2 mm align adjustment.) c) Execute a copy or scan job to check the image improvement. d) Repeat step 2,3 for improvement. NOTE If the image does not improve by three attempts, please stop the adjustment. Copyright© 1995-2017 SAMSUNG. All rights reserved. 4-257...
- Page 508 Rotate the ‘R’ screw 90 degrees in a counterclockwise direction. (This is the 1.2 mm align adjustment.) c) Execute a copy or scan job to check the image improvement. d) Repeat step 2,3 for improvement. NOTE If the image does not improve by three attempts, please stop the adjustment. 4-258 Copyright© 1995-2017 SAMSUNG. All rights reserved.
- Page 509 P.4–262 Image registration problem occurs after ACR (Auto Color Registration) P.4–263 How to handle TRC error & ACR P.4–264 Removing debris from the Developer Unit. P.4–265 Image is not printed on media. P.4–266 Copyright© 1995-2017 SAMSUNG. All rights reserved. 4-259...
- Page 510 1) WTB noise problem • Symptom : When printing out, blunt noise occurs (tak tak tak) at front side. • Cause : Defect of waste toner container • Troubleshooting Replace the waste toner container. 4-260 Copyright© 1995-2017 SAMSUNG. All rights reserved.
- Page 511 The Coupler(OPC unit) is difficult to rotate. (Coupler Locking) Blade is overturned. • Cause : CR electrification part transformation happens since Blade overturned. OPC rotation torque rises up since Blade overturned. • Troubleshooting Replace the OPC unit with new one. Copyright© 1995-2017 SAMSUNG. All rights reserved. 4-261...
- Page 512 • Symptom : Toner Supply error and toner leakage has occurred. • Cause : FRAME MAIN-DUCT Toner assembly does not reach the designated position. • Troubleshooting Reassemble or replace the Toner Duct Assy. 4-262 Copyright© 1995-2017 SAMSUNG. All rights reserved.
- Page 513 6) Bad connection between the main board and the CRUM Joint PBA Check the connection between the main board and the CRUM Joint PBA. If the connection is bad, replace the harness or the CRUM Joint PBA or main board. Copyright© 1995-2017 SAMSUNG. All rights reserved. 4-263...
- Page 514 4) Check the gear of the main drive is changed (damaged) or if there is an alien substance. If the gear is changed (damaged) then replace the main drive. If an alien substance is found then remove it. 5) Replace the imaging unit that causes the problem. 4-264 Copyright© 1995-2017 SAMSUNG. All rights reserved.
- Page 515 If the value is 1152 like the above report, ACR cannot be done. LSU need to be replaced. Succeeded or Failed for ACR: [0] → ACR was performed OK [OK] Succeeded or Failed for ACR: [1] → ACR was not performed OK [Fail] Copyright© 1995-2017 SAMSUNG. All rights reserved. 4-265...
- Page 516 Too low - 190: needs to be adjusted counter-clockwise by 10 clicks Too high - 210: needs to be adjusted clockwise by 10 clicks If the value is between 193~217 then it does not need to be adjusted 4-266 Copyright© 1995-2017 SAMSUNG. All rights reserved.
- Page 517 2) Disassemble the developer unit cover (pay attention not to destroy lock) Empty developer out on clean paper. 3) Remove lumps with the Jig from mag roller. 4) Pay attention & clean the circled area where oil can cause build-up in the Fuser. Copyright© 1995-2017 SAMSUNG. All rights reserved. 4-267...
- Page 518 After installing the OPC unit, the OPC lever is not properly locked. • Troubleshooting 1) Check whether the OPC lever is in locking state or not. Please rotate the OPC lever until the lever is properly locked as the following picture. 4-268 Copyright© 1995-2017 SAMSUNG. All rights reserved.
- Page 519 1) Acoustic noise in Fuser unit • Symptom : Acoustic noise from fuser assembly in early stage of printing • Cause : Fuser belt edges is damaged. • Troubleshooting 1) Replace the fuser unit with new one. Copyright© 1995-2017 SAMSUNG. All rights reserved. 4-269...
- Page 520 P.4–275 ADF is not recognized and an S3-3211 error occurs or copying must be P.4–276 performed from the platen. During copy or scan job, the original paper JAM and U3–3213 error occur. P.4–277 4-270 Copyright© 1995-2017 SAMSUNG. All rights reserved.
- Page 521 When power on the copier machine, UI indicate CCD Lock message and FR-Carriage can’t move on the rail. • Cause : Tilted copier set over 20 degree. When operate scanner in FR pushed condition. • Troubleshooting 1) Open the scan glass 2) Bend the spring like picture Copyright© 1995-2017 SAMSUNG. All rights reserved. 4-271...
- Page 522 2) Remove the connector and 1 screw. 3) Lift up and remove the ADF unit. 4) Remove 4 screws from the each hinge unit. And then replace the hinge unit with new one. 5) Reassemble the ADF unit again. 4-272 Copyright© 1995-2017 SAMSUNG. All rights reserved.
- Page 523 2) Remove the ADF separation pad then replace it with new one. 3) Remove the Guide Pickup by pressing the side as shown below. 4) Assemble the new Guide Pickup. 5) Update the firmware as the latest version. Copyright© 1995-2017 SAMSUNG. All rights reserved. 4-273...
- Page 524 24V output channel before replacing the SMPS. 5) If the main board and signal is abnormal and all 24V output channels are nearly 0V, inspect the harness, connector and main board. 4-274 Copyright© 1995-2017 SAMSUNG. All rights reserved.
- Page 525 2) Perform a copy job from the ADF and see if image distortion occurs. Repeat steps 1 and 2 if there is distortion. 3) If image distortion is removed then tighten the hinges’ screws. Copyright© 1995-2017 SAMSUNG. All rights reserved. 4-275...
- Page 526 Where rear screw is located when it is seen from the rear of device. b) Normally distance between head of screw and Heat Sink is about 1mm. Loosen screw and align FR. Tighten screw and verify alignment with vernier calipers. 4-276 Copyright© 1995-2017 SAMSUNG. All rights reserved.
- Page 527 [How to perform above step 4] a) Remove the ADF cover. b) Remove the ADF pick up Assy. c) Use a razor knife to shave the cover area which is binding with the Registration ROLLER-IDLE. Copyright© 1995-2017 SAMSUNG. All rights reserved. 4-277...
- Page 528 ADF power cable fails. • Troubleshooting 1) Reassemble the ADF power cable and if it does not solve the problem, replace the cable. 2) Adjust harness and make it fixed with cable tie. 4-278 Copyright© 1995-2017 SAMSUNG. All rights reserved.
- Page 529 2) If yes, refer to following guide. a) Remove 3 screws. b) Remove the linker pressing its upper side to the inner direction. And then, remove the front cover. c) Remove 4 screws. Copyright© 1995-2017 SAMSUNG. All rights reserved. 4-279...
- Page 530 4. Troubleshooting d) Remove the Pick up Assy. e) Replace the DSDF-HOUSING SEPARATION. 4-280 Copyright© 1995-2017 SAMSUNG. All rights reserved.
- Page 531 (Service Mode > Diagnostics > Engine Diagnostics > Engine Test Routines > Fuser Motor Forward) 3) Remove the fuser unit. And execute the fuser motor test again. 4) If the machine still makes noise, replace the “DRIVE-FUSER EXIT” Assy. 5) If not, replace the fuser unit. Copyright© 1995-2017 SAMSUNG. All rights reserved. 4-281...
- Page 532 Product name : HANARL SN-250 Manufacture : KANTO KASEI, Inc. Appearance : Orange Directions for use : Soak an object in HANARL, or apply it by brushes. After having been dried for 30 minutes, do ASSY. 4-282 Copyright© 1995-2017 SAMSUNG. All rights reserved.
- Page 533 1) Check the harness connection. If the harness is not connected correctly, reconnect it. 2) Check the pick up connector on main board. If the connector has some problem of soldering, replace the main board. Copyright© 1995-2017 SAMSUNG. All rights reserved. 4-283...
- Page 534 (EDC Mode > Diagnostics > Engine Diagnostics > Engine Test Routine > Feed motor > on/off ) Check the two feed rollers operating status. d) If the feed rollers can not rotate, open the rear cover and check the motor and gears. 4-284 Copyright© 1995-2017 SAMSUNG. All rights reserved.
- Page 535 4. Troubleshooting 2) Check the connection between the main board(CN27) and feed motor. 3) If the problem persists, replace the main board. Copyright© 1995-2017 SAMSUNG. All rights reserved. 4-285...
- Page 536 706 Error(Paper Jam) occurs while using Polaris inner finisher. • Troubleshooting 1) Refer to the guide from the TSP site. (http://tsp.samsung.com > Knowledge > Technical Resource > Troubleshooting Guide > TG-13020002) 5) Envelope wrinkle • Symptom : Envelope is wrinkled when printing from MP tray.
- Page 537 Symptom : Set UI indicates ACR fail message. • Cause : The brokenness of reflection mirror • Troubleshooting 1) Check the assembly condition inside of LSU. 2) If the reflection mirror is deviated, replace the LSU. Copyright© 1995-2017 SAMSUNG. All rights reserved. 4-287...
- Page 538 Cause : LSU motor defect • Troubleshooting 1) Enter the service mode and execute the LSU motor test. 2) If the LSU motor run sound is loud, replace the LSU. 3) If not, check the other unit. 4-288 Copyright© 1995-2017 SAMSUNG. All rights reserved.
- Page 539 4. Troubleshooting 4.8.7. Software problem Problem Description Troubleshooting Page Driver installation problem P.4–288 Job pause problem P.4–289 Scan to PC login failure P.4–290 Script error in Internet Explorer P.4–291 Copyright© 1995-2017 SAMSUNG. All rights reserved. 4-289...
- Page 540 1) Added the version information to the barcode on CD artwork in order to not apply wrong version CD when making SOP product at Plant. 2) Can confirm the exact CD information through barcode and can apply the exact CD to product. 4-290 Copyright© 1995-2017 SAMSUNG. All rights reserved.
- Page 541 1) During job pausing process, keep valid state of pause process. a) Pausing → Paused b) If user press cancel, paused → canceling → canceled. c) If user press continue, paused → resuming → progressing. Copyright© 1995-2017 SAMSUNG. All rights reserved. 4-291...
- Page 542 1) If Login Failure problem is happened and Easy Printer Manager lower than 1.03.45.01 version is installed on customer PC, please update Easy Printer Manager to the latest version (from Download Center of Samsung web site) 2) Launch Easy Printer Manager and check whether ‘Enable Scan from Device Panel’ is checked in the Scan to PC Settings menu.
- Page 543 Cause : In protected mode, the “RegOpenCurrentUser” function with write authority returns error or access denied. Can not write on the HKEY_CURRENT_USER registry. • Troubleshooting 1) Download the latest driver and install it. Copyright© 1995-2017 SAMSUNG. All rights reserved. 4-293...
- Page 544 Cause : The spring plate of the side cover open sensor is deformed by the deformation of the stopper of the side cover. • Troubleshooting 1) Replace the side cover open sensor Assy or deform the spring plate to normal shape. 4-294 Copyright© 1995-2017 SAMSUNG. All rights reserved.
- Page 545 24V output channel before replacing the SMPS. 5) If Main board and signal is abnormal and all 24V output channels are nearly 0V, inspect the harness, connector and main board. Copyright© 1995-2017 SAMSUNG. All rights reserved. 4-295...
- Page 546 3) HDD makes a loud noise. • Symptom : The Hard Disk Drive makes a loud noise when working. • Cause : HDD itself has defects. • Troubleshooting 1) Replace the HDD with new one. 4-296 Copyright© 1995-2017 SAMSUNG. All rights reserved.
- Page 547 Surge voltage from the outside may cause the defects. 4) If those components have visible defects, then the main board should be changed. Copyright© 1995-2017 SAMSUNG. All rights reserved. 4-297...
- Page 548 2) If the touch malfunction persists, check the followings. a) Press "Power button“ until the pop up will be displayed. b) Press pop-up area except “Cancel” and “Turn Off” button until the password window will be displayed. 4-298 Copyright© 1995-2017 SAMSUNG. All rights reserved.
- Page 549 Proiority : 1.(default) → 4. 401K_500K → 5. 500K_599K → 3. 148K_290K → 2. 86K_216K f) Check the touch operation. If the touch malfunction persists, change “Touch Config” to another value and test the touch operation again. Copyright© 1995-2017 SAMSUNG. All rights reserved. 4-299...
- Page 550 Symptom : Home screen icon is disappeared or UI screen is broken. • Cause : UI software error • Troubleshooting 1) Enter SVC mode. (Refer to 4.5.1) 2) Execute “Main Memory Clear” (Service Functions > Main Memory Clear) 4-300 Copyright© 1995-2017 SAMSUNG. All rights reserved.
- Page 551 Symptom : After turning the machine on, it can not turn on. And OPE lamp is not on. • Cause : The main board harness is not connected correctly. • Troubleshooting 1) Unplug all the harness from the main board. Then reconnect them. Copyright© 1995-2017 SAMSUNG. All rights reserved. 4-301...
- Page 552 If the meatallic sticker has attached on Active NFC module, NFC will not works fine. Because metallic sticker block electronic signal between NFC model and tag. If you attached following sticker on NFC module, remove it now. 4-302 Copyright© 1995-2017 SAMSUNG. All rights reserved.
- Page 553 Do not use the electric driver or big driver. If you use these drivers, you would not feel the click. Use of a hexagonal body driver without the grip is recommended. (Maximum diameter of a driver hole : 5 mm / Depth : 30 mm) Copyright© 1995-2017 SAMSUNG. All rights reserved. 4-303...
- Page 554 If the value for YMC is in 200±7, complete the skew adjustment. NOTE If value can not meet the target, repeat the step1~3. 4.9.2. Adjusting the ADF(DSDF_RADF) skew 1) Stand the ADF unit. Loosen 2 screws securing both hinge units slightly. 4-304 Copyright© 1995-2017 SAMSUNG. All rights reserved.
- Page 555 If the skew image is like a below sample, adjust the hinge unit to the direction of arrow. (1 scale => 1.0 mm skew adjustment) b) If the skew image is like a below sample, adjust the hinge unit to the direction of arrow. (1 scale => 1.0 mm skew adjustment) Copyright© 1995-2017 SAMSUNG. All rights reserved. 4-305...
- Page 556 4. Troubleshooting 3) Detach the ADF sponge after adjusting the skew. Place the ADF sponge on platen glass. And then close the ADF unit to stick the sponge. 4-306 Copyright© 1995-2017 SAMSUNG. All rights reserved.
- Page 557 2) Lift the scan glass up and release it. NOTE Be careful not to contaminate the scan glass. 3) Tap 4 corners of the FR carriage to check the direction that adjustment is needed. Copyright© 1995-2017 SAMSUNG. All rights reserved. 4-307...
- Page 558 4. Troubleshooting 4) Move the FR carriage as shown below. And then, remove the transparent sheet. 5) Rotate the slider-adjust to adjust the FR carriage flatness. 6) Reassemble in reverse order of disassembly. 4-308 Copyright© 1995-2017 SAMSUNG. All rights reserved.
- Page 559 If the top skew is like a below sample (@AS chart, 1.5mm clockwise direction skew), rotate ‘S’ screw one turn and ‘R’ screw a half turn in a clockwise direction. NOTE The combination of ‘S’ screw one turn and ‘R’ screw a half turn must be kept. Copyright© 1995-2017 SAMSUNG. All rights reserved. 4-309...
- Page 560 ‘R’ screw a half turn in a counterclockwise direction. NOTE The combination of ‘S’ screw one turn and ‘R’ screw a half turn must be kept. 4) Reassemble in reverse order of disassembly. 4-310 Copyright© 1995-2017 SAMSUNG. All rights reserved.
- Page 561 Galaxy Note series (Note1, Note2, Note3,…) • Galaxy Tab series (Tab7.0, Tab7.7, Tab8.9, Tab10.1,…) b) Android version • Android 4.0 or later (Ice Cream Sandwich) 2) Printer a) USB support model b) Wifi-Direct support model Copyright© 1995-2017 SAMSUNG. All rights reserved. 4-311...
- Page 562 Press ‘ACCEPT’ after checking required authority. 5) Installing • SPDS App will be installed. 6) Installation Complete • After completing install App you can see installation result. If you want to run App press ‘OPEN’. 4-312 Copyright© 1995-2017 SAMSUNG. All rights reserved.
- Page 563 If Partner ID is invalid you cannot receive approval of administrator. 3) Request User Registration • After request of user registration wait for approval of administrator. • If approved by the administrator email notification will be sent out. Copyright© 1995-2017 SAMSUNG. All rights reserved. 4-313...
- Page 564 Confirm Authentication Code to e-mail of registered user. 4) Input Authentication Code • Press ‘OK’ after input authentication code. 5) Registration Password • Input your password. 6) Complete Registration • Press ‘OK’ and then login at login screen. 4-314 Copyright© 1995-2017 SAMSUNG. All rights reserved.
- Page 565 Try login after input ID and Password. • If you forget your password, press ‘Change/Reset your Password’. 3) Success login • If you have successful login you can see the four device connectivity method. Copyright© 1995-2017 SAMSUNG. All rights reserved. 4-315...
- Page 566 When present device USIM and USIM that used at sign up are different you can login after USIM Change Request. 3) USIM Change Request • You can login via new ID and password after administrator approve USIM change. • USIM information will be updated you cannot login with existing USIM. 4-316 Copyright© 1995-2017 SAMSUNG. All rights reserved.
- Page 567 Once SPDS has connected you can see User Information Consent Screen. 4) Fail Device Connect • When your printer firmware is not supported by SPDS a temporary device error pop-up message will occur. Copyright© 1995-2017 SAMSUNG. All rights reserved. 4-317...
- Page 568 When NFC tagging ‘Wi-Fi Direct’ device connection is made confirmation window pops up. • Unlike ‘Wi-Fi Direct’ NFC Tagging method is directly connected to the printer. The list of available devices is omitted. 4-318 Copyright© 1995-2017 SAMSUNG. All rights reserved.
- Page 569 1) Device Connect Method • Press ‘Without Connection’. • Need no connection to device ‘Approval process of user information’ is omitted. 2) Initial Screen • -You can see initial screen does not include any device information. Copyright© 1995-2017 SAMSUNG. All rights reserved. 4-319...
- Page 570 2) Customer Information Consent • Customer consent has not been completed this screen comes out. 3) Input information • Check the checkbox after reading terms. • Input name, company, e-mail of customer, and then press ‘Consent’. 4-320 Copyright© 1995-2017 SAMSUNG. All rights reserved.
- Page 571 4) When there is no error • If connected device has no error code pop-up comes out. 5) Auto Complete • If you input more than two characters, Error Code auto complete function is offered. Copyright© 1995-2017 SAMSUNG. All rights reserved. 4-321...
- Page 572 After input search condition conduct search. 5) Result list • The results of search condition comes out as a list. 6) See the detail • By selecting items from list you can see detail. 4-322 Copyright© 1995-2017 SAMSUNG. All rights reserved.
- Page 573 Corrective Part and History of Each Service Engineer. 3) Subordinate Menu Selection • Corrective Histories are listed by selecting menu. 4) See the detail • Detailed Action comes out by selecting Corrective history list. Copyright© 1995-2017 SAMSUNG. All rights reserved. 4-323...
- Page 574 2) Authority Confirm • Requesting Statistics require administrator authority. So if you have no administrator authority, you cannot use this function. 3) Requesting Statistics • Usage/Statistics History will be sent to e-mail of requester. 4-324 Copyright© 1995-2017 SAMSUNG. All rights reserved.
- Page 575 If movie does not exist a download confirmation pop-up comes out. NOTE Movie is saved to SD Card. (/Card/Android/data/com.sec.spds/files/video/) 4) Play Movie • Play Movie that exist in SD card. • Movie support landscape mode. Copyright© 1995-2017 SAMSUNG. All rights reserved. 4-325...
- Page 576 3) Device Sleep Mode • If device status is sleep you can use diagnosis mode after wake-up process. 4) Device in use • However, wake-up device you cannot use diagnosis before status become ready. 4-326 Copyright© 1995-2017 SAMSUNG. All rights reserved.
- Page 577 1 sided, Simplex/2 sided, Duplex, Number of Pages to Print is only enable at ‘Prints out a blank sheet’. • ‘Prints out a blank sheet’ 1 to 100 can be entered. 3) Print • When press Print, options set in the print are utilized. Copyright© 1995-2017 SAMSUNG. All rights reserved. 4-327...
- Page 578 Preferences Information indicates Model Name, Device Serial Number, Date of Installation, Firmware Version. 4) Date of First Set Installation • Date of First Set Installation, Firmware information indicate each information. 5) Print • Press ‘Print’, information indicated on UI will print out. 4-328 Copyright© 1995-2017 SAMSUNG. All rights reserved.
- Page 579 Supplies indicate Supplies information of connected device. 2) Network • Network indicate Network information of connected device. 3) Fax Report • FAX REPORT Fax Sent, Fax Received, Fax Protocol Dump, Fax Diagnostics . Copyright© 1995-2017 SAMSUNG. All rights reserved. 4-329...
- Page 580 Export data of printer press ‘OK’. 4) Import • Importing data of data that exported from connected printer press ‘OK’. 5) Complete • After end of Import press ‘OK’, Export menu ends. • Device will reboot. 4-330 Copyright© 1995-2017 SAMSUNG. All rights reserved.
- Page 581 • Log names that can transport are indicated on screen. Select save method(Server) 6) Server Transport Complete • After completing upload pop-up comes out. • Press ‘OK’ then ‘Send Debug Log’ Menu end. Copyright© 1995-2017 SAMSUNG. All rights reserved. 4-331...
- Page 582 2) IP Setting • Input IP Address, Subnet Mask, Gateway. • Press OK. 3) Change Complete • If IP changing complete normally, above pop-up comes out. • Press ‘OK’, then ‘IP Setting’ Menu end. 4-332 Copyright© 1995-2017 SAMSUNG. All rights reserved.
- Page 583 Press Service → Device Settings. Press Counter Initialization 2) Counter Initialization • Select item to initialize. 3) Initialization Complete • If initialization complete normally, pop-up comes out. Press ‘OK’ you can initialize other counter value. Copyright© 1995-2017 SAMSUNG. All rights reserved. 4-333...
- Page 584 2) Footer Setting • When press ‘ON’ button, activate Footer value. • When press ‘OFF’ button, inactivate Footer value. 3) Footer Change Request • If Footer Setting is requested normally toast message will occur. 4-334 Copyright© 1995-2017 SAMSUNG. All rights reserved.
- Page 585 Part for Actions are Feeding, Main board, Delivery, Belt, Scan, Sensor, Power, Fixing, Option, Fax, Frame, Phenomenon, LSU, Application, Driver, Firmware, Others. 5) Input Detailed Action • Part of Action and Detailed Action are required. • Input requirements and press ‘Upload’ button Copyright© 1995-2017 SAMSUNG. All rights reserved. 4-335...
- Page 586 If connection between App and device ( e.g. device reboot, Timeout ), go to device connection menu. 2) Disconnected Devices • For App reconnect to device go to device connection menu before indicate subordinate menu. 3) Subordinate Menu • If device connection perform normally you can see subordinate menu. 4-336 Copyright© 1995-2017 SAMSUNG. All rights reserved.
- Page 587 In this case it is necessary to check the network. 4) Network Normal • When network (3G, LTE, WIFI) is connected normally, try search. 5) Normal Result • Because there is no problem with the network App will show normal results. Copyright© 1995-2017 SAMSUNG. All rights reserved. 4-337...
- Page 588 The connection diagram includes the harness part code as shown below. • Black text harness code is for color and mono model in common. • Blue text harness code is for mono model. • Red text harness code is for color model. Copyright© 1995-2017 SAMSUNG. All rights reserved.
- Page 589 STEP JC 39-01607A EXI T1 FULL DUPLEX RETURN Col or onl y. T1 POSI TON JC 39-01629A EXI T2 EXI T2 FULL SI DE COVER OPEN JC 39-01610A Col or onl y. FUSER FA Copyright© 1995-2017 SAMSUNG. All rights reserved.
- Page 590 DUPLE X nPAPE R_ J AM _ DUPLEX OUT _FAN_ DUPLEX nDETEC T_FAN_ DUPLEX 3 . 3 V ADC_M P_ SI ZE M P SI ZE JC 39-02073A SE NSOR JC39 -02087A MAIN PB A Copyright© 1995-2017 SAMSUNG. All rights reserved.
- Page 591 G N D AD C _LSU _TEMP _C O N 5V1_LP 5V1_LP C LK_LSU _O U T nR EAD Y_LSU _I N nSTAR T_LSU _O U T G N D 24V3 24V3 nD ETE C T_LSU Copyright© 1995-2017 SAMSUNG. All rights reserved.
- Page 592 C TD C EN TER 5V_AC R C TD GN D C TD _S_C EN T C TD _LED _C EN T I N N ER TEMP ADC _I NN ER _TEM P GN D Copyright© 1995-2017 SAMSUNG. All rights reserved.
- Page 593 H EA TER S/ W TYPE 5 TYPE 5 LI VE NEU TRA L JC 39- 01585A M AI N SW I TC H JC 39- 01582A JC 39- 01581A I N LET GN D Copyright© 1995-2017 SAMSUNG. All rights reserved.
- Page 594 KU P2M C B 5V_O PE nKE Y_SO FT_PW R _AVR 5V_O PE 5V_O PE 5V_O PE R ST_U SB _HU B_O PE nR ST_U I GN D GN D M AI N PBA Copyright© 1995-2017 SAMSUNG. All rights reserved.
- Page 595 CRUM CRUM CRUM W ASTE I NST JC39- 01675A JC39- 01675A JC39- 01675A JC39- 01675A STEP TC K SENSOR FRONT COVER OPEN TC M SENSOR W TB STEP TC C SENSOR TC Y SENSOR Copyright© 1995-2017 SAMSUNG. All rights reserved.
- Page 596 3. 3V_LP 3. 3V_A1000 3. 3V_LP 3. 3V_A1000 3. 3V_LP GN D GN D GN D GN D 5V2_LP 5V2_LP 5V2_LP 5V2_LP GN D GN D 10V_CC D 10V_CC D 10V_CC D 10V_CC D Copyright© 1995-2017 SAMSUNG. All rights reserved.
- Page 597 FT2_LI M I T 3. 3V nSENS_P_FEED2 5V_SUSP FEED2 SI DE COVER OPEN CN3 SI DE COVER OPEN 24V4 COVER OPEN nSI DECOVER_OPEN STEP PI CKUP1 STEP STEP STEP FE ED STEP PI CKUP1 STEP Copyright© 1995-2017 SAMSUNG. All rights reserved. 5-10...
- Page 598 ODEM NDCD_M ODEM 1 NDCD_M ODEM 1 NRST_M ODEM 1 TXD_M ODEM RXD_M ODEM FAX2 3. 3V 3. 3V AOUT nCTS_M ODEM nRTS_M ODEM RI _M ODEM nI NT_M ODEM DCD_M ODEM 5-11 Copyright© 1995-2017 SAMSUNG. All rights reserved.
- Page 599 To clean the frame and scan glass Black soft cloth To cover the OPC drum Service Install guide, User guide, When installing the machine. Installation Admin guide Software CD When installing the machine. Installation Copyright© 1995-2017 SAMSUNG. All rights reserved.
- Page 600 Image Remark Test Chart To check the image quality Service A4 image, A3 image, • Skew Spare Kit To fix the unit or parts Service Screw, E-Ring • Clamp To form the harness Service Copyright© 1995-2017 SAMSUNG. All rights reserved.
- Page 601 IP addresses to client hosts. Dual Inline Memory Module (DIMM), a small circuit board that holds memory. DIMM stores all DIMM the data within the machine like printing data, received fax data. Copyright© 1995-2017 SAMSUNG. All rights reserved.
- Page 602 Hard Disk Drive (HDD), commonly referred to as a hard drive or hard disk, is a non-volatile storage device which stores digitally-encoded data on rapidly rotating platters with magnetic surfaces. Copyright© 1995-2017 SAMSUNG. All rights reserved.
- Page 603 As most faxes consist mostly of white space, this minimizes the transmission time of most faxes. Modified Modified READ (MMR) is a compression method recommended by ITU-T T.6. Copyright© 1995-2017 SAMSUNG. All rights reserved.
- Page 604 Resolution resolution. Server Message Block (SMB) is a network protocol mainly applied to share files, printers, serial ports, and miscellaneous communications between nodes on a network. It also provides an authenticated Interprocess communication mechanism. Copyright© 1995-2017 SAMSUNG. All rights reserved.
- Page 605 (WAP) and any wireless laptop or WPA-PSK desktop devices. WPA-PSK generates a unique key for each session between a wireless client and the associated WAP for more advanced security. Copyright© 1995-2017 SAMSUNG. All rights reserved.
- Page 606 XML Paper Specification (XPS) is a specification for a Page Description Language (PDL) and a new document format, which has benefits for portable document and electronic document, developed by Microsoft. It is an XML-based specification, based on a new print path and a vector-based device-independent document format. Copyright© 1995-2017 SAMSUNG. All rights reserved.
- Page 607 - Applying Independent sub brand name by Segment : Xpress / ProXpress / MultiXpress 2) Model code Information • Basic Structure : [SL-●○○■□◆◆] ◆◆ : Function Information • Function Network Wireless Network Duplex Printing Reverse Type ADF XOA (eXtensible Open Architecture) Handset Auto Document Feeder Copyright© 1995-2017 SAMSUNG. All rights reserved.
- Page 608 Change HVPS(JC44–00212A → JC44–00212B) and FDB (220V : JC44-00211A → JC44-00211C / 110V : JC44-00210A → JC44-00210C) code. 1.46 01/Jun/2017 P.4–243~ Add adjustment for platen unit. 1.47 23/Jun/2017 P.3–10~ Update the replacement of the Developer Unit. 6-10 Copyright© 1995-2017 SAMSUNG. All rights reserved.
- Page 609 CIS, Africa E.Asia, W.Asia, https://gspn2.samsungcsportal.com China, Japan N.America, S.America https://gspn3.samsungcsportal.com This Service Manual is a property of Samsung Electronics © 2017 Samsung Electronics Co.,Ltd. Co.,Ltd. All rights reserved. Any unauthorized use of Manual can be punished under Printed in Korea applicable International and/or domestic law.
Need help?
Do you have a question about the MultiXpress X4 Series and is the answer not in the manual?
Questions and answers