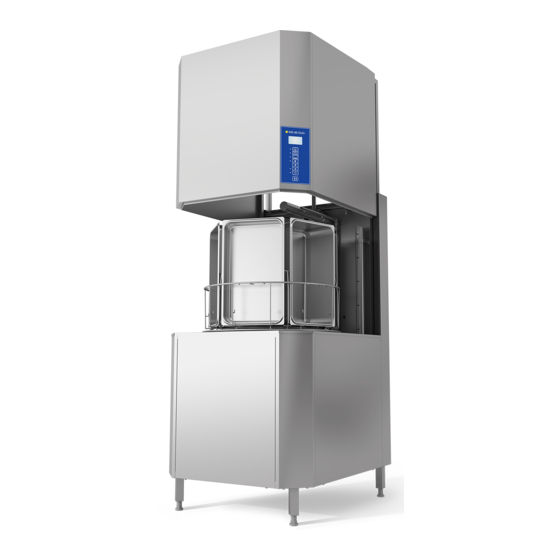
Wexiodisk WD-90 DUO Installation And User Manual
Combination dishwasher
Hide thumbs
Also See for WD-90 DUO:
- Installation and user manual (65 pages) ,
- Installation and user manual (72 pages) ,
- Installation and user manual (88 pages)

Related Manuals for Wexiodisk WD-90 DUO


Summary of Contents for Wexiodisk WD-90 DUO
- Page 1 COMBINATION DISHWASHER WD-90 DUO (translation of the original documentation) Read the manual before using the machine! Installation and user manual S/N: (En) Valid from: 202204 Rev.: 2.0...
-
Page 3: Table Of Contents
WD-90 DUO Rev. 2.0 (202204) 1. General information ................. 1 1.1 Symbols used ....................2 1.2 Machine rating ....................3 1.3 Checking that the machine and manual correspond ........3 1.4 EU Declaration of Conformity ................4 2. Safety instructions ................5 2.1 General information .................. - Page 4 WD-90 DUO Rev. 2.0 (202204) 3.5 Connections ....................18 3.5.1 Standard machine ................... 18 3.5.2 Machine with condensing unit (option) ........... 19 3.5.3 Sink connection ..................20 3.5.4 Electrical connection ................20 3.5.5 Water connection, regardless of any options .......... 21 3.5.6 Drain/waste pipe connection ..............
-
Page 5: General Information
WD-90 DUO Rev. 2.0 (202204) General information 1. General information Read the instructions in this manual carefully as they contain important informa- tion regarding the correct, effective and safe installation, use and servicing of the machine. Service personnel should have access to all documentation for the ma- chine. -
Page 6: Symbols Used
WD-90 DUO Rev. 2.0 (202204) General information 1.1 Symbols used This symbol warns of situations where a safety risk may arise. The instructions given should be followed in order to prevent injury and dangerous situations. This symbol on a machine part warns of electrical equipment. The machine must be entirely non-live during servicing, turn off the power at the power switch and if required, the switch should be locked to prevent unintentional operation. -
Page 7: Machine Rating
WD-90 DUO Rev. 2.0 (202204) General information 1.2 Machine rating The machine has two rating plates, one of which is placed at the bottom of one side of the machine and the other in the electrical cabinet. The technical informa- tion on the plates is also included on the machine’s wiring diagram. -
Page 8: Eu Declaration Of Conformity
WD-90 DUO Rev. 2.0 (202204) General information 1.4 EU Declaration of Conformity A so-called EU Declaration of Conformity is provided on delivery of the machine. CE_16_2 Contact details of the manufacturer (Wexiödisk AB, Mårdvägen 4, SE- 35245 Växjö, SWEDEN, Tel.: +46 470 771200, Fax: +46 470 23752, E- mail: wexiodisk@wexiodisk.com). -
Page 9: Safety Instructions
WD-90 DUO Rev. 2.0 (202204) Safety instructions 2. Safety instructions Read the chapter GENERAL INSTRUCTIONS carefully before starting work. 2.1 General information The machine is CE marked, which means that it complies with the requirements of the EU Machinery Directive with regard to product safety. Product safety means that the design of the machine will prevent personal injury or damage to property. -
Page 10: Transport
Warranty repairs must be performed by an authorised company. Contact an authorised service company to draw up a programme of preventive care and maintenance. For authorised service companies, please see www.wexiodisk.com or contact Wexiödisk AB. • The regular checks described in the manual must be carried out in accord- ance with the instructions. -
Page 11: Operation
WD-90 DUO Rev. 2.0 (202204) Safety instructions 2.5 Operation Be very careful around the machine when it is in operation. 2.5.1 High temperatures • The temperature of the washing and rinsing water is 60° C and 85°C. Do not open the machine until the washing and rinsing phases have finished. -
Page 12: Risk Of Slipping
WD-90 DUO Rev. 2.0 (202204) Safety instructions 2.5.3 Risk of slipping The floor should be kept clean and dry to eliminate any risk of slipping. Mop up any water and leftover food that has been spilt. Any granules which have ended up on the floor must be swept up regularly. -
Page 13: Installation Instructions
WD-90 DUO Rev. 2.0 (202204) Installation instructions 3. Installation instructions Read the chapters GENERAL INSTRUCTIONS and SAFETY INSTRUCTIONS carefully before starting work. 3.1 General information Read these instructions carefully, as they contain important information regarding the correct installation method. •... -
Page 14: Rust On Industrial Dishwashers
WD-90 DUO Rev. 2.0 (202204) Installation instructions 3.1.1 Rust on industrial dishwashers • Large-scale industrial dishwashers in general as well as our dishwashers are made of stainless materials, but despite this, there are still situations where rust can occur on “stainless” materials. -
Page 15: Requirements For The Installation Site
WD-90 DUO Rev. 2.0 (202204) Installation instructions 3.2 Requirements for the installation site 3.2.1 Lighting In order to ensure the best possible working conditions during installation, opera- tion, servicing and maintenance, make sure that the machine is installed in a well- lit room. -
Page 16: Space For Servicing
WD-90 DUO Rev. 2.0 (202204) Installation instructions 3.2.6 Space for servicing The dishwasher is designed to allow it to be positioned in a corner as shown in the figure below. There must be a gap of at least 100 mm between the walls and the dishwasher. -
Page 17: Transport And Storage
WD-90 DUO Rev. 2.0 (202204) Installation instructions 3.3 Transport and storage Always transport the machine in an upright position. Take care during transport, as there is a risk of tipping. N.B.! The machine must not be transported without a pallet or other support. A packing notice will have been applied to the packaging where the latter covers the front of the machine. -
Page 18: Installation
WD-90 DUO Rev. 2.0 (202204) Installation instructions 3.4 Installation 3.4.1 Preparing for the installation Check that there is sufficient room for the machine at the installation location. • Check that correct connections are available for water, electricity, drainage and possibly steam at the installation location. See TECHNICAL SPECIFI- CATIONS. -
Page 19: Positioning The Machine
WD-90 DUO Rev. 2.0 (202204) Installation instructions 3.4.2 Positioning the machine Check the following points before the machine is placed in position: • Check that the fuse for the machine at the site is off, blocked and that out- going electrical circuits from the machine are non-live. -
Page 20: Fitting The Condensation Unit
WD-90 DUO Rev. 2.0 (202204) Installation instructions 3.4.3 Fitting the condensation unit On delivery of dishwashers with condensing unit, the condensing unit is folded down over the hood and secured with protective transport plates. N.B.! The dish- washer should be adjusted so that it is standing level when assembly of the con- densing unit starts Loosen and remove the upper back panel at the rear of the dishwasher. - Page 21 WD-90 DUO Rev. 2.0 (202204) Installation instructions Connect the water pipes (2) to and from (3) the condensing unit (1), the hose for condensed water (4) and any power cable (contact JM15). 25-4-01-004_1 Attach the power cable to the condensing unit in such a way that it does not risk becoming trapped in the hood carriage.
-
Page 22: Connections
WD-90 DUO Rev. 2.0 (202204) Installation instructions 3.5 Connections 3.5.1 Standard machine Standard dishwasher Hot water connection Cold water connection Electrical connection Drain/waste pipe connection Detergent connection In the following chapter, figures are given in brackets to clarify what needs to be... -
Page 23: Machine With Condensing Unit (Option)
WD-90 DUO Rev. 2.0 (202204) Installation instructions 3.5.2 Machine with condensing unit (option) 25-4-00-019_1_r1 Dishwasher with condensing unit ---- Cold water connection Electrical connection Drain/waste pipe connection Detergent connection In the following chapter, figures are given in brackets to clarify what needs to be... -
Page 24: Sink Connection
WD-90 DUO Rev. 2.0 (202204) Installation instructions 3.5.3 Sink connection PROFIL DISKTANK PROFIL DISKBÄNK WASH TANK PROFILE SINK PROFILE Hood Insida Wash chamber Insida disktank Max.bredd på Internal side wash tank anslutande bänk: Mot sida: 754mm Mot front: 614mm Max.with... -
Page 25: Water Connection, Regardless Of Any Options
WD-90 DUO Rev. 2.0 (202204) Installation instructions 3.5.5 Water connection, regardless of any options • A stopcock must be installed on the incoming lines, which are fitted with a filter. • It is important that the water supply has sufficient pressure to ensure the correct flow of water to the machine. -
Page 26: Installing Detergent And Drying Agent Equipment (Option)
WD-90 DUO Rev. 2.0 (202204) Installation instructions 3.5.7 Installing detergent and drying agent equipment (option) • The dishwasher is preconfigured for connection of detergent and drying agent equipment. The detergent and drying agent equipment is not includ- ed in delivery of the dishwasher. Contact your detergent supplier! •... - Page 27 WD-90 DUO Rev. 2.0 (202204) Installation instructions Detergent dosage The equipment for detergent dosage is connected to the hose on the rear of the machine. 25-4-04-002_1 Hose for detergent dosage on the rear of the dishwasher In the tank bottom is an outlet for a sensor for measuring detergent concentration.
- Page 28 WD-90 DUO Rev. 2.0 (202204) Installation instructions Drying agent dosage On the dishwasher’s right panel, next to connections for water and electricity, there is bushing for a hose for a drying agent in the form of a breaker block. This is denoted with a sign which reads DRYING AGENT.
-
Page 29: Bleeding The Booster Pump
WD-90 DUO Rev. 2.0 (202204) Installation instructions 3.5.8 Bleeding the booster pump Bleeding of the booster pump must be performed when the dishwasher is started This is what you should do: Open the water connection to the dishwasher and wait until the dishwash- er’s break tank has filled with water. -
Page 30: Bleeding The Hood Lifting Cylinder
WD-90 DUO Rev. 2.0 (202204) Installation instructions 3.5.9 Bleeding the hood lifting cylinder Bleeding of the hood lifting cylinder must be performed when the dishwasher is started up after the booster pump has been bled. This is what you should do: Start the dishwasher. -
Page 31: Installation Of Options
WD-90 DUO Rev. 2.0 (202204) Installation instructions 3.6 Installation of options 3.6.1 Folding tables Available for fitting to: • Front of the machine (WD209.7451) • The right-hand side of the machine (the machine seen from the front) (WD209.7452) • The left-hand side of the machine (the machine seen from the front) (WD209.7453) - Page 32 WD-90 DUO Rev. 2.0 (202204) Installation instructions This is what you should do: D5019_1 D5019_2...
- Page 33 WD-90 DUO Rev. 2.0 (202204) Installation instructions D5019_3 D5019_4 D5019_5...
- Page 34 WD-90 DUO Rev. 2.0 (202204) Installation instructions Side mounting, folding table, right (WD209.7452) and left (WD209.7453) WD209.7452 Folding table for fitting to the right-hand side of the machine WD209.7453 Folding table for fitting to the left-hand side of the machine...
- Page 35 WD-90 DUO Rev. 2.0 (202204) Installation instructions This is what you should do: -7452, -7453, S1 -7452, -7453, S2...
- Page 36 WD-90 DUO Rev. 2.0 (202204) Installation instructions WD47772.31 -7452, -7453, S3 WD47776.31 -7452, -7453, S4...
- Page 37 WD-90 DUO Rev. 2.0 (202204) Installation instructions -7452, -7453, S5 -7452, -7453, S6...
- Page 38 WD-90 DUO Rev. 2.0 (202204) Installation instructions -7452, -7453, S7 WD306084.32 (WD209.7452 left) WD306084.31 (WD209.7453 right) -7452, -7453, S8...
- Page 39 WD-90 DUO Rev. 2.0 (202204) Installation instructions -7452, -7453, S9 -7452, -7453, S10...
- Page 40 WD-90 DUO Rev. 2.0 (202204) Installation instructions -7452, -7453, S11...
-
Page 41: Potwash Sink (Wd209.7270)
WD-90 DUO Rev. 2.0 (202204) Installation instructions 3.6.2 Potwash sink (WD209.7270) - Page 42 WD-90 DUO Rev. 2.0 (202204) Installation instructions Dividing plate (WD209.7463 and WD209.7464) Depending on whether the potwash sink is to be connected to the front or side of the machine, a dividing plate is also needed. Dividing plate for fitting to the side of the machine...
- Page 43 WD-90 DUO Rev. 2.0 (202204) Installation instructions Spray gun with hose (WD209.7290) The potwash sink can also be fitted with equipment for rinsing dishware. WD209.7290 Potwash sink with cleaning gun fitted. This is what you should do: D5017_1...
- Page 44 WD-90 DUO Rev. 2.0 (202204) Installation instructions D5017_2 D5017_3 D5017_4...
- Page 45 WD-90 DUO Rev. 2.0 (202204) Installation instructions D5017_5...
-
Page 46: Trial Operation
WD-90 DUO Rev. 2.0 (202204) Installation instructions 3.7 Trial operation Prepare the machine for trial operation with the help of OPERATING INSTRUC- TIONS. The instructions describe the measures that must be taken to prepare the machine for operation. 3.7.1 Start-up schedule This should be completed when the machine is started up and used. -
Page 47: Documentation
WD-90 DUO Rev. 2.0 (202204) Installation instructions 4. Run a number of washes complete with dishware and check: • There are no water leaks • The hood’s switch, anti-crushing system and automatics are working • The water temperatures are maintained •... -
Page 48: Operating Instructions
WD-90 DUO Rev. 2.0 (202204) Operating instructions 4. Operating instructions Read the chapters GENERAL INSTRUCTIONS and SAFETY INSTRUCTIONS carefully before starting work. This chapter describes what must be done with the machine: • Before washing • How washing should be performed •... -
Page 49: Before Washing
WD-90 DUO Rev. 2.0 (202204) Operating instructions 4.1 Before washing 4.1.1 Machine design Exterior parts 25-4-00-027 The dishwasher’s bottom section where, among other things, the tank, pumps and electrical cabinet can be found. Hood Control panel where buttons for starting and stopping the machine, select- ing a program and operating the hood are found. - Page 50 WD-90 DUO Rev. 2.0 (202204) Operating instructions Wash compartment 25-4-00-028 Rotating table - the wash basket is placed on the rotating table during washing...
- Page 51 WD-90 DUO Rev. 2.0 (202204) Operating instructions 25-4-04-006 Initial rinse pipe, potwash - rinses the items using a water/detergent mix, with or without granules, when a potwash program is run. Initial rinse pipe, normal wash - rinses the items using a water/detergent mix when a normal wash program is run.
- Page 52 WD-90 DUO Rev. 2.0 (202204) Operating instructions Tank 25-4-00-031 The diagram shows the dishwasher’s tank Dividing wall - is perforated and divides the tank into two parts. The part nearest the front contains the water with granules. The part nearest the rear of the dishwasher only contains water.
- Page 53 WD-90 DUO Rev. 2.0 (202204) Operating instructions Control panel 25-4-00-003_1 Control panel Display Normal wash programs. When the machine is equipped with a drain pump and has been switched off using On / Off (8), the draining process is started by pressing this button.
-
Page 54: Preparations Before Filling
WD-90 DUO Rev. 2.0 (202204) Operating instructions 4.1.2 Preparations before filling Check: • The machine and removable parts have been cleaned. If not – clean them! • there is no dirt in the wash arms or in the initial rinse pipes’ nozzles •... -
Page 55: Filling And Heating The Machine
WD-90 DUO Rev. 2.0 (202204) Operating instructions 4.1.3 Filling and heating the machine When filling the machine with water, you should not have any items in the ma- chine. Water which is hotter than for normal washing is flushed into the wash com- partment when the machine is being filled. -
Page 56: Before Washing, Regardless Of Program
WD-90 DUO Rev. 2.0 (202204) Operating instructions 4.1.4 Before washing, regardless of program When washing, you should remember the following: • make sure as much food residue as possible is removed from the dishware to be washed before putting them in the machine (this will help reduce the number of times the wash water in the machine will need changing). - Page 57 WD-90 DUO Rev. 2.0 (202204) Operating instructions The yellow basket is used for plates, side plates, etc. (WD009.9011) The blue basket is used for glasses and cups, (WD009.9014) The brown basket is used for cutlery, (WD009.9013)
- Page 58 WD-90 DUO Rev. 2.0 (202204) Operating instructions Granules 10kg, (WD209.7260) and Granules spatula, (WD209.7261) korg o plåt Collection plate and Granule collector...
- Page 59 WD-90 DUO Rev. 2.0 (202204) Operating instructions Extra equipment to be used for both heavy and normal wash To reduce the risk of strain injuries, the table trolley should be used for moving dishware. vagn Table trolley, (WD209.7462)
-
Page 60: Positioning Of Items In Baskets
WD-90 DUO Rev. 2.0 (202204) Operating instructions 4.1.5 Positioning of items in baskets Potwash Potwash items are positioned in the baskets supplied. The dirty side (the inside) of the items to be washed must face away from the centre of the basket. Items must be positioned so that water will not collect in them, e.g. - Page 61 WD-90 DUO Rev. 2.0 (202204) Operating instructions Accessories for potwash basket For optimum use, there are a number of accessories which are extra equipment. 1: Ladle holder WD209.7251 2: Saucepan support WD209.7252 3: Rubber tensioner WD209.7272 4: Flexible insert WD209.7481...
- Page 62 WD-90 DUO Rev. 2.0 (202204) Operating instructions The ladle holder is used to hold ladles, whisks, gravy boats etc. in place during washing. The ladle holder is positioned in the middle of the saucepan holder and can only be used together with it.
- Page 63 WD-90 DUO Rev. 2.0 (202204) Operating instructions 1: Ladle holder WD209.7277 2: All-round holder WD209.7273 3: Holder for small pots and bowls WD209.7279 4: Mesh basket WD209.7278 Normal wash Normal wash items are placed in one of the plastic baskets supplied with the ma- chine, measuring 50 x 50 cm.
-
Page 64: Washing
WD-90 DUO Rev. 2.0 (202204) Operating instructions 4.2 Washing In order to reduce the risk of strain injuries, the dishware should be stacked in the wash basket which is best placed on the potwash sink, table trolley or the folding table fitted on the machine (extra equipment). - Page 65 WD-90 DUO Rev. 2.0 (202204) Operating instructions The dishwasher has normal wash programs, for washing glass, crockery and cut- lery, etc., and potwash programs, with or without granules, for washing heavily soiled items, e.g. saucepans and canteens. If no wash has been performed since the machine was switched on, program P1 is displayed for both normal wash and potwash.
- Page 66 WD-90 DUO Rev. 2.0 (202204) Operating instructions Normal wash programs A normal wash program is used for items such as, e.g. glass, crockery and cut- lery. Three different normal wash programs can be selected with the button (2) by pressing it once, twice or three times. The selected program is shown on the dis- play (1) and the LED next to the button is lit.
- Page 67 WD-90 DUO Rev. 2.0 (202204) Operating instructions Potwash programs For potwash, there are six different programs to choose from, three where gran- ules are used for the wash (P1–P3) and three without granules (P4–P6). The se- lected program is shown on the display (1) and the LED next to the button is lit.
-
Page 68: Starting Washing
WD-90 DUO Rev. 2.0 (202204) Operating instructions 4.2.2 Starting washing Take care to select the correct program for the items which are to be washed. This is what you should do: Put the items to be washed in the machine. -
Page 69: Checking The Wash Result
WD-90 DUO Rev. 2.0 (202204) Operating instructions 4.2.4 Checking the wash result The wash result should be checked after each wash. Check: • there is no discolouration, spots, misting, food residue or deposits visible on the items, • no deposits at all are visible on the washed items. - Page 70 WD-90 DUO Rev. 2.0 (202204) Operating instructions Scraping off – It is important that as much food residue as possible is scraped off the items before putting them in the machine. Proper scraping off will mean the water in the washer tank will not need changing as often.
-
Page 71: Changing The Water
WD-90 DUO Rev. 2.0 (202204) Operating instructions 4.2.5 Changing the water The water in the washer tank should be changed daily. More frequent changes of water are needed if: • significant amounts of foam build up in the machine; e.g. if you can see foam coming out of the waste pipe, or the filter in the machine’s tank is cov-... - Page 72 WD-90 DUO Rev. 2.0 (202204) Operating instructions Rinse the filter tray (1) and cover plates (2) with water. 25-4-03-001 Remove the strainer (1) and cover plates (2). Remove any detritus which has got stuck in the strainer holes. If the machine is equipped with a drain pump (option), this is started by pressing the button for normal wash (2).
- Page 73 WD-90 DUO Rev. 2.0 (202204) Operating instructions The machine will now be refilled by: Start the machine by pressing the ON/OFF button. The dishwasher’s hood opens. Select a wash program. Any program can be selected. Press the button for operating the hood.
-
Page 74: After Use
WD-90 DUO Rev. 2.0 (202204) Operating instructions 4.3 After use HACCP is a preventive inspection system to ensure hygiene requirements are met during the washing process and cleaning of the machine. As a result of its design, the machine meets strict hygiene requirements. Regular, thorough clean- ing is also important from a hygiene perspective. -
Page 75: Care And Maintenance
WD-90 DUO Rev. 2.0 (202204) Operating instructions 4.3.2 Care and maintenance To obtain a good wash result when washing and to get the best possible benefit from the dishwasher, it needs to be looked after and maintained at given intervals. -
Page 76: Draining And Cleaning The Machine
WD-90 DUO Rev. 2.0 (202204) Operating instructions 4.3.3 Draining and cleaning the machine The machine should be cleaned at least once a day when in normal operation. Once a week, more thorough cleaning of the machine should be carried out, where the initial rinse pipes and granules are also properly cleaned and a check performed on the amount of granules. - Page 77 WD-90 DUO Rev. 2.0 (202204) Operating instructions If the machine is equipped with a drain pump (option), this is started by pressing the button for normal wash (2). Unhook the level pipe (1) from its holder, give it a quarter turn and leave it positioned in the waste pipe.
- Page 78 WD-90 DUO Rev. 2.0 (202204) Operating instructions Cleaning the level sensors (2) in the tank. Check the operation of the float on the level sensor. This should move freely and must not jam. daglig_r Cleaning the initial rinse pipes Clean the inside of the hood, etc.
- Page 79 WD-90 DUO Rev. 2.0 (202204) Operating instructions Weekly cleaning of the inside This is what you should do: Close the hood using the push-button (9). Remove the rotating table. Get hold of the spokes in the rotating table, to- wards the hub, and pull it straight up towards you. Where necessary, press on the shaft with the thumb of one hand to get the rotating table to come off more easily.
- Page 80 WD-90 DUO Rev. 2.0 (202204) Operating instructions If the machine is equipped with a drain pump (option), this is started by pressing the button for normal wash (2). Unhook the level pipe (1) from its holder, give it a quarter turn and leave it positioned in the waste pipe.
- Page 81 WD-90 DUO Rev. 2.0 (202204) Operating instructions Checking and cleaning of initial rinse pipes, final rinse pipes, cold water jet and draining nozzles Initial rinse pipes, final rinse pipes and nozzles are checked and cleaned as need- ed when cleaning the dishwasher in general.
- Page 82 WD-90 DUO Rev. 2.0 (202204) Operating instructions Clean the heat recovery unit N.B.! Cleaning of the heat recovery unit should be performed 1-2 times a year. N.B.! When rinse cleaning the heat recovery unit and the base of the battery box, do not use more water than the drain under the battery can remove from the ma- chine.
-
Page 83: Granules
WD-90 DUO Rev. 2.0 (202204) Operating instructions 4.3.4 Granules For normal operation, the granules should be cleaned and their amount checked at least once a week. Collection of granules Open the hood of the machine by pressing the button at the very bottom of the panel. - Page 84 WD-90 DUO Rev. 2.0 (202204) Operating instructions Cleaning Pour the granules into a bucket. Place the bucket in a sink. Rinse the granules with water. Stir in the granules at the same time as they are rinsed. Remove any food residues and detritus.
-
Page 85: Checking The Hood's Anti-Crushing System
WD-90 DUO Rev. 2.0 (202204) Operating instructions Granule change • The granules should be changed once or twice a year. It may be a good idea to do this during longer scheduled periods without use, such as e.g. holiday periods or similar. -
Page 86: Longer Periods Without Use
WD-90 DUO Rev. 2.0 (202204) Operating instructions 4.3.6 Longer periods without use Periods without use of up to a week • The machine is cleaned as during a weekly cleaning. • The granules are placed in a bucket containing water mixed with soaking agent or a suitable cleaning agent. -
Page 87: Operating Problems
WD-90 DUO Rev. 2.0 (202204) Operating instructions 4.3.7 Operating problems Troubleshooting The following errors can be dealt with by the operator. If the problem persists, contact authorised service personnel. PROBLEM CAUSE ACTION No indication on the control pan- Power switch is off. - Page 88 WD-90 DUO Rev. 2.0 (202204) Operating instructions PROBLEM CAUSE ACTION The machine is not cleaning The rinse and wash nozzles are Check and clean the nozzles. properly. clogged with dirt. There is too little detergent. Check the amount of detergent.
- Page 89 WD-90 DUO Rev. 2.0 (202204) Operating instructions Machine faults and user errors If a fault occurs on the machine, an alarm appears on the panel display. In the table below, alarms are displayed in order of priority, in other words, if several alarms are activated at the same time, the one that is highest in the list is dis- played first.
- Page 90 WD-90 DUO Rev. 2.0 (202204) Operating instructions ALARM MESSAGE ACTION Switch off the machine and restart it. PLATFORM ERROR (63) POWER SUPPLY Switch off the machine and restart it. FAILURE CHECK THE EMERGENCY SWITCH (98) HARDWARE ERROR Switch off the machine and restart it.
- Page 91 WD-90 DUO Rev. 2.0 (202204) Operating instructions ALARM MESSAGE ACTION (20) Contact service personnel! FREQUENCY INVERTER ERROR CALL SERVICE (16) Contact service personnel! COMMUNICATION ERROR FREQUENCY INVERTER CALL SERVICE (17) Contact service personnel! ROTATION ERROR ROTATING TABLE PRESS RESET (18)
- Page 92 WD-90 DUO Rev. 2.0 (202204) Operating instructions ALARM MESSAGE ACTION (62) HACCP ALARM Contact service personnel! NO FLOW DURING FINAL RINSE MACHINE LOCKED (39) FINAL RINSE ERR Contact service personnel! SENSOR ERROR FLOW METER BV02 CALL SERVICE (40) The alarm can be reset with the reset button, but a check should be made on HACCP ALARM the water flow in the machine (to ensure the water taps to the machine’s water...
- Page 93 WD-90 DUO Rev. 2.0 (202204) Operating instructions ALARM MESSAGE ACTION (50) WASHING Check whether the machine is out of detergent. Add detergent. The alarm can DETERGENT ALARM be reset by pressing the reset button. If the alarm recurs, contact service per-...
-
Page 94: Technical Specifications
WD-90 DUO Rev. 2.0 (202204) Technical specifications 5. Technical specifications The manufacturer reserves the right to make changes to the technical data. TECHNICAL DATA Granules pump (kW) Chemical wash pump (kW) Rinse pump / booster pump (kW) 0.58 Normal wash pump (kW) 0.74... - Page 95 WD-90 DUO Rev. 2.0 (202204) Technical specifications CAPACITY AND OPERATING DATA Normal wash, program P1 (min.) * Normal wash, program P2 (min.) * Normal wash, program P3 (min.) * Potwash with granules, program P1 (min.) * Potwash with granules, program P2 (min.) * Potwash with granules, program P3 (min.) *...
- Page 96 WD-90 DUO Rev. 2.0 (202204) Technical specifications WATER, DRAIN AND VENTILATION CONNECTIONS Water quality, hardness (° dH) 2–7 Hot water connection 50-65° C (external thread) R½" Cold water connection, 5–12° C (external thread) R½" Waste pipe connection, PP pipe (ø mm) Water capacity, min.
Need help?
Do you have a question about the WD-90 DUO and is the answer not in the manual?
Questions and answers