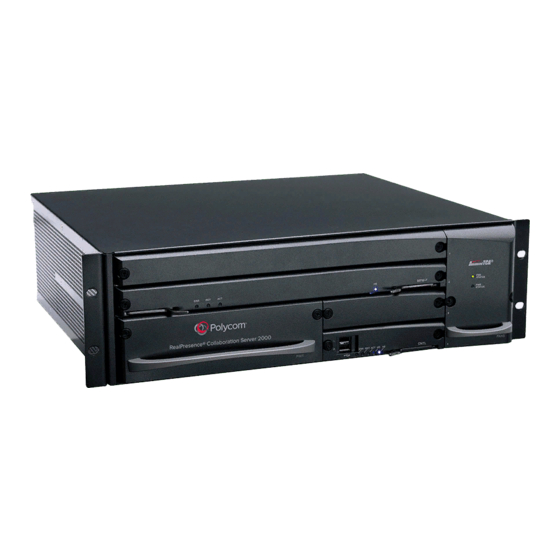
Polycom RMX 2000 Migration Manual
Mpmrx
Hide thumbs
Also See for RMX 2000:
- Getting started manual (133 pages) ,
- Hardware manual (32 pages) ,
- Installation & configuration manual (9 pages)
Advertisement
Quick Links
®
RMX
2000/4000 MPMRx Migration
The product names, Polycom
interchangeably throughout this document.
Verify before initiating this hardware migration procedure that your kit contains the following:
•
RMX 2000:
— CNTL 2000 unit
— Power Module
— 2 RTM LAN cards
— at least one MPMRx-D card
— Software License, for the latest RMX software version
•
RMX 4000:
— CNTL 4000 unit
— at least one MPMRx-D card
— Software License, for the latest RMX software version
For more detailed information refer to the Polycom
2000 and 4000 Hardware Guides.
Guidelines
Prior to the installation make sure:
•
Backup the configuration file. For more information, see the RMX 1500/1800/2000/4000
Administrator's Guide, Software Management.
•
That if Windows 7™ is installed on the workstation, Protected Mode must be disabled before
connecting the workstation.
•
RMX 2000 users:
— Its is recommended that RMX software version 6.0 or later is installed on your system.
—
chassis type of your RMX system. The MPMRx card requires a chassis of the type D
Verify the
or E. For more information, see RMX 2000 Hardware Guide, Chapter 1, RMX Chassis Types.
he RTM IP card Properties pane locate the Card Part Number. If the part number DOES NOT
—
In t
MATCH: BRD2114E-L0 or BRD2114E-R5, you are required to RMA the RTM IP card.
•
RMX 4000 users:
— Its is recommended that RMX software version 6.0 or later is installed on your system.
www.polycom.com
Procedure
®
®
RealPresence
Collaboration Server and RMX
®
RealPresence
®
are used
®
Collaboration Server (RMX)
1
Advertisement

Subscribe to Our Youtube Channel
Summary of Contents for Polycom RMX 2000
- Page 1 RMX system. The MPMRx card requires a chassis of the type D Verify the or E. For more information, see RMX 2000 Hardware Guide, Chapter 1, RMX Chassis Types. he RTM IP card Properties pane locate the Card Part Number. If the part number DOES NOT —...
- Page 2 Upgrading the RMX with MPMRx cards involves the following processes: • Process 1: Removing RMX Hardware — RMX 2000. Remove the Power Supply, Control (CNTL) Unit, Media Card(s) and LAN card(s, if installed). — RMX 4000. Remove the Control (CNTL) Unit and Media Card(s).
- Page 3 Removing the Existing Control (CNTL) Module from the MCU Unscrew the captive screw on the front panel of the RMX 2000 that secure the Control (CNTL) Unit. Use the handle to pull the Control (CNTL) Unit. out of its slot in the Backplane.
- Page 4 (Optional) Removing the Existing RTM LAN Card from the MCU Unscrew the captive screws on the rear panel of the RMX 2000 that secure the RTM LAN card. Use the ejector levers (see “Appendix B - Using the Ejector Lever(s)” on page 11) to pull the RTM LAN card out of its slot in the Backplane.
- Page 5 Process 2: Installing RMX Hardware Install the following RMX Hardware: • RMX 2000: Install the Power Supply, Control (CNTL 2000) Unit and LAN card(s). For more information see Installing RMX 2000 Components. • RMX 4000. Install the Control (CNTL 4000) Unit. For more information see Installing the CNTL Unit on the RMX 4000.
- Page 6 Repeat the procedure for the other RTM LAN card. d: Connecting Cables Do not remove the protective caps from LAN1, LAN3 and ShMG ports. On the RMX 2000 connect the following cables to the back panel: • Power cable •...
- Page 7 • RTM IP: Lan cable to LAN 2 port Install the CNTL 4000 Unit on the RMX 4000 Slide in the CNTL 4000 Module. Push the CNTL Module firmly into the Backplane, making sure it is properly seated in its slot. Ensure that the metal ejector lever is fully retracted into its housing.
- Page 8 The RMX Welcome screen is displayed. RMX Manager users are required to install the latest version software. Click the Install RMX Manager link. In the RMX Web Client – Welcome screen, enter your User Name: POLYCOM and Password: POLYCOM and click Login.
- Page 9 In the Activation Key field, enter or paste the Product Activation Key obtained earlier. If you did not register your product earlier in the process and you do not have an Activation Key, click the Polycom Resource Center button to access the Service & Support page of the Polycom Support website.
- Page 10 For more information on Backup and Restore, see the RMX 1500/2000/4000 Administrator’s Guide, Chapter 21, Software Management. — Reset (System Restart button) the RMX to switch the RMX 2000/4000 to the MPMRx Configuration Mode. The card startup procedure is complete when the MPMRx card(s) successfully completes startup and the green RDY (Ready) LED remains lit on the MPMRx card(s) and Control Unit.
-
Page 11: Appendix A - Rmx 2000 A/B/C-Type Chassis Upgrade
Chassis upgrade is required for RMX 2000 systems with A/B/C-type chassis. For more information see the RMX 2000 Hardware Guide, Chapter 2, RMX Chassis Types. If your shipment included a new chassis, start with "Installing RMX 2000 Components” procedure on page 1-5. - Page 12 Please be aware that the old RMX 2000 chassis and MPM/MPM+ board(s) cannot be disposed of with household waste. Instead, it is your responsibility to dispose of outdated equipment by handing it over to a designated collection point for the recycling of electronic equipment. The collection and recycling of obsolete equipment will help conserve natural resources and protect the environment.


Need help?
Do you have a question about the RMX 2000 and is the answer not in the manual?
Questions and answers