Advertisement
Quick Links
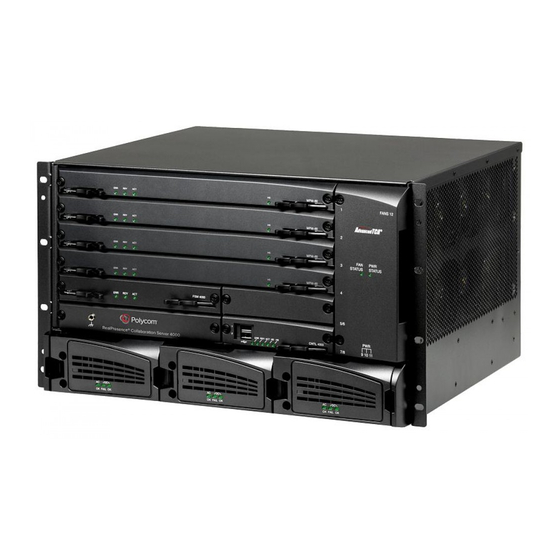
RealPresence Collaboration Server (RMX)
Installation Quick Start Guide for RealPresence
Collaboration Server (RMX) 4000
Basic Setup
•
The product name, RealPresence® Collaboration Server 4000 and
RMX® 4000 are used interchangeably throughout this document.
•
Before installing the RMX 4000 and performing the Basic Setup, please read
the RealPresence® Collaboration Server (RMX) 4000 Hardware Guide for the
description of:
•
Regulatory notices and General Safety Precautions
•
Unpacking, Rack mounting instructions, and connecting a DC system
•
Installing the RTM ISDN card(s) if the kit is shipped with the system
>> Connect the cables to the rear panel of RMX 4000 as illustrated below:
1
®
4000
•
Two people are required to lift the MCU out of the box and install it in a rack.
•
Do not remove the protective plastic caps from RTM IP LAN 1, LAN 4, and LAN 5
ports. These ports are intended only for debugging.
Configuring the LAN Properties on the USB Key
1
Insert the USB key provided with your system into the PC workstation.
The Polycom Documentation window opens.
In Windows 7:
a
Select Open Folder to view files using Windows Explorer.
Double-click the index.hta file.
b
The Language Menu opens.
Select the documentation language.
2
3
In the License Agreement window, click the Accept Agreement button.
4
In the Product Type screen, select RMX 4000.
5
In the Initial Setup Utility, click the LAN Configuration Utility hyperlink.
6
The LanConfigUtility dialog box opens.
7
Modify the parameters in the utility's dialog box using the information supplied by
your network administrator.
8
Click OK.
9
Remove the USB key from the PC.
First-time Power-up and Connection to MCU
1
Insert the USB key containing the modified IP addresses into the USB port of the
RTM IP card, on the back panel of the system.
2
Power the RMX ON. The FAN STATUS and PWR STATUS LEDs turn ON.
Wait for the upload process to complete. It is completed when all the flickering and
flashing LEDs turn off and only the red ERR LED (on the CTNL unit) remains ON.
It remains ON until the Default IP Network Service is configured.
In the browser, enter the IP address of the RMX Control Unit and press Enter.
3
After the Welcome screen is displayed, remove the USB key from the RMX.
4
5
6
The Media card ERR/RDY/ACT LEDs flicker, until only the RDY LED turns ON.
Enter POLYCOM.
Enter POLYCOM.
Click Login.
Click the Accept Agreement
check box.
Click to connect to Polycom web
site and register the RMX.
Click Product Registration and
follow the on screen instructions
to obtain the Product Activation
Key.
Enter or paste the Product
Activation Key obtained.
Click OK.
.
1725-74850-000/A
Advertisement

Subscribe to Our Youtube Channel
Related Manuals for Polycom RMX 4000


Summary of Contents for Polycom RMX 4000
- Page 1 Click OK. Remove the USB key from the PC. >> Connect the cables to the rear panel of RMX 4000 as illustrated below: First-time Power-up and Connection to MCU Insert the USB key containing the modified IP addresses into the USB port of the RTM IP card, on the back panel of the system.
- Page 2 Dial: conference_routing _name@domain_name. Conference routing name must be to synchronize RMX time with up Enter the name of the MCU on registered with the SIP server. For example, enter 1001@polycom.com if conference to three external NTP servers the network. routing name is 1001 and the domain name is polycom.com.
Need help?
Do you have a question about the RMX 4000 and is the answer not in the manual?
Questions and answers