Table of Contents
Advertisement
Advertisement
Table of Contents
Troubleshooting

Subscribe to Our Youtube Channel
Related Manuals for Lightspeed Redcat


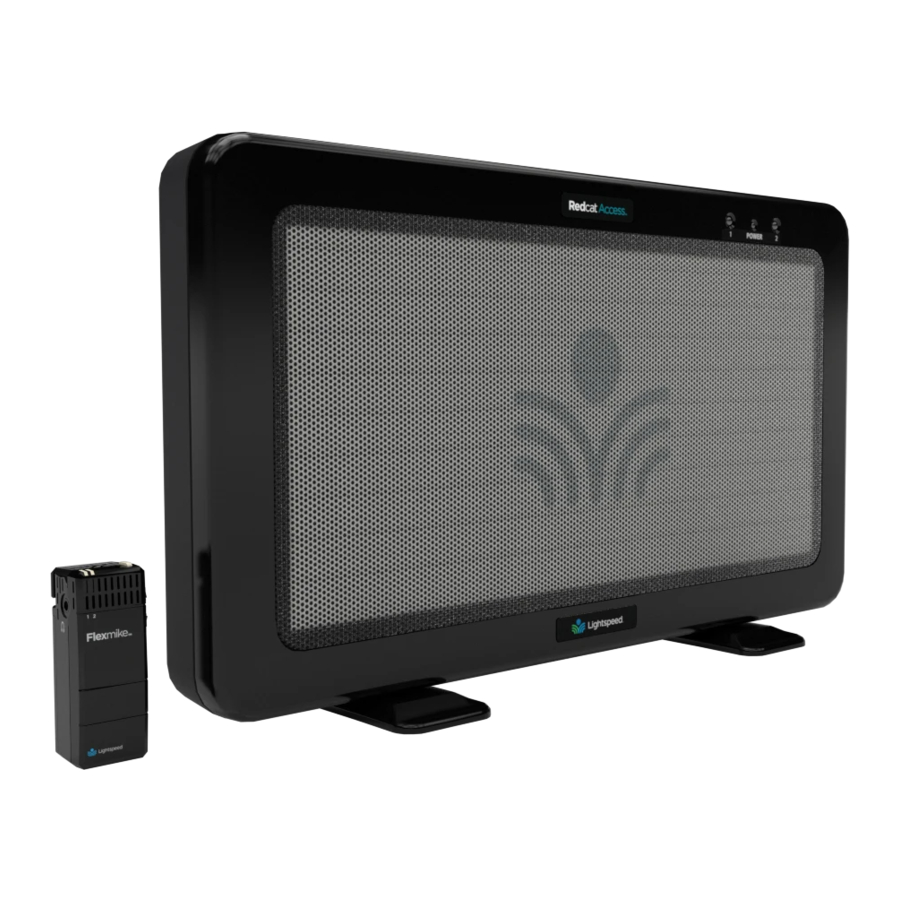
Summary of Contents for Lightspeed Redcat
- Page 1 ® Instructional Audio System User Manual...
-
Page 2: Table Of Contents
Pairing your Microphone Output to Assistive Listening Device (ALD) Using Your Microphone as a Wireless Audio Link OPTIONAL ACCESSORIES Sharemike Controls and Connections Media Connector Controls and Indicators Activate System with Pods for Small Group Instruction Battery Pack for Redcat... -
Page 3: Overview
14. CAUTION: Risk of explosion if battery is replaced by any battery other than Lightspeed Part # L3.7V... -
Page 4: System Components And Unpacking
Receiver/Amplifier and Power Supply PLEASE NOTE: Redcat and any wireless components (microphones, Activate Station, Media Connector, Pods) are paired together at the factory. Please keep all components together as a system. Moving them from one system or room to another will result in the need to re-pair them to function. -
Page 5: Optional Accessories
Input Output Activate System Media Connector Sharemike with power adapter and cable Handheld Microphone ACT-6P add-on speaker pods For further information on Activate for small group instruction, please visit www.lightspeed-tek.com Wall Mounting Security Bracket Redcat Battery Pack Power supply bracket... -
Page 6: Controls And Connections
Controls and Connections FRONT PANEL STATUS LIGHT: Microphone link and pair indicators Solid blue: Audio link has been established Alternating blue/white: Registration in process Off: Unregistered or nothing linked POWER LIGHT Solid white: Indicates power on REAR PANEL CARRYING HANDLE INSET CABLE MANAGEMENT AND STRAIN RELIEF WALL MOUNTING SLOTS SECURITY BRACKET SLOT... - Page 7 (see 2, 3, 5 below). TONE SELECTOR: Selects tone as the mode for the adjustment knob (1) that adjusts the bass or treble that is heard through the Redcat. Push AUDIO INPUT VOLUME SELECTOR: Selects Volume as the mode for the adjustment knob (1) for the audio sources connected to the audio input jack below.
-
Page 8: Flexmike Controls And Connections
LANYARD INTERFACE: Insert the lanyard into this hook to wear the Flexmike. BATTERY: Remove the battery to replace the rechargeable battery pack. 10. USB INPUT: Connect audio source to send to Redcat. USB input can also be used for charging. - Page 9 Flexmike/Sharemike Cradle Charger DC POWER PORT: Connect the 5V/1.0A DC power cord here...
-
Page 10: Set-Up & Operation
SET-UP & OPERATION Determine Set-Up Location Redcat is shipped with feet to stand on a cabinet or tabletop. Alternatively, the feet can be used as wall mount brackets. TABLETOP (RECOMMENDED) WALL-MOUNT • Virtually no setup time • More permanent setup •... - Page 11 • If this is not possible, other good locations are on the wall next to the teacher. • Avoid placing Redcat on any wall close to where the teacher usually stands to instruct the class. Having the teacher’s mic too close to Redcat can result in feedback.
- Page 12 • Place the power supply and power cord into the bracket • Insert the DC connector into the Power jack on Redcat and plug the other end into an electrical outlet. Use the slot on the end of the bracket to hold...
- Page 13 • Continue with “Attach Redcat and power supply” steps. • After Redcat is in place, hold the top of Redcat and push the security bracket into the slot until you hear it ‘click’ in place. NOTE: If Redcat needs to be removed, use a small flat blade screwdriver to pry the security bracket toward the wall and out of the slot on the back of Redcat.
-
Page 14: Connecting The Power Supply
• Locate the power supply and AC power cord. Connect the AC power cord into the DC power supply. • Insert the DC connector into the “Power” on Redcat and plug the other end to an electrical outlet. • Redcat automatically powers on and the white Power light on the front panel Push will appear. -
Page 15: Audio Integration
TV, DVD or computer directly into Redcat. AUDIO INPUT Redcat has one AUDIO INPUT with volume control for connecting to classroom audio sources. Use a patch cable (not included) to connect a computer, phone, tablet, or other audio source. -
Page 16: Setting Up The Flexmike
CONTROL • Once initial volume level is set, walk around the room and listen for overall audio quality. • If further fine tuning is required, you may need to adjust the Tone Control on the front of the Redcat. -
Page 17: Charging The Flexmike
Flexmike will last for up to 8 hours of use. If microphones are used daily, they should be charged each night. Replacement lithium polymer battery packs may only be purchased through Lightspeed Technologies (part # L3.7V). CHARGING IN PROGRESS CHARGING COMPLETE... -
Page 18: Daily Use Of The Flexmike
• The Flexmike will stay powered on during charging, but will automatically be muted. • It is not necessary to turn off Redcat at end of day, but you may do so by pressing the power button on the side panel. -
Page 19: Pairing Your Microphone
The mic 1 or mic 2 light on the is located on the back of the pairing process finish. microphone will stay illuminated. microphone). FLEXMIKE SHAREMIKE REDCAT IR TRANSMITTER MIC 1 MIC 2 POWER POWER IR TRANSMITTER MIC 1... -
Page 20: Output To Assistive Listening Device (Ald)
Connect a patch cable from the ALD’s microphone jack or AUX input to the 3.5mm audio jack labeled “ALD OUT” on the side of Redcat. Level With Redcat and ALD turned on, speak into the Flexmike and slowly adjust Tone the ALD volume control until the appropriate audio level is attained in the Input ALD’s receiver headphones. -
Page 21: Using Your Microphone As A Wireless Audio Link
You can connect your 2nd (or 3rd) microphone to your computer’s USB port to enable a wireless 2-way audio link. SEND AUDIO FROM THE COMPUTER to Redcat to ensure all audio from the computer (videos, video conferencing, audio books, music, etc.) can be played. -
Page 22: Sharemike Controls And Connections
Blue: solid = Talk White: solid = Mute MICROPHONE VOLUME UP/DOWN USB INPUT: Connect audio source to send to Redcat. USB input can also be used for charging. IR TRANSMITTER: For pairing to base unit AUDIO INPUT: Plug a laptop or other audio device into this jack to wirelessly transmit the audio signal to be played through the system. - Page 23 It takes about 5-6 hours to fully charge the battery. The light will turn green when charging is complete. PLEASE NOTE: The Redcat and microphone(s) are paired together at the factory and all components should be kept together as a system. Moving...
- Page 24 Sharemike: Initial Set-Up Ensure Redcat is on. The white power light will glow. Turn on the Sharemike by pressing and holding the power button until the LED lights. While speaking in a normal voice, increase the volume with the Sharemike until your voice is barely audible.
-
Page 25: Media Connector Controls And Indicators
Media Connector Controls and Indicators FRONT PANEL POWER LIGHT AUDIO INPUT VOLUME SELECTOR: Selects Volume as the White light: Power on mode for the adjustment knob (2) for the audio sources connected to the audio inputs on the back of the Media POWER BUTTON / VOLUME ADJUSTMENT: Press this button Connector. - Page 26 Media Connector Controls and Indicators (Optional) BACK PANEL AUDIO INPUTS: 3.5mm stereo connectors for connecting classroom audio sources to be played through audio system. AUDIO OUTPUTS: 3.5mm stereo connectors for connecting to an assisted listening device (ALD) or to a computer for recording. USB INPUT: Plug the USB-C end of the power cable into this USB port on the Media Connector.
- Page 27 • Do not enclose in a metal cabinet or in a location where the signal will be obstructed. NOTE: The Media Connector does not require a direct line of sight to Redcat. However it functions best when no obstructions are between the two devices. CONNECT TO POWER Power...
- Page 28 USB audio (3.5mm analog audio ports will be disabled). USB audio enables a 2-way audio link to: Send audio from the computer to Redcat to ensure all audio can be played through the Redcat speaker. Send audio to the computer from Redcat to ensure the teacher’s Flexmike and any student microphones are clearly picked up by a video conferencing solution.
- Page 29 At this point, the status light on on both Redcat and Media Redcat will blink for 30 seconds. Connector, pairing is successful. If after 30 seconds the status light blinks rapidly, you will need to start the pairing process again.
- Page 30 VGA Out Audio Out LAPTOP REDCAT TEACHER FLEXMIKE Audio In Video Out Audio Out Power Status Media Media Connector Connector Push Audio Audio Tone Level Input Output MEDIA CONNECTOR INTERACTIVE DISPLAY Audio Out PHONE OR TABLET Lightspeed Access transmission protocol...
-
Page 31: Activate System With Pods For Small Group Instruction
• Reinforce and redirect group activities • Capture audio and video of student groups or of an individual speaker If your Redcat system was configured with Activate pods, please refer to the Activate System user guide for operation and setup ACTIVATE CHARGING SMALL GROUP instructions. -
Page 32: Battery Pack For Redcat
POWER light will glow blue. USING REDCAT WITH BATTERY PACK When Redcat is in use with the battery pack, the POWER light will blink red if battery is low. Charge battery pack by plugging Redcat into the 24V / 1.75A power supply. -
Page 33: Maintenance & Troubleshooting
MAINTENANCE & TROUBLESHOOTING Flexmike Battery Replacement BATTERY PART #L3.7V Push down on the latch and carefully pull the battery pack away from the Flexmike. Insert new battery pack as shown and make sure the latch is secure. Place the Flexmike in a cradle charger to charge the battery pack. -
Page 34: Sharemike Battery Replacement
Sharemike Battery Replacement BATTERY PART # L3.7V Push down on the latch and carefully pull the battery pack away from the Sharemike. Insert new battery pack as shown and make sure the latch is secure. Place the Flexmike in a cradle charger to charge the battery pack. -
Page 35: Redcat Battery Replacement
Redcat Battery Replacement BATTERY PART # L14V Find and remove the battery pack on the back of Redcat by pinching the tabs located on each side of the battery pack. Place the new battery pack into the compartment by pinching the tabs on either side of the battery pack and inserting it into the compartment. -
Page 36: Troubleshooting
SOLUTION: Follow these steps to produce sound from Redcat. Technical Services at 800.732.8999, 5 am – 5 pm, PST. Customers outside the • Confirm that the blue POWER light located on the front panel of Redcat is on. U.S. should contact their local reseller. -
Page 37: Warranty, Safety & Specifications
(5) years, beginning at the date of the purchase invoice. If such malfunction occurs, the product will be repaired or replaced (at Lightspeed’s option) without charge during the warranty period. -
Page 38: Safety Warnings And Certifications
THE CONSTRUCTION AND OPERATION OF THE PRODUCT AND and maintenance (servicing) instruction in the literature THE HAZARDS INVOLVED. accompanying this product. USE A LIGHTSPEED SUPPLIED BATTERY ONLY CERTIFICATIONS This product is listed to UL standards and requirements for electrical safety by Underwriters Laboratories Inc. - Page 39 Européenne suivantes : 2004/108/ EC Electromagnetic Compatibility (EMC) and 2006/95/ EC Low Voltage Directive (LVD). Lightspeed Technologies a lancé un programme de recyclage de produits en Europe conformément à la directive de l’Union Européenne 2002/96/CE relative aux déchets d’équipements électriques et électroniques (directive «...
- Page 40 FCC Notice to User This device complies with Part 15 of the FCC Rules. Operation is subject to the French: following two conditions: NOTE IMPORTANTE: Pour se conformer au règles d’exposition des ondes RF par la This device may not cause harmful interference; and FCC, la (ou les) antenne(s) utilisée(s) par ce transmetteur doivent être installées de façon à...
- Page 41 à assurer la sécurité de toutes les personnes, indépendamment de l’âge et de la santé. NOTE: Lightspeed is not responsible for any changes or modifications not expressly approved by the party responsible for compliance. Such modifications could void the user’s authority to operate the equipment.
- Page 42 Canada, Industry Canada (IC) Notices English This device complies with Industry Canada license exempt RSS standard(s). This Class B digital apparatus complies with Canadian ICES-003 and CAN ICES-3(B)/ NMB-3(B).Operation is subject to the following two conditions: (1) this device may not cause interference, and (2) this device must accept any interference, including interference that may cause undesired operation of the device.
- Page 43 Directive based on its design and type, as brought into circulation by us. In case of alteration of the system, not agreed upon by us, this declaration will lose its validity. Products: Redcat, Topcat, 975, Access Link, Flexmike, Sharemike, Pod, Activate Station, Media Connector, TCQ2, DRQ, Mobile Connector Model Numbers:...
- Page 44 Access to powerful in-the-moment insights to the learning process. Our audio and video solutions improve student engagement, enable teachers to activate small groups, and encourage collaboration. 11509 SW HERMAN ROAD TUALATIN, OREGON 97062 TOLL FREE: 800.732.8999 PHONE: 503.684.5538 FAX: 503.684.3197 LIGHTSPEED-TEK.COM MN0609US01-1...
Need help?
Do you have a question about the Redcat and is the answer not in the manual?
Questions and answers