Table of Contents
Advertisement
Advertisement
Table of Contents

Related Manuals for Lightspeed Redcat


Summary of Contents for Lightspeed Redcat
- Page 1 Classroom Audio System CH A CH B U s e r M a n u a l...
-
Page 2: Important Safety Instructions
IMPORTANT SAFETY INSTRUCTIONS 1. Read these instructions. 9. Do not defeat the safety purpose of the polarized or grounding-type plug. A 2. Keep these instructions. polarized plug has two blades with one 3. Heed all warnings. wider than the other. A grounding-type 4. - Page 3 IMPORTANT SAFETY INSTRUCTIONS CONT’D 11. Only use attachments/ accessories way, such as power-supply cord or plug specified by the manufacturer. is damaged, liquid has been spilled or objects have fallen into the apparatus, the 12. Use only with a cart, stand, tripod, bracket apparatus has been exposed to rain or or table specified by the manufacturer, or moisture, does not operate normally, or...
-
Page 4: Table Of Contents
TABLE OF CONTENTS SECTION 1: System Components and Unpacking Overview Optional Components Front Panel Indicators Top Panel Controls Side Panel Controls and Connections Rear Panel Controls and Connections REDMIKE Controls and Connections Cradle Charger Controls and Connections SECTION 2: Step 1. Determine Set-up Location Set-up &... - Page 5 TABLE OF CONTENTS CONT’D SECTION 2: 4. Charging the REDMIKE Set-up & Use Cont’d Operating the REDMIKE Output to Assistive Listening Device (ALD) Using REDMIKE as Wireless Audio Link SECTION 3: Optional REDMIKE VC Controls and Connections Optional Accessories REDMIKE VC: Charging REDMIKE VC: Intial Set-up REDMIKE Share: Controls and Connections REDMIKE Share: Charging...
- Page 6 TABLE OF CONTENTS CONT’D SECTION 4: Common Problems and Solutions Troubleshooting Tips to Obtain Optimum Audio Performance Output to Assistive Listening Device (ALD) Using the REDMIKE to Amplify External Audio Equipment SECTION 5: Five-Year Limited Warranty Warranty, Safety & Safety Warnings and Certifications Specifications System Specifications...
-
Page 7: System Components And Unpacking
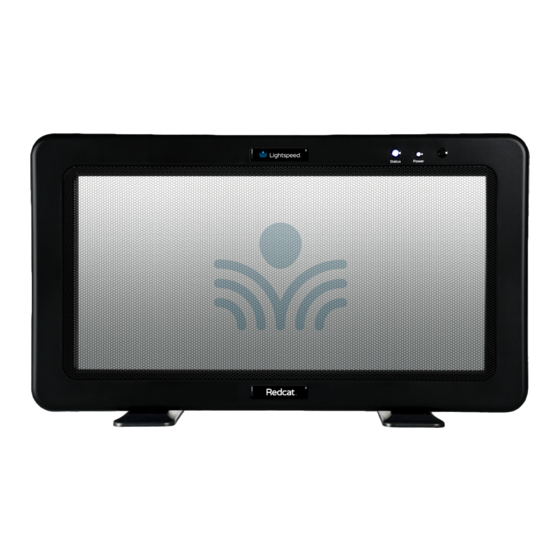
SECTION 1: OVERVIEW SYSTEM COMPONENTS AND UNPACKING The standard configuration of the REDCAT® will contain: CH A CH B REDCAT® Infrared Receiver/Amplifier with Table Stand and Power Supply... - Page 8 SYSTEM COMPONENTS AND UNPACKING CONT’D The standard configuration of the REDCAT will contain: Charging REDMIKE® Cradle and Classroom Power Supply Microphone...
-
Page 9: Optional Components
OPTIONAL COMPONENTS Optional equipment which may be part of your REDCAT system: REDMIKE® VC REDMIKE® Share Volume Control Handheld Mic & Microphone Charger Cable... - Page 10 STANDARD COMPONENTS Standard Components REDCAT all-in-one receiver/amplifier/speaker with power supply 24V-1.75-NA Power supply for REDCAT RMT2 REDMIKE classroom microphone with lavaliere cord and rechargeable AA battery NH2A27 Lightspeed AA rechargeable sensing battery (for REDMIKE) AC-RMLC2 Lavaliere cord for REDMIKE BC-RMCC REDMIKE cradle charger 5V-1.0-NA...
- Page 11 NiMH rechargeable battery pack for REDMIKE Share LT71 LightMic microphone with batteries IRMC2 Infrared media connector with cables and power supply AC-WMKRC2 REDCAT wall mounting kit includes screws, wall anchors, security clip and extra RC feet AA NiMH rechargeable battery (LT71)
-
Page 12: Front Panel Indicators
FRONT PANEL INDICATORS 1. POWER ON INDICATOR: The power LED will glow Blue when power is applied. 2. CH A & CH B: Illuminate Red when the audio for the corresponding microphone is CH A CH B received. -
Page 13: Top Panel Controls
TOP PANEL CONTROLS 1. CHANNEL A VOLUME: Controls the volume level of the microphone set to Channel A. 2. CHANNEL B VOLUME: Controls the volume level of the microphone set to Channel B. CH B CH A MICROPHONE... -
Page 14: Side Panel Controls And Connections
1. TONE CONTROL: Adjusts the audio level for 4. POWER SWITCH: This switch is used to turn optimum sound quality. the REDCAT ON or OFF. The front panel Blue LED lights when power is ON. 2. AUDIO INPUT VOLUME CONTROL &... - Page 15 SIDE PANEL CONTROLS CONT’D...
-
Page 16: Rear Panel Controls And Connections
REAR PANEL CONTROLS AND CONNECTIONS 1. CARRYING INSET: Cutaway grip for moving or carrying the REDCAT. 2. CABLE MANAGEMENT AND STRAIN RELIEF... - Page 17 REAR PANEL CONTROLS AND CONNECTIONS CONT’D Testing Purposes Only...
-
Page 18: Redmike Controls And Connections
3. Battery Compartment: To access the battery Note: REDMIKE microphones are shipped compartment, slide the door downward. with batteries installed. Charge the The battery should only be replaced by a microphone overnight before using. Lightspeed AA rechargeable sensing battery (part # NH2A27). - Page 19 REDMIKE CONTROLS CONT’D...
- Page 20 REDMIKE CONTROLS CONT’D 5. AUDIO/MICROPHONE INPUT: Use this 8. Group Designation: input to plug in a laptop, MP3 player or other G1= Group 1 frequencies audio source to wirelessly transmit audio to be 2.06/2.54 MHz played through the system. Alternatively, an G2= Group 2 frequencies external microphone can be connected.
- Page 21 REDMIKE CONTROLS CONT’D...
-
Page 22: Cradle Charger Controls And Connections
LT71 or the is sensed, (REDMIKE Yellow Protective Tab REDMIKE Share microphones here. may not have been completely removed—see page 18, item 4.) A blinking Green LED means a non-Lightspeed battery has been installed (possibly an alkaline battery). - Page 23 CRADLE CHARGER CONTROLS AND CONNECTIONS CONT’D...
-
Page 24: Step 1. Determine Set-Up Location
SECTION 2: SET-UP & USE 1. DETERMINE SET-UP LOCATION The REDCAT is shipped with feet to stand on a cabinet or tabletop. Alternatively, the feet can be used as the wall mount bracket. Advantages of either include: Tabletop (recommended): Wall-mount: •... -
Page 25: 1A. To Set-Up On Table-Top
If this is not possible, other good locations are along either wall next to the teacher or in a corner. Avoid placing the REDCAT next to where the teacher instructs. Putting the REDCAT in close proximity to the teacher’s mic can result in feedback. - Page 26 1A. TO SET-UP ON TABLE-TOP CONT’D Best placement Good placement Avoid!
- Page 27 • Drill Bit: 1/4” Drill Bit opposite the teacher. Avoid placing the • Anchors: Needed for mounting on drywall REDCAT on any wall close to where the teacher usually stands to instruct the class. • Screws: wood screws or screws appropriate Having the teacher’s mic too close to the...
- Page 28 3. Drill pilot holes 4. Insert anchors 5. Insert screws through the REDCAT feet into the anchors 6. If using optional security bracket, mount on wall using the provided screws and anchors 7. Slide the REDCAT onto the wall mounted feet...
- Page 29 1B. WALL MOUNTING PROCEDURE CONT’D...
-
Page 30: 1C. Wall Mounting Locations
1C. WALL MOUNTING LOCATIONS Best placement Good placement Avoid! -
Page 31: Step 2. Audio Integration
2. AUDIO INTEGRATION The next step in setting up your REDCAT system is to connect it to the other elements of your audio system. Audio systems have varying elements – you may have a computer, television, DVD/VCR player, a visual projection system or other devices. -
Page 32: Audio Input
2. AUDIO INTEGRATION CONT’D Projector Projector Audio Input Teacher’s REDMIKE The REDCAT has one audio input with volume control for connecting Audio Out VGA Out to classroom audio sources. Use IR Transmission a 3.5 mm to 3.5 mm patch cable Teacher’s... - Page 33 2. AUDIO INTEGRATION CONT’D 1. Turn the Audio Input volume on the REDCAT all the way down. 2. Connect a patch cable (not included) from the audio source into the Audio IN jack on the side of the REDCAT. 3. With both the REDCAT and audio source power on, adjust the volume control until the desired level is achieved.
- Page 34 2. AUDIO INTEGRATION CONT’D...
-
Page 35: Step 3. Connecting The Power Supply
Make sure the AC Power cord is inserted all the way into the power supply. 2. Insert the DC connector into the “DC POWER INPUT” jack on the side of the REDCAT and plug the other end into an electrical outlet. -
Page 36: Charging The Redmike
A blinking light indicates a charging or sensing error. See Troublshooting section for more information. REDMIKE incorporates alkaline protection into the microphone design. Always use a Lightspeed rechargeable sensing battery. Replacement AA... - Page 37 4. CHARGING THE REDMIKE CONT’D 1. Plug power cord into the cradle charger and then plug the AC end into an electrical outlet. NOTE: The power supply for countries outside the USA and Canada has interchangeable power plug adapters. Select the correct adapter for your country.
-
Page 38: Operating The Redmike
Proper volume level should be as follows: 1. Push the REDCAT power switch to the ON position. • Your voice should be clearly heard by another 2. Remove the REDMIKE from the charging cradle person on the other side of the room. - Page 39 5. OPERATING THE REDMIKE CONT’D 6. Once initial volume level is set, walk around the room and listen for audio dropout and overall audio quality. 7. If a second REDMIKE was purchased, repeat steps CH B MICROPHONE CH A 2-5.
- Page 40 5. OPERATING THE REDMIKE CONT’D...
-
Page 41: Output To Assistive Listening Device (Ald)
OUTPUT TO ASSISTIVE LISTENING DEVICE (ALD) 1. Turn the Audio (ALD) Out volume control on receiver to maximum output. NOTE: This is to the REDCAT side panel all way the down. set the maximum allowable signal from the REDCAT. 2. Determine the size and type of audio input jack on the device as many manufacturers’... - Page 42 OUTPUT TO ALD CONT’D...
-
Page 43: Using Redmike As Wireless Audio Link
USING REDMIKE AS WIRELESS AUDIO LINK The REDMIKE includes a 3.5mm audio input jack To determine which REDMIKE is set to Channel to connect to an audio source like a laptop or B, you can look at the switch on the back of the MP3 player. - Page 44 USING REDMIKE AS WIRELESS AUDIO LINK CONT’D 1. Plug your external audio equipment AUDIO (for example, laptop), into the input on INPUT the REDMIKE labeled “INPUT” using a 3.5mm patch cable. AUDIO OUTPUT...
- Page 45 USING REDMIKE AS WIRELESS AUDIO LINK CONT’D 2. Adjust the volume of the selected mic channel to achieve desired loudness. MICROPHONE CH B CH A...
-
Page 46: Optional Redmike Vc Controls And Connections
SECTION 3: OPTIONAL ACCESSORIES OPTIONAL REDMIKE VC (VOLUME CONTROL) CONTROLS AND CONNECTIONS... - Page 47 3. Battery Compartment: To open, slide the this to choose Channel A or B. If you are using door downward. The battery should only be a single microphone, we recommend using replaced by a Lightspeed AA rechargeable Channel A. sensing battery (part # NH2A27).
- Page 48 OPTIONAL REDMIKE VC CONTROLS CONT’D...
-
Page 49: Redmike Vc: Charging
REDMIKE. the REDMIKE to setup the REDMIKE VC. NOTE: A nominal volume level must be set on the REDCAT before adjusting controls on the REDMIKE VC. The teacher can now use the controls on the REDMIKE VC to adjust the volume level from anywhere in the room. -
Page 50: Redmike Share: Controls And Connections
REDMIKE SHARE: CONTROLS AND CONNECTIONS 1. POWER SWITCH 4. CHANNEL SELECT SWITCH (CH A/B): Located in the battery compartment, this 2. POWER/CHARGE INDICATOR: this light switch is set to Channel B at the factory. glows blue when turned on and turns off to indicate low battery level. - Page 51 REDMIKE SHARE: CONTROLS AND CONNECTIONS CONT’D...
-
Page 52: Redmike Share: Charging
REDMIKE SHARE: CHARGING 1. Ensure the REDMIKE share is turned OFF. 2. Make sure the cradle charger is plugged into a wall outlet. Connect one end of the charging cable into the jack labeled CHARGER on the bottom of the REDMIKE Share. Plug the other end into the charging jack on the rear of the cradle charger. -
Page 53: Redmike Share: Initial Set-Up
REDMIKE SHARE: INITIAL SET-UP 1. Ensure the REDCAT is ON. The blue LED on REMEMBER: This equipment is designed to the front panel will glow. supplement and distribute the user’s voice so they are able to speak in a conversational 2. -
Page 54: Initial Set-Up: Optional Irmc Media Connector
INITIAL SET-UP: OPTIONAL IRMC MEDIA CONNECTOR 1. Turn off the second microphone. The iR Media 2. The iR Media Connector volume is preset Connector uses the same channel (channel B) for most standard audio signals. If you need as the optional second microphone (REDMIKE to turn the volume up or down, follow this or REDMIKE Share). - Page 55 DVD players) adjust the volume at the iRMC. 3. If the first two options do not give optimum CH A CH B volume level, the last place to adjust the volume is the CH. B Volume on the REDCAT.
-
Page 56: Optional Irmc Media Connector Audio Integration
OPTIONAL IRMC MEDIA CONNECTOR AUDIO INTEGRATION The iRMC is designed to integrate with the REDCAT and multiple audio sources, allowing other instructional technologies to be clearly heard throughout the classroom. - Page 57 CONT’D CH A CH B CH A CH B Teacher’s Microphone Teacher’s Microphone Audio Out VGA Out REDCAT Audio Out VGA Out REDCAT Audio In Audio In Video Out Audio Out Video Out Audio Out iR Media Connector Audio Out...
-
Page 58: Optional Accessories
OPTIONAL ACCESSORIES Other Optional Accessories RMS2 REDMIKE Share microphone with rechargeable battery pack and charging cable LT71 LightMic with rechargeable batteries and charging cable MC-TK250LTM Noise-canceling headset microphone AC-TCC7 Charging cable for LT71 and REDMIKE Share microphones MSC3535 3.5mm to 3.5mm stereo audio cable AA Rechargeable battery (for LT71 and REDMIKE Share... -
Page 59: Common Problems And Solutions
SECTION 4: TROUBLESHOOTING COMMON PROBLEMS AND SOLUTIONS Note: Most problems are directly related to low battery power. Please run through the “Battery Check” items first. For remaining troubleshooting, use known good, fully-charged batteries. - Page 60 SOLUTION: Follow these steps to eliminate each night. static. • Confirm proper batteries are used. The • Ensure REDCAT is in optimum location. The REDMIKE requires the Lightspeed NH2A27 REDCAT will cover a 1200 sq. ft. enclosed rechargeable sensing battery for proper classroom.
- Page 61 COMMON PROBLEMS AND SOLUTIONS CONT’D PROBLEM: Low Volume or Feedback • Turn the REDCAT on. Confirm that the POWER light located on the front panel is on. SOLUTION: Follow these steps to eliminate low volume or feedback. • Confirm signal is being received at the REDCAT.
-
Page 62: Tips To Obtain Optimum Audio Performance
TIPS TO OBTAIN OPTIMUM AUDIO PERFORMANCE • Speak in a natural voice. A normal • Turn the REDMIKE off during private conversational speech level will provide conversations with a student, parent, or other an adequate signal. It is not necessary classroom visitor. -
Page 63: Five-Year Limited Warranty
SECTION 5: WARRANTY, SAFETY & SPECIFICATIONS FIVE-YEAR LIMITED WARRANTY Lightspeed Infrared Audio Systems and optional For warranty service, including return shipping accessories are warranted against malfunction labels, please contact Lightspeed’s Service due to defect in materials and workmanship for Department at 800.732.8999 / a period of five (5) years from date of purchase. - Page 64 FIVE-YEAR LIMITED WARRANTY CONT’D Our Service Department (800.732.8999, 3. Prepaid shipping labels are provided by Lightspeed factory or an authorized warranty 5 a.m. – 5 p.m., PST) will handle all your service center for warranty repairs. repair/replacement needs. 4. Warranty does not extend to finish,...
-
Page 65: Safety Warnings And Certifications
SAFETY WARNINGS AND CERTIFICATIONS The lightning flash with arrowhead symbol CAUTION within an equilateral triangle is intended to alert the user to the presence of uninsulated “dangerous voltage” within the product’s enclosure, that may be sufficient magnitude to RISK OF ELECTRIC SHOCK DO NOT OPEN constitute a risk of electric shock. - Page 66 SAFETY WARNINGS AND CERTIFICATIONS CONT’D Lightspeed Technologies launched a formal product recycle program in Europe that complies with the European Union Directive This product is listed to UL standards 2002/96/EC on Waste Electrical and Electronic and requirements for electrical safety by Equipment (“WEEE Directive”).
- Page 67 This device complies with part 15 of the FCC Rules. Operation is subject to the following two conditions: (1) This device may not cause harmful interference, and (2) this device must accept any interference received, including interference that may cause undesired operation.
- Page 68 Ce dispositif est conforme à l’article 15 de la réglementation FCC. Le fonctionnement est soumis aux deux conditions suivantes : (1) ce dispositif ne peut pas causer d’interférence nuisible et (2) ce dispositif doit accepter toute interférence reçue, notamment les interférences pouvant occasionner un fonctionnement non souhaité. Tout changement ou modification n’ayant pas fait l’objet d’une autorisation expresse émanant de la partie responsable de la conformité...
-
Page 69: System Specifications
SYSTEM SPECIFICATIONS OVERALL SPECIFICATIONS Power Output 20 Watts Amplifier Frequency Response 120 Hz – 13 kHz Signal-to-Noise Ratio >77 dB Dynamic Range > 73 dB Overall Dimensions (W x D x H) 16” x 9.5” x 1.75” (406.4 mm x 241.3 mm x 44.5 mm) Weight 3.23 lbs. - Page 70 SYSTEM SPECIFICATIONS CONT’D RECEIVER SPECIFICATIONS Carrier Frequencies (IR) 2.06 / 2.54 MHz IR Operating Range up to 1200 square feet Receiver Type Superheterodyne Receiver Sensitivity 6 μV for 60 dB S/N Image and Spurious Rejection > 70 dB Alternate Carrier Frequencies (iR) 3.20/3.70 MHz...
- Page 71 SYSTEM SPECIFICATIONS CONT’D TRANSMITTER SPECIFICATIONS REDMIKE and REDMIKE VC Audio Distortion < 1 % Built-in Microphone Unidirectional Electret Battery Power (1-year warranty) 1 AA NiMH Rechargeable Sensing Battery Audio Input 3.5 mm Dimensions (W x D x H) 0.9” x 1.0” x 3.5” (22.9 mm x 25.4 mm x 88.9 mm) Weight 2.1 oz.
- Page 72 SYSTEM SPECIFICATIONS CONT’D TRANSMITTER SPECIFICATIONS REDMIKE Share Handheld Microphone Audio Distortion < 1 % Built-in Microphone Unidirectional Electret Battery Power (1-year warranty) 2 AA NiMH Rechargeable Dimensions (W x D x H) 2.25” x 2.25” x 8.75” (57.2 mm x 57.2 mm x 222.3 mm) Weight 7.36 oz.
- Page 76 AC-MNRC2 L IG H T S PEED TEC H N OL OG I ES 1 15 09 SW HER M A N R OA D / TU ALATI N, O R 9 7 0 62 T O L L FR EE : 80 0 .7 3 2 .8 9 9 9 / P H O NE: 5 03 . 6 8 4 . 5 538 / FA X: 503. 684.3197 L IG H T SPEE D- TE K.C O M MN0435US01-0...
Need help?
Do you have a question about the Redcat and is the answer not in the manual?
Questions and answers