Lightspeed Redcat Access User Manual
Classroom audio system
Hide thumbs
Also See for Redcat Access:
- User manual (76 pages) ,
- Manual (12 pages) ,
- Setup manual (2 pages)
Table of Contents
Advertisement
Advertisement
Table of Contents

Related Manuals for Lightspeed Redcat Access


Summary of Contents for Lightspeed Redcat Access
- Page 1 Classroom Audio System POWER U s e r M a n u a l...
-
Page 3: Table Of Contents
TABLE OF CONTENTS SECTION 1: Important Safety Instructions Overview System Components and Unpacking Optional Components Front Panel Indicators Top Panel Controls and Connections Side Panel Controls and Connections Rear Panel Features Flexmike Controls and Connections SECTION 2: Step 1. Determine Set-up Location Set-up &... -
Page 4: Important Safety Instructions
IMPORTANT SAFETY INSTRUCTIONS Read these instructions. 13. Unplug this apparatus during lightning storms or when unused Keep these instructions. for long periods of time. Heed all warnings. 14. Refer all servicing to qualified Follow all instructions. service personnel. Servicing is required when the apparatus Do not use the apparatus near has been damaged in any way,... -
Page 5: Overview
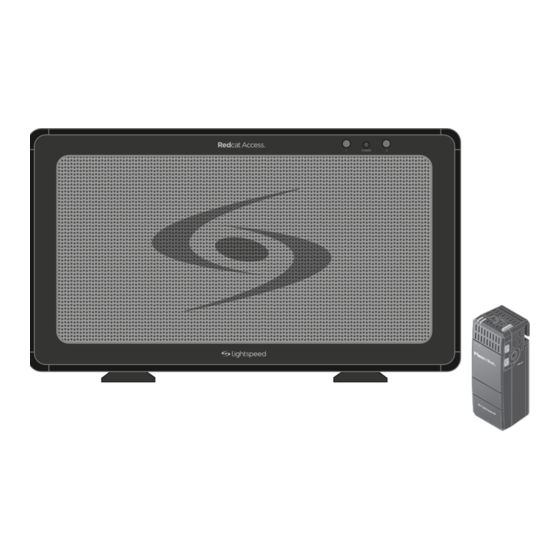
SECTION 1: OVERVIEW SYSTEM COMPONENTS AND UNPACKING The standard configuration of the Redcat Access will contain: POWER Redcat Access Receiver/ Amplifier and Power Supply Flexmike Classroom Microphone Wall Charger & Charging Cable PLEASE NOTE: The Redcat Access and Microphone(s) are registered together at the factory and are labeled as such. - Page 6 Flexmike wall charger, U.S. and Canada USB2-INT Flexmike wall charger, specify country USB-MCB USB Type A-Micro B charging cable for Flexmike Optional Accessories FCAD-4 Flexcat for small group instruction* *For further information on Flexcat for small group instruction, please visit www.lightspeed-tek.com...
-
Page 7: Top Panel Controls
FRONT PANEL INDICATORS POWER ON INDICATOR: The power light will glow blue when power is applied. MIC 1 & MIC 2: Mic link and registration indicators a. Flashing amber indicates registration is in process. b. Solid green indicates a link has been established. POWER TOP PANEL CONTROLS 1. -
Page 8: Rear Panel Features
Controls the volume level of the audio output. This button is POWER BUTTON: used to turn the Redcat Access on or off. The front panel blue light will glow when power is on. Plug the power DC INPUT JACK: supply (16V/2.0A) into this jack. - Page 9 When in operation, turns red to indicate low battery. MICROPHONE VOLUME UP/DOWN AUDIO INPUT: connect audio source to send to Redcat Access LANYARD INTERFACE: insert the lanyard into this hook to wear the Flexmike. BATTERY DOOR: remove the battery door to replace the rechargeable battery pack 10.
-
Page 10: Section 2
SECTION 2: SET-UP & USE 1. DETERMINE SET-UP LOCATION The Redcat Access is shipped with feet to stand on a cabinet or tabletop. Alternatively, the feet can be used as wall mount brackets. Advantages of either include: Tabletop (recommended): Wall-mount: • Virtually no setup time... - Page 11 6-8 feet off next to the teacher. Avoid placing the the ground. Redcat Access on any wall close to where the teacher usually stands to Next, find a location as far away as instruct the class. Having the teacher’s...
- Page 12 3. Drill pilot holes 4. Insert anchors 5. Remove feet from Redcat Access and place over anchors 6. Insert and secure screws through the Redcat Access feet into the anchors 7. If using optional security bracket, mount on wall using the provided screws and anchors 8.
- Page 13 DC INPUT 16V/2.0A 2. Insert the DC connector into the “DC INPUT” connector on the Redcat Access and plug the other end to an electrical outlet. 3. The Redcat Access automatically powers on and the blue power LED on the front panel will light.
- Page 14 3. AUDIO INTEGRATION The next step in setting up your Redcat Access system is to connect it to the other elements of your audio system. Audio systems have varying elements – you may have a computer, television, DVD/VCR player, a visual projection system or other devices.
- Page 15 A green light indicates that charging is complete and a full charge has been reached. See Troubleshooting section for more information. Replacement NiMH battery packs may only be purchased through Lightspeed Technologies (part # NH2.4V). Do not attempt to charge with other battery packs.
- Page 16 Flexmike is set at the factory to the mid point. 3. While speaking in a normal voice, fine-tune the microphone volume on top of the Redcat Access up or down. Proper volume level should be as follows: • Your voice should be clearly heard by another person on the other side of the room.
- Page 17 DEVICE (ALD) 1. Turn the ALD (Assistive Listening of the Redcat Access. Device) volume control on 4. With the Redcat Access and ALD the Redcat Access side panel turned on, speak into the Flexmike counterclockwise all way the down. and slowly adjust the ALD volume 2.
- Page 18 7. USING FLEXMIKE AS WIRELESS AUDIO LINK The Flexmike includes a 3.5mm audio input jack to connect to an audio source like a laptop or MP3 player. The Flexmike will transmit the audio signal to be played through the system. If your system includes two Flexmikes, you can use one mic for instruction and the second mic to transmit audio through the system.
-
Page 19: Daily Operation
The Flexmike will stay powered on during charging, but will automatically be muted. • It is not necessary to turn off Redcat Access. If you do want to power it down, press the power button on side of Redcat Access. If Redcat Access is powered... -
Page 20: Section 4
SECTION 4: MAINTENANCE & TROUBLESHOOTING BATTERY REPLACEMENT Replacement of battery pack in Flexmike. Slide the battery door open. Carefully pull the battery pack away from the Flexmike and disconnect the cable. Connect the cable of the new battery pack as shown and insert the battery pack into the compartment. -
Page 21: Common Problems And Solutions
Wait for of microphone will indicate it is muted. If you review these instructions and still have questions, call Lightspeed Technical Services at 800.732.8999, 5 a.m. – 5 p.m., PST. Customers outside the U.S. should contact their local reseller. - Page 22 TIPS TO OBTAIN OPTIMUM AUDIO PERFORMANCE • Speak in a natural voice. A normal conversational speech level will provide an adequate signal. It is not necessary to increase the intensity of your voice—the audio system provides adequate amplification (approximately 5 – 10 dB) above ambient room noises. • Avoid wearing jewelry that may rub or bump against the microphone.
-
Page 23: Section 5
2. Warranty on Lightspeed NiMH rechargeable batteries is one (1) year. 3. Prepaid shipping label provided by Lightspeed for warranty repairs within the United States. Customers outside the U.S. should refer to the Lightspeed website (www.lightspeed-tek.com) for warranty repair instructions. - Page 24 European Union Directives: 2004/108/EC Electromagnetic Compatibility (EMC) and 2006/95/EC Low Voltage Directive (LVD). Lightspeed Technologies launched a formal product recycle program in Europe that complies with the European Union Directive 2002/96/EC on Waste Electrical and Electronic Equipment (“WEEE Directive”).
- Page 25 Européenne suivantes : 2004/108/EC Electromagnetic Compatibility (EMC) and 2006/95/EC Low Voltage Directive (LVD). Lightspeed Technologies a lancé un programme de recyclage de produits en Europe conformément à la directive de l’Union Européenne 2002/96/CE relative aux déchets d’équipements électriques et électroniques (directive «...
-
Page 26: Fcc Rf Radiation Exposure Statement
FCC Notice to user This device complies with Part 15 of the FCC Rules. Operation is subject to the following two conditions: (1) This device may not cause harmful interference; and (2) This device must accept any interference received, including interference that may cause undesired operation. This equipment has been tested and found to comply with the limits for a Class B digital device, pursuant to Part 15 of the FCC Rules. - Page 27 NOTICE FOR USB NOTE: Lightspeed is not responsible for any changes or modifications not expressly approved by the party responsible for compliance. Such modifications could void the user’s authority to operate the equipment. NOTE: This equipment has been tested and found to comply with the limits for a Class B digital device, pursuant to part 15 of the FCC Rules.
-
Page 28: System Specifications
SYSTEM SPECIFICATIONS REDCAT ACCESS SPEAKER Power output: Acoustic frequency response: 120 Hz - 13 kHz DC power Input: 16V / 2.0A Total harmonic distortion <1% @ 10W Wireless communication: Access Technology (1.9 GHz + RF4CE) Tone control: 1 bass/treble control Audio input: 3.5mm stereo w/ volume control... - Page 29 This page intentionally left blank...
- Page 30 This page intentionally left blank...
- Page 32 L IG HTSP EE D T EC H N OL OG I ES 11 509 S W HERM AN R O A D / TU AL AT IN, O R 9 7 0 62 T OLL F REE : 8 00. 7 3 2 . 8 9 9 9 / PH ON E : 5 0 3 .6 8 4 .5 5 38 / FAX: 503 .684 .3197 LI GHTSP EED - TEK.
Need help?
Do you have a question about the Redcat Access and is the answer not in the manual?
Questions and answers