Table of Contents
Advertisement
Quick Links
Supplied and Serviced by Roberts audio Solutions LTD
User guide – RedCat (Access)
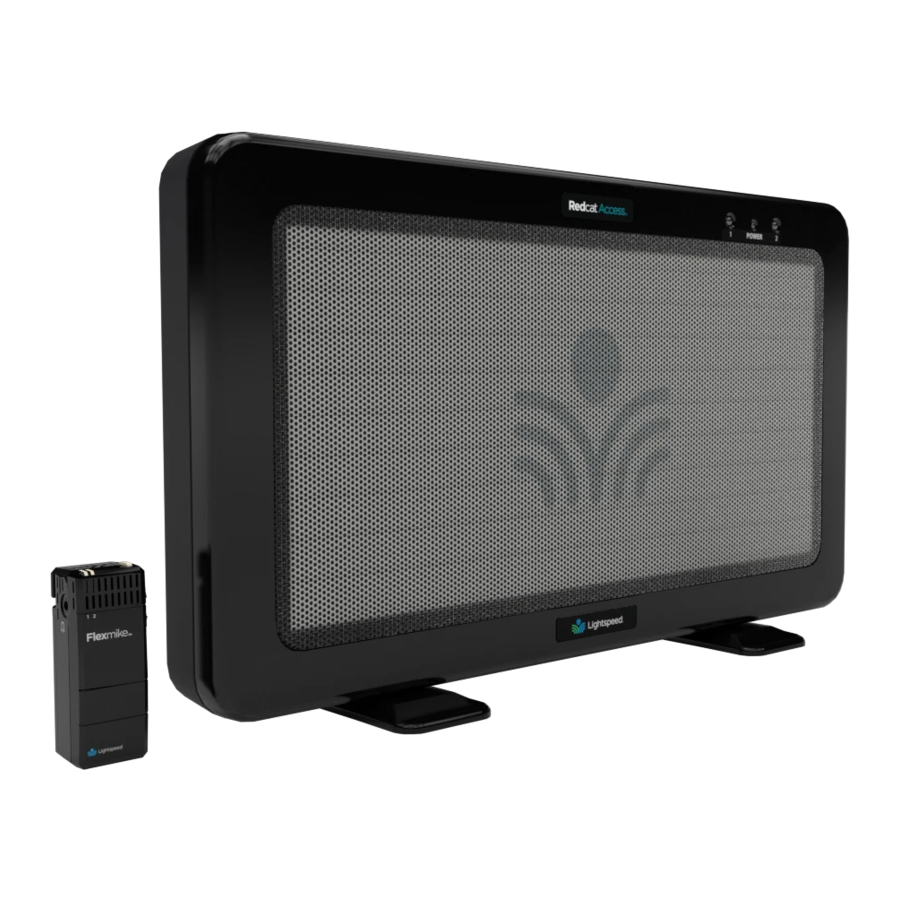
Main Unit
Front Panel Indicators
1. Power on indicators: The power LED will glow
power is supplied
2. MIC 1 & MIC 2: Mic link and registration indicators 2
a. Flashing
Amber
b. Solid
Green
indicates registration is in process.
indicates a link has been established
Side Panel Controls
1. REGISTRATION: Press this button if there is a new component, such
as a microphone, to be registered
2. AUDIO INPUT JACK & VOLUME CONTROL:
3.5mm stereo connector for connecting classroom audio sources to the
Redcat Access. Controls the volume level of the audio input from the
connected audio source.
3. AUDIO OUTPUT JACK & VOLUME
CONTROL: 3.5mm stereo connector for connecting to an assisted
listening device (ALD) or to a computer for recording. Controls the volume
level of the audio output.
4. POWER BUTTON:
This button is used to turn the Redcat Access on or off. The front panel
blue light will glow when power is on.
5. DC INPUT JACK: Plug the power supply (16V/2.0A) into this jack
Prioryfield House, 20 Canon Street, Taunton, Somerset, TA1 1SW |
www.robertsaudiosolutions.co.uk |info@robertsaudiosolutions.co.uk |
Blue
when
Top Panel Controls
1. MIC VOLUME: Controls the volume level of
the microphones.
2. TONE CONTROL: Adjusts the audio tone,
adding more bass or treble for a more rich
or crisp sound
| 01823 323363
Page 1
Advertisement
Table of Contents

Related Manuals for Lightspeed RedCat


Summary of Contents for Lightspeed RedCat
- Page 1 4. POWER BUTTON: This button is used to turn the Redcat Access on or off. The front panel blue light will glow when power is on. 5. DC INPUT JACK: Plug the power supply (16V/2.0A) into this jack...
- Page 2 Redcat Access as well. While speaking in a normal voice, fine-tune the microphone volume on top of the Redcat Access up or down. Proper volume level should be as follows: Your voice should be heard by another person on the...
- Page 3 Output to assistive listening device 1. Turn the ALD (Assistive Listening Device) volume control on the Redcat Access side panel counter clockwise all the way down 2. Determine the size and type of audio input jack on the device. 3. Connect a patch cable from the ALD’s microphone jack or AUX input to the 3.5mm audio jack labelled “ALD OUT”...
- Page 4 However, if you have difficulty please follow the two links below which take you to an on-line video which should be able to help you…. Pairing up teachers microphone with the main system: https://www.lightspeed-tek.com/support/tutorials/tutorial-library/redcat-access-registration- tutorial/register-sharemike-to-redcat-access/ Pairing up students microphone with the main system: https://www.lightspeed-tek.com/support/tutorials/tutorial-library/redcat-access-registration-...
Need help?
Do you have a question about the RedCat and is the answer not in the manual?
Questions and answers