WEG CFW-11 Series User Manual
Hide thumbs
Also See for CFW-11 Series:
- Programming manual (291 pages) ,
- Installation manual (212 pages) ,
- User manual (145 pages)

Related Manuals for WEG CFW-11 Series


Summary of Contents for WEG CFW-11 Series
- Page 1 Motors | Automation | Energy | Transmission & Distribution | Coatings Frequency Inverter CFW-11 User's Manual...
- Page 2 FREQUENCY INVERTER MANUAL Series: CFW-11 Language: English Document: 10000784107 / 03 Models: 242...720 A / 380...480 V Models with Special DC Hardware: 242...720 A / 380...480 V 04/2014...
- Page 3 Summary of Revisions Revision Description Chapter First edition Correction of table 8.1 General revision...
-
Page 4: Table Of Contents
Summary CHAPTER Safety Instructions 1.1 Safety Warnings in the Manual .....................1-1 1.2 Safety Warnings in the Product .....................1-1 1.3 Preliminary Recommendations .....................1-2 CHAPTER 2 General Information 2.1 About the Manual ........................2-1 2.2 Terms and Definitions used in the Manual ..................2-1 2.3 About the CFW-11 ........................2-4 2.4 CFW-11 Identification Labels .......................2-8 2.5 Receiving and Storage ......................2-11... - Page 5 Summary CHAPTER 5 First Time Power-Up and Start-Up 5.1 Start-Up Preparation ........................5-1 5.2 Start-Up .............................5-2 5.2.1 P0000 Password Setting .....................5-2 5.2.2 Oriented Start-Up ......................5-3 5.2.3 Basic Application Parameter Settings ...................5-5 5.3 Date and Time Setting .........................5-8 5.4 Parameter Change Prevention ......................5-8 5.5 How to Connect a PC .........................5-9 5.6 Flash Memory Module ........................5-9 CHAPTER 6...
-
Page 6: Safety Warnings In The Manual
Safety Instructions SAFETY INSTRUCTIONS This manual provides information for the proper installation and operation of the CFW-11 frequency inverter. Only trained and qualified personnel should attempt to install, start-up, and troubleshoot this type of equipment. 1.1 SAFETY WARNINGS IN THE MANUAL The following safety warnings are used in this manual: DANGER! The procedures recommended in this warning have the purpose of protecting the user against dead,... -
Page 7: Preliminary Recommendations
Safety Instructions Hot surface. 1.3 PRELIMINARY RECOMMENDATIONS DANGER! Only qualified personnel familiar with the CFW-11 frequency inverter and associated equipment should plan or implement the installation, start-up and subsequent maintenance of this equipment. These personnel must follow all the safety instructions included in this Manual and/or defined by local regulations. - Page 8 Other manuals are provided only in electronic format available in the CD-ROM supplied with the inverter or it can be obtained at WEG website - www.weg.net. The CD-ROM should always be kept with the equipment. A hard copy of the files available in the CD-ROM can be ordered...
- Page 9 Safety Instructions...
-
Page 10: General Information
RS-232/RS-485 Serial Communication Manual. CANopen Slave Communication Manual. Anybus-CC Communication Manual. These manuals are included on the CD supplied with the inverter or can be downloaded from the WEG website at - www.weg.net. 2.2 TERMS AND DEFINITIONS USED IN THE MANUAL... - Page 11 General Information DC Link: Inverter intermediate circuit; DC voltage obtained from the rectification of the AC input voltage or from an external power supply. It feeds the inverter output IGBT bridge. U, V and W Arms: Set of two IGBTs forming the inverter output phases U, V and W. IGBT: “Insulated Gate Bipolar Transistor”;...
- Page 12 General Information °C: Celsius degree. °F: Fahrenheit degree. AC: Alternating Current. DC: Direct Current. CFM: “Cubic feet per minute”; It is a flow measurement unit. cm: Centimeter. CV: “cheval-vapeur” = 736 Watts; Power measurement unit, normally used to indicate the mechanical power of electric motors.
-
Page 13: About The Cfw-11
General Information 2.3 ABOUT THE CFW-11 The CFW-11 is a high performance Variable Frequency Drive that makes it possible the control of speed and torque of three-phase AC induction motors. The central characteristic of this product is the “Vectrue” technology, which presents the following advantages: (V/f), V V W or vector control programmable in the same product;... - Page 14 General Information Braking resistor External braking module (Optional) RFI filter/MOVs Three-phase rectifier R/L1 U/T1 Power S/L2 V/T2 Motor supply W/T3 T/L3 IGBT inverter CPC 11 Pre-charge control Feedback: - voltage - current POWER Control power supply and interfaces CONTROL between power and control sections SuperDrive G2 software WLP software Accessories...
- Page 15 General Information DC supply U/T1 V/T2 Motor W/T3 IGBT inverter Feedback: - voltage - current POWER Control power supply and interfaces CONTROL between power and control sections SuperDrive G2 software WLP software Accessories I/O Expansion (Slot 1 - white) Keypad (remote) Keypad Encoder Interface (Slot 2 - yellow)
- Page 16 General Information A - HMI B - Control rack cover C - CC11 control board D - FLASH memory module E - Control accessory module F - Anybus-CC accessory module G - Bottom front cover H - Heatsink fan I - Mounting supports (for surface mounting) J - Hoisting eye K - Rear part of the inverter (external part for flange mounting) L - SRB2 safety stop board...
- Page 17 The label under the keypad allows the identification of the most important characteristics of the inverter even if they are mounted side-by-side. Manufacturing date (day/month/year) CFW-11 model Serial number WEG part number Maximum ambient temperature surrounding the Inverter net weight inverter Rated input data (voltage, number of...
- Page 18 General Information Nameplate affixed to the side of the inverter Label under the keypad Figure 2.5 - Location of the identification labels...
- Page 19 General Information 2-10...
-
Page 20: Receiving And Storage
General Information 2.5 RECEIVING AND STORAGE The CFW-11 inverters from the frame size F and G models are supplied packed in wooden boxes. There is an identification label affixed to the outside of the package, identical to the one affixed to the side of the inverter. - Page 21 General Information 2-12...
-
Page 22: Installation And Connection
Installation and Connection INSTALLATION AND CONNECTION This chapter describes the CFW-11 electrical and mechanical installation procedures. The guidelines and suggestions must be followed aiming personnel and equipment safety, as well as the proper operation of the inverter. 3.1 MECHANICAL INSTALLATION 3.1.1 Environmental Conditions Avoid installing the inverter in an area with: Direct exposure to sunlight, rain, high humidity, or sea-air;... - Page 23 Installation and Connection ATTENTION! When installing two or more inverters vertically, respect the minimum clearance A + B (figure 3.2) and provide an air deflecting plate so that the heat rising up from the bottom inverter does not affect the top inverter. ATTENTION! Provide independent conduits for the physical separation of signal, control, and power cables (refer to the section 3.2 - Electrical Installation).
- Page 24 Installation and Connection (in) (in) (in) (in) (5.91) (9.84) (0.78) (3.15) Tolerance: ±1.0 mm (±0.039 in) Figure 3.2 - Ventilation clearances...
-
Page 25: Cabinet Mounting
Installation and Connection 3.1.3 Cabinet Mounting It is possible to mount the inverters in two manners, either on the mounting surface, or with the heatsink mounted outside the cabinet, so that the air for cooling the power heatsink is kept outside the enclosure (flange mounting). For these cases, consider: Surface mounting: Provide adequate exhaustion, so that the internal cabinet temperature remains within the allowed range for... -
Page 26: Access To The Control And Power Terminals
Installation and Connection 3.1.4 Access to the Control and Power Terminals In order to get access to the control terminals, it is necessary to remove the HMI and the control rack cover, as showed in the figure 3.3. Figure 3.3 - Removal of the HMI and the control rack cover In order to get access to the power terminals, it is necessary to remove the bottom front cover, as showed in the figure 3.4. -
Page 27: Hmi Installation At The Cabinet Door Or Command Panel (Remote Hmi)
Installation and Connection 3.1.5 HMI Installation at the Cabinet Door or Command Panel (Remote HMI) 28.5 [1.12] 23.5 [0.93] 35.0 [1.38] ∅4.0 [0.16] (3X) 65.0 [2.56] Figure 3.6 - Data for the HMI installation at the cabinet door or command panel – mm [in] The keypad frame accessory can also be used to fix the HMI, as mentioned in the table 7.2. -
Page 28: Identification Of The Power Terminals And Grounding Points
Installation and Connection 3.2.1 Identification of the Power Terminals and Grounding Points R/L1, S/L2, T/L3: AC power supply. U/T1, V/T2, W/T3: motor connection. DC+: DC link positive terminal. DC-: DC link negative terminal. Figure 3.7 (a) - Frame size F: Power terminals and grounding points... - Page 29 Installation and Connection Figure 3.7 (b) - Frame size F with special DC hardware: Terminals for DC voltage supply. Terminals R/L1, S/L2 and T/L3 are not internally connected in this version U/T1 V/T2 W/T3 R/L1 S/L2 T/L3 Figure 3.7 (c) - Frame size G: Power terminals and grounding points...
-
Page 30: Power / Grounding Wiring And Fuses
Installation and Connection Figure 3.7 (d) - Frame size G with special DC hardware: Terminals for DC voltage supply. Terminals R/L1, S/L2 and T/L3 are not internally connected in this version 3.2.2 Power / Grounding Wiring and Fuses ATTENTION! Use proper cable lugs for the power and grounding connection cables. ATTENTION! Sensitive equipment such as PLCs, temperature controllers, and thermocouple cables, must be kept at a minimum distance of 0.25 m (9.84 in) from the frequency inverter and from the cables connecting... - Page 31 Installation and Connection DANGER! Mauvaise connexion des câbles: - Le variateur sera endommagé si l’alimentation d’entrée est connectée aux bornes de sortie (U/T1, V/T2 ou W/T3). - Vérifier toutes les connexions avant de mettre le variateur sous tension. - En cas de remplacement d’un variateur existant par un CFW-11, vérifier si l’installation et le câblage sont conformes aux instructions figurant dans ce manuel.
- Page 32 Installation and Connection Table 3.2 - Recommended wire gauge and fuses for standard models - use only copper wire [75 ºC (167 °F)] Power terminals Wiring Fuse I Duty Fuse Bolt Recommended Model @ 25 ºC cycle Terminals (wrench/bolt torque N.m Cable lugs head type) (lbf.in)
- Page 33 Installation and Connection Table 3.3 - Recommended wire gauge and fuses for models fed with DC voltage (Special DC hardware) - use only copper wire [75 ºC (167 °F)] Power terminals Wiring Fuse I Duty Fuse Bolt Recommended Model @ 25 ºC cycle Terminals (wrench/bolt...
-
Page 34: Power Connections
Installation and Connection 3.2.3 Power Connections OPTIONAL External braking module Braking resistor PE W V U R S T U V W Shield Power Disconnect Fuses supply switch (a) Models with alternating current power supply (IP20) Direct current power supply 380-480 V models: 462 to 747 Vdc Fuses PE W V U... -
Page 35: Input Connections
Installation and Connection 3.2.3.1 Input Connections DANGER! Provide a disconnect device for the inverter power supply. This device must cut off the power supply whenever necessary (during maintenance for instance). DANGER! Montez un dispositif de coupure sur l'alimentation du variateur. Ce composant déconnecte l'alimentation du variateur si cela est nécessaire (ex. -
Page 36: Pre-Charge Circuit Fuses
3.2.3.1.2 Pre-charge Circuit Fuses 4 A / 690 V slow blow fuse. Manufacturer: Ferraz Shawmut. Commercial reference: 17019-G. WEG part number: 10411503. 3.2.3.2 Dynamic Braking ATTENTION! Frame sizes F and G CFW-11 models do not have internal braking IGBT. External braking modules and resistors must be installed when necessary, as showed in the figure 3.8 (a). -
Page 37: Output Connections
Installation and Connection Figure 3.10 - Sequence for the connection of external dynamic braking cables 3.2.3.3 Output Connections ATTENTION! The inverter has an electronic motor overload protection that must be adjusted according to the driven motor. When several motors are connected to the same inverter, install individual overload relays for each motor. - Page 38 Installation and Connection Recommendations for motor cables: Unshielded cables: Can be used when it is not necessary to meet the European directive of electromagnetic compatibility (89/336/EEC). Keep motor cables away from other cables (signal cables, sensor cables, control cables, etc.), according to the table 3.4.
-
Page 39: Grounding Connections
Installation and Connection 3.2.4 Grounding Connections DANGER! Do not share the grounding wiring with other equipment that operate with high currents (e.g. high power motors, soldering machines, etc.). When installing several inverters, follow the procedures presented in figure 3.12 for the grounding connection. DANGER! Ne pas partager le câblage de mise à... -
Page 40: Control Connections
Installation and Connection CFW-11 nº1 CFW-11 nº2 CFW-11 nºN CFW-11 nº1 CFW-11 nº2 Cabinet internal ground busbar Figure 3.12 - Grounding connections with multiple inverters 3.2.5 Control Connections The control connections (analog inputs/outputs, digital inputs/outputs), must be made at the CC11 control board terminal strip XC1. - Page 41 Installation and Connection Factory Setting Function Specifications Terminal Strip Positive reference for Output voltage: +5.4 V, ±5 %. REF+ potentiometer. Maximum output current: 2 mA. AI1+ Analog input # 1: Differential Speed reference (remote). Resolution: 12 bits. ≥5 kΩ Signal: 0 to 10 V (R = 400 kΩ) / 0 to 20 mA / 4 to 20 mA (R = 500 Ω).
- Page 42 Installation and Connection Factory Setting Function Specifications Terminal Strip Positive reference for Output voltage: +5.4 V, ±5 %. REF+ potentiometer. Maximum output current: 2 mA. Analog input # 1: Differential AI1+ Speed reference (remote). Resolution: 12 bits. ≥5 kΩ Signal: 0 to 10 V (R = 400 kΩ) / 0 to 20 mA / 4 to 20 mA (R = 500 Ω).
- Page 43 Installation and Connection NOTE! In order to use the digital inputs as "Active Low", remove the jumper between XC1:11 and 12 and install it between XC1:12 and 13. Slot 5 Slot 1 (white) Slot 2 (yellow) Slot 3 (green) Slot 4 Figure 3.14 - XC1 terminal strip and DIP-switches for selecting the signal type of analog inputs and outputs As the factory setting, the analog inputs and outputs are adjusted to operate in the 0 to 10 V range, but they can be changed by using the S1 DIP-switch.
- Page 44 Installation and Connection Table 3.6 - Minimum separation distances between wiring Minimum separation Cable length distance ≤ 30 m (100 ft) ≥ 10 cm (3.94 in) > 30 m (100 ft) ≥ 25 cm (9.84 in) 4) The correct connection of the cable shield is showed in the figure 3.16. Insulate with tape Inverter side...
-
Page 45: Typical Control Connections
Installation and Connection 3.2.6 Typical Control Connections Control connection # 1 - Run/Stop function controlled from the keypad (Local Mode). With this control connection, it is possible to run the inverter in local mode with the factory default settings. This operation mode is recommended for first-time users, since no additional control connections are required. For the start-up in this operation mode, please follow instructions listed in chapter 5. - Page 46 Installation and Connection Control connection # 3 - 3-Wire Start/Stop function. Enabling the Run/Stop function with 3-wire control. Parameters to set: Set DI3 to START P0265=6 Set DI4 to STOP P0266=7 Set P0224=1 (DIx) for 3-wire control in Local mode. Set P0227=1 (DIx) for 3-wire control in Remote mode.
- Page 47 Installation and Connection Control connection # 4 - Forward/Reverse. Enabling the Forward/Reverse function. Parameters to set: Set DI3 to Forward run P0265=4 Set DI4 to Reverse run P0266=5 When the Forward/Reverse function is set, it will be active either in Local or Remote mode. At the same time, the HMI keys will remain always inactive (even if P0224=0 or P0227=0).
-
Page 48: Installation According To The European Directive Of Electromagnetic Compatibility
Installation and Connection 3.3 INSTALLATION ACCORDING TO THE EUROPEAN DIRECTIVE OF ELECTROMAGNETIC COMPATIBILITY The frame size F and G CFW-11 inverters have an internal RFI filter for the reduction of the electromagnetic interference. These inverters, when properly installed, meet the requirements of the electromagnetic compatibility directive “EMC Directive 2004/108/EC“. -
Page 49: Emission And Immunity Levels
Installation and Connection Category C2: inverters with a voltage rating less than 1000 V intended for use in the First Environment, not provided with a plug connector or movable installations. They must be installed and commissioned by a professional. Note: A professional is a person or organization familiar with the installation and/or commissioning of inverters, including their EMC aspects. - Page 50 Installation and Connection Table 3.8 - Conducted and radiated emission levels Without external RFI filter With external RFI filter Conducted Conducted External RFI emission - emission - Inverter model Radiated emission Radiated emission filter part number - maximum motor maximum motor (manufacturer: cable length cable length...
- Page 51 Installation and Connection 3-30...
-
Page 52: Keypad (Hmi)
Keypad (HMI) KEYPAD (HMI) This chapter describes: - HMI keys and their functions; - Display indications; - Parameter structure. 4.1 INTEGRAL KEYPAD - HMI-CFW11 Through the HMI, it is possible to command the inverter, visualize and adjust all of its parameters. It presents a navigation mode similar to the one used in cell phones, with options to access the parameters sequentially or by means of groups (Menu). - Page 53 Keypad (HMI) Cover Remove the cover Location of the battery access cover Press the cover and rotate it counterclockwise Remove the battery with the help of HMI without the battery Install the new battery positioning it first at a screwdriver positioned at the right the left side side Press the battery for its insertion...
- Page 54 Keypad (HMI) Installation: The keypad can be installed or removed from the inverter with or without AC power applied to it. The HMI supplied with the product can also be used for remote command of the inverter. In this case, use a cable with male and female D-Sub9 (DB-9) connectors wired pin to pin (mouse extension type) or a market standard Null-Modem cable.
-
Page 55: Parameter Structure
Keypad (HMI) 4.2 PARAMETER STRUCTURE When the right soft key ("MENU") is pressed in the monitoring mode, the display shows the first 4 groups of parameters. An example of how the groups of parameters are organized is presented in table 4.1. The number and name of the groups may change depending on the firmware version used. -
Page 56: Start-Up Preparation
First Time Power-Up and Start-Up FIRST TIME POWER-UP AND START-UP This chapter describes how to: - Check and prepare the inverter before power-up. - Power-up the inverter and check the result. - Set the inverter for the operation in the V/f mode based on the power supply and motor information by using the Oriented Start-Up routine and the Basic Application group. -
Page 57: Start-Up
First Time Power-Up and Start-Up 5.2 START-UP The start-up procedure for the V/f is described in three simple steps by using the Oriented Start-up routine and the Basic Application group. Steps: (1) Set the password for parameter modification. (2) Execute the Oriented Start-up routine. (3) Set the parameters of the Basic Application group. -
Page 58: Oriented Start-Up
First Time Power-Up and Start-Up 5.2.2 Oriented Start-Up There is a group of parameters named ”Oriented Start-up”, which makes the inverter settings easier. The parameter P0317 from this group allows entering the Oriented Start-up routine. The Oriented Start-Up routine presents the main parameters on the HMI in a logical sequence, so that their setting, according to the operation conditions, prepares the inverter for the operation with the used line and motor. - Page 59 First Time Power-Up and Start-Up Step Action/Result Display indication Step Action/Result Display indication - If necessary, set P0402 - If necessary, change the according to the motor value of P0296 according rated speed. To do so, to the line rated voltage. Config 0rpm Config...
-
Page 60: Basic Application Parameter Settings
First Time Power-Up and Start-Up 5.2.3 Basic Application Parameter Settings After running the Oriented Start-up routine and properly setting the parameters, the inverter is ready to operate in the V/f mode. The inverter has a number of other parameters that allow its adaptation to the most different applications. This manual presents some basic parameters, whose setting is necessary in the majority of cases. - Page 61 First Time Power-Up and Start-Up Table 5.1 - Parameters contained in the Basic Application group Adjustable Factory User Parameter Name Description Range Setting Setting P0100 Acceleration - It defines the time to accelerate linearly from 0 up to the 0.0 to 999.0 s 20.0 s Time maximum speed (P0134).
- Page 62 First Time Power-Up and Start-Up Table 5.2 - Main read only parameters Parameter Description Adjustable Range Parameter Description Adjustable Range P0001 Speed Reference 0 to 18000 rpm P0048 Present Alarm 0 to 999 P0002 Motor Speed 0 to 18000 rpm P0049 Present Fault 0 to 999...
-
Page 63: Date And Time Setting
First Time Power-Up and Start-Up 5.3 DATE AND TIME SETTING Step Action/Result Display indication Step Action/Result Display indication - Parameter “Day P0194” Ready 0rpm is already selected. - Monitoring Mode. - If needed, set P0194 - Press “Menu” according to the actual Ready 0rpm (right soft key). -
Page 64: How To Connect A Pc
First Time Power-Up and Start-Up 5.5 HOW TO CONNECT A PC NOTES! - Always use a standard host/device shielded USB cable. Unshielded cables may cause communication errors. - Recommended cables: Samtec: USBC-AM-MB-B-B-S-1 (1 meter); USBC-AM-MB-B-B-S-2 (2 meters); USBC-AM-MB-B-B-S-3 (3 meters). - The USB connection is galvanically isolated from the mains power supply and from other internal inverter high voltages. - Page 65 First Time Power-Up and Start-Up 5-10...
-
Page 66: Troubleshooting And Maintenance
Troubleshooting and Maintenance TROUBLESHOOTING AND MAINTENANCE This chapter presents: - A lists of all the faults and alarms that may occur. - The possible causes of each fault and alarm. - A lists of the most frequent problems and corrective actions. - Instructions for periodic inspections and preventive maintenance on the equipment. -
Page 67: Faults, Alarms, And Possible Causes
Troubleshooting and Maintenance 6.2 FAULTS, ALARMS, AND POSSIBLE CAUSES Table 6.1 - Faults, alarms and possible causes Fault/Alarm Description Possible Causes F006: Mains voltage imbalance too high or phase Phase missing at the inverter's input power supply. Imbalance or missing at the input power supply. Input voltage imbalance >... - Page 68 Troubleshooting and Maintenance Table 6.1 (cont.) - Faults, alarms and possible causes Fault/Alarm Description Possible Causes A050: The IGBT NTC temperature sensors detected a High inverter surrounding air temperature (> 50 °C (122 °F)) U Phase IGBT High high temperature alarm. and high output current.
- Page 69 Alarm that indicates an access error to the Defective, unrecognized, or incorrectly installed Anybus-CC Anybus Access Error Anybus-CC communication module. module. Conflict with a WEG option board. A133: Alarm indicating that the power supply was not Broken or loose cable. CAN Not Powered connected to the CAN controller.
- Page 70 Invalid Clock Value P0199. Keypad battery is discharged, defective, or not installed. F182: Indicates a fault at the feedback from the Please contact WEG Service. Pulse Feedback Fault output pulses. F183: Overtemperature related to the IGBTs overload High surrounding air temperature.
- Page 71 Troubleshooting and Maintenance Table 6.1 (cont.) - Faults, alarms and possible causes Fault/Alarm Description Possible Causes A191: Temperature alarm detected at the sensor 1. Motor high temperature. Temp. Sensor 1 Alarm A problem in the wiring connecting the sensor to the IOE-01 (02 or 03).
- Page 72 Troubleshooting and Maintenance Table 6.1 (cont.) - Faults, alarms and possible causes Fault/Alarm Description Possible Causes A700: Alarm or fault related to the HMI disconnection. RTC function block has been activated in the SoftPLC applicative Disconnected HMI and the HMI is disconnected from the inverter. F701: Disconnected HMI A702:...
-
Page 73: Solutions For The Most Frequent Problems
Troubleshooting and Maintenance 6.3 SOLUTIONS FOR THE MOST FREQUENT PROBLEMS Table 6.2 - Solutions for the most frequent problems Problem Point to be Verified Corrective Action Motor does not start Incorrect wiring 1. Check all power and control connections. For instance, the digital inputs set to start/stop, general enable, or no external error must be connected to the 24 Vdc or to DGND* terminals (refer to figure 3.18). -
Page 74: Information Necessary For Contacting Technical Support
Do not perform any withstand voltage test! If necessary, consult WEG. The inverters require low maintenance when properly installed and operated. The table 6.3 presents the main procedures and time intervals for preventive maintenance. The table 6.4 provides recommended periodic... -
Page 75: Cleaning Instructions
Inverter is being used: Every 10 years. Contact WEG technical support to obtain replacement replace procedures. (1) The inverters are set at the factory for automatic fan control (P0352=2), which means that they will be turned on only when the heatsink temperature exceeds a reference value. - Page 76 Troubleshooting and Maintenance Fan securing screws removal Fan removal Cable disconnection Figure 6.1 - Removal of the heatsink fans 6-11...
- Page 77 Troubleshooting and Maintenance 6-12...
-
Page 78: Option Kits And Accessories
Option Kits and Accessories OPTION KITS AND ACCESSORIES This chapter presents: The option kits that can be integrated to the inverter from the factory: - Safety Stop according to EN 954-1 category 3; - External 24 Vdc power supply for control and keypad. Instructions for the proper use of the option kits. -
Page 79: Vdc External Control Power Supply
Option Kits and Accessories 3. In order to return to the normal operation after the Safety Stop activation, it is first necessary to apply 24 Vdc to the relay coils (XC25:1(+) and 2(-); XC25:3(+) and 4(-)). XC25 Figure 7.1 - Location of the SRB2 board in the frame size F and G CFW-11 inverters Table 7.1 - XC25 connections XC 25 Function... -
Page 80: Accessories
Option Kits and Accessories Observe that the inverters with the external 24 Vdc power supply option use terminals XC1:11 and 13 as the input for the external power supply and no longer as the output like in the standard inverter (figure 7.2). In case of interruption of the external 24 Vdc power supply, the digital inputs/outputs and analog outputs will no longer be fed, even if the mains power is on. - Page 81 ATTENTION! Only one module at a time can be fitted into each slot (1, 2, 3, 4 or 5). Table 7.2 - Accessory models Identification WEG Part Parameters Name Description Slot...
-
Page 82: Technical Specifications
Technical Specifications TECHNICAL SPECIFICATIONS This chapter describes the technical specifications (electric and mechanical) of the CFW-11 inverter series frame sizes F and G models. 8.1 POWER DATA Power Supply: Voltage tolerance: -15 % to +10 %. Frequency: 50/60 Hz (48 Hz to 62 Hz). Phase imbalance: ≤3 % of the rated phase-to-phase input voltage. - Page 83 Technical Specifications Table 8.1 - Technical specifications of the CFW-11 inverter series frame sizes F and G models at rated switching frequencies CFW11 CFW11 CFW11 CFW11 CFW11 CFW11 CFW11 Model 0242 T 4 0312 T 4 0370 T 4 0477 T 4 0515 T 4 0601 T 4 0720 T 4...
- Page 84 (3) The motor power ratings are merely a guide for 230 V or 460 V, IV pole WEG motors. The adequate inverter sizing must be based on the used motor rated current.
- Page 85 - Ambient with pollution degree 2 (according to EN50178 and UL508C). (2) The motor power ratings are merely a guide for 230 V or 460 V, IV pole WEG motors. The adequate inverter sizing must be based on the used motor rated current.
-
Page 86: Electronics/General Data
Technical Specifications 8.2 ELECTRONICS/GENERAL DATA CONTROL METHOD Voltage source. Type of control: - V/f (Scalar); - VVW: Voltage Vector Control; - Vector control with encoder; - Sensorless vector control (without encoder). PWM SVM (Space Vector Modulation). Full digital (software) current, flux, and speed regulators. Execution rate: - current regulators: 0.2 ms (switching frequency of 2.5 kHz and 5 kHz), 0.25 ms (switching frequency = 2 kHz);... -
Page 87: Codes And Standards
Technical Specifications 8.2.1 Codes and Standards SAFETY UL 508C - Power conversion equipment. STANDARDS UL 840 - Insulation coordination including clearances and creepage distances for electrical equipment. EN61800-5-1 - Safety requirements electrical, thermal and energy. EN 50178 - Electronic equipment for use in power installations. EN 60204-1 - Safety of machinery. -
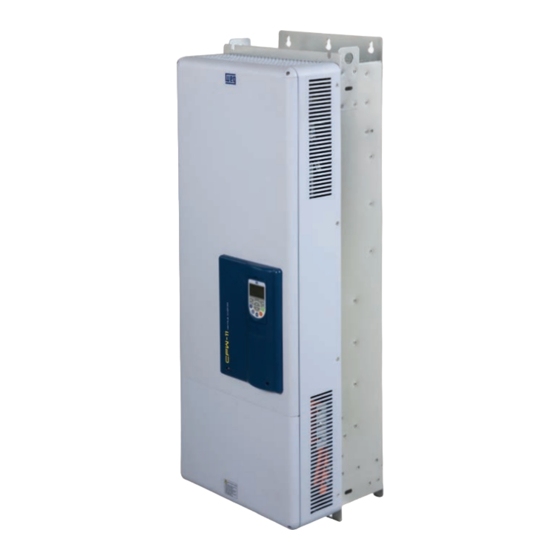
Page 88: Mechanical Data
Technical Specifications 8.3 MECHANICAL DATA Figure 8.2 - Frame size F dimensions - mm [in]... - Page 89 Technical Specifications Figure 8.3 - Frame size G dimensions - mm [in]...
Need help?
Do you have a question about the CFW-11 Series and is the answer not in the manual?
Questions and answers