Sign In
Upload
Download
Table of Contents
Contents
Add to my manuals
Delete from my manuals
Share
URL of this page:
HTML Link:
Bookmark this page
Add
Manual will be automatically added to "My Manuals"
Print this page
×
Bookmark added
×
Added to my manuals
Manuals
Brands
REA Manuals
Printer Accessories
JET HR pro 2K
User manual
REA JET HR pro 2K User Manual
Hide thumbs
1
2
3
4
5
6
7
8
9
10
11
12
13
14
15
16
17
18
19
20
21
22
23
24
25
26
27
28
29
30
31
32
33
34
35
36
37
38
39
40
41
42
43
44
45
46
47
48
49
50
51
52
53
54
55
56
57
58
59
60
61
62
63
64
65
66
67
68
69
70
71
72
73
74
75
76
77
78
79
80
81
82
83
84
85
86
87
88
89
90
91
92
93
94
95
96
97
98
99
100
101
102
103
104
105
106
107
108
109
110
111
112
113
114
115
116
117
118
119
120
121
122
123
124
125
126
127
128
129
130
131
132
133
134
135
136
137
138
139
140
141
142
143
144
145
146
147
148
149
150
151
152
153
154
155
156
157
158
159
160
161
162
163
164
165
166
167
168
169
170
171
172
173
174
175
176
177
178
179
180
181
182
183
184
185
186
187
188
189
page
of
189
Go
/
189
Contents
Table of Contents
Bookmarks
Table of Contents
Table of Contents
1 About this Instruction Manual
Symbols Used in this Manual
Safety Instructions
Handling
Responsibilities of the Operator
Responsibilities of the Employees
Intended Use
Expected Misuse
Hazards When Handling the REA JET HR Pro 2K / 4K
Information on EU Directives and CE Marking
Declaration of Conformity REA JET Hrpro 2K
Declaration of Conformity REA JET Hrpro 4K
Electrical Hazards
Fire and Explosion Hazards
Hazard through Ink
Further Hazard Sources
2 Scope of Delivery, Transport and Handling
Scope of Delivery
Transport
Handling
3 Mechanical Data, Assembly and Installation
Mechanical Data
Print Head
Print Head Retainer Rod
Parallel Program
Shaft Encoder with Integrated Cable
Suspended Measuring Arm for Shaft Encoder with Solid Shaft
HD Mount for the Shaft Encoder with Solid Shaft
Signal Lamp with Assembly Foot and Magnetic Foot
Signal Lamp with Assembly Bracket
I/O Connecting Element
Assembly and Installation
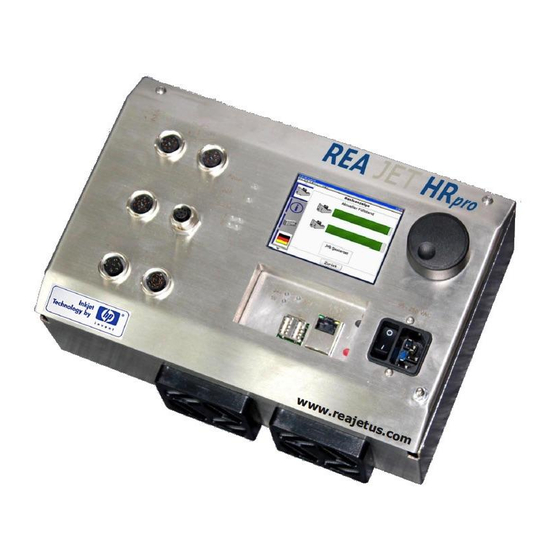
Assembly of the REA JET HR Pro 2K/4K Control Device
Assembly of the Print Heads / Print Heads
Installation of a Shaft Encoder
Installing the Signal Lamp
Installation of the I/O Connection Cable
Installation of the I/O Multiplier
Installation of the Shaft Encoder Multiplier
4 Electrical Connections to the Control Device Subdirectory
4 Electrical Connections to the Control Device
Brief Description of the Connections
Detailed Description of the Connections Incl. Connection Values
Mains Connection (A1)
Connection for Power Supply and Power Switches (A1)
Assignment of the Mains Connection (A1)
Power Supply Values of the REA JET HR Pro Control Device
Ground Bolts (A2)
Ethernet Connection (A3)
USB Connections (A4)
Assignment of the USN Connection (A4)
Connection for a Bulk System (A5)
Connection for a Bulk System (A11)
Assignment of the Bulk Connection (A5, A11)
Electrical Limit Values of the Bulk Connection (A5)
Serial Connection (A6)
Serial Connection (A11)
Assignment of the Serial Connection (A6, A12)
Connection for a Shaft Encoder (A7)
Connection for a Shaft Encoder (A13)
Assignment of the Serial Connection (A7, A13)
Electrical Limit Values of the Shaft Encoder Connection (A7, A13)
Functional Circuit Diagram of the Shaft Encoder Connection (A7, A13)
Connection for Digital Inputs and Outputs (A8)
Connection for Digital Inputs and Outputs (A14)
Assignment of the I/O Connection (A8, A14)
Electrical Limit Values of Digital Inputs and Outputs (A8, A14)
Functional Circuit Diagram Limit Values of Digital Inputs and Outputs (A8, A14)
Connection for Print Head 1 (A9)
Connection for Print Head 2 (A10)
Connection for Print Head 3 (A15)
Connection for Print Head 4 (A16)
Assignment of the Print Head Connection (A9, A10, A15, A16)
Cold Device Connection Cable
5 Operation - Observe
The Menu of the REA JET HR Pro 2K / 4K
6 Advanced Commissioning
System Control Connection
Operation in an IT Network
7 Delivery Status of Rea Jet Hr Pro 2K/4K
Data Backup
Factory Settings
Reset 1
8 List of Figures
Advertisement
Quick Links
1
Print Head
2
The Menu of the Rea Jet Hr Pro 2K / 4K
3
System Control Connection
Download this manual
User Manual
pro
REA JET HR
Version 3.5x_001 · Status 28.05.2015
Instruction manual
REA JET HR
V 1.4 01.02.2012
pro
2K/HR
4K
Page 1 / 189
Copyright © REA Elektronik
Table of
Contents
Previous
Page
Next
Page
1
2
3
4
5
Advertisement
Chapters
Table of Contents
4
3 Mechanical Data, Assembly and Installation
23
4 Electrical Connections To The Control Device Subdirectory
105
Table of Contents
Need help?
Do you have a question about the JET HR pro 2K and is the answer not in the manual?
Ask a question
Questions and answers
Related Manuals for REA JET HR pro 2K
Printer Accessories REA JET HR pro 4K User Manual
(189 pages)
Printer Accessories REA JET SK 7 User Manual
Print heads (38 pages)
This manual is also suitable for:
Jet hr pro 4k
Table of Contents
Save PDF
Print
Rename the bookmark
Delete bookmark?
Delete from my manuals?
Login
Sign In
OR
Sign in with Facebook
Sign in with Google
Upload manual
Upload from disk
Upload from URL


Need help?
Do you have a question about the JET HR pro 2K and is the answer not in the manual?
Questions and answers