Intercoax ECP-2808RM User Manual
Ethernet over coax / utp managed receiving switch
Hide thumbs
Also See for ECP-2808RM:
- User manual (41 pages) ,
- Quick installation manual (4 pages) ,
- User manual (22 pages)

Related Manuals for Intercoax ECP-2808RM


Summary of Contents for Intercoax ECP-2808RM
- Page 1 Ethernet over Coax / UTP Managed Receiving Switch ECP-2808RM / ECP-2816RM / EUP-2808RM / EUP-2816RM User Manual Version 3.0...
-
Page 2: Table Of Contents
Contents Precaution and Safety Guidelines ..............4 1. Product Overview ..................5 1.1. Introduction ........................5 1.2. Features ..........................5 1.3. Package Contents ......................5 2. Hardware Installation .................. 6 2.1. Front Panel ........................6 2.2. Rear Panel ........................7 2.3. LED Indication .......................8 2.4. Configuration Instruction .....................9 2.4.1. - Page 3 4.5. Configuring and Monitoring RM Units in ECP Manager .........22 4.5.1. Changing the IP Address ..................22 4.5.2. Join & Node Control ....................24 4.5.3. Node Monitor ......................24 4.5.4. Power ........................25 4.5.5. Traffic ........................26 4.5.6. Multicast ........................26 4.5.7. Settings ........................27 4.6. SNMP ...........................30 4.7. Web GUI ........................33 4.8. SSH ..........................34 5.
-
Page 4: Precaution And Safety Guidelines
Precaution and Safety Guidelines • Please install the device following the installation guide. • Read all warnings. • Warning: Do not touch the device and cable with wet hands. • Warning: Clean this device only with a dry cloth. • Warning: Please do not put the device on anything electrically conductive (screwdrivers, coins, iron, etc.) and do not put them around water. -
Page 5: Product Overview
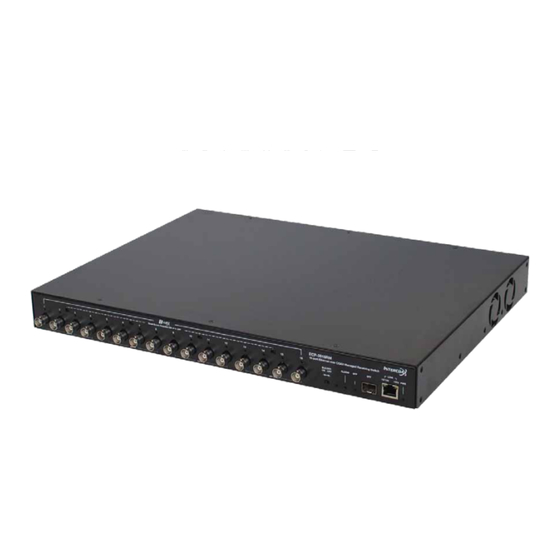
1. Product Overview 1.1. Introduction The Intercoax ECP/EUP-2808RM/2816RM Series are 19” rack mountable managed Long Distance Ethernet and PoE over Coax/UTP Receiving Switches. ECP/EUP-2808RM/2816RM series are capable of connecting 8/16 ECP Transmitters and also support PoE powered devices such as IP cameras. -
Page 6: Hardware Installation
[EUP-2816RM] Description B-Linx Ports (1~8 / 1~16) : Connect Intercoax ECP Transmitters or IEEE1901-HPAV standard devices by coaxial cable with BNC male connector. T-Linx Ports (1~8 / 1~16) : Connect Intercoax ECP Transmitters or IEEE1901-HPAV standard devices by UTP cable with RJ45 male connector. -
Page 7: Rear Panel
Description Buzzer On Off : Move the switch left or right to set the buzzer sound on or off. Factory Reset : The hidden factory reset button. Press and hold for 10 seconds the reset button to restore to its original IP settings (192.168.4.17/24) SFP : Connect an SFP module for uplink data (1000Base-SX and 1000Base-LX slot). Link : Connect an RJ45 Ethernet cable for uplink data (10/100/1000 Base-T). -
Page 8: Led Indication
2.3. LED Indication [ECP-2808RM] [EUP-2808RM] [ECP-2816RM] [EUP-2816RM] Blinking Indication • ECP/EUP Transmitter is B-Linx/T-Linx connected • No device connected • Short circuit or over current on B-Linx / T-Linx port protection is working (1~8 / 1~16) • Power over coax / UTP working properly •... -
Page 9: Configuration Instruction
2.4. Configuration Instruction 2.4.1. Prepare devices and materials • Ethernet over Coax /UTP Receiving Switch (ECP-2808RM, EUP-2808RM, ECP-2816RM, EUP-2816RM) • ECP-Transmitters (ECP-2601, ECP-2701, etc.) • EUP-Transmitters (EUP-2601T & or ECP Transmitters with BTE-02) • RJ-45 patch cord • Coax cables (ECP) or 4 pairs Cat5 or up UTP cables (EUP) •... - Page 10 2. Connect ECP-Transmitters to the IP end device (e.g. IP Camera, IP Access Control Unit, VoIP phone, etc.) (If you want the device to be powered by PoE, Please set the PoE Switch to ‘ON’ on the ECP Transmitter). Connect the receiving switch to your Network Switch or your PC using the RJ45 Patch cord. 3.
-
Page 11: Rackmount Bracket Installation Guide
2.4.2.1. Rackmount Bracket Installation Guide 1. Remove the 3 factory installed screws from both sides of the receiving switch and keep these screws as they will be used to attach the new rack mount brackets. (See Picture 1 & 2) Picture 1 Picture 2 2. -
Page 12: Typical Installation
2.5. Typical Installation • The ECP/EUP-2808/2816RM Series deliver high bandwidth and power over coax/UTP cable. All ECP/EUP single port units or ECP/EUP transmitter series can be used as remote transmitters, typically located at the IP camera. • Application Examples ECP-2816RM PoE Camera Coax ECP-2704T... -
Page 13: Product Specifications
3. Product Specifications 3.1. Technical Specifications Model ECP-2808RM EUP-2808RM ECP-2816RM EUP-2816RM 8 * 75Ω BNC 16 * 75Ω BNC Coax (Female) - Ethernet (Female) - Ethernet over Coax (B-Linx) over Coax (B-Linx) 8 * 100Ω RJ45 16 * 100Ω RJ45 Interface (Female) - Ethernet (Female) - Ethernet over Twisted Pairs over Twisted Pairs... -
Page 14: Management Software Configuration
The ECP MANAGER LITE is the browser based GUI. Users can access to management of all ECP/EUP-2808/16 series and its connected IEEE1901-HPAV standard transmitters. • The ECP MANAGER software allows managing multiple INTERCOAX Managed Receivers remotely from the central management office. With the ECP MANAGER software, users can access to all connected IEEE1901-HPAV standard transmitters. -
Page 15: Installing Ecp Manager
4.3. Installing ECP Manager To download the ECP Manager and its prerequisites, please visit www.intercoax-emea.com in your browser: In the top navigation bar, select 'Support': In the filter, select 'Software': Click on the download button next to 'ECPManager_v3.0.zip' to download the file: Save the .zip file where you want and unpack it with your preferred unpacking software (WinRAR, 7Zip, etc.) Go into the unpacked folder and install the prerequisites. If you use Windows 7 or lower, you need to run the ‘dotNetFx45_Full_stup’ installer for the .NET 4.5 Framework. When using Windows 8 or higher, this step is not necessary. - Page 16 Next, you need to install the second prerequisite, the SSCE Runtime software. There are two options, 32-bit (x86) and 64-bit, depending on your Operating System. When in doubt, start with running the 64-bit installer: If an error shows up explaining your Operating System does not support x64 software, use the other installer: Follow the instructions in the installer to finish the installation.
- Page 17 After the installation has finished, ECP Manager will start automatically. When never having installed ECP Manager before, ECP Manager will create a new folder and database: Continue at all the message boxes: ECP Manager will open up with the login screen showing: If a Windows Security Alert is displayed, tick both boxes and select ‘Allow Access’: You are now ready to start using ECP Manager.
-
Page 18: Setting Up Ecp Manager
4.4. Setting up ECP Manager 4.4.1. Setting up Groups and ECP units Start ECP Manager, if it is not running already. It will show the login screen. Use the credentials ‘admin’ and password ‘admin’ to log in: In the left navigation panel, select ‘ECP Config’: In the ‘Group Configuration’ tab, you can set up groups of RM units to monitor. These can be individually enabled or disabled to monitor different groups of RM units in separate buildings/ networks. - Page 19 Next, select the ‘ECP Configuration’ tab to add RM units to the Group we made just now. Fill out the information to add the RM you would like to manage and monitor: Select the Group we just made, the model you have, and give up the IP of the RM device. The standard IP Address of all RM units is 192.168.4.17. Give up a desired Location and set the monitoring settings.
- Page 20 Most likely, the unit we added will not be detected yet: When the ‘Check’ shows, this means your ECP Manager cannot connect to any RM units in your enabled Groups. When an Orange ‘Check’ shows, ECP Manager cannot connect to some but not all RM units in your enabled Groups.
-
Page 21: Admin Window
4.4.2. Admin Window • The initial administrator ID & Password is set to “admin” and you will need to configure the password in the admin window. • The administrator has full access to all users. • The administrator account cannot be deleted. • Please change this password regularly for your security. - Manager level: Select the user level. Only an administrator is allowed to create new account ID's and Password. -
Page 22: Configuring And Monitoring Rm Units In Ecp Manager
4.5. Configuring and monitoring RM units in ECP Manager 4.5.1. Changing the IP Address Having set up ECP Groups and ECP Units, we can now start with configuring and monitoring the units. We will go over all the functions in ECP Manager in detail : a lot of these functions are available as well in either the Web GUI or over SSH Commands. - Page 23 ECP Manager will now lose connection, because the IP Address of the RM we set up in ECP Manager is still 192.168.4.17, while the IP Address of the RM itself has changed to these new settings. Now connect your RM unit to your network, using the Ethernet Uplink Port and/or SFP Fiber uplink port. Connect your PC/Laptop to the same network, changing your adapter settings if necessary.
-
Page 24: Join & Node Control
Now that we haved configured the basic IP Settings of the RM unit, changed the ECP Manager configuration to monitor the new IP, and saved this configuration of the RM permanently, we can look at some more detailed settings. 4.5.2. Join & Node Control After going into the RM unit by clicking on it in the ‘General’ tab, select the ‘Join & Node Control’ tab: In this tab, you can view any connected TX units and their MAC Addresses. Unless being very familiar with IEEE 1901 devices, do not change any settings! Any warranty will be void when changing these settings without official support. -
Page 25: Power
Another function in the ‘Node Monitor’ tab is MAC Address Locking. When having connected all TX units and their IP end devices, it is possible to ‘Lock’ these devices by MAC Address. When one of the devices, for example a PoE camera, is replaced by an intruder with another IP device, a warning will be displayed for the RM in the ‘General’... -
Page 26: Traffic
4.5.5. Traffic This tab is purely for info, displaying current and past 5 minutes traffic history. Traffic is shown individually per chipset, so per four ports, and for the SFP and UTP port. TX or RX traffic can be shown individually as well by using the check boxes. 4.5.6. Multicast When having the desire to use multicast on one or more of the IP end devices connected to the RM unit, for example in video streaming, it is necessary to use an IGMP Query Generator. When you want to have a device, for example a PoE camera, to stream a multicast stream, configure the camera ... -
Page 27: Settings
Add the Multicast IP to the list and make sure the IGMP Query Generator is applied: A virtual Multicast MAC Address will be added to the list, corresponding to the provided Multicast IP Addres: It is now possible to receive the Multicast stream from the IP end-device on the network. Do this for all needed Multicast IP Addresses. - Page 28 QoS Setting, Port Base Priority It is possible to set priority of a specific chipsets, so again per four channels. Assign a number from one to four to each channel, with 1 being lowest and 4 being highest priority: Confirm by using the ‘Set’ button. VLAN Setting, 2nd Network with SFP Uplink It is possible to place specific chipsets on a different internal VLAN, making them able to connect with a second network and be put in a different broadcast domain with the SFP uplink port, using untagged VLAN. For example: This will place chipset 3 and 4, so port 9-16, in a different untagged VLAN, allowing to send traffic from and to port 1-8 only over the Ethernet uplink port and traffic from and to port 9-16 only over the SFP uplink port. The management system will also be accessible from this 2nd IP Address in this 2nd network over the uplink port. To make the changes for these VLAN settings, press ‘Set’.
- Page 29 SNMP Community String It is possible to change the SNMP Read-Only and Read-Write Community Strings. Simply give up the desired values and click 'Change'. Configuration Backup and Configuration Restore With these functions, it is possible to respectively save your RM configuration to a file that you save on your PC/ Laptop, and inject these settings into an RM unit. To export your configuration, click the ‘Backup’ button and select a name and place to file the save to. To import this configuration file into an RM, click the ‘Restore’ button and select the file from which you want to ...
-
Page 30: Snmp
4.6. SNMP Using the SNMP protocol, the system or network administrator can monitor the device, using the Read-Only and Read-Write Community Strings. It is possible to simply test our SNMP functionality in ECP Manager, in the ‘SNMP’ page: Here, all SNMP values, both Read-Only and Read-Write can be found: To test a specific SNMP value, select a Group and ECP you have set up previously in ECP Manager, and click on the value you would like to test. The Community String will be filled out automatically : Click on ‘Get’, and if you are connected to the RM unit, it will display the SNMP value :... - Page 31 To test a Read-Write SNMP value, click on an RW value, click ‘Get’ to get the value, change the value and Click ‘Set’ to push the settings change: To make the configuration, click the ‘save’ button of the respective RM unit and reboot the unit. Warning: It is recommended to only use the SNMP Read-Only values. To change RM settings, it is recommended to use the ECP Manager RM configuration pages.
- Page 32 SNMP MIB █ 1.3.6.1.2.1.1.1.0 sysDescr System Description 1.3.6.1.2.1.1.2.0 sysObectID System Object ID 1.3.6.1.2.1.1.3.0 sysUpTime TickTime after Power On 1.3.6.1.2.1.1.4.0 sysContact Contact Point 1.3.6.1.2.1.1.5.0 sysName Product Number, Network Video Technologies 1.3.6.1.2.1.1.6.0 sysLocation Product Location 1.3.6.1.4.1.50840.1.1.0 ecpOverView Overview Information 1.3.6.1.4.1.50840.1.2.0 ecpModel ECP Receiver Model Name 1.3.6.1.4.1.50840.1.3.0 ecpProductNumber ECP Receiver Product Number...
-
Page 33: Web Gui
4.7. Web GUI To use the Web GUI, go to the IP address of the RM unit in your preferred browser: Use User ID 'admin' and password 'admin to log in: You arrive on the ‘Overview’ page: This Web GUI is based upon the ECP Manager Software, but a 'Lite' version. Please refer to '3.5: Configuring and Monitoring RM Units in ECP Manager'. -
Page 34: Ssh
4.8. SSH 1. Download and Install PuTTY. 2. Double-click PuTTY icon. 3. Category - Setting in Session - Host Name(IP Address) : RM IP Address (Default 192.168.4.17) - Port : - Connection type : - Click Open 4. SSH Login ID : admin Enter PW : admin0417 Enter... - Page 35 5. Enter the Command : ECP status check <ecpget –option> ECP setting <ecpset –option> ECP control <ecpreset –option> Changes to the configuration are only made in RAM and will be reverted on reboot, unless saved! To copy the running configuration (RAM) to the startup configuration (ROM), please enter the command: ecpset -save Do this for every configuration change! Management Software Configuration — 35...
- Page 36 ECP Receiver CLI Command Table Item List Contents Device -ECP device information display command Information usage : ecpinform -[option] Option -hwversion -fwversion -model -porttype -portnumber -productnumber -serialnumber Configuration -ECP configuration check command Check usage : ecpconfig -[option]... Option -igmpreport ; display IGMP report mode on, off setting -ipaddr ; display IP network address inform -multicast ;...
- Page 37 Port -ECP port control command Control usage : ecpport -[option] [parameter] Option -number -reset [port number] -enable [port number] -disable [port number] -ECP port reset command usage : ecpportreset -[option] [parameter] Option -port [port number] ; reset port Traffic -ECP traffic monitoring command Monitoring usage : ecptmon -[option] [port] Option...
- Page 38 Node Management - ECP local node join information check command usage : ecpnodelocal -[option]... Option -nmk ; display NMK inform -ufid ; display UFID inform - ECP local node join information set command usage : ecpnodelocalset -[option]... Option -groupA -nmk [nmk hexa string] ;set groupA NMK inform -groupB -nmk [nmk hexa string] ;set groupB NMK inform -groupC -nmk [nmk hexa string] ;set groupC NMK inform -groupD -nmk [nmk hexa string] ;set groupD NMK inform...
- Page 39 General - ECP general information set command usage : ecpset -[option] [parameter] Option -igmpreport [on/off] ; set IGMP Report mode on, off -ipaddr [192.168.4.17] ;set IP network address -netmask [255.255.255.0] ;set IP network address mask -gateway [192.168.4.1] ;set default gateway address -ipaddr2 [192.168.4.17] ;set IP network address for vlan2 -netmask2 [255.255.255.0] ;set IP network address mask for vlan2 -gateway2 [192.168.4.1]...
-
Page 40: Warranty Policy
Intercoax’s liability under any warranties shall be discharged by replacing or repairing any part or parts which do not conform to the applicable warranty under normal and proper use. Intercoax’s liability with respect to any product shall not exceed a refund of the price received by Intercoax for that product, and in no event shall Intercoax have any liability for any incidental, consequential, special, or indirect ...
Need help?
Do you have a question about the ECP-2808RM and is the answer not in the manual?
Questions and answers