Table of Contents
Advertisement
Quick Links
OWNER'S MANUAL
U.S. Patent: #8,377,160
U.S. Patent: #8,377,160
U.S. Patent #9,125,535 B2
U.S. Patent #9,125,535 B2
Rev: 01/13/2020
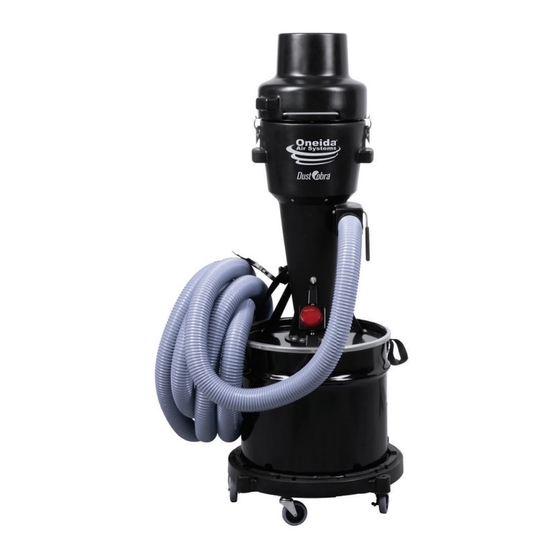
Appearance may vary slightly
Dust Cobra
Dust Collector
Standard /Industrial/Vortex
#XCKM010000
#XCKM013500
#XCKM010000-IND
#XCKM013500-IND
#XCKM010000-VOR
#XCKM013500-VOR
Doc. #ZBM000025B
Advertisement
Table of Contents

Related Manuals for Oneida Air Systems Dust Cobra


Summary of Contents for Oneida Air Systems Dust Cobra
- Page 1 OWNER’S MANUAL Dust Cobra Dust Collector Standard /Industrial/Vortex #XCKM010000 #XCKM013500 #XCKM010000-IND #XCKM013500-IND #XCKM010000-VOR U.S. Patent: #8,377,160 U.S. Patent: #8,377,160 #XCKM013500-VOR U.S. Patent #9,125,535 B2 U.S. Patent #9,125,535 B2 Appearance may vary slightly Rev: 01/13/2020 Doc. #ZBM000025B...
-
Page 3: Table Of Contents
Table of Contents System Start-Up Information System Speci cations System Dimensions System Contents Industrial and Vortex Contents Assembly Instructions Vortex Assembly Instructions Filter Pulse Bar Cleaning Maintenance Troubleshooting Warranty Information Recommended Accessories Notes oneida-air.com... -
Page 4: System Start-Up Information
A re hazard is still present. Combustible material is now in the dust collector and storage container. e following points are worth heeding: a. It is the buyer’s responsibility to follow all applicable federal, state, local, OSHA, NFPA, or authorities having jurisdiction Oneida Air Systems... - Page 5 System Start-Up Information (Continued) codes and regulations when installing and operating this dust collector. b. Before Purchasing or Installing a dust collection system the buyer is cautioned to do so in accordance with prescribed Federal, State, Local, OSHA, NFPA, and any other applicable codes or regulations relating to the type of dust(s) you are collecting.
-
Page 6: System Speci Cations
Drum Type Reinforced Steel Drum with Painted Exterior Container Size 17 Gallons/35 gallons Overall Height 17 Gallon: 53.5" / 35 Gallon: 59.25" Drum Dolly Height Add 4-7/8" Overall Weight 17 Gallon: 45 lbs // 35 Gallon: 55.8 lbs Oneida Air Systems... - Page 7 System Specifications Keep the Certi cate of Compliance on hand while doing lead remediation WARNING This motor can expose you to chemicals, including carbon black, which is known to the State of California to cause cancer. For more information go to www.P65Warnings.ca.gov oneida-air.com...
-
Page 8: System Dimensions
1359 mm 53 - 1/2" 1359 mm 31-1/4" 794 mm to center of inlet 16.5" 419 mm 18.25" 464 mm Note: Drum Dolly adds 4.25" (108 mm) to height. Larger casters add 1/2 (25 mm) to height. Oneida Air Systems... - Page 9 System Dimensions with 35 Gallon Drum Nominal dimensions shown. Dimensions subject to slight variations in manufacturing. 37" 939.8 mm 59-1/4" 1505 mm 37" 940 mm to center of inlet 22-1/4" 565 mm 22" 559 mm Note: Drum Dolly adds 4.25" (108 mm) to height. Larger casters add 1/2"...
-
Page 10: System Contents
Vacuum Hose Storage Strap VAB251555 35-55 Gallon Drum Liner Bag AFJ051602 5/16"-18 x 2" J Bolt AFT155175 5/16" Whiz-Lock Nut Please unpack the parts carefully and con rm you have RHS000010 Filter Retainer Strap received each item listed here. Oneida Air Systems... - Page 11 System Contents (Continued) Motor Attachment Filter Hardware Bag Hold Down Kit Strut Pack Dust Sentry Hardware Dust Sentry mount options Cyclone Hardware Kit Handle Pack Bag Hold Down Kit oneida-air.com...
-
Page 12: Industrial And Vortex Contents
Molded Vortex Barrel Note: NEVER use any solvents, cleansers, or abrasives on the plastic components . Solvents will cause the clear polycarbonate cyclone to crack and abrasives will cause scratching. Use a clean so cloth for cleaning. 10 Oneida Air Systems... - Page 13 Industrial and Vortex Contents (Continued) Cobra Strap Pack oneida-air.com...
-
Page 14: Assembly Instructions
3 [FIG. 2a]. Tuck the excess behind the Handle Plate (F1) so that the end of the Webbing Handle (F6) is captured between the Drum (D) and the Handle Plate (F1). See [FIG. 2b] FIG. 2a FIG. 2b 12 Oneida Air Systems... - Page 15 Assembly Instructions (Continued) Secure both Handle Assemblies to pre-drilled holes on sides of Drum (D) using Hex Head Bolt (F2), Flat Washer, (F3), Rubber Washer (F4), and Nylock Nut (F5) as shown in FIG 3. Drum Firmly Tighten. FIG. 3 Turn Cone Assembly (B) upside down and install Strut (F7) using one Carriage Bolt (F9), Rubber Washer (F10), two Flat Washers (F11),...
- Page 16 Elbow (F28) [FIG. 7a]. Install Bag Hold Down Kit into pre drilled hole located on the Drum (D) [FIG. 7b]. FIG. 7a • Refer to the Quick Disconnect Installation Sheet (#ZBI000019) for more information. FIG. 7b 14 Oneida Air Systems...
- Page 17 Assembly Instructions (Continued) Install Gasket (F27) around the top outer rim of the Cone Assembly (B) [FIG 8.] Note: Align the gasket notches over the notches in the rim. Dust collection systems cannot operate e ectively if there isn’t a complete seal. ere must be NO air leaks.
- Page 18 Insert a Drum Liner Bag (F41) into the Drum (D), making sure it fully expands against the sides and the bottom of the Drum. e top edges of the bag should fold out and over the Drum’s upper rim [FIG. 13]. FIG. 13 16 Oneida Air Systems...
- Page 19 Assembly Instructions (Continued) Align the Nylon Elbow (F28) on the Cone (B) with the Nylon Elbow (F29) on the Drum (D). [FIG. 14] Attach the fully assembled unit onto the Drum with Lid Clamp (D). Note: Make sure that the Liner Bag (F41) is smoothly laid over the edge of the Drum (i.e.
- Page 20 Strap tight Use the second Ladder Lock Slider (K5) to secure the Tether Strap (K1) to the inlet Hose (O). [FIG 18b] If you did not purchase the Vortex Unit (#VOR), your installation is complete! FIG. 18b 18 Oneida Air Systems...
-
Page 21: Vortex Assembly Instructions
Vortex Assembly Instructions Remove cardboard ring from Vortex Barrel (S2) Inlet; you may need pliers to do so. FIG. 19 read a Whiz-Lock Nut (S4D) onto each readed Rod (S4C), at side down, until it is about 1" deep. [FIG. 20a] en screw each readed Rod (S4C) into the threaded inserts on top of the Vortex Barrel (S2) so that the at... - Page 22 Rubber Coupling Band Clamp (R4G) on the Rubber Coupler. [FIG. 25] Dust pipe or Purchased Handle FIG. 25 20 Oneida Air Systems...
- Page 23 Vortex Assembly Instructions (Continued) Secure Hose (R) in place onto elbow of the Vortex Sander Cyclone (S3) with one Turn Key Hose Clamp (R4H) [FIG. 26]. FIG. 26 Connect other end of Hose (R) to Cobra’s inlet and secure with 1/2” Turn Key Hose Clamp (S4H) [FIG.
-
Page 24: Filter Pulse Bar Cleaning
A broken lter can leak material into the motor and cause severe damage! You cannot operate the Dust Cobra without a proper lter in place. (See Accessories page for the replacement lter part.) Operating without a su cient... -
Page 25: Maintenance
3. Remove the cowling and the spacer to access the motor. 10 - 15 minutes without collecting any dust. Emptying the Drum When rst using the Dust Cobra dust collector, check Cowling the drum regularly to get an idea of how o en it needs to be emptied. -
Page 26: Troubleshooting
1. Replace the two motor brushes (Oneida Air System’s Part Number: BRB010120). unexpectedly If you continue to experience difficulty with your Dust Cobra dust collector, call Oneida Air Systems’ Customer Service Department at 1-866-387-8822 or email support@oneida-air.com. 24 Oneida Air Systems... -
Page 27: Warranty Information
Oneida Air Systems makes every e ort to accurately represent our products and prices, however Oneida Air Systems reserves the right to make changes to products and prices at any time. As a manufacturer, Oneida Air Systems reserves the right to change product speci cations at any time in an e ort to achieve better quality products. -
Page 28: Recommended Accessories
• Low voltage - works on standard 110V power. Universal Drum Dolly #SDD990000 • Fits nearly any cylindrical waste bin sold by Oneida Air Systems. • Includes ve 2” non-marking caster wheels (3 non-locking, 2 locking). • 3” non-marking caster wheels available (AXC000004) - Page 29 Recommended Accessories (Continued) 2.5” x 25’ CleanShop Vacuum Hose Kit #ASK000000 • Complete hose accessory kit for general shop cleanup. • Includes 25’ reinforced vacuum hose with smooth inner wall for minimal air resistance. • Accessory kit includes extension handle, 4” - 2.5” reducer, and vacuum accessory heads. 2.5”...
-
Page 30: Notes
Notes 28 Oneida Air Systems... - Page 32 Regardless of where you purchased your system, if you have any questions or issues with missing / damaged parts, please call Oneida Air Systems rst to let us help resolve your problem. We fully stand behind the quality of our products and place the utmost value on the satisfaction of our customers.
Need help?
Do you have a question about the Dust Cobra and is the answer not in the manual?
Questions and answers