Oneida Air Systems Dust Deputy Deluxe Manual
Hide thumbs
Also See for Dust Deputy Deluxe:
- User manual ,
- Manual (32 pages) ,
- Owner & user manual (32 pages)

Related Manuals for Oneida Air Systems Dust Deputy Deluxe


Summary of Contents for Oneida Air Systems Dust Deputy Deluxe
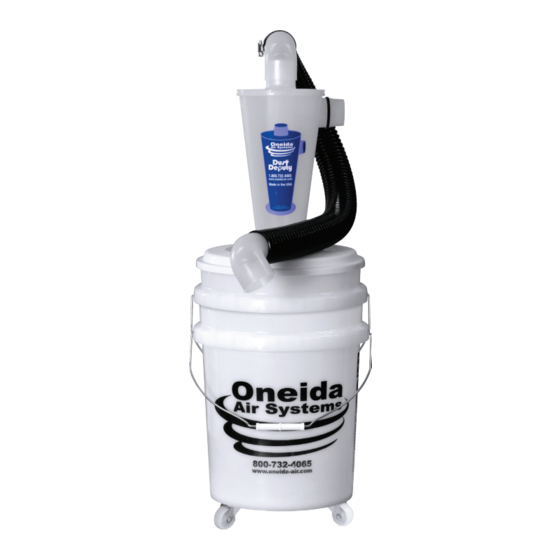
- Page 1 Dust Deputy Deluxe 10 Gallon # AXD250010 U.S. Pat. 6833016 RE40048 7282074 Appearance may vary slightly Rev: 04/11/2022 Doc. # ZBM000050...
-
Page 2: System Start-Up Information
8. Can be used for collecting non-flammable liquids. 9. Dispose of waste in a FIRE SAFE AREA. SOME DUSTS ARE HIGHLY FLAMMABLE OR Ÿ EXPLOSIVE. LEARN/ KNOW WHAT YOU ARE DEALING WITH. FOLLOW ALL LOCAL, STATE, FEDERAL & NFPA CODES AND GUIDELINES. Oneida Air Systems... -
Page 3: System Dimensions
System Dimensions Nominal dimensions shown. Dimensions subject to slight variations in manufacturing. 2-1/2" O.D. 2-5/16" I.D. 64 mm 58 mm 2-5/16" I.D. 58 mm 8-1/2" 216 mm 7-5/8" 194 mm 34-1/4" 15-5/8" 870 mm 397 mm 13-3/4" 349 mm 32 -7/16" 824 mm 19 -3/16"... -
Page 4: System Contents
30" AXD250066 2.5" x 5.5' Wire-Reinforced Vacuum Hose Please unpack the parts carefully and confirm you have received each item listed here. * Combined inside hardware package (AHX250010). †Additional washers are included in your hardware package (AHK000012). Oneida Air Systems... - Page 5 System Contents (Cont.) Please unpack the parts carefully and confirm you have received each item listed here. ×2 oneida-air.com...
- Page 6 This is normal and does not impact performance as long as the cyclone is installed according to these instructions. Arrange the Dolly Legs (F) in a descending stack as shown in [FIG. 1a] and [FIG. 1b]. FIG. 1a FIG. 1b Oneida Air Systems...
- Page 7 Assembly Instructions (Cont.) Secure Dolly Legs (F) together using three Bolts (G) and three Whiz-Lock Nuts (H) as shown in [FIG. 2a] and [FIG. 2b]. FIG. 2a FIG. 2b oneida-air.com...
- Page 8 Assembly (F) and a Retainer Clip (I). Secure together using six Nylock Nuts (J1) [FIG. 3a] [FIG. 3b]. Note: For ease of assembly, hardware should be finger tightened when connecting the Drum (D). FIG. 3a FIG. 3b Oneida Air Systems...
- Page 9 Assembly Instructions (Cont.) Place the Drum (E) onto the Assembled Dolly [FIG. 4a], then slide the Retainer Clips (I) into position over the bottom lip of the drum to securely hold the container in place. [FIG. 4b] Start by tightening two opposing Nylock Nuts (J1) until the lip of the drum is fully secured.
- Page 10 Gasket (B) and align all the holes. Secure Cyclone, Gasket, and Lid together using six Bolts (C1), six Washers (C2), and six Whiz-Lock Nuts (C3) as shown in [FIG. 5]. Note: Thoroughly tighten hardware to eliminate air leaks. FIG. 5 Oneida Air Systems...
- Page 11 Assembly Instructions (Cont.) Put Cyclone and Lid assembly (A, D) on top of your Drum (E). Close the Drum using the provided clamp and seal it airtight.[FIG. 6]. FIG. 6 oneida-air.com...
- Page 12 Connect the Cyclone's (A) inlet (sideways facing port) to your dust producing tool with your vacuum's hose or ductwork. Connect the Cyclone's outlet (upwards facing port) to your vacuum with Hose (L) [FIG. 7]. To wet/dry vacuum To Tool FIG. 7 Oneida Air Systems...
- Page 13 Note: Any air leak in the Lid (D) or Drum (E) will affect separation performance. Make sure to check your dust drum frequently so you do not overfill it. Leak Point (Outlet) Leak Point (Inlet) Leak Point (Cyclone/lid) Leak Point (Drum/lid) FIG. 8 Oneida Air Systems oneida-air.com...
- Page 14 Install the Metal Tape (K) to the Cyclone (A) so that the inlet, outlet, and flange are attached by a continuous, conductive path. The tape should wrap 1/4" around the edge of each opening [FIG 9]. FIG. 9 Oneida Air Systems...
- Page 15 Optional Grounding Instructions For added grounding, attach a self-supplied wire with a ring terminal on one end and a washer tied to the other end when installing one of the bolts in Step 5 on Page 10. The wire must be long enough for the washer to lie on the floor [FIG 10].
-
Page 16: Troubleshooting
2. Use a hose clamp. 3. Wrap the inlet and outlet of the Dust Deputy with a layer of electrical tape to increase the friction fit. 4. Secure hose with a sheet metal screw. Oneida Air Systems... - Page 17 Does the 2.5 have the same flange pattern as the original Dust Deputy? Yes! Both the original Dust Deputy cyclone and the new Dust Deputy 2.5 cyclone share the same bottom flange pattern. This makes upgrading existing cyclone installations quick and easy! You can find printable template files for download in the Documents tab found on the website of our product pages.
- Page 18 1" to 3" in diameter. Connecting 4" tools to the Dust Deputy cyclone's 2" ports will result in significant losses in airflow and suction power. Larger ports (4" and larger) will instead require one of our Super Dust Deputy cyclones. Oneida Air Systems...
- Page 19 What's the CFM range for the Dust Deputy 2.5? Rather than worrying about what specs your vacuum needs (e.g. air watts, cfm, static lift, etc.), we at Oneida Air Systems have a much simpler approach - simply match the size of your vacuum's inlet to the size of the Dust Deputy cyclone's ports.
- Page 20 There are some outlets like Peachtree Woodworking that may have adapters that can better fit your tool, and there are also plumbing- style adapters at most hardware stores (look for Fernco) that might also work and be cheaper/more readily available. Oneida Air Systems...
- Page 21 Accessories 2" x 10' Wire Reinforced Vacuum Hose #AXD400000 • Crush-resistant, flexible hose with a smooth- wall inner lining that minimize air resistance. 2.5" Turnkey Hose Clamp #ACB360000 • Secures hose fitting in place to eliminate disconnects when pulling or flexing the hose. • Fits hoses and port sizes from 2"...
- Page 22 Tapered on one end for easy friction-fit hose connections. Viper Vacuum Scraper Paint Removal Tool #AXS001160B • Ergonomic hand scraping tool with high- textured grip and reversible, tungsten-carbide blade. • Hollow handle fits 1-1/4" to 1-1/2" vacuum hoses. Oneida Air Systems...
-
Page 23: Warranty Information
Limited Warranty – Activate online at oneida-air.com/warranty Oneida Air Systems®, Inc. (OAS) warrants the Dust Deputy for a period of 1 year, to the original purchaser from the date of purchase, unless otherwise specified. Items not manufactured by Oneida Air Systems are limited to their own manufacturer’s warranties. All electrical items such as magnetic starters, remotes, sensors, pumps, bin sensors, bag grippers, etc. - Page 24 Regardless of where you purchased your Oneida Air Systems product, if you have any questions or issues with missing / damaged parts, please call Oneida Air Systems first to let us help resolve your problem. We fully stand behind the quality of our products and place the utmost value on the satisfaction of our customers.
Need help?
Do you have a question about the Dust Deputy Deluxe and is the answer not in the manual?
Questions and answers