Table of Contents
Advertisement
Quick Links
Advertisement
Table of Contents

Related Manuals for Elitech AEROSPRAY CYTOLOGY 7522

Summary of Contents for Elitech AEROSPRAY CYTOLOGY 7522
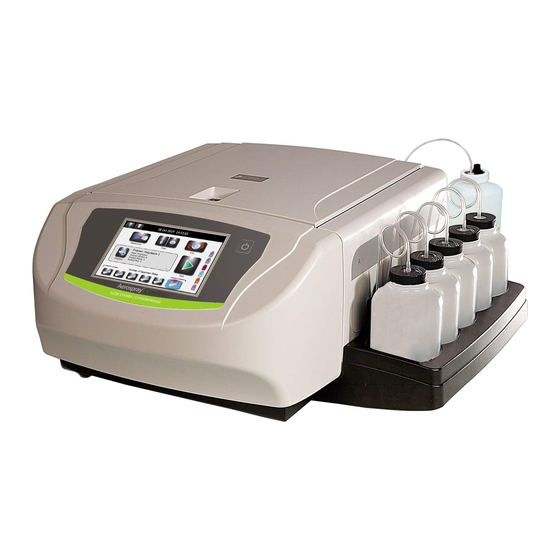
- Page 1 AEROSPRAY® CYTOLOGY Slide Stainer/Cytocentrifuge MODEL 7522 USER’S MANUAL...
- Page 2 AEROSPRAY® Cytology Slide Stainer/Cytocentrifuge MODEL 7522 USER’S MANUAL 57-0197-01A (Last update 03/23/2020)
- Page 3 ©2020 ELITechGroup Inc. All rights reserved. Printed in the United States of America. No part of this publication may be reproduced, transmitted, transcribed, stored in a retrieval system, or translated into any language (human or computer) in any form, or by any means whatsoever, without the prior express written permission of ELITechGroup Inc.
-
Page 4: Table Of Contents
Table of Contents Section 1: Introduction 1.1 Instrument Overview Using This Manual Functional Description Key Features Intended Use 1.2 Instrument Description Figure 1: Front and Right-Side Panels Figure 2: Front Panel and Touchscreen Figure 3: Rear Panel Figure 4: Stainer Bowl Components Figure 5: Nozzle Diagram Barcode Reader Figure 6: Barcode Reader... - Page 5 Figure 8: Incorrect Hub Pattern Test Result Loading the Carousel Figure 9: Loading a 12-Slide Carousel (Slide Labels Toward Outer Rim) Figure 10: Loading a 30-Slide Carousel (Slide Label Toward Center) Figure 11: Reattaching the Carousel Lid Using Blocking Slides Figure 12: Using Blocking Slides Performing a Stain Cycle Unloading the Carousel...
- Page 6 Appendix A: Reagents (Stains, Washes, Agents) Aerospray® Cytology Reagents Critical Reagent Components Appendix B: Risk and Safety Phrases Appendix C: Accessories and Supplies Appendix D: Stain Modes and Programming Options General Settings Intensity Stain Settings Wash Settings Appendix E: Technical Background of Papanicolaou Staining To Remove Carbowax Introduction The ELITechGroup Staining System...
-
Page 7: Section 1: Introduction
Section 1: Introduction 1.1 Instrument Overview Using This Manual This manual provides instructions to install, operate, and maintain the Aerospray Cytology Slide Stainer/ Cytocentrifuge Model 7522. The manual is an important part of the product. Read it carefully and completely before setup and first use of the instrument. If additional accident prevention and environmental protection requirements exist in the country of operation, this manual must be supplemented by appropriate instructions to ensure compliance. -
Page 8: Functional Description
Section 1: Introduction WARNING! If power is lost while the stainer is running, the lid will remain locked until power is restored. Do not attempt to open the lid while power is off. WARNING! Electrical shock hazard: Do not open this instrument or attempt internal repairs. Refer servicing to qualified service personnel. -
Page 9: Intended Use
Section 1: Introduction • Multiple languages • High-volume staining productivity (12 or 30 slides per stain cycle) • Automatic Clean Cycle to purge the reagent spray nozzle with approved alcohol • Separate reservoir, delivery tube, and pump for each reagent •... - Page 10 Section 1: Introduction Category Characteristics Fuses 2.0 Amp time-lag (Type T) (5 x 20 mm) (2 required). Manufactured by Littlefuse (Part No. 218002) or Bussman (Part No. GDC-2A) Ambient Temperature Operating 15 to 30 °C (59 to 86 °F) Storage -10 to 50 °C (14 to 122 °F) Relative Humidity ≤...
- Page 11 Section 1: Introduction Table 3: Carousel and Rotor Information Only the following slide staining carousels or cytocentrifuge rotor can be used in this instrument. Each should be used following the instructions in this manual or the Cytopro Applications Manual (RP-517). Maximum Rotor/Carousel Maximum Capacity...
- Page 12 Section 1: Introduction Symbol Description Caution, Consult Accompanying Documents (Attention, see instructions for use) CE Mark, product meets the essential requirements designated in Annex I of the In Vitro Device Directive (IVDD) 98/79/EC. Consult Instructions For Use Do Not Reuse Do not use if package is damaged Fragile, Handle with Care Fuse...
- Page 13 Section 1: Introduction Symbol Description Corrosive Environment Hazard Flammable Harmful/Irritant Oxidant Toxic Product to be used for manual cleaning only. Do not pump product through instrument. Systemic health hazards...
-
Page 14: Instrument Description
Section 1: Introduction 1.2 Instrument Description Figure 1: Front and Right-Side Panels 1. 30-Slide Carousel 2. 12-Slide Carousel 3. Lid with Safety Lock 4. Bowl 5. Front Panel with Touch Screen Display 6. Right Side Panel with Label Indicating Reagent Positions: A. - Page 15 Section 1: Introduction Figure 2: Front Panel and Touchscreen 1. Standby/Ready Button 2. Touch Screen The front panel features an interactive touchscreen display. Refer to Touchscreen and User Interface (Section 1.3, Table 7) for more information. Figure 3: Rear Panel 1.
- Page 16 Section 1: Introduction Figure 4: Stainer Bowl Components 1. Nozzle DF (Reagents D Hematoxylin Stain, F Acid Alcohol Wash) 2. Nozzle ABCE (Reagents A EA-50 Stain, B Orange G Stain, C Bluing Agent, E Alcohol Wash) 3. Drive Hub Figure 5: Nozzle Diagram 1.
- Page 17 Section 1: Introduction Component Name Description Nozzle Cleaning Strainer Strains the nozzle parts to prevent them from going down a drain. Nozzle Tool Unscrews nozzles from the stainer bowl. Nozzle Wrench Disassembles the nozzle. Nozzle Brush Cleans nozzles without removing them from the stainer.
-
Page 18: Barcode Reader
Section 1: Introduction Barcode Reader An optional barcode reader is available for the Cytology Stainer/Cytocentrifuge (Model 7522). Figure 6: Barcode Reader Other Needed Items The following parts are not available worldwide from ELITechGroup, but they can be obtained locally: • Approved alcohol (Ethanol or Isopropanol) Empty bottles are available from ELITechGroup. -
Page 19: Touchscreen And User Interface
Section 1: Introduction 1.3 Touchscreen and User Interface Users control all instrument functions from the interactive touchscreen display. Table 7: Front Panel/Main Screen Function Keys Button Name Description Standby/Ready With instrument power ON: Blue = Ready Amber = Standby Pressing standby runs a System Clean Cycle and places instrument into standby mode. - Page 20 Section 1: Introduction Button Name Description System Setup Allows users to modify the software settings. See System Setup Menu (Section 3.1). Table 8: System Setup Keys Button Name Description Stain Programs Allows users to create, edit, and delete stain programs. Cyto Programs Allows users to create, edit, and delete cytocentrifuge programs.
- Page 21 Section 1: Introduction Button Name Description Delete/Erase/Remove Deletes or erases the selected item. Edit/Change User Allows editing of an existing stain or cytocentrifuge program. Allows manual entry of slide or specimen information (stain or cytocentrifuge mode). Also allows system administrator to edit user information. Zero Zeros the Level Detect sensors.
-
Page 22: Section 2: Setup And Preparation For Operation
Section 2: Setup and Preparation for Operation 2.1 Instrument Setup Unpacking and Installing the Stainer Follow this sequence when using this instrument for the first time. Details about these operations are given in the next three sections. • Install the drain tube •... -
Page 23: Connecting Power
Section 2: Setup and Preparation for Operation NOTE: Ensure the waste tube has no loops or kinks and is as straight and as short as possible. Cut off excess tubing as needed. 3. Connect the drain tube to the waste container. 4. -
Page 24: Installing Standard 500 Ml Reagent Bottles For The First Time
Section 2: Setup and Preparation for Operation Installing Standard 500 mL Reagent Bottles for the First Time WARNING! Reagents used in the instrument contain moderately hazardous chemicals that require care in handling. Always handle reagents using appropriate safety measures, including gloves and eye protection. -
Page 25: Installing The Barcode Reader
Section 2: Setup and Preparation for Operation Installing the Barcode Reader A barcode reader can be connected to the stainer for scanning reagent bottles and specimen slides that contain barcodes. This allows easy reagent and specimen information tracking. If a barcode reader is not installed, reagent and specimen information can be entered manually (Section 3.2). - Page 26 Section 2: Setup and Preparation for Operation 4. Press Maintenance from the Main menu. 5. Press the A prime button. Stain should appear within 10 seconds. When properly primed, a steady stream of reagent (no sputtering or breaks) flows from the nozzle receptacle. ◊...
-
Page 27: The Clean Cycle
Section 2: Setup and Preparation for Operation The Clean Cycle Two Clean Cycles are available from the Main menu: System Clean – cleans nozzle ABCE by purging it with SS-051E (Alcohol Wash) and cleans nozzle DF by purging it with SS-051F (Acid Alcohol Wash) while cycle progress is displayed on the screen. The cycle may be stopped at any time during the process. -
Page 28: Performing Tests
Section 2: Setup and Preparation for Operation Performing Tests The Pattern Test and Volume Test must be performed before using the instrument. See Section 6, Nozzle Maintenance and Performance. Reagent Level Monitoring Reagent Level Detect monitors reagent levels and sounds an alert when the reagent is running low, or when the waste container is full (when using the waste container with level detect). - Page 29 Section 2: Setup and Preparation for Operation 3. Press Level Detect to enter the Reagent Level Detect Setup menu: NOTE: The stainer should be turned ON for at least 30 minutes before zeroing to stabilize level sensors. The instrument can be used during this time. 4.
-
Page 30: Section 3: Controlling And Customizing Stainer Functions
Section 3: Controlling and Customizing Stainer Functions 3.1 System Setup Menu Many software settings can be controlled from the System Setup menu, including: • Creating, editing, and deleting stain programs • Creating, editing, and deleting cytocentrifuge programs • Tracking reagent information •... -
Page 31: Creating A Stain Program
Section 3: Controlling and Customizing Stainer Functions Creating a Stain Program 1. From System Setup, press Stain Programs. Depending upon how many stain programs have been added, an existing program may need to be erased to remain within the 12-program limit. 2. -
Page 32: Editing, Renaming, Or Adjusting Stain Programs
Section 3: Controlling and Customizing Stainer Functions 6. Select the Wash tab and set the desired program settings. 7. Select Enter Name button and enter the desired name using the keypad. 8. Press Enter on the keypad. 9. Press Save. Editing, Renaming, or Adjusting Stain Programs 1. -
Page 33: Administrator And User Accounts
Section 3: Controlling and Customizing Stainer Functions 5. To rename the program, select Program Name and enter a new program name using the keypad. 6. Press Enter on the keypad. 7. Press Save. See Appendix D for more information. Administrator and User Accounts One Administrator account and multiple (up to 50) user accounts can be created. - Page 34 Section 3: Controlling and Customizing Stainer Functions Creating User Accounts NOTE: This function is available only if an administrator account has been created. 1. Press System Setup. 2. Enter the Administrator password and press Enter. 3. Press Users to reveal the Manage Users menu. 4.
-
Page 35: Using Reagent Information Tracking
Section 3: Controlling and Customizing Stainer Functions • Enable Run Login requires the current user to enter a password to run a Stain or Cytocentrifuge cycle. Global Login must be enabled to use this option. • User System Access enables complete control of the instrument, including changing the System Setup options. -
Page 36: Modifying Level Detect Functions
Section 3: Controlling and Customizing Stainer Functions 5. Select Change next to the appropriate reagent. 6. Scan the reagent bottle barcodes (Section 3.2) or manually enter the reagent information in the correct fields. 7. Press Save. 8. Repeat steps 5-7 for each reagent. Modifying Level Detect Functions The Level Detect function alerts when the reagent is running low, or when the waste container is almost full. -
Page 37: Setting The Date And Time
Section 3: Controlling and Customizing Stainer Functions 3. Select OK. Setting the Date and Time 1. From System Setup, press Set Date/Time. 2. Choose 12 for a 12-hour clock or 24 for a 24-hour clock. 3. Use the up and down arrows to modify the time and date. 4. -
Page 38: Controlling Beeper Alerts
Section 3: Controlling and Customizing Stainer Functions Controlling Beeper Alerts 1. From System Setup, select Beeper. 2. Use the sliders to modify the beeper volume for Cycle Complete, Warnings, Errors, or Key Clicks. 3. Select Beep On Startup to turn the audible startup alert ON or OFF. QC/Maintenance Tracking Under system default settings, the following QC/Maintenance Tracking options are disabled: •... - Page 39 Section 3: Controlling and Customizing Stainer Functions 4. Press Load Slides. The Scan and Load Slides menu appears. 5. Enter slide information. A. If using the barcode reader, scan the specimen slides that contain barcodes. See Scanning Slides with the Barcode Reader (Section 3.2) for complete instructions. B.
-
Page 40: Restoring Software Defaults
Section 3: Controlling and Customizing Stainer Functions 3. Enter the information for the Daily, Weekly, and QC Slide prompts in corresponding fields. See Using the Preventive Maintenance Log (Section 5.1). Enable Reagent Tracking To activate Reagent Tracking: 1. From System Setup, select QC/Maintenance Tracking. 2. -
Page 41: Recording Specimen And Reagent Information
Section 3: Controlling and Customizing Stainer Functions 3.2 Recording Specimen and Reagent Information Scanning Slides with the Barcode Reader 1. From System Setup select QC/Maintenance Tracking. 2. Select Enable Stain Slide Tracking. NOTE: Selecting Enable Stain Slide Tracking changes the Start button on the Main menu to “Load Slides.” See Scanning Slides with the Barcode Reader. - Page 42 Section 3: Controlling and Customizing Stainer Functions 2. Select Enable Reagent Tracking for each desired reagent (A, B, C, D, E, F). 3. Press Back to return to the System Setup menu. 4. Press Reagents to reveal the Reagent Information screen. 5.
-
Page 43: Manually Entering Specimen Information
Section 3: Controlling and Customizing Stainer Functions Manually Entering Specimen Information With Stain Slide Tracking and Manual Entry enabled in the QC Maintenance menu: 1. Press Load Slides on the Main menu. 2. Press Add to reveal the keypad. 3. Enter slide information (maximum of 24 characters) and press Enter. 4. -
Page 44: The Help Menu
Section 3: Controlling and Customizing Stainer Functions 3.3 The Help Menu The Help menu is a comprehensive onscreen help function that provides detailed information on the following subjects: • Help Screens • Basic Operation ◊ Loading the Carousel ◊ Programming Number of Slides ◊... -
Page 45: Using Help
Section 3: Controlling and Customizing Stainer Functions Using Help 1. Press Help to access the help function. 2. Select the desired topic. 3. Use the direction arrows to navigate. 4. Press Exit to return to the Main menu. -
Page 46: Section 4: Operating The Stainer
Section 4: Operating the Stainer 4.1 Operating Instructions Suggested Staining Protocol NOTE: Samples and slides should be prepared and fixed according to recommendations in Appendix E or equivalent. • Perform a Hub Pattern Test (once per day). • Select or verify desired stain program. •... -
Page 47: Loading The Carousel
Section 4: Operating the Stainer NOTE: If the Hub Pattern Test result is incorrect, clean the nozzle orifice with the nozzle brush provided in the Nozzle Maintenance Kit or disassemble nozzle and clean all pieces (Section 6). Loading the Carousel CAUTION: Never load chipped or cracked slides into the instrument. -
Page 48: Using Blocking Slides
Section 4: Operating the Stainer Figure 9: Loading a 12-Slide Carousel (Slide Labels Toward Outer Rim) Labels Toward Outer Rim Specimen Side Figure 10: Loading a 30-Slide Carousel (Slide Label Toward Center) Labels Toward Center Specimen Side Figure 11: Reattaching the Carousel Lid 5. -
Page 49: Performing A Stain Cycle
Section 4: Operating the Stainer Performing a Stain Cycle NOTE: Sample slide preparation guidelines can be found in Appendix E. 1. Insert a carousel loaded with specimen slides and close the instrument lid. 2. If Slide Tracking is not enabled, select the number of slides to be stained. Slide selection defaults to full carousel at the end of the run, after pressing Stop, or selecting a number greater than the full carousel default. -
Page 50: Monitoring Reagent And Waste Levels
Section 4: Operating the Stainer Treat slides in accordance with good laboratory practices and local regulations. 1. Remove the carousel from the bowl and place it on a solid, level surface (carousel may not be dry). 2. Remove the carousel lid by pressing the button and lifting the lid. 3. -
Page 51: Replacing A Reagent Bottle
Section 4: Operating the Stainer NOTE: Access the Reagent Information menu by pressing the bottle icons on the right side of the Main menu. Press Change to scan or manually enter reagent information. NOTE: Do not put residual reagent from a used bottle into a new bottle. This can lead to an accumulation of residue on the slides and may be a source of contamination. -
Page 52: Emptying The Waste Container
Section 4: Operating the Stainer Emptying the Waste Container The Reagent Level Detect function, automatically monitors the waste level and indicates when the waste container should be emptied. It is still necessary to check waste levels visually to ensure the waste container does not overfill. -
Page 53: Section 5: Preventative Maintenance And Safety
Section 5: Preventative Maintenance and Safety 5.1 Preventive Maintenance The system provides a Preventive Maintenance Log for tracking the most recent maintenance activities. See Enable Preventive Maintenance Tracking (Section 3.1) and Using the Preventive Maintenance Log in this section. Daily Maintenance/Quality Control (QC) 1. -
Page 54: Monthly Maintenance
Section 5: Preventative Maintenance and Safety Monthly Maintenance 1. Disassemble and manually clean all nozzles. Refer to Nozzle Disassembly and Cleaning (Section 6.1). 2. Ensure the maintenance procedures in the Preventive Maintenance Log have been performed and entered. The Preventive Maintenance chart may also be used. Annual Maintenance 1. - Page 55 Section 5: Preventative Maintenance and Safety 3. Press Save to record entries.
-
Page 56: Storing The Instrument
Section 5: Preventative Maintenance and Safety 5.2 Storing the Instrument If the instrument will be inactive for more than one week, the recommendation is to perform the long-term storage procedure. This will prevent nozzles from clogging when the instrument is reactivated. Preparing for Long-Term Storage 1. -
Page 57: Replacing Fuses
Section 5: Preventative Maintenance and Safety 5.3 Replacing Fuses WARNING! To prevent the risk of fire, the main fuses must only be replaced with fuses of the same type and rating. Recurring fuse failure indicates serious internal problems, if this occurs, contact ELITechGroup. -
Page 58: Cleaning The Stainer And Carousels
Section 5: Preventative Maintenance and Safety 5.4 Cleaning the Stainer and Carousels WARNING! All cleaning procedures should be performed in a well-ventilated room by authorized and trained personnel wearing appropriate protection equipment. 1. Clean the outside of the instrument with 70 to 100% ethanol or methanol or SS-029 nozzle cleaning solution. -
Page 59: Decontaminating The Stainer And Carousels
Section 5: Preventative Maintenance and Safety 5.5 Decontaminating the Stainer and Carousels All parts of the instrument that come into contact with biological specimens, patient specimens, positive control specimens, or hazardous material must be treated as potentially infectious. Before the instrument is returned for service, all outer surfaces must be decontaminated. The operating authority must complete a disinfection declaration, otherwise the instrument may be rejected by the distributor or service center or quarantined by customs authorities. - Page 60 Section 5: Preventative Maintenance and Safety 5. Repeat the spray treatment every 2 or 3 minutes for a total of 20 minutes. Do not allow cleaning solutions to dry on the instrument surfaces. 6. Rinse the inner bowl and lid thoroughly with water. 7.
-
Page 61: Shipping Or Disposing Of The Stainer Or Carousels
Section 5: Preventative Maintenance and Safety 5.6 Shipping or Disposing of the Stainer or Carousels Shipping the Instrument or Carousels WARNING! Disinfect the instrument or carousels before returning them to ELITechGroup. The operator must complete a Hazard Free Certification form, otherwise the distributor or service center may not accept the instrument;... -
Page 62: Section 6: Nozzle Maintenance And Performance
Section 6: Nozzle Maintenance and Performance 6.1 Nozzle Disassembly and Cleaning Nozzle maintenance requires the nozzle maintenance kit and SS-029 nozzle cleaning solution. WARNING! Always wear protective clothing and eye protection when using SS-029 nozzle cleaning solution. Dispose of used solution properly. NOTE: If the compression screw cannot be easily loosened, use light penetrating oil and a 5/8-in. -
Page 63: Nozzle Reassembly
Section 6: Nozzle Maintenance and Performance 6.2 Nozzle Reassembly 1. Hold your thumb or a nozzle strainer over the end of the tube to keep the nozzle parts in the tube. Discard the cleaning solution according to Swirl Cone Grooves applicable statutes. -
Page 64: Manual Priming
Section 6: Nozzle Maintenance and Performance 6.3 Manual Priming 1. Remove the carousel from the bowl. 2. Remove the nozzle connected to the line to be manually primed. 3. Insert the priming tool nozzle adapter (included in the Nozzle Maintenance Kit) into the nozzle holder. -
Page 65: Performing The Volume Test
Section 6: Nozzle Maintenance and Performance 6.4 Performing the Volume Test The Volume Test requires the Nozzle Maintenance Kit. NOTE: The Volume Test must be performed weekly. 1. From the Maintenance menu, select Volume Test. 2. Hold a Volume Test tube (small tube) to cover the selected nozzle. 3. - Page 66 Section 6: Nozzle Maintenance and Performance 9. Prepare the Maintenance Kit for future use: ◊ Empty the contents of the tubes into the stainer bowl. ◊ Rinse the tubes with water. ◊ Place the tubes back into their original place in the Maintenance Kit or tube stand. 10.
-
Page 67: Line Flush
Section 6: Nozzle Maintenance and Performance 6.5 Line Flush The Line Flush is a semi-automated procedure for cleaning the reagent lines. The Line Flush allows flushing the D line, the A and B lines, or all three lines at the same time. Follow the screen prompts as the sequence progresses. -
Page 68: Performing The Slide Pattern Test
Section 6: Nozzle Maintenance and Performance 6.6 Performing the Slide Pattern Test This test can differentiate poor staining results from sample preparation problems, or nozzle obstructions. Perform the Slide Pattern Test when a Hub Pattern Test produces a normal result, but staining is still inadequate. -
Page 69: Section 7: Solving Problems
Section 7: Solving Problems 7.1 Troubleshooting The following table is to help identify and solve routine problems with the stainer. More difficult problems may require technical service. Contact your ELITechGroup representative for assistance. WARNING! Due to the electrical shock hazard, do not open this instrument or attempt internal repairs. Refer servicing to qualified service personnel. - Page 70 Section 7: Solving Problems Problem Solution Error messages on the screen. If the display shows Lid Not Shut: Verify that the lid is fully closed and latched. If the Lid Not Shut indication remains, contact ELITechGroup for assistance. If the display shows Wrong Rotor after pressing Start: Make sure the slide carousel is properly loaded on the drive hub.
- Page 71 Section 7: Solving Problems Problem Solution Abnormal staining on entire surface of all slides. Check the reagent level on the display and/ or in the reagent bottles. Make sure the external reagent dip tubes are securely attached to each bottle (Section 2.1). Open the lid and verify that each reagent pump is primed, by pressing the corresponding prime button.
- Page 72 Section 7: Solving Problems Problem Solution The slides are too red. An empty Reagent E (alcohol wash) reservoir prevents slides from rinsing well, leaving residual Reagent A (EA-50) on the slide. Check Reagent E level, and if necessary, run the Spray Pattern test to make sure there is proper reagent delivery.
- Page 73 Section 7: Solving Problems Problem Solution Slide is covered with hematoxylin Check the Reagent C (bluing) reservoir level or check precipitate and nucleus is red. nozzle ABCE for plugging. If bluing is not delivered in sufficient quantities, proper bluing of nucleus and removal of hematoxylin is not possible.
- Page 74 Section 7: Solving Problems Problem Solution Electronic Failure An electronic failure would appear as an obvious malfunction such as a scrambled or totally inoperative display panel. Transient voltages coming through the power lines may cause the stainer to “lose its place.” If this occurs, switch the main power OFF for 10-20 seconds and then back ON to reset the instrument.
-
Page 75: Instrument Malfunction
Section 7: Solving Problems 7.2 Instrument Malfunction Air or Reagent Leaks Repriming the instrument is usually unnecessary unless a reagent bottle runs completely dry. An air leak is usually to blame if a smooth and continuous liquid spray fails to come from the nozzles. Carefully inspect all components in the external reagent delivery lines. -
Page 76: Reagent Level Detect System Errors
Section 7: Solving Problems Reagent Level Detect System Errors Reagent A-E Not Calibrated During the second part of calibration, if no bottles are detected, the display shows an error message. Calibrate again, making sure that the reagent bottles are inserted in those tray positions that have been enabled in the level detection system. -
Page 77: Calibrating The Touchscreen
Section 7: Solving Problems NOTE: Calibration requires full, unopened (caps and seals in place) 500 mL bottles of reagent, placed in the correct tray positions (due to different densities of each reagent type). 6. Place the correct reagent bottles in all enabled positions, and press Start. NOTE: The calibration function ignores any disabled reagent line. -
Page 78: Service Information
Section 7: Solving Problems 7.3 Service Information ELITechGroup’s Service Department will help resolve any questions about the operation or performance of the Aerospray Cytology Stainer/Cytocentrifuge. Customers in the United States should contact us by telephone. Outside the U.S., our authorized dealers offer full local service and support. -
Page 79: Section 8: Cytopro ® Cytocentrifuge
Section 8: Cytopro Cytocentrifuge ® 8.1 Cytopro Cytocentrifuge Information Functional Description The Cytopro Cytocentrifuge rotor allows rapid sedimentation of specimen cells onto microscope slides for staining or other purposes. Up to eight disposable/reusable sample chamber assemblies with absorbent pads and glass microscope slides can be loaded into the Cytocentrifuge rotor. Cytocentrifuge and staining functions are independent of one another. -
Page 80: Appendix A: Reagents (Stains, Washes, Agents)
Appendix A: Reagents (Stains, Washes, Agents) Aerospray Cytology Reagents ® ELITechGroup Aerospray Cytology reagents are proprietary Papanicolaou staining reagents intended for ® use in the Aerospray Cytology stainer in cytology and histology labs. ® Hematoxylin Stain ELITechGroup offers Hematoxylin I (SS-051D) and II (SS-051D2). Both hematoxylin stains can be used for either progressive or regressive staining functions. -
Page 81: Critical Reagent Components
Appendix A: Reagents (Stains, Washes, Agents) Critical Reagent Components Critical Components Reagent(s) SS-029 Nozzle Cleaning Solution contains: 40-55% Methyl Alcohol 1-3% Oxalic Acid SS-029C Nozzle Cleaning Solution 95-99% Deionized Water Concentrate contains: 1-5% Oxalic Acid SS-051A Aerospray Cytology EA-50 Stain 70-80% Ethanol ®... -
Page 82: Appendix B: Risk And Safety Phrases
Appendix B: Risk and Safety Phrases SS-029 or SS-029C Aerospray Nozzle Cleaning Solution Concentrate Hazard Pictogram Single word Danger Hazard statements H226 - Flammable liquid and vapor. H301+H311+H331 - Toxic if swallowed, in contact with skin or if inhaled. H314 - Causes severe skin burns and eye damage. H319 - Causes serious eye irritation. - Page 83 Appendix B: Risk and Safety Phrases SS-051B Aerospray Cytology Orange G Stain ® Hazard Pictogram Single word Danger Hazard statements H225 - Highly flammable liquid and vapor. Precautionary P210 - Keep away from sparks, open flames, hot surfaces, heat. No smoking. Statements P260 - Do not breathe vapors, spray, mist, fume.
- Page 84 Appendix B: Risk and Safety Phrases SS-051D Aerospray Cytology Hematoxylin I Stain ® Precautionary P260 - Do not breathe spray, mist, vapors. Statements P264 - Wash hands thoroughly after handling. P270 - Do not eat, drink or smoke when using this product. P280 - Wear protective gloves, eye protection.
- Page 85 Appendix B: Risk and Safety Phrases SS-051F Aerospray Cytology Acid Alcohol Wash ® Hazard Pictogram Single word Danger Hazard statements H225 - Highly flammable liquid and vapor. H314 - Causes severe skin burns and eye damage. H319 - Causes serious eye irritation. H336 –...
- Page 86 Appendix B: Risk and Safety Phrases SS-133 Decontamination Solution Concentrate Precautionary P261 - Avoid breathing vapors, mist, or spray. Statements P264 - Wash hands and other exposed areas thoroughly after handling. P280 - Wear protective gloves, protective clothing, and eye protection. P302+ P352 - If on skin: Wash with plenty of water.
-
Page 87: Appendix C: Accessories And Supplies
Appendix C: Accessories and Supplies Only replacement parts supplied by ELITechGroup should be used in this instrument. Use of non-approved parts may affect the performance and safety features of this product. For supplies associated with cytocentrifugation see the user’s manual for the Cytopro Cytocentrifuge Rotor (57-2007-01). Reference Number Accessories Drain Tube, 1.8 meter (6 foot) Length... -
Page 88: Appendix D: Stain Modes And Programming Options
Appendix D: Stain Modes and Programming Options Appendix D: Stain Modes and Programming Options D.1 Staining Sequence Table 13: Staining Sequence NOTE: Table 13 represents the staining sequence with program settings with an approximate stain cycle duration in minutes:seconds. Progressive Regressive Program Step Prewash Alcohol... -
Page 89: General Settings
Appendix D: Stain Modes and Programming Options D.2 Stain Program Settings The following is an explanation of the user-adjustable staining parameters and how staining can be affected by adjusting these parameters. Each step has 9 possible settings and 0, which turns the step off. General Settings Carbowax is a highly alcohol and water-soluble component of spray fixatives that must be removed before staining can successfully occur. -
Page 90: Intensity Stain Settings
Appendix D: Stain Modes and Programming Options Intensity Stain Settings Nuclear (Hematoxylin) The greater the numeric value selected, the more intense the application. Low settings require less time than higher settings. These settings allow you to vary the staining results according to specimen thickness, type of cells to be stained, or special situations. -
Page 91: Wash Settings
Appendix D: Stain Modes and Programming Options Wash Settings Acid Alcohol Wash Increase numbers to reduce hematoxylin background staining. Do not set to 0 unless extra maintenance will be performed on nozzles. To conserve reagent, select minimum value which produces satisfactory results. - Page 92 Appendix D: Stain Modes and Programming Options Table 14: Summary – Timing Table Stain Program Settings Program Step *Applications Prewash Alcohol Spray Applications Wait Applications Prewash Bluing Spray Applications Wait Applications Nuclear/Htox Spray Applications Wait Applications Acid Alcohol Wash Spray Applications Wait Applications Bluing Spray Applications...
- Page 93 Appendix D: Stain Modes and Programming Options D.3 Examples of Program Settings with Staining Results Following are examples of buccal specimens prepared using a smear technique and stained using different program setting. The sides were cleared and then cover slipped and viewed at a magnification of 10x. Table 15: Program Settings with Staining Results 1 and 2 Program Setting Figure 1 Figure 2...
- Page 94 Appendix D: Stain Modes and Programming Options Table 16: Program Settings with Staining Results 3 and 4 Program Setting Figure 3 Figure 4 Prewash Alcohol Prewash Bluing Nuclear/Htox Acid Alcohol Wash Bluing Bluing Wash Orange G Orange G Wash Cytoplasmic/EA Final Wash End Spin Figure 3...
- Page 95 Appendix D: Stain Modes and Programming Options Table 17: Program Settings with Staining Results 5 and 6 Program Setting Figure 5 Figure 6 Prewash Alcohol Prewash Bluing Nuclear/Htox Acid Alcohol Wash Bluing Bluing Wash Orange G Orange G Wash Cytoplasmic/EA Final Wash End Spin Figure 5...
- Page 96 Appendix E: Sample/Slide Preparation Guidelines D.4 General Guidelines • Load specimens of similar type in the same carousel. • Since cytocentrifuged body fluid preparations are deposited in a monolayer, stain intensity setting should be less than that for a smear. •...
-
Page 97: Appendix E: Technical Background Of Papanicolaou Staining
Appendix E: Technical Background of Papanicolaou Staining D.6 Staining Smears 1. Avoid spreading smear on the edges of the slide. 2. Recommend using coated slides (SS-118). 3. Fix smears using one of the following methods: ◊ Spray fixative. ◊ Immerse in 95% alcohol for 15 to 30 minutes. ◊... -
Page 98: Introduction
Appendix F: Technical Background of Papanicolaou Staining Introduction George Papanicolaou developed what now is known as the “pap stain” in the early 1940’s during his (1-3) studies to detect the action of ovarian hormones on vaginal specimens. Its origins lie in the earlier staining methods of Shorr and Mallory as reviewed by Marshall Over the years, the papanicolaou stain has attained a pre-eminent position in the analysis of gynecological smears and body fluids. -
Page 99: Stain Chemistry
Appendix F: Technical Background of Papanicolaou Staining requirements. Since a small volume of stain is applied, stain usage is comparable to dip staining. 2. No Dilution Stain concentration does not vary with time due to evaporation or dilution with carryover alcohol and loss during daily filtering procedures as in the traditional dip method. - Page 100 Appendix F: Technical Background of Papanicolaou Staining ELITechGroup employs an OG stain as in the traditional papanicolaou stain. The OG stain is filtered using an 0.2 µM filter to eliminate any precipitates. 4. Alcohol Wash The traditional papanicolaou stain procedure employs a graded alcohol series of 50, 75, 95%, for washing and dehydration.
- Page 101 Appendix F: Technical Background of Papanicolaou Staining 9. P.N. Marshall, W. Galbraith, J.W. Bacus, Studies on Papanicolaou Staining II. Quantitation of Dye Components Bound to Cervical Cells. Analyt. Quant. Cytol., 1, 169-178 (1979). 10. R.W. Payne, Determination of Basic Dyes by Precipitation with Phosphotungstic Acid. J. Soc. Dyers Color, 50, 320 (1934).
- Page 102 57-0197-01A ELITechGroup Inc. 370 West 1700 South Logan Utah 84321-8212 800 435 2725 www.elitechgroup.com +1 435 752 6011 info@elitechgroup.com...
Need help?
Do you have a question about the AEROSPRAY CYTOLOGY 7522 and is the answer not in the manual?
Questions and answers