Molecular Devices StakMax User Manual
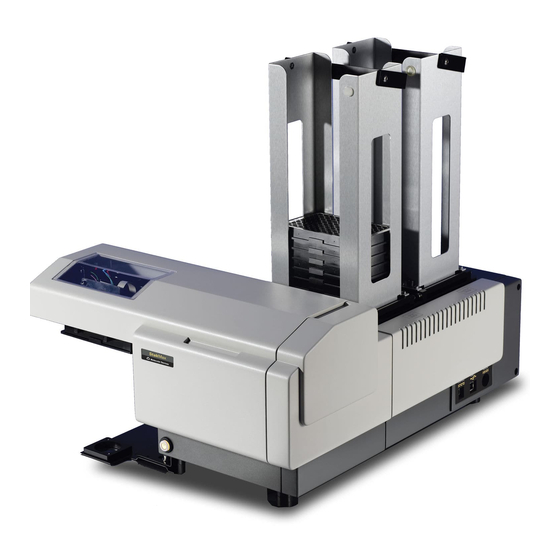
Microplate handling system for the spectramax paradigm multi-mode detection platform
Hide thumbs
Also See for StakMax:
- User manual (140 pages) ,
- User manual (90 pages) ,
- User manual (146 pages)

Related Manuals for Molecular Devices StakMax


Summary of Contents for Molecular Devices StakMax
- Page 1 StakMax Microplate Handling System ® for the SpectraMax Paradigm ® ® Multi-Mode Detection Platform User Guide 5012878 A January 2011...
- Page 2 Molecular Devices equipment, software, reagents, and consumables. This document is copyright protected and any reproduction of this document, in whole or any part, is strictly prohibited, except as Molecular Devices may authorize in writing. Software that may be described in this document is furnished under a license agreement.
-
Page 3: Table Of Contents
Chapter 1 Installation and Setup of the StakMax System ....... 13 Background. - Page 4 Operational Overview ......70 Turning the StakMax Instrument On and Off ..70 Opening the Software .
- Page 5 StakMax Microplate Handling System User Guide Chapter 4 Troubleshooting ..... 105 Error Messages ......105 “Object reference not set to an instance of an object”...
- Page 6 Contents 5012878 A...
-
Page 7: Safety
Labeling on page 7 • Interrupt on page 9 Safety Guidelines Read and understand all of the safety guidelines before using the StakMax instrument. Labeling The following warning labels are attached to the StakMax instrument. Do not remove these labels. 5012878 A... - Page 8 Nameplate Instrument nameplate StakMax identification, voltage, and serial number (back of instrument) +24V 1311 Orleans Drive, Sunnyvale CA 94089 408 747-1700 StakMax input and output stack labels INPUT OUTPUT STACK STACK Laser-based barcode reader safety label (internal) Wavelength: 630-680 nm, Maximum...
-
Page 9: Interrupt
(as shown below). Pressing the button interrupts the operation of the StakMax instrument, immediately stops any StakMax movement, and then resets the entire system. The button can also be used as a Power/Reset button to turn the StakMax instrument 5012878 A... - Page 10 Safety 5012878 A...
-
Page 11: Preface
The StakMax Plate Handling System User Guide provides instructions ® for the proper setup, installation and use of the StakMax microplate handler and software. The StakMax instrument is a plate handling system that can be attached to several different types of instruments. This manual includes the information and procedures required to integrate the SpectraMax ®... -
Page 12: Conventions
• SpectraMax Paradigm Multi-Mode Detection Platform User Guide • SpectraMax Paradigm Detection Cartridge User Guides If you need any of the above guides, contact your Molecular Devices sales representative. Training Molecular Devices offers training on the StakMax System. Contact your Molecular Devices sales representative for further details. -
Page 13: Chapter 1 Installation And Setup Of The Stakmax System
Unpacking the System The StakMax instrument is packed in a specially-designed carton. It consists of an inner box, which contains the StakMax instrument and all of the included parts, and an outer box for protection. The inner box is suspended under compression between a pair of trampoline-like lids (top and bottom) to protect the StakMax system from damage. - Page 14 Installation and Setup of the StakMax System Retain the original carton and the packing materials. If the unit needs to be returned for any reason, including repairs, it must be sent in the original carton with the original packing materials.
- Page 15 StakMax Microplate Handling System User Guide 7. Carefully remove the StakMax instrument from the box and place it on a flat surface. 8. Gently pull up the foam block at a slight angle and remove it from the input stack. See Figure 1-1.
-
Page 16: Components
Installation and Setup of the StakMax System Components The StakMax instrument package contains the following components. Accessory kit • StakMax® Microplate Handling System User Guide (not for use with the SpectraMax Paradigm Platform) • USB cable • Single Plate Adapter •... -
Page 17: Installing The Stakmax System
6. Attach the power and USB cables by following the instructions in Connecting the Cables on page 7. If this is the first time connecting your StakMax, you must install the USB driver. See Installing the StakMax Driver on page... -
Page 18: Installing The Baseplate On The Reader
Installation and Setup of the StakMax System 8. Start the StakMax Software and align the transfer position. See Aligning the Microplate Transfer Position on page 9. Perform a functional check of the integration between the stacker and the reader. See... - Page 19 StakMax Microplate Handling System User Guide 5. Use the 2.5 mm hex key screwdriver to remove one of the rear feet from the reader. See Figure 1-3. Figure 1-3 Removing a rear foot from the reader 5012878 A...
- Page 20 Installation and Setup of the StakMax System 6. Re-use the foot and the washer and insert a black spacer bushing between the foot and the reader, and then use a new screw from the accessory kit to reattach the foot to the base of the reader.
- Page 21 StakMax Microplate Handling System User Guide 10. Use the new screws from the accessory kit to attach the baseplate to the reader by reattaching the front feet to the bottom of the reader. Figure 1-5 Attaching baseplate to the reader 11.
-
Page 22: Installing The Stakmax Instrument Stand
To perform a front installation on page To perform a side-by-side installation 1. Position the StakMax instrument stand to the right of the plate reader and slide the slots on the instrument stand onto the screws at the edge of the baseplate. See Figure 1-6. - Page 23 StakMax Microplate Handling System User Guide 2. Use the 2.5 mm hex key screwdriver to tighten the screws, as shown in Figure 1-7. Figure 1-7 Attaching the StakMax instrument stand to the reader Item Description Front Screw Rear Screw 5012878 A...
- Page 24 Installation and Setup of the StakMax System To perform a front installation Note: To open the bottom cartridge drawer after performing a front installation, you need to remove the front cover from the cartridge drawer. The cover is held in place with magnets. See...
- Page 25 2.5 mm hex key screwdriver to attach the front installation adapter in its place, as shown in Figure 1-9 Figure 1-10. Figure 1-9 Attaching the front installation adapter Figure 1-10 StakMax instrument stand with front installation adapter attached 5012878 A...
- Page 26 Installation and Setup of the StakMax System 3. Align the threaded holes on the front installation adapter with the screws on the front of the baseplate. See Figure 1-11. Figure 1-11 Threaded adapter holes aligned with baseplate screws 4. Use the 2.5 mm hex key screwdriver to tighten the screws. See Figure 1-12.
-
Page 27: Installing The Plate Drawer Protection Stand
StakMax Microplate Handling System User Guide Installing the Plate Drawer Protection Stand Depending on whether you are performing a side-by-side installation or a front installation, use the clamp on the appropriate side of the baseplate to secure the plate drawer protection stand to the plate reader. - Page 28 Installation and Setup of the StakMax System 2. Place the alignment studs (on the bottom of the plate drawer protection stand) in the holes on the baseplate. See Figure 1- Figure 1-14 Alignment Studs positioned in baseplate holes 3. Slide the lock bracket into the baseplate to secure the plate drawer protection stand.
- Page 29 StakMax Microplate Handling System User Guide Note: The cartridge drawers cannot open when the StakMax instrument is in place. To open a cartridge drawer, see To open the cartridge drawer on page 102. CAUTION! Do not operate the instrument in an environment where potentially damaging liquids or gases ar present.
-
Page 30: Installing The Stakmax Instrument
Note: The photographs used for this procedure are for a side-by-side installation. To install the StakMax instrument 1. Use the 3.0 mm hex key screwdriver to attach the alignment studs to the outermost holes on the StakMax mounting bracket. Figure 1-16. Figure 1-16 Attaching the alignment studs... - Page 31 StakMax Microplate Handling System User Guide 2. Place the StakMax instrument above the instrument stand, and then slide the alignment studs on the StakMax instrument firmly into the alignment slots on the inner edge of the instrument stand. See Figure 1-17.
-
Page 32: Setting The Plate Drawer Protection Stand Height
Installation and Setup of the StakMax System Setting the Plate Drawer Protection Stand Height Before using the StakMax instrument, set the height of the plate drawer protection stand to a safe distance between the top of the plate drawer protection stand and the bottom of the plate drawer. - Page 33 StakMax Microplate Handling System User Guide 5. Turn the adjustment wheel until the Gap Distance Check Tool comes into light contact with the top of the protection plate and the bottom of the plate drawer. See Figure 1-19. To move the top of the plate drawer protection stand up, ...
-
Page 34: Connecting The Cables
Installation and Setup of the StakMax System Connecting the Cables The StakMax instrument must be connected to power with the power cable, and to the computer with a USB cable. To connect the cables 1. Connect the instrument to the power supply by plugging the 1/4-inch metal connector into the DC input on the right side of the StakMax instrument. - Page 35 StakMax Microplate Handling System User Guide 2. Connect the power supply and the power cable by inserting one end of the cord into the power supply. See Figure 1-21. Figure 1-21 Connecting the power supply to the cable 3. Connect the power cable to the wall outlet, surge suppressor, or UPS, and then wait three seconds.
- Page 36 Installation and Setup of the StakMax System 4. Press the Power/Reset button (located on the front-left side of the instrument) to initialize the instrument. After a few seconds, the Power/Reset button turns green. Figure 1-22 Pressing the Power/Reset button Note: Do not connect the USB cable until after you install the StakMax Software.
- Page 37 StakMax Microplate Handling System User Guide Figure 1-23 Completed side-by-side installation 5012878 A...
- Page 38 Installation and Setup of the StakMax System Figure 1-24 Completed front installation 5012878 A...
-
Page 39: Installing The Software
StakMax Microplate Handling System User Guide Installing the Software StakMax Software is a Windows application used to control the StakMax Microplate Handling System. Plates are loaded into the stacker and then transferred to the Multi-Mode Reader for reading. Upon completion of a read, the stacker transfers the plates to a magazine for used plates. -
Page 40: Installing The Stakmax Driver
Installation and Setup of the StakMax System Installing the StakMax Driver To install the StakMax driver 1. After installing StakMax Software, turn on the StakMax instrument and connect the USB cable from the instrument to the computer. See Figure 1-25. - Page 41 StakMax Microplate Handling System User Guide 2. In the Found New Hardware Wizard screen that appears, select No, not this time, and then click Next. Figure 1-26 The Found New Hardware Wizard welcome screen 3. Select Install from a list or specific location (Advanced) and then click Next.
- Page 42 5. Select Browse and locate the CD/DVD drive (usually the D: drive). 6. Open the StakMax Software CD, locate and select the StakMax Drivers folder, and then click OK to return to the original window. Figure 1-28 Selecting the StakMax Drivers folder 7.
- Page 43 StakMax Microplate Handling System User Guide 8. Click Continue Anyway. Figure 1-29 Continuing with the hardware installation 9. Click Finish to complete the driver installation. Figure 1-30 Driver installation complete 5012878 A...
-
Page 44: Protecting The Com Port From Interruption
Installation and Setup of the StakMax System Protecting the COM Port from Interruption The Multimode Communication Service polls COM ports as part of its monitoring tasks. If the COM port where the stacker is connected gets polled when the stacker is communicating with the software, it can cause an error condition in the software. -
Page 45: Aligning The Microplate Transfer Position
Aligning the Microplate Transfer Position The microplate transfer position must be adjusted before you can use the StakMax System. In most cases, the alignment process needs to be performed only once, following installation. The StakMax Software includes a Transfer Position Teaching wizard that provides detailed on- screen instructions to assist in completing the alignment process. - Page 46 Installation and Setup of the StakMax System 4. Click Transfer Position Teaching. The Transfer Position Teaching wizard appears and the Integration Layout window is displayed. 5. Select the type of integration layout that matches your installation: Side-by-side (for landscape plate orientation) ...
- Page 47 StakMax Microplate Handling System User Guide 6. Click Next to continue. The Preparation window appears. 7. Before you begin the adjustment, select check boxes to confirm the following: You have both teaching plates (Top Adjustment Plate and Bottom Adjustment Plate) There are no plates in the stacker magazines ...
- Page 48 Installation and Setup of the StakMax System 8. Click Next to continue. The Stacker - Arm Movement window appears. 5012878 A...
- Page 49 StakMax Microplate Handling System User Guide 9. Place the Top Adjustment Plate onto the input stack of the stacker (see Figure 1-31) and then click Move to Transfer Position. Figure 1-31 Top Adjustment Plate in input stack 5012878 A...
- Page 50 Installation and Setup of the StakMax System 10. Check that the gripped plate is above the plate protection stand where the reader plate drawer opens and then click Next. 5012878 A...
- Page 51 StakMax Microplate Handling System User Guide The Reader-Eject Plate Drawer window appears. 11. Click Eject. 5012878 A...
- Page 52 Installation and Setup of the StakMax System The plate drawer opens on the opposite side from the stacker arm to make it easier to place the Bottom Alignment Plate in the carriage. 5012878 A...
- Page 53 StakMax Microplate Handling System User Guide 12. When the plate drawer opens, place the Bottom Adjustment Plate with Landscape orientation (for side-by-side installation) or Portrait orientation (for front installation) on the plate drawer. Figure 1-32. Figure 1-32 Bottom Adjustment Plate in reader plate drawer 13.
- Page 54 Installation and Setup of the StakMax System The Reader-Position Transport window appears. 14. If necessary, click the Left, Right, Backward, and Forward controls to adjust the positioning of the Bottom Adjustment Plate until the marks on the front and the side of the Top...
- Page 55 StakMax Microplate Handling System User Guide Figure 1-33 Top Adjustment Plate and Bottom Adjustment Plate properly aligned 5012878 A...
- Page 56 Installation and Setup of the StakMax System 15. Click Next to continue. The Stacker-Transfer Test window appears. 16. Select the check box to load and eject the plate drawer on the opposite side from the stacker arm to make it easy to remove the plate.
- Page 57 StakMax Microplate Handling System User Guide 19. Click OK in the confirmation message that appears. The stacker places the Top Adjustment Plate in the reader plate drawer. 5012878 A...
- Page 58 Installation and Setup of the StakMax System 20. Select the check box to move the plate drawer to the opposite position for easy removal of the Top Adjustment Plate, and then click Next to continue. The Adjustment Complete window appears.
-
Page 59: Performing A Functional Check
Performing a Functional Check Following alignment, perform the following functional check procedure to make sure that the StakMax instrument is operational. The functional check transfers a total of 50 plates from the stacker to the reader where each plate is read using a simple protocol. - Page 60 5. Select any available method type and then click Next to go to the Method Parameters step of the wizard. 6. In the Method Name field, type StakMax Test and then click Save to close the wizard and save the new detection method.
- Page 61 3. In the Select Protocol Type dialog box, click Next to go to the General Settings step of the wizard. 4. In the Protocol name field, type StakMax Test and then click Next to go to the Technique Type step of the wizard.
- Page 62 Installation and Setup of the StakMax System 8. In the Layout Settings step, click well A1 and then click Fill Layout to mark well A1 as Sample 1. 9. Click Next to go to the Method Selection step of the wizard.
- Page 63 StakMax Microplate Handling System User Guide 10. Select the detection method from the column on the left side of the window. The detection method from the previous procedure is named StakMax Test. 11. Click the plus (+) button to place the detection method in the center column of the window and then click Next to go to the Data Reduction step of the wizard.
- Page 64 Installation and Setup of the StakMax System 13. Clear all the check boxes in this window to avoid generating data files and then click Save to close the wizard and save the protocol. 14. Close the Multi-Mode Analysis Software before running the functional check.
-
Page 65: Required Equipment For A Functional Check
StakMax Microplate Handling System User Guide Required Equipment for a Functional Check • 5 empty microplates (located in the accessory kit) To perform a functional check 1. Turn on the StakMax instrument. 2. Open the StakMax Software. 3. In the Run Setup area, click Run all plates with this protocol and then select a simple protocol from the list. -
Page 66: Installing Or Replacing A Barcode Reader
Installation and Setup of the StakMax System 8. In the StakMax Software window, click Run. 9. Make sure that there are no plates in the reader and then click 10. In the Run Options dialog box, click Start Immediately and then click OK. - Page 67 StakMax Microplate Handling System User Guide To install a barcode reader 1. Turn off the power to the StakMax instrument and the reader. 2. To remove the front cover, pull the cover down. See Figure 1- Figure 1-34 Removing the front cover 3.
- Page 68 Installation and Setup of the StakMax System 5. Attach the cable on the reader to the connector protruding from the gray housing. See Figure 1-36. Figure 1-36 Attaching the cable to the barcode reader. 6. Close the panel, making sure that you do not pinch any wires.
-
Page 69: Chapter 2 Operation
® ® Multi-Mode Detection Platform. StakMax Software interacts with the Multi-Mode Analysis Software for selecting and running protocols. However, protocol definition and data analysis are performed using the Multi-Mode Analysis Software and are not described in this guide. For more information, see the Multi-Mode Analysis Software User Guide. -
Page 70: Operational Overview
Operation Operational Overview Turning the StakMax Instrument On and Off The power button is located on the lower-front side of the StakMax instrument. The Power/Reset button operates as a Power On button, Interrupt, and Reset button. Figure 2-1 The StakMax Power/Reset and Interrupt button To turn the StakMax instrument on •... -
Page 71: Opening The Software
StakMax Microplate Handling System User Guide Opening the Software Note: You must have StakMax Software installed in order to operate the StakMax instrument. To open the software • Click Start > All Programs > Molecular Devices > Multi-Mode Analysis Software> StakMax. -
Page 72: Loading Microplates In The Stakmax Instrument
Operation Loading Microplates in the StakMax Instrument There are two ways to load microplates into the instrument: load the magazine from the bottom or load using continual feed. An additional method requires an optional Magazine Loading and Unloading tool. This section describes each method in detail. - Page 73 StakMax Microplate Handling System User Guide To load a magazine from the bottom 1. Stack all of the microplates on the bench. 2. Align the magazine over the stacked plates. See Figure 2-2. Figure 2-2 Aligning magazine over stacked plates.
- Page 74 Operation 4. The magazine picks up all of the plates except the bottom plate. Figure 2-4. Figure 2-4 Magazine does not pick up last plate when loaded from the bottom. Note: Always stack one extra plate if you are loading the magazine from the bottom because the bottom plate is not picked up.
-
Page 75: Continual Feed
See Single Plate Loading Tool on page You can use the StakMax instrument to manually feed up to 50 plates into the input or output stack. If you choose to read plates until empty, you can continuously feed plates into the StakMax instrument. -
Page 76: Magazine Loading And Unloading Tool
Magazine Loading and Unloading Tool The optional StakMax Magazine Loading and Unloading Tool assists in ® loading and unloading a group of microplates to and from a StakMax magazine. Use the Magazine Loading and Unloading tool if you: • want to load or unload a group of plates, without lifting plates from the top of the magazine. - Page 77 StakMax Microplate Handling System User Guide To load plates into a StakMax magazine 1. Remove the Unload Plate Ring from the Plate Loading Base and set it aside. The Unload Plate Ring is not used for loading plates. 2. Place the stack of plates that you want to load onto the Plate Loading Base.
- Page 78 Operation 6. Using the magazine handle, slowly lift the loaded magazine straight up and off the Plate Loading Base, and relocate the magazine and plate stack to an appropriate location. Figure 2-8 Loaded magazine removed from Plate Loading Base 7. To load another magazine with plates, repeat Step 2 through Step...
- Page 79 StakMax Microplate Handling System User Guide To unload plates from a StakMax magazine 1. Place the Unload Plate Ring onto the Plate Loading Base and make sure it is securely seated in the base. Figure 2-9 Unload Plate Ring seated in Plate Loading Base 2.
- Page 80 Operation 3. Carefully lower the loaded magazine over the top of the tool, aligning the corners of the black aluminium magazine base into the blue raised corners of the Unload Plate Ring. Figure 2-10 Loaded magazine positioned over tool 5012878 A...
- Page 81 StakMax Microplate Handling System User Guide 4. Place the loaded magazine on top of the tool, making sure the two spring clips on the Unload Plate Ring are securely clipped on the crossing bars on each side of the magazine.
- Page 82 Operation 5. Carefully lift up the empty magazine and the Unload Plate Ring until you clear the plate stack. Note: When removing the empty magazine and the Unload Plate Ring, do not touch the unsupported stack of plates. Figure 2-12 Empty magazine and ring being removed from plate stack 5012878 A...
- Page 83 StakMax Microplate Handling System User Guide 6. Place the empty magazine and the Unload Plate Ring in a stable location. Figure 2-13 Empty magazine and ring next to plates 5012878 A...
- Page 84 Operation 7. Use your thumbs to unclip the Unload Plate Ring from the magazine by pushing the two spring clips on the Unload Plate Ring away from the crossing bars on the sides of the magazine. Figure 2-14 Empty magazine unclipped from ring, next to plates 8.
-
Page 85: Single Plate Loading Tool
StakMax Microplate Handling System User Guide Single Plate Loading Tool Place the single plate loading tool into the input area of the stacker. Load a single plate in the opening. See Figure 2-15. Figure 2-15 (A) Single plate loading tool, (B) inserting the tool, (C) loading a plate. -
Page 86: Overview Of The Software
You must have StakMax Software installed in order to operate the StakMax instrument. This section describes how to use the main elements of the StakMax Software interface. You can use the StakMax Software to control basic stacker functions, for example, starting and stopping plate reads, moving plates from the reader to the input or output stacks, and moving plates within the stacker. -
Page 87: Setting Run Options
StakMax Microplate Handling System User Guide Setting Run Options Selecting the Protocols to Run All protocols need to be pre-defined in the Multi-Mode Analysis Software. Use StakMax Software to select how you want to run protocols: • in sequence, using a job list •... - Page 88 Operation 3. If you choose Run all plates with this protocol, then select the pre-defined protocol from the list. 4. (optional) Select the Group all plates in one result check box. 5. In the If reading barcode fails group, select one of the following options: Use timestamp as ID if no Plate ID found in the job ...
-
Page 89: Using The Barcode Reader
The system fails. There are several alarm options available that you can select and configure. To configure alarms 1. In the StakMax Software window, click Alarm Configuration Options. 2. Select one or more of the following alarm types: Play a Beep ... - Page 90 Operation 4. Click the Beep tab and select an option for how often you want the beep to Repeat: Once—sound just one beep Continuously—sound a constant beep Every x seconds—sound a beep every x seconds; enter a value for x Note: To sound a Beep alarm, the PC must include either an internal beeper or external speakers attached to a sound card.
- Page 91 StakMax Microplate Handling System User Guide 5. Click the Program tab and select a program to run when an alarm situation occurs (for example, a program from a messaging service for notifications, such as a NET SEND net.exe file). Program—Browse to a specific program file to run ...
- Page 92 Operation 6. Click the Red Box tab and select the location of a red rectangle to appear on the screen when an alarm situation occurs. Upper-Left Corner (pixels)—Select the Distance from Top and Distance from Left (in pixels) for the red box to appear on the screen Dimensions (pixels)—Select the Width and Height (in ...
- Page 93 StakMax Microplate Handling System User Guide 7. Click the Email tab and configure the parameters for delivering an immediate notification that provides detailed information when an alarm situation occurs. SMTP Email Server—email server name From Address—email address to display in the From field ...
-
Page 94: Cancelling An Alarm
Two of these methods—Sequential-driven and Barcode-driven—use job lists. The main window of StakMax Software displays a list of Active Job Lists. Each job list has at least one job item. Each job item appears in the expanded job list next to an icon indicating whether the job item has been read yet. -
Page 95: Creating A New Job List
StakMax Microplate Handling System User Guide Creating a New Job List 1. In the StakMax Software window, in the Run Setup group, select either Sequence-driven or Barcode-driven from the workflow list. Note: The workflow method you select determines the available options when creating a new job list. - Page 96 Operation 4. When creating a job list, enter information in the following fields: Plate ID—unique barcode number for each plate Protocol Name—name of the protocol to be run with this plate Number of samples (optional)—number of samples that ...
-
Page 97: Importing A Job List
You can choose to use LIMS or Liquid Handler Software to import a job list into the StakMax Software. A job list must be in simple text file format and each row must be a single job item. Each row must contain columns which are delimited by a tab or a semi-colon. -
Page 98: Running Protocols
Operation Running Protocols When the StakMax Software opens, the system is in Stopped state. When you click Run, the system is in Running state and runs until the stack is finished or a system failure occurs. You can also pause or stop the run. -
Page 99: Viewing Logs
StakMax Microplate Handling System User Guide Viewing Logs The StakMax Software window displays a Log View frame that captures detailed information about all actions in the system. Each sequential entry includes a time-stamp [mm:dd:yr hr:min:sec] followed by a brief message. - Page 100 Operation 5012878 A...
-
Page 101: Chapter 3 Maintenance
45. Following alignment, perform a functional check. Performing a Functional Check on page Removing the StakMax instrument from the instrument stand You might need to move the StakMax instrument to access the cartridge drawers. To remove the StakMax Instrument from the instrument stand 1. -
Page 102: Accessing Spectramax Paradigm Platform Detection Cartridges
Molecular Devices service representatives initially install the lower baseplate and stand that connects the StakMax instrument to the SpectraMax Paradigm Platform. However, you might occasionally need to remove and attach the StakMax instrument in order to gain access to the cartridge drawers. To open the cartridge drawer 1. -
Page 103: Aligning The Microplate Transfer Position
SpectraMax Paradigm Platform. In most cases, the alignment process needs to be performed only once, following installation. Occasionally, users might need to use the StakMax Software Transfer Position Teaching wizard to re-align the position. The Transfer Position Teaching wizard provides detailed on-screen instructions to assist in completing the alignment process. - Page 104 Maintenance CAUTION! Do not touch or loosen any screws or parts other than those specifically designated in the instructions. Doing so could cause misalignment and possibly void the warranty. 5012878 A...
-
Page 105: Chapter 4 Troubleshooting
Can't move axis if it's Press the occurred during a already in motion. Power/Reset button. motion. Error: A Problem Generic EPROM error. Call Molecular Devices occurred with the Technical Support EPROM. +1-800-635-5577. Error: A problem Carriage drop off Re-align the... -
Page 106: Object Reference Not Set To An Instance Of An Object" Error
Check for object occurred during a after opening. blocking movement motion. and then re-align. Error: A Problem EPROM space is larger Call Molecular Devices occurred with the than portion of FLASH Technical Support EPROM. memory allocated. +1-800-635-5577. Error: A problem... -
Page 107: Appendix A System Diagrams And Specifications
50-plate stack = 40.40 inches (1026.2 mm) • Power source: 100–240 VAC, autoranging line voltage, 50/60 Hz, ~1.5A • Operating temp.: 10°C–40°C • Connectivity: USB 2.0 (requires Multi-Mode Analysis Software version 3.4 or later and StakMax Software version 3.4 or later) 5012878 A... -
Page 108: Diagrams
[ ] = metric 20 plate stack = 21.27 inches (540.3 mm) No [ ] = imperial 40 plate stack = 31.20 inches (792.5 mm) 50 plate stack = 40.40 inches(1026.2 mm) Figure A-1 Dimensions of the StakMax instrument 5012878 A... - Page 109 StakMax Microplate Handling System User Guide Figure A-2 Dimensions of the StakMax instrument and SpectraMax Paradigm System (side-by-side orientation) 5012878 A...
- Page 110 System Diagrams and Specifications Figure A-3 Dimensions of the StakMax instrument and SpectraMax Paradigm System (front orientation) 5012878 A...
Need help?
Do you have a question about the StakMax and is the answer not in the manual?
Questions and answers