Advertisement
Quick Links
Advertisement

Related Manuals for Molecular Devices SpectraMax MiniMax 300


Summary of Contents for Molecular Devices SpectraMax MiniMax 300
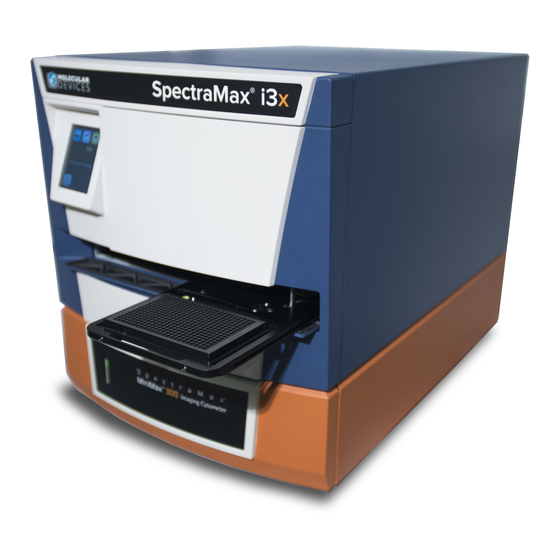
- Page 1 SpectraMax® MiniMax™ 300 Imaging Cytometer Installation Guide 5024111 D October 2018...
- Page 2 For research use only. Not for use in diagnostic procedures. The trademarks mentioned herein are the property of Molecular Devices, LLC or their respective owners. These trademarks may not be used in any type of promotion or advertising without the prior written permission of Molecular Devices, LLC.
-
Page 3: Computer Integration
Multi-Mode Detection Platform Installation Guide. Computer Integration Each Molecular Devices microplate reader is shipped with a license key for the SoftMax® Pro Data Acquisition and Analysis Software that you install on the computer that you use to operate the instrument. The SoftMax Pro Software provides integrated instrument control, data display, and statistical data analysis. - Page 4 SpectraMax MiniMax Imaging Cytometer Installation Guide The SpectraMax MiniMax 300 Imaging Cytometer is shipped with a computer that meets greater minimum computer system specifications than those required for the standard SoftMax Pro Software installation. You must install the SoftMax Pro MiniMax Imaging Edition of the SoftMax Pro Software on the supplied computer to operate the SpectraMax i3x with the SpectraMax MiniMax 300 Imaging Cytometer.
- Page 5 Setting Up the SpectraMax® MiniMax™ 300 Imaging Cytometer 3. Under Power Options, click Change When the Computer Sleeps. 4. Click Change advanced power settings. 5. On the Power Options dialog, set Hard disk > Turn Off Hard Disk After to Never. 6.
- Page 6 For a complete list of the contents of the package, see the enclosed packing list. The SpectraMax MiniMax 300 Imaging Cytometer is operated by a computer that has rigid specifications. Molecular Devices provides this computer and a monitor. The computer and monitor are shipped in separate packages.
- Page 7 Setting Up the SpectraMax® MiniMax™ 300 Imaging Cytometer Unpacking the Cytometer The package is designed to protect the instrument during transportation. WARNING! LIFTING HAZARD. To prevent injury, use a minimum of two people to lift the instrument. Note: Retain the shipping box and all packaging materials for future transport needs. Do not use tools that can damage the packaging or the instrument.
- Page 8 SpectraMax MiniMax Imaging Cytometer Installation Guide Removing Shipping Protections To prevent damage during shipping, four wing nuts secure the bolts in the corners, a transport bracket with six blue retaining screws and three more blue retaining screws secure the optics plate on the top of the cytometer, and a cover with three blue retaining screws protects the optical components in the optics tower.
- Page 9 Setting Up the SpectraMax® MiniMax™ 300 Imaging Cytometer 2. Use the 3.0 mm hex key to remove the six blue retaining screws that secure the transport bracket (B) to the instrument. 3. Remove the transport bracket and store the retaining screws in the bag that held the 3.0 mm hex key.
- Page 10 SpectraMax MiniMax Imaging Cytometer Installation Guide Attaching the Cytometer to the Microplate Reader Prepare a work area that is approximately 130 cm (51.2 in.) wide and 65 cm (25.6 in.) deep, preferably with access on all sides to lift the instruments. The required vertical clearance for this procedure is 56 cm (22.0 in.). WARNING! LIFTING HAZARD.
- Page 11 Setting Up the SpectraMax® MiniMax™ 300 Imaging Cytometer 3. Use the 2.5 mm hex key to remove the four screws (G) that secure the optics access cover (F) to the bottom of the microplate reader. Optics Access Cover (Bottom of Microplate Reader) Description F ...
- Page 12 SpectraMax MiniMax Imaging Cytometer Installation Guide 6. Place one of the laser interlock brackets (H) over the optics access opening with the interlock tab (I) on the bracket inserted into the corresponding alignment slot (J) on the bottom of the microplate reader. Laser Interlock Brackets Description H ...
- Page 13 Setting Up the SpectraMax® MiniMax™ 300 Imaging Cytometer 10. Carefully place the cytometer on its side on the foam pad so that the top of the cytometer faces the bottom of the microplate reader. Note: you might need to slide the microplate reader on the foam pad to make room for the cytometer.
- Page 14 SpectraMax MiniMax Imaging Cytometer Installation Guide 12. Use a flat head screwdriver to tighten one of the four bolts on the bottom of the cytometer. Note: You might need to use your free hand to push the cytometer into the reader to start the bolt and engage the threads.
-
Page 15: Removing Transport Locks
Setting Up the SpectraMax® MiniMax™ 300 Imaging Cytometer Removing Transport Locks CAUTION! The instrument can be damaged if the you do not remove the transport locks before you power on the instrument. There are transport locks on the detection cartridge drawer and the plate drawer to protect the instrument from damage during shipping. - Page 16 SpectraMax MiniMax Imaging Cytometer Installation Guide 2. Turn the knob on the detection cartridge drawer transport lock counter-clockwise until it is free of the hole in the floor of the drawer compartment. Item Description 1 Detection cartridge drawer 2 Detection cartridge drawer transport lock 3.
- Page 17 Setting Up the SpectraMax® MiniMax™ 300 Imaging Cytometer 7. Gently pull the yellow tab that protrudes from the plate chamber door to open the door. Hold the door (5) open while you remove the transport lock. Note: Do not to tear the yellow tab. It remains attached to the transport lock to make it easier to open the plate chamber door.
- Page 18 SpectraMax MiniMax Imaging Cytometer Installation Guide Connecting Instrument Cables The power cord and USB cables connect the ports on the rear of the instruments to the computer and the power supply. Two USB cables connect from the cytometer to the computer.
- Page 19 Setting Up the SpectraMax® MiniMax™ 300 Imaging Cytometer Item Description 6 Interconnect USB port 7 Cytometer USB port 1 8 Cytometer USB port 2 9 Alternative power input for the SpectraMax i3 Multi-Mode Microplate Reader. Item Description 1 Power switch 2 3 To connect the cytometer cables: 1.
- Page 20 SpectraMax MiniMax Imaging Cytometer Installation Guide 3. Connect one end of the shorter USB cable (P) supplied with the cytometer to the interconnect USB port labeled SpectraMax® System (Q) on the rear of the cytometer, and then connect the other end of the USB cable to the microplate reader USB port (R) on the rear of the microplate reader.
- Page 21 Setting Up the SpectraMax® MiniMax™ 300 Imaging Cytometer 4. Connect one end of the 2 meter USB cable (S) supplied with the cytometer to the USB 3.0 port in the PCI card on the rear of the computer, and then connect the other end of the USB cable to the USB port labeled COMPUTER USB 1 (T) on the rear of the cytometer.
- Page 22 SpectraMax MiniMax Imaging Cytometer Installation Guide Installing Detection Cartridges When you install a detection cartridge in the instrument, the SoftMax Pro Software detects the cartridge and displays the related data acquisition settings on the Settings dialog and enables the applicable read modes. You can install most detection cartridges into any of the first three slots in the detection cartridge drawer.
- Page 23 Setting Up the SpectraMax® MiniMax™ 300 Imaging Cytometer 3. Position the two small holes and the connector pins on the detection cartridge over the holder pins and connector for the detection cartridge slot. Note: Some detection cartridges occupy more than one slot. Item Detection Cartridge Drawer Top View 1 ...
- Page 24 SpectraMax MiniMax Imaging Cytometer Installation Guide 5. Push the two retaining clips on either side of the detection cartridge so that they fasten securely to the retaining rods on both sides of the detection cartridge drawer. Note: Detection cartridges that occupy more than one slot have two retaining clips on each side.
- Page 25 Setting Up the SpectraMax® MiniMax™ 300 Imaging Cytometer Selecting the Light Source for Imaging The SpectraMax MiniMax 300 Imaging Cytometer captures images from the bottom of each plate well. You can illuminate the sample with white transmitted light from the top of the plate when you use the Transmitted Light (TL) Detection Cartridge, or you can use fluorescent excitation from the bottom of the plate.
- Page 26 The trademarks used herein are the property of Molecular Devices, LLC or their respective owners. ©2018 Molecular Devices, LLC. Specifications subject to change without notice. Patents: www.moleculardevices.com/productpatents All rights reserved. FOR RESEARCH USE ONLY. NOT FOR USE IN DIAGNOSTIC PROCEDURES...
Need help?
Do you have a question about the SpectraMax MiniMax 300 and is the answer not in the manual?
Questions and answers