
Related Manuals for PLUSOPTIX PowerRef 3


Summary of Contents for PLUSOPTIX PowerRef 3
- Page 1 PowerRef 3 - plusoptiX R09 Binocular Pupillometer - plusoptiX P09 INSTRUCTION MANUAL (Version 31.07.2019 / 5.0.22.0) Plusoptix GmbH Neumeyerstr. 48 90411 Nuernberg Germany www.plusoptix.eu Englisch Page 1 of 34...
-
Page 2: Table Of Contents
Safety instructions ..................4 Warning and Symbols ....................4 Handling of the plusoptiX R09 ..................5 Exclusive use of the plusoptiX R09 ................5 Operation of the plusoptiX R09 ................... 5 Duties of the operator ....................5 Delivery ....................... 6 Storage ......................... - Page 3 11. Measurement setup ..................28 12. Warranty ......................29 Service and maintenance ................29 13.1 Service ........................29 13.2 Maintenance ....................... 30 14. Practical tips ....................30 14.1 Measurement results ....................30 14.2 Troubleshooting ......................31 15. Specifications ....................32 Page 3 of 34...
-
Page 4: Safety Instructions
Plusoptix authorized service representatives listed in the section Service and Maintenance (Chapter 11). Do not sterilize the plusoptiX R09 device or any of the components. CAUTION: Use of controls or adjustments or performance of procedures other than those specified herein may result in wrong measurements. -
Page 5: Handling Of The Plusoptix R09
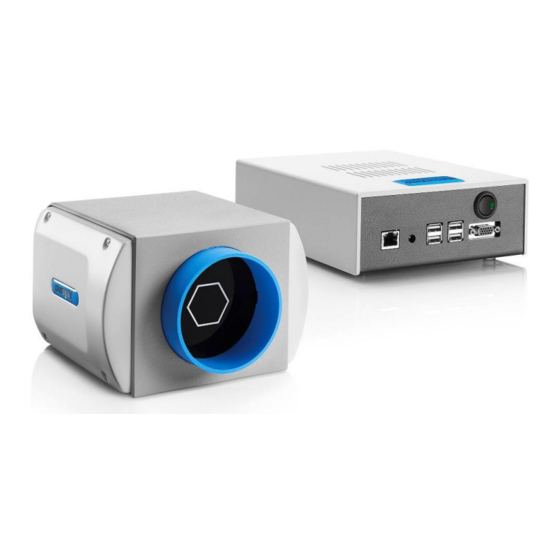
The plusoptiX R09 is an optical electronic measuring device. The construction and functionality of the plusoptiX R09 is very similar of a video camera / camcorder. So, please handle the device as carefully as you would use your own camcorder. If you follow this advice, the plusoptiX R09 will last you for many years without any trouble. -
Page 6: Delivery
Delivery The plusoptiX R09 device is delivered in a paper carton. The following information is printed on the carton: Only 5 This side Fragile Keep dry Carton CE conform Recycleable cartons on manufactorer each other Cover Camera Medical power Cradle... -
Page 7: Storage
Do not store the packing material in a room with an open fire place. 2.3 Setting up When you set up the plusoptiX R09 make sure that no cable can be reached by Probands. Protect the plusoptiX R09 from direct sunlight. -
Page 8: Connecting And Switching On The System
Connect the VGA cable from the monitor to the plusoptiX R09. The keyboard and mouse can be connected to the plusoptiX R09 by means of a USB cable or a wireless USB adapter. Attach the 12V DC connector to the plusoptiX R09 and the medical power unit to a 110 –... - Page 9 Instruction manual system has been switched on. Please make sure that no USB-stick is inserted in the plusoptiX R09 during switching on, because it can lead to problems during booting. Now plug in the delivered USB-stick. This USB-stick contains a normal Measurement procedure and the files for the graphical output.
- Page 10 After the USB Key is inserted the plusoptiX R09 it will be detected automatically. Now you are able to choose “Standart” on the Program. Now the plusoptiX R09 is ready for measurement. Page 10 of 34...
-
Page 11: Settings
4. Settings For the first start-up it is recommended to adapt settings e.g. general (basic settings), system to your custom conditions. With the exception of the general settings appears at the “System” page a security query, where you have to type in “YES”, to perform settings if you are authorized to do that. -
Page 12: System
4.2 System The system settings have been carried out by the company you have bought the device from. In case you would like to change some system settings, please proceed as follows: Click here to set the current data and time of day. Click here to select the date format for entering the date of birth. -
Page 13: Measurement Procedure
5. Measurement procedure 5.1 Measurement procedure predefined Measurement Routine Step 1: Plug in the delivered USB Storage device, which contains the predefined Measurement routine. Step 2: Please enter the logfile name. Please use a meaningful name for the logfile. So it will be easier to find the logfile and/or the video which will be saved on the USB Storage device. - Page 14 Step 3: Choose a Standart Program. Click here to choose a predefined measurement program If you like to save a Video mark the checkbox Record Video. Now place the patient on the chinrest. And ask the patient to focus to the target. Page 14 of 34...
- Page 15 Step 4: Press “Start camera” and be sure that the pupils will be detected continuously. If the pupils are not found continuously please make sure the pupils are > 4mm and no eye lit or eye shade will cover the eyes. In some cases it can be helpful to deactivate the automatic brightness.
- Page 16 Step 5: Start Measurement Now press “Start” in order to perform a measurement. In the predefined measurement program “Standart “ the measurement will not stop automatically. To cancel a measurement click on “Stop”. Click start to begin a Measurement. Page 16 of 34...
- Page 17 Step 6: Measurement Values On the Predefined Measurement program there will be a graphical evaluation at the end of the measurement. To watch the measured data proceed as follows: Choose the logfile you want to evaluate, after that choose the preferred Graphic. Click here to choose the logfile Click “Start”, the measured logfile will be analyzed and displayed on the screen.
-
Page 18: Documentation Logfile
5.2 Documentation Logfile The documentation of the plusoptiX R09 is the logfile. The logfile is being saved on the USB stick. The logfile is separated with semicolons. It contains the following information: Value Description Time [ms] Time stamp of the measured values. Every 20ms there will be one measured value. -
Page 19: Viewing The Video Of The Last Measurement
5.3 Viewing the video of the last measurement If you marked to record a Video you can watch the recorded Video directly after the measurement ends. Please note: The Video begins at the start of the measurement and last at least 360 Frames. After that 360 Frames the Video recording stops, but the measurement will carry on as long the measurement program lasts or the “Stop”... -
Page 20: Loading A Video
5.5 Loading a video The plusoptiX R09 allows you to load videos directly from a USB stick and to view them. You can only play back videos that have been recorded and stored using the plusoptiX R09. 1. Click on “Load video”. The window containing the available videos opens. -
Page 21: Predefined Measurement Routines
6. Predefined measurement routines On the delivered USB key there are two predefined Measurement Routines. Here is a summary how they will work. Program Description Standart This is the measurement which is described in the measurement procedure. Standart_10_sec The measurement will start by pressing the Start button. It will last 10 sec. After that time it will stop automatically. 6.1 Graphical output The graphical output bases on Gnuplot. - Page 22 Refraction_and_Gaze_2 This output generate a plot of the change of refraction (right and left eye) and gaze (roght and left eye) over the time. But separated into two Plots. Example: Refraction_and_Gaze_2_pdf This output generates a plot of the change of refraction (right and left eye) and gaze (right and left eye) over the time.
- Page 23 Pupil_and_Refraction_2 This output generates a plot of the change of refraction and pupil size over time. But separated into two Plots Example: Pupil_and_Refraction_2_pdf This output generates a plot of the change of refraction and pupil size over time. But separated into two Plots and will generate a PDF File on the USB Storage. Gaze_X This output file generates a plot of the change of the horizontal gaze over time.
-
Page 24: How To Create Your Own Measurement Routines
In this section the creation of measurement routines is being described. To create Measurement routines, you will need a Text editor. There is a text editor on the plusoptiX R09 installed, too. All scripts which already installed are written with this editor. -
Page 25: Example: Standart_10Sec.pox
7.4 Example: Standart_10sec.pox Here is an example *.pox file. Standart_10sec.pox Explanation: Every *.pox has to begin with a “1”. # ########################## This is an optional comment line for better readability Wait until clicking Button “Start Camera” + StartCam StartCamera Start the Camera # ########################### This is an optional comment line for better readability Wait until clicking Button “Start”... -
Page 26: Logging External Events
8.1 How does it work? To activate that feature a USB Key with a support script and an USB Serial Converter from FTDI is needed. The USB Key Support script is provided by Plusoptix, and the USB Serial Converter is available from http://www.ftdichip.com/Products/Cables/USBTTLSerial.htm... -
Page 27: Remote Control
9. Remote control To control the PowerRef 3 remotely there is program binary in the delivered measurement routines called “powerrefcontrol”. The program can control the PowerRef 3 over a command line (On the Powerref 3 itself or over ssh connection). -
Page 28: Switching Off The System
10. Switching off the system First switch off the plusoptiX R09 using the on/off switch, followed by the monitor. The on/off switch on the plusoptiX R09 flashes after switch-off until the program has been shut down completely. At the end of business day the monitor and the medical power unit must be separated from the power supply or you have to switch off the on/off switch at the multiple socket outlet. -
Page 29: Warranty
Plusoptix will repair or exchange the system at no charge. The guarantee is only supplied on new systems that have been sold by Plusoptix or an authorized sales partner of Plusoptix. Systems requiring repair can be returned to the authorized sales partner from whom the system was purchased. -
Page 30: Maintenance
14.1 Measurement results 1. Measurement range The measurement range of the plusoptiX R09 is between -7.00 dpt and +5.00 dpt and is based on the spherical equivalent of the measurement result. This measurement range can be extended by a max. ± 3.00 dpt by using flippers with plus or minus lenses. -
Page 31: Troubleshooting
Check also whether the monitor is connected and is switched on. 2. The message “Boot error” appears on the monitor after switching on the plusoptiX R09 The plusoptiX R09 does not boot completely. Switch off again the plusoptiX R09 at the on/off switch. -
Page 32: Specifications
15. Specifications Measurements Refraction (vertical meridian) binocular and monocular Spherical range +5.00/-7.00 dpt in 0.01 dpt steps 4.0 – 8.0 mm in 0.1 mm steps Pupil size ± 10% Pupil distance mm in 1.0 mm steps ± 10 % Time per measurement 0.02 s Measuring distance 1 m ( ±... - Page 33 Guidance and manufacturer´s declaration – electromagnetic emissions/ immunity The plusoptiX 09 is intended for use in the electromagnetic environment specified below. The customer or the user of the equipment should assure that it is in such an environment. Emissions Test...
- Page 34 Recommended separation distances between portable and mobile RF communications equipment and the plusoptiX 09 The plusoptiX 09 is intended for use in an electromagnetic environment in which radiated RF disturbances are controlled. The customer or the user of the plusoptiX 09 can help prevent electromagnetic interference by maintaining a minimum distance between portable and mobile RF communications equipment (transmitters) and the plusoptiX 09 as recommended below, according to the maximum output power of the communications equipment.
Need help?
Do you have a question about the PowerRef 3 and is the answer not in the manual?
Questions and answers