
Related Manuals for PLUSOPTIX A09


Summary of Contents for PLUSOPTIX A09
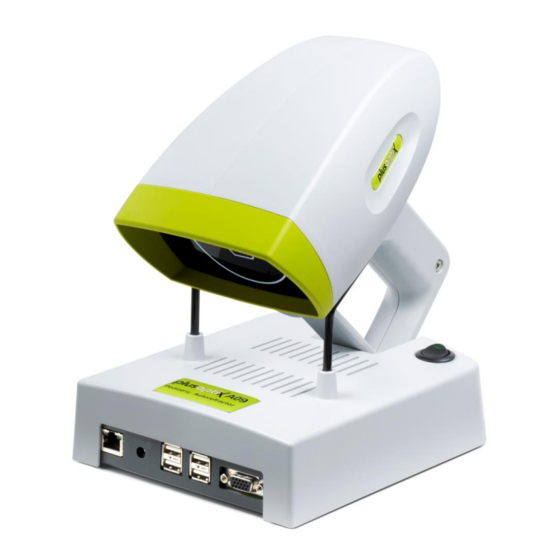
- Page 1 Pediatric Autorefractor plusoptiX A09 INSTRUCTION MANUAL (Version 5.0.20.0) Plusoptix GmbH Neumeyerstr. 48 90411 Nuernberg Germany www.plusoptix.eu Page 1 of 43 Englisch...
-
Page 2: Table Of Contents
Safety instructions ..................4 Warning and Symbols ....................4 Handling of the plusoptiX A09 ................... 5 Exclusive use of the plusoptiX A09 ................5 Operation of the plusoptiX A09 .................. 5 Duties of the operator ....................5 Delivery ....................... 6 Storage ......................... - Page 3 Patient database (License D, optional) ............32 Entering patient data ....................32 Measurement data ..................... 33 Deleting or modifying patient data ................34 Backing up measurement results ................35 Warranty..................... 36 Service and maintenance ................37 11.1 Service ........................37 11.2 Maintenance .......................
-
Page 4: Safety Instructions
Plusoptix authorized service representatives listed in the section Service and Maintenance (Chapter 11). Do not sterilize the plusoptiX A09 device or any of the components. CAUTION: Use of controls or adjustments or performance of procedures other than those specified herein may result in wrong measurements. -
Page 5: Handling Of The Plusoptix A09
The plusoptiX A09 is an optical electronic measuring device. The construction and functionality of the plusoptiX A09 is very similar of a video camera / camcorder. So, please handle the device as carefully as you would use your own camcorder. If you follow this advice, the plusoptiX A09 will last you for many years without any trouble. -
Page 6: Delivery
Delivery The plusoptiX A09 device is delivered in a paper carton. The following information is printed on the carton: Only 5 This side Fragile Keep dry Carton CE conform Recycleable cartons on manufactorer each other Cover Camera Cradle Medical power... -
Page 7: Storage
Do not store the packing material in a room with an open fire place. Setting up When you set up the plusoptiX A09 make sure that no cable can be reached by children. Protect the plusoptiX A09 from direct sunlight. -
Page 8: Connecting And Switching On The System
Fig. 1: Connect the VGA cable from the monitor to the plusoptiX A09. The keyboard and mouse can be connected to the plusoptiX A09 by means of a USB cable or a wireless USB adapter. Attach the 12V DC connector to the plusoptiX A09 and the medical power unit to a 110 –... -
Page 9: Switching On The System
3.2 Switching on the system Switch on the monitor before you switch on the plusoptiX A09 (see Fig. 2 on page 8 for the on/off switch). After loading the software (approx. 1.5 minutes) the “Plusoptix Start Page” appears. You can now start measurements. -
Page 10: Settings
Settings For the first start-up it is recommended to adapt settings e.g. general (basic settings), printer, network (GDT), your address and system to the conditions of your practice. With the exception of the general settings appears at each page a security query, where you have to type in “YES”, to perform settings if you are authorized to do that. -
Page 11: Installing A Printer
To be able to print a screenshot, a self-adhesive label for the patient paper record or a measurement report (optional, License Z), suitable printer must be installed. You can attach the printer to the plusoptiX A09 directly via the USB or via your practice network. -
Page 12: Practice Network
8410 to 8421. Enter the name of the plusoptiX A09 in the network here. The paths for data input to the plusoptiX A09 and for data export to the network are extracted from this value. -
Page 13: My Address (License Z, Optional)
4.4 My Address (License Z, optional) Enter the name, address, telephone, fax and email address of your practice here, to enable the details to appear on the measurement report. Click on “Settings” and then on "My address". Click here to enter the name of your practice. Click here to enter the address, telephone, fax and email address of your practice. -
Page 14: System
4.5 System The system settings have been carried out by the company you have bought the device from. In case you would like to change some system settings, please proceed as follows: Click here to set the current data and time of day. Click here to select the date format for entering the date of birth. -
Page 15: Binocular Measurement
Binocular measurement 5.1 Measurement procedure Step 1: If the plusoptiX A09 is not connected to a practice network and the measurement results are to be documented, please enter the patient data. This data should be entered before the child is seated for measurement. - Page 16 Step 2: Hold the camera approximately 1.20 metres (3.3 feet) away from the child at eye level and start the camera by pressing once on the trigger in the handle. A warble sound can be heard to draw the child’s attention to the camera. Avoid the child observing the monitor.
- Page 17 2. A red edge around the pupil is a sign that the pupil is too small. Reduce the light in the room to allow the pupils to dilate and repeat the measurement. 3. If the plusoptiX A09 does not find the pupils within 20 seconds, the measurement procedure is automatically terminated. The most common reasons for this are:...
- Page 18 a) One or both pupils are not completely displayed on the screen, e.g. eyelashes or the eyelid is partially occluding the pupil. The mother should lift the child’s eyelid gently. Repeat the measurement. b) If the corneal reflexes appear on one gaze chart as red point clouds and on the other as green point clouds, the asymmetry of the corneal reflexes is ≥...
-
Page 19: Documentation
5.2 Documentation The following documents can be printed: Measurement report (measurement results with comments) Measurement results on self-adhesive label Screenshot To print one of these documents later, videos must be saved to archive the data. To do so, see chapter 5.4 Storing a video and 5.5 Loading a video. Click here to print the measurement report with the measurement results and your comments (optional, License Z). - Page 20 Measurement report (A4 and letter format) Page 20 of 43...
- Page 21 Screenshot Self-adhesive label Printer: Dymo Label Printer Label Size 54 x 25 mm, Order no. 11352 (Europe), order no. 30336 (America) Note: The order no. can differ in your country. Check it on: http://sites.dymo.com/pages/CountrySelector.aspx Page 21 of 43...
-
Page 22: Viewing The Video Of The Last Measurement
5.3 Viewing the video of the last measurement You can view the video in individual images directly after measurement Detect media blurring Detect strabismus in false colours Trace eye movements Test the infrared component in the room To redisplay the measurements, the video must be replayed in real time again. Click here to play back the video of the measurements in individual images. -
Page 23: Storing A Video
5.4 Storing a video Videos are not stored in the plusoptiX A09, but are rather overwritten by the next measurement. If a measurement indicates particular issues such as media blurring, the video can be stored directly after the measurement on a USB stick or an external hard drive with a maximum current consumption of 0.5 A. - Page 24 Is there not enough storage space on the inserted USB-stick, following window appears: Click on “OK” and remove this USB-stick. Take a new, empty USB-Sick and insert it into the plusoptiX A09 and click again on “Save video”, to save the video.
-
Page 25: Loading A Video
You can only play back videos that have been recorded and stored using the plusoptiX A09. To do so, insert a USB stick or an external hard drive with a maximum current consumption of 0.5 A into one of the free USB ports on the plusoptiX A09 and proceed as follows: 1. -
Page 26: Monocular Measurement
Monocular measurement Patients displaying asymmetric corneal reflexes ≥ 10º cannot be measured binocularly. The monocular measurement function “OD” and “OS” allow you to measure each eye individually. The measurement is performed as for binocular measurement (see 5.1 Measurement). Click here to measure the right eye. Cover the left eye. -
Page 27: Switching Off The System
Switching off the system First switch off the plusoptiX A09 using the on/off switch, followed by the monitor. on/off switch on/off switch plusoptiX A09 multiple socket outlet The on/off switch on the plusoptiX A09 flashes after switch-off until the program has been shut down completely. -
Page 28: Printing The Measurement Report (License Z, Optional)
Printing the measurement report (License Z, optional) Is a printer installed and connected, the measurement results can be printed together with your comments. The comments can be stored as freely editable text modules. Click here to create text modules (see chapter 8.2) Click here to create a measurement report. -
Page 29: Adding An Info Column
2. Store this information as an image on the supplied USB stick. The name of the image may not contain any diacritical marks and must have a suffix of .png. 3. Switch on the plusoptiX A09 and wait until the start page appears. 4. Insert the USB stick into the plusoptiX A09. Following window appears. -
Page 30: Creating Text Modules
8.2 Creating text modules You can enter a maximum of 20 different text modules. To do so, proceed as follows: 5. Click here to delete a selected text module and the title. 4. Click here to store the text module. 3. -
Page 31: Printing The Measurement Report
8.3 Printing the measurement report You can add different text modules to the measurement report as comments and edit these before printing. To do so, proceed as follows: 1. Click here to select a text module to be printed on the measurement report. -
Page 32: Patient Database (License D, Optional)
Patient database (License D, optional) The patient database is an alternative to a practice network. You can use the database to store patient data and measurement results, and to compare measurement results with previous ones. 9.1 Entering patient data Enter patient data. The following data are valid: a) Patient data (Surname, first name, date of birth and gender) or b) Patient data and ID or c) ID and date of birth... -
Page 33: Measurement Data
9.2 Measurement data Click on “Patients” and enter the entire patient data or scroll down to the patient to have a look at these existing measurement data. The data are listed chronologically. Date of Measurement data Measurement data Asymmetry of measurement right eye left eye... -
Page 34: Deleting Or Modifying Patient Data
9.3 Deleting or modifying patient data To delete a patient record from the database, i.e. this patient data including measurement results, proceed as follows: Call up the patient to be modified. 2. Click here to delete the selected patient data record. Afterwards a window with a security query will appear. -
Page 35: Backing Up Measurement Results
The system provides an option to back up the measurements on a regular basis. To do so, insert the supplied USB stick into a free USB port on the plusoptiX A09. The data is automatically saved on the stick. The space available on the stick is sufficient to store about 10 years’... -
Page 36: Warranty
10. Warranty The plusoptiX A09 is supplied with a 12-month guarantee, starting from the data of the delivery note. All work processes at Plusoptix are included in a quality management system, thus providing the highest degree of assurance of error-free materials and workmanship. -
Page 37: Service And Maintenance
11. Service and maintenance 11.1 Service For repairs or guarantee services, please send the plusoptiX A09 system in its original packaging to the company you have bought the device from or to: Plusoptix GmbH Plusoptix Inc. Service 2850 Paces Ferry Road Neumeyerstr. -
Page 38: Practical Tips
12. Practical tips 12.1 Measurement results The major benefit of the plusoptiX A09 is that binocular measurements in miosis in children can be performed from a distance of one meter. Device accommodation is therefore unnecessary, and the measurement is non-stressful for the child, the parent and the examiner. - Page 39 The following images show clear cataract-like structures. 6. Nystagmus The plusoptiX A09 can be used to measure nystagmus in children in most cases, as the determination of refraction is performed at 50 Hz, i.e. every measurement is performed at 20 ms.
-
Page 40: Status Messages
8. Measurement range The measurement range of the plusoptiX A09 is between -7.00 dpt and +5.00 dpt and is based on the spherical equivalent of the measurement result. This measurement range can be extended by a max. ± 3.00 dpt by using flippers with plus or minus lenses. -
Page 41: Troubleshooting
If the green control lamp on the on/off switch on the plusoptiX A09 casing does not illuminate, check that the medical power unit is connected to the power socket and the 12 V outlet with the plusoptiX A09, and that the on/off switch is in the “on” position. -
Page 42: Specifications
10 - 85 % not condensing Packaging Size of carton 51 x 41 x 20 cm (20 x 16 x 8 inches) Weight A09 device 2.2 Kg (4.9 LB) Carton 1.3 Kg (2.6 LB) Total 3.5 Kg (7.7 LB) Page 42 of 43... - Page 43 Guidance and manufacturer´s declaration – electromagnetic emissions/ immunity The plusoptiX A09 is intended for use in the electromagnetic environment specified below. The customer or the user of the equipment should assure that it is in such an environment. Emissions Test...
Need help?
Do you have a question about the A09 and is the answer not in the manual?
Questions and answers