Table of Contents
Advertisement
Advertisement
Table of Contents

Related Manuals for ELCOM Euro-50


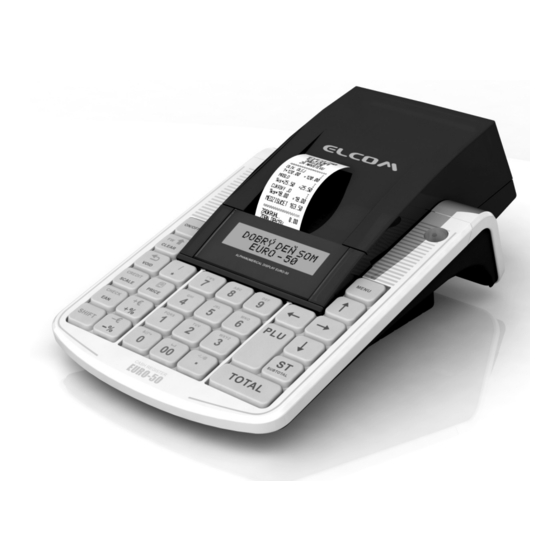
Summary of Contents for ELCOM Euro-50
- Page 1 Euro-50 Euro-50 Service manual version 1.0 © ELCOM s. r. o., 2008...
- Page 2 This manual was not subject to any language revision. This manual or any part of it may not be copied, reproduced or otherwise distributed without the publisher‘s consent. All rights reserved. Elcom, s.r.o.
-
Page 3: Table Of Contents
4.3.4. The paper ribbon does not wind reliably or at all on the winding reel ..........32 4.3.5. The cash register inexplicably signals the absence of one of the paper ribbons or a lifted printer head ............................32 4.3.6. Cash register inexplicably reports an overheated printer head ............33 Elcom s. r. o. - Page 4 5.12. Interface for an FM connection ...................... 48 5.13. Buzzer ...............................48 5.14. Power supply board ........................48 5.14.1. Input filter ..............................48 5.14.2. Charging the accumulator ........................48 5.14.3. Supply 3.3V - VDDQ ..........................49 5.14.4. Supply 5V - EXT5V ..........................49 Elcom s. r. o.
- Page 5 6.4. Connecting electronic scales to the cash register ................ 53 7. UPDATING THE CASH REGISTER SOFTWARE ............55 7.1. Software update using Euro-50 Mini flash update utility .............. 56 7.2. Initializing the cash register - Master reset ..................57 8. BLOCK DIAGRAMS, PLACEMENT DRAWINGS, SPECIFICATIONS ......59 8.1.
-
Page 7: Introduction
Service manual Euro-50 1. INTRODUCTION Elcom s. r. o. -
Page 8: General Specifications
I2C interface for connecting to fiscal memory 128/256/512KB • I2C interface for connecting 2 internal displays (character and segmented) • Thermal printer LTPZ245N • COM1 RS232 (RxD, TxD, GND, 5V) • COM2 RS232 (RxD, TxD, GND) • USB 2.0 slave Elcom s. r. o. -
Page 9: Disassembling The Cash Register
Service manual Euro-50 2. DISASSEMBLING THE CASH REGISTER Elcom s. r. o. -
Page 10: Procedure For Disassembling The Cash Register
2. Loosen the screw to the accumulator cover, remove the accumulator and disconnect it from the motherboard. Figure 2.1. The accumulator cover. E-50 accumulator cover (M040433) Li-lon bat ICR18650x2; 7,2V (M220014) 3. Open the paper ribbons cover and remove it. Elcom s. r. o. - Page 11 4. Press on the metal eject lever (marked with an arrow) to release the platen holder. 5. Remove the paper ribbons holder, and if necessary, the platen holder. Cust disp glass (M040438) Short ribbon tearer (M051048) Tape cover (M040430) Elcom s. r. o.
- Page 12 6. Loosen the screw of the seal and the four screws joining the top and bottom covers of the cash register (two from above and two from below) and gently separate the bottom, top, rear top and rear bottom parts. Upper cover (M040428) Stick-on (M040467) Elcom s. r. o.
- Page 13 Service manual Euro-50 Figure 2.4. Parts of the cash register Back cover long (M040436) Back cover (M040434) Rubber feet (M060120) 7. As needed, disconnect the cables connecting the individual parts of the cash register. Elcom s. r. o.
-
Page 14: Replacing The Cash Register Modules
Figure 2.5. Removing the power supply board PCB POWER E-50 (P012008) Bottom cover (M040427) 4. Remove the DPS, replace it with a new one, then attach it with the screws. 5. Connect the cables and reassemble the cash register. Elcom s. r. o. -
Page 15: Replacing The Motherboard - Dps E50 Mb
1. Disassemble the cash register as directed in the previous chapter. 2. Disconnect the printer cable and the cable for the paper sensor from the motherboard. 3. Loosen the printer holder (4 screws) and carefully pull out the holder with the printer. Elcom s. r. o. - Page 16 Figure 2.7. Dismantling the printer holder 4. Loosen the screws keeping the printer in place in the holder, then remove the printer. Figure 2.8. Disassembly of the printer from the holder Printer LTPZ245N (M080145) Printer holder (M040444) Elcom s. r. o.
-
Page 17: Replacing The External Paper Sensor
1. Disassemble the cash register as directed in the previous chapter. 2. Loosen the rubber band from the motor‘s shaft. The motor is located in the back of the upper part of the cash register casing. Elcom s. r. o. - Page 18 Euro-50 Service manual Figure 2.10. The journal motor Motor E50 (P250008) Motor rubber (M040027) Upper insertion long (M040432) Customer display holder (M040439) 10-dig. display JCSC08-01 (M090038) PCB Interconnect (M039008) Segment display foil (M040458) Elcom s. r. o.
-
Page 19: Replacing The Reserve Battery
2.1.2.9. Replacing the cashier display 1. Disassemble the cash register as directed in the previous chapter. 2. Remove the motherboard and the printer. 3. Detach the display pad from the display. Figure 2.11. Cashier display. Display templet (P344008) Elcom s. r. o. -
Page 20: Replacing The Customer Display
1. Remove the top cash register cover as directed in the previous chapter. 2. Remove the blind flanges of the COM connectors in the lower part of the casing. 3. Plug the COM connectors with cables into the openings. Elcom s. r. o. - Page 21 Service manual Euro-50 Figure 2.13. Placement of the COM connectors COM connector (P190008) 4. While assembling, connect the cable of connector COM1 to XC12 and COM2 to XC13 on the motherboard. 5. Finish assembling the cash register. Elcom s. r. o.
- Page 22 Wire harness 140 mm 6-pins 2H (M200100) Wire harness 200 mm 2-pins of winding motor (M200098) Printer grounding wire 140 mm AWG26 Wire harness 140 mm 9-pins 1250HM09 2H (M200114) (M200096) Wire harness 95 mm 15-pins 2H (M200112) Elcom s. r. o.
-
Page 23: Testing The Cash Register
Service manual Euro-50 3. TESTING THE CASH REGISTER Elcom s. r. o. -
Page 24: Switching The Cash Register Into The Programming P-Mode - Tests Menu
1. Both lines of the display are gradually filled in. After filling in all of the dots, they are displayed for approximately 1s. 2. The display is then gradually cleared off. Upon completion of the test, the printer will print a report about the test. Elcom s. r. o. -
Page 25: Progress Of The Test For Segmented Displays
The keyboad test allows you to check the proper functioning of the cash register‘s keyboard keys. Launching the test: [Left arrow] keys, select the test Keyboard. 1. Using the [Right arrow] or 2. Start the test by pressing [TOTAL]. Elcom s. r. o. -
Page 26: Testing The External Interfaces
flow (38400, 8N1). The terminal must be set for the COM port on which the PC detects the cash register after it is connected to the USB interface. Launching of the test of the USB interface: Elcom s. r. o. -
Page 27: Testing The Sd Card Interface
1. Press the MENU button and using the arrow keys, find Sys. parameter Software version and then press the [TOTAL] button. 2. The current version of the software installed on the cash register is displayed. Elcom s. r. o. -
Page 29: Removing Malfunctions
Service manual Euro-50 4. REMOVING MALFUNCTIONS Elcom s. r. o. -
Page 30: Supply Voltage For The Cash Register
Replace the display with a functional one Check whether a short has occurred between signals DISPDA- TA-1, DISPCLK-1, DISPRST1-1. Check the progress of the signals Launch the cashier display test (102) DISPDATA-1, DISPCLK-1, DISPRST1-1 to connector XC2 with an oscilloscope. Elcom s. r. o. -
Page 31: Incorrect Imaging On The 7-Segment Display
Table 4.5. Procedure for incomplete or blank printing, print motor advances paper ribbon Test Steps in the case of an unsuccessful test Check progress of signals PSTB, PCLK, PDATA, PLATCHn. Replace the printer (E50MB.pdf, list print-control.schdoc) Elcom s. r. o. -
Page 32: Printer Prints Everything Onto One Microline -Printer Motor Stops (Compressed Printing)
Check the logic level signals PS1, PS2. Check logic level signal of Check resistors R51, R61, R67 and capacitors C44, C56, PLATEN. C57. (E50MB.pdf, list print-control.schdoc) Note: Signals PS1, PS2, PLATEN are valid only if the VDDQSW voltage is switched on. Elcom s. r. o. -
Page 33: Cash Register Inexplicably Reports An Overheated Printer Head
Connect the USB interface of the cash register to the USB in- Check L10 on DPS E50 PWR (E50PWR.pdf, list connectors. terface on the PC and measure voltage VBUS =5V. SchDoc) Check VZ1, find the flaw on DPS and remove it. Elcom s. r. o. -
Page 34: Malfunctions In Communications With An Sd Card
Tabuľka 4.16. Postup pri odstraňovaní poruchy nabíjača Test Steps in the case of an unsuccessful test Faulty circuit NL1. Replace. (E50PWR.pdf, list power.SchDoc). Faulty diode VD23. Replace. (E50PWR.pdf, list power.SchDoc). Indicators: VIN - OK, VINF - OK, doesn‘t charge. Elcom s. r. o. -
Page 35: Malfunctions Of The 3.3V (Vddq) Power Source
The cash register cannot be turned on and the problem is not in the power supply. • Check the functioning of the switch SA1. Upon switching, the voltage must change on pin no. 4 of the connector XC5 from 0V to VDDQ. Elcom s. r. o. -
Page 36: List Of Service Items
Printer LTPZ245N M080145 Short ribbon tearer M051048 Mainboard P001008 Note: The bill of material and the ordering code of each part being assembled on the particular PCB is listed in chapter 8. Block Diagrams, Placement Drawings, Specifications. Elcom s. r. o. -
Page 37: The Cash Register Circuits
Euro-50 Service manual 5. THE CASH REGISTER CIRCUITS Elcom s. r. o. -
Page 38: The Motherboard
During a reset and after a reset before the starting of the software, ports PO to P9 of the microcontroller are set as GP10 inputs. All pins of the PO to P9 ports and inputs of other components in use are saved by pull-up or pull-down Elcom s. r. o. - Page 39 H - switched on VH motor Table 5.5. Port 2 Active level Type Output Signal Type Function State during reset - specification - quiet state SCL, customer and cashier DISPCLK I2C0, Master, SCL output OD - H display Elcom s. r. o.
- Page 40 ADC2 input - X 5V for external equipment L - paper missing H - paper OK. State Built in sensor for journal of sensor can only input ribbon be determined if VDDQSW voltage is switched on Elcom s. r. o.
- Page 41 L to H H - motor turns, for sta- Controlling winding of jour- bilization of the current JMOTOR output output - L nal motor through the motor, it is necessary to use PWM unused Elcom s. r. o.
-
Page 42: Internal Memory - Ram
5.4.5. RESET The correct functioning of the microcontroller after switching on/loss of power is secured by an internal resetting circuit and for the input RESETINn an external resetting signal generated by the NL3 circuit is led in. Elcom s. r. o. -
Page 43: External Memory Subsystem
Description VBUS Voltage from USB host USBDP-1 Data driver USBDN-1 Data driver Relative potential SDCLK/FCLK-2 Timeclock signal for SD card SDI/FDI-2 DATA IN signal for SD card Relative potential SDDO/FDO-2 DATA OUT signal for SD card Elcom s. r. o. -
Page 44: Controlling Printing
Top consumption from source Vp 3.6A max. (with Vp = 9.5V) - thermal head 0.6A max. - motor Top consumption from source Vdd 0,1A max. Figure 5.1. Block diagrams for the printer head Grabbing registry Scrolling registry Elcom s. r. o. -
Page 45: Measuring The Temperature Of The Printer Head
For ensuring the advance of the paper, the step motor is awoken by the signals A, An, B, Bn in this order. Table 5.19. Waking sequence for the step motor for advancing the paper ribbon Step Elcom s. r. o. -
Page 46: Printer Sensors
Table 5.21. Auxiliary sensor for the paper ribbon end - XC8 Signal Description VDDQSW Collector of the phototransistor PS2-1 Emitter of the phototransistor VDDQSW Cathode LED LEDC-XC8 Anode LED Table 5.22. Sensor of the print roller position - XC9 Signal VDDQSW PLATEN-1 Elcom s. r. o. -
Page 47: Keyboard
XC5. Table 5.25. Signals for interfaces COM1 RS232 - XC12 XC12 Signal Description EXT5V-XC12 Supply voltage for peripheral device - scanner GND-XC12 Relative potential RXD0-232-1 COM1 RXD TXD0-232-1 COM1 TXD Elcom s. r. o. -
Page 48: Interface For An Fm Connection
Capacitors C8 and C9 block the supply voltage for circuit NL1, which works in switching mode at a frequency above 1 MHz. Condenser C12 determines the period that passes before continuous charging is forcibly ended. The period Elcom s. r. o. -
Page 49: Supply 3.3V - Vddq
The FFC cable of the customer display (a 10-place 7-segment display) is connected to connector XC2 on dps e50 d-ic v1.0. To connector XC1 is connected a 6-pin cable, which connects the dps to the motherboard (XC3 na MB). Elcom s. r. o. - Page 50 Supply voltage for electronic display A0 - zero bit I2C slave of the address display DISPDATA I2C DATA Unused DISPCLK I2C CLK Note Using dps e50 dic in1.0 it is possible to connect only a 7-segment display to the motherboard. Elcom s. r. o.
-
Page 51: Connecting Peripheral Devices
Service manual Euro-50 6. CONNECTING PERIPHERAL DEVICES Elcom s. r. o. -
Page 52: The Connection Of Rs232 Connectors Of The Euro 50 Cash Register
A bar-code scanner can be connected to the Euro 50 cash register via a RS232 interface. The transmission parameters of the scanner must set the same as those of the cash register. The scanner can be connected to either COM1 or COM2. Elcom s. r. o. -
Page 53: Connecting Electronic Scales To The Cash Register
Electronic scales can be connected to either COM1 or COM2. The port for the scales must be set in the service mode of the cash register. Elcom s. r. o. - Page 54 Euro-50 Service manual Elcom s. r. o.
-
Page 55: Updating The Cash Register Software
Servisný manuál Euro-50 7. UPDATING THE CASH REGISTER SOFTWARE Elcom s. r. o. -
Page 56: Software Update Using Euro-50 Mini Flash Update Utility
4. Switch on the cash register - the software programming mode is announced with two soundings of the buzzer. Note If Windows still does not have the USB driver installed for the Euro-50 Mini, it will request the driver - it‘s necessary to install it (euro-50-cdc. inf) 1. -
Page 57: Initializing The Cash Register - Master Reset
8. On the cashier display, you will be asked to enter the current time. Do so in the form HHMM and confirm by pressing TOTAL. 9. After completion of initialization, these words appear on the cashier display: „INITIALIZATION OK“ 10. Switch off the cash register. 11. Disconnect jumber XT1. 12. Reassemble the cash register. Elcom s. r. o. -
Page 59: Block Diagrams, Placement Drawings, Specifications
Euro-50 Service manual – Supplements 8. BLOCK DIAGRAMS, PLACEMENT DRAWINGS, SPECIFICATIONS Elcom s. r. o. -
Page 60: Pcb Mb E50 - Block Diagram
BCDCOL[3..1] RW[4..0] RW[4..0] Drawn By Ing. Martin Hruby 07.05.2008 Checked By ONSWSTAT ONSWSTAT Aproved By ONSW Title Euro 50 MB block diagram - 1.1 Elcom, s.r.o. Námestie mládeže 3 Draw. No Sheet 080 01 Prešov Slovakia Elcom s. r. o. -
Page 61: Pcb Mb E50 - Mpu
PDATA PDATA PLATCHn PLATCHn PSTB PSTB Change Drawn By Ing. Martin Hruby 28.04.2008 Checked By Aproved By Title Euro 50 MB MPU - 1.1 Elcom, s.r.o. Námestie mládeže 3 Draw. No Sheet 080 01 Prešov Slovakia Elcom s. r. o. -
Page 62: Pcb Mb E50 - Ram And Dataflash
Checked By P134 FCSn AT45DB081D-SU FCSn P101 Aproved By R103 Title VDDQ RN11 R104 Euro 50 MB RAM & DATAFLASH - 1.1 Elcom, s.r.o. Námestie mládeže 3 Draw. No Sheet 080 01 Prešov VDDQ VDDQ Slovakia Elcom s. r. o. -
Page 63: Pcb Mb E50 - Printer Control
P126 Drawn By Ing. Martin Hruby 28.04.08 PLATEN PLATEN Checked By P160 VDDQ Aproved By Title Euro 50 MB PRINTER CONTROL - 1.1 Elcom, s.r.o. 100nF Námestie mládeže 3 Draw. No Sheet 080 01 Prešov Slovakia Elcom s. r. o. -
Page 64: Pcb Mb E50 - Rs232 And Usb Interface
Ing. Martin Hruby 28.04.08 VDDQ P198 Checked By Aproved By VDDQ 100nF Title Euro 50 MB RS232 & USB interface - 1.1 74LVC573 P199 VDDQ Elcom, s.r.o. Námestie mládeže 3 Draw. No Sheet 080 01 Prešov 180R Slovakia Elcom s. r. o. -
Page 65: Pcb Mb E50 - Keyboard
Change P120 10uF Drawn By Ing. Martin Hruby 26.04.08 TZMB3V3 100pF Checked By Aproved By ONSW Title ONSW Euro 50 MB KEYBOARD - 1.1 Elcom, s.r.o. Námestie mládeže 3 Draw. No Sheet 080 01 Prešov Slovakia Elcom s. r. o. -
Page 66: Pcb Mb E50 - Journal Motor, Buzzer
JMOTOR-1 JMOTOR RJP020N06 R107 Change Drawn By Ing. Martin Hruby 28.04.08 Checked By Aproved By Title Euro 50 MB journal motor, buzzer - 1.1 Elcom, s.r.o. Námestie mládeže 3 Draw. No Sheet 080 01 Prešov Slovakia Elcom s. r. o. -
Page 67: Pcb Mb E50 - Displays, Fm Interface
DISPRST2 DISPRST2-1 DISPRST2 VDDQ Change Drawn By Ing. Martin Hruby 26.04.08 Checked By Aproved By Title Euro 50 MB DISLAYS, FM INTERFACE - 1.1 Elcom, s.r.o. Námestie mládeže 3 Draw. No Sheet 080 01 Prešov Slovakia Elcom s. r. o. -
Page 68: Pcb Mb E50 - Power Interface
P117 ON-OFF ON-OFF LL4148 P112 Change Drawn By Ing. Martin Hruby 26.04.08 Checked By Aproved By Title Euro 50 MB POWER INTERFACE - 1.1 Elcom, s.r.o. Námestie mládeže 3 Draw. No Sheet 080 01 Prešov Slovakia Elcom s. r. o. - Page 69 Euro-50 Service manual – Supplements PCB E50 MB - ASSEMBLY DRAWING Elcom s. r. o.
- Page 70 R102, R103, R104, R106, R107 Resistor 47K 5% 0603 1608 (0603) M100239 R69, R90, R91, R95 Resistor 47K 1% 0603 1608 (0603) M100167 R13, R14, R15, R16, R17, R18, R19 Resistor NS * 1608 (0603) 1608 (0603) Elcom s. r. o.
- Page 71 2199SB-20G-SM-3017 1 M190189 Connector 52610-3072 52610-3072 M190192 XC8, XC12, XC13 Connector 1251S-04-SM1 1251S-04-SM1 M190197 XC9, XC11 Connector 1251S-02 SM1 1251S-02-SM1 M190196 XC10 Connector 009999-0987 009999-0987 M190194 XT-1/2/3 Connector 2211R-06G-SM-5846 2211R-06G-SM-5846 M190201 PCB E50 MB v1.1 M240225 Elcom s. r. o.
-
Page 72: Pcb Pwr E50 - Power
DO/MISO Change Drawn By Ing. Sanik 9.5.2008 500999-0900 Checked By Ing. Piskor 100K 100K Aproved By Title Euro 50 Powerboard - connectors v1.2 Elcom, s.r.o. VDDQ Námestie mládeže 3 Draw. No Sheet 080 01 Prešov Slovakia Elcom s. r. o. - Page 73 VBAT-1 Checked By Ing. Piskor VBAT BCMS201209A121 MDS-12F05-BT Aproved By ACCUTMP-1 COVER SWITCH Title 1251S-09-SM1 Euro 50 Powerboard - power supplies v1.2 Elcom, s.r.o. Námestie mládeže 3 Draw. No Sheet ACCUTMP 080 01 Prešov EBMS160808A102 Slovakia Elcom s. r. o.
- Page 74 Euro-50 Service manual – Supplements PCB E50 POWER - ASSEMBLY DRAWING Elcom s. r. o.
- Page 75 SuperSOT-6 M170259 USBLC6-2SC6, USB 2.0 protection SOT23-6L M110057 P6SMB18CAT3G M110109 Connector DS-313-13 DS-313 M190186 Connector 1251S-15-SM1 1251S-15-SM1 M190200 Connector 5075BMR-05-SM-CR 5075BMR-05-SM M190190 Connector MOLEX 500999-0900 500999-0900 M190191 Connector 1251S-09-SM1 1251S-09-SM1 M190199 PCB E50 PWR v1.2 M240228 Elcom s. r. o.
-
Page 76: Pcb E50 - D-Ic
100nF VLCD Customer display DISPDATA DISPCLK 53047-0610 3700-7P-T-T Change Drawn By Ing. Hruby 19.5.2008 Checked By Aproved By Title E50 Segment Display Interconnect v1.0 Elcom, s.r.o. Námestie mládeže 3 Draw. No Sheet 080 01 Prešov Slovakia Elcom s. r. o. - Page 77 PCB E50 D-IC – BILL OF MATERIALS Designator Description Package Stock item Assembly Capacitor 100nF 0805 SMD 2012 (0805) M120044 Capacitor 100nF 50V X7R RM=2,54 CAPA254X450X318 M120175 Connector 53047-0610 53047-0610 M190038 Connector 3700-7P-T-T 3700-7P-T-T M190187 PCB E50 d-ic v1.0 M240224 Elcom s. r. o.
-
Page 78: Pcb E50 - Ps
Euro-50 Service manual – Supplements 8.12. PCB E50 – PS QRE1113.GR Zmena Vypracoval Ing. Hrubý 03.03.2008 Kontroloval Schválil Názov E50 paper sensor v1.0 Elcom, s.r.o. Jesenná 23 Číslo výkresu List 080 01 Prešov Listov Elcom s. r. o. - Page 79 Description Package Stock item Assembly QRE1113GR SOIC180P460-4N M290005 Cable 1250HM-04 1H 90mm M200094 PCB E50 PS v1.0 M240223 ����� ���������� ����� ����������� ���������� �������� ����������� ����� �������������������������� ��������������� ������������������ ������������� ���� � ������������� ���������������� � ������ Elcom s. r. o.
-
Page 80: E50 - Com Connectors
Cable 4pin 1H 70mm M200061 Connector 260-8P-8C M190188 Change Drawn By Ing. Martin Hrubý 23.6.2008 Checked By Aproved By Title Euro 50 COM connectors - 1.0 Elcom, s.r.o. Námestie mládeže 3 Draw. No Sheet 080 01 Prešov Slovakia Elcom s. r. o. -
Page 81: E50 - Cable Adapters - Scales
Mini Tiger - CNRS MOD8P8C MOD8P8C Change Drawn By Ing. Hruby 22.07.2008 Checked By Aproved By Title Euro 50 scales adapters and cables - 1.0 Elcom, s.r.o. Námestie mládeže 3 Draw. No Sheet 080 01 Prešov Slovakia Elcom s. r. o. -
Page 82: E50 - Cable Adapters - Scanner
MS9540 Voyager From external power adapter 5V DC Change Drawn By Ing. Hruby 22.07.2008 Checked By Aproved By Title Euro 50 scanner adapters - 1.0 Elcom, s.r.o. Námestie mládeže 3 Draw. No Sheet 080 01 Prešov Slovakia Elcom s. r. o.
Need help?
Do you have a question about the Euro-50 and is the answer not in the manual?
Questions and answers