Table of Contents
Advertisement
Advertisement
Table of Contents

Related Manuals for Inateck P7


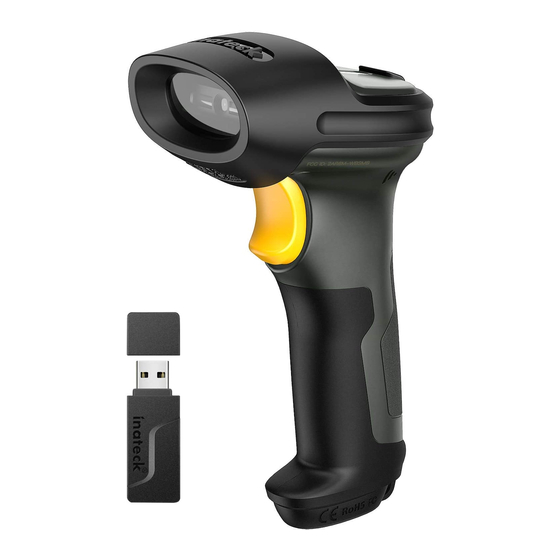
Summary of Contents for Inateck P7
- Page 1 433MHz+Bluetooth 1D Red Light Barcode Scanner User Manual...
-
Page 2: Table Of Contents
Contents IMPORTANT NOTICE .......................... 5 Safety Precaution ........................5 Maintenance Precaution ......................5 Overview of Inateck P7 barcode Scanner ..................5 Features of the Scanner ......................5 Introduction of Key Function ....................6 Product Specification ........................ 6 Correct Scanning Way ....................... 8 Incorrect Scanning Way ...................... - Page 3 2.6 Set the Bluetooth Name ....................32 Chapter 3 Symbology Settings ......................33 3.1 Codabar ..........................33 3.1.2. Start/Stop Transmission ..................34 3.2 Code 11 ..........................34 3.2.1. Enable/Disable Code 11 ..................34 3.2.2 Checksum Verification .................... 35 3.3 Code 128 ........................... 37 3.3.1 Enable/Disable Code 128 ..................
- Page 4 3.11.2 Checksum Verification ..................53 3.12 Interleaved 2 of 5 ......................54 3.12.1 Enable / Disable Interleaved 25 ................54 3.13 Matrix 2 of 5 ........................54 3.13.1 Enable /Disable Matrix 25 ..................54 3.13.2 Checksum Verification ..................55 3.14 Standard 2 of 5 / Industrial 2 of 5 ................... 56 3.14.1 Enable / Disable Standard 25 ................
-
Page 5: Important Notice
Please record the specific scenario and consult the after sales team should you encounter anything abnormal regarding the barcode scanner. Overview of Inateck P7 barcode Scanner Features of the Scanner There are four types of scanning mode, including Red Light Auto-off Mode, Continuous Scanning Mode, Manual Mode and Hands-free Mode. -
Page 6: Introduction Of Key Function
The settings of scanning mode, barcode type and data transmitting format are made by scanning correspondent barcodes. ★ Screen barcodes supported ★ Numerous decoding types ★ Super-fast decoding speed ★ Dustproof and anti-drop design ★ Completely self-owned intellectual property ★ Extremely comfortable operation design ★... - Page 7 PERFORMANCE CHARACTRISTICS Light Source Red LED Light Sensor 2500 pixel CCD Applicable Barcodes Codabar, Code 11, Code 128, GS1-128, USPS, FedEx, Code 39, Code 32, Code 93, EAN-8, EAN-13, ISBN, ISSN, MSI, UPC-A, UPC-E, IATA 25, Industrial 25 / Standard 25, Interleaved 25, Matrix 25, China Postal Code, Plessey, Telepen Resolution 3mil...
-
Page 8: Correct Scanning Way
Incorrect Scanning Way QUICK START The settings of the Inateck P7 Barcode Scanner can be changed by scanning the setup barcodes included in this manual. This section describes the procedure of setting the Inateck P7 Barcode Scanner by scanning the setup barcodes. Examples are... -
Page 9: Enter The Setting Mode
Exit with save Note: The Inateck P7 Barcode Scanner will respond with a long beep if any setup error occurs. The flow chart of Setup Enter setup Read a Setup barcode (such as, enable/disable a certain barcode) -
Page 10: Exit With Save
Restore custom settings If you want to return to the custom settings while the barcode scanner has been reset, just scan the barcode "Enter setup", and then scan "Restore custom settings". The P7 will exit the setting mode after successful operation. -
Page 11: Restore Factory Defaults
Check Software Version If you want to check the software version of Inateck P7, you should scan the “Enter Setup” and “Output Software Version” barcode, then you will get it on the device connected with the P7. Enter setup Output Software Version “Check Software Version”... -
Page 12: Chapter 1 Features And Basic Setups
This chapter introduces the features and usage of the P7 barcode scanner. 1.1 Battery The P7 barcode scanner is powered by 2600mAh chargeable Lithium batteries. If you use the red light auto-off mode, the barcode scanner can work 107 hours continuously under 433MHz wireless mode, when it can read 192,600 barcodes (read a barcode Code 128 every 2s). -
Page 13: Battery Level Display
P7 will respond with two short beeps (tone from high to low) and the blue LED indicator will flash once. When the buffer is full, the P7 will respond with a long beep (high tone) to remind that the space of the buffer is not enough and cannot store any more barcodes. The user should return to the transmission range quickly to upload the scanned data to computer/phone. -
Page 14: Inventory Mode
Users may use inventory mode to keep scanned barcodes in the buffer of Inateck P7, and upload them to computer in batches. Under inventory mode, users are not restricted to the time and location when upload data. Of course, history data can be cleared in buffer after uploading. -
Page 15: Led Indicator
Note: For achieve these five functions above, you can just scan the setting barcode. There is no need to scan “Enter setup” and “Exit with save”. 1.3 LED Indicator The LED indicators on Inateck P7 can help the user know more about the current operation status. LED Status... -
Page 16: Beeper
1.4 Beeper The built-in beeper in the P7 can help the user to know about the current operation status. Beeping Meaning One short high note(100ms) Read barcode successfully One short high note(20ms) Data upload from scanner to host One long high note(400ms) Wrong Setup(on setup status, blue LED stays on)... -
Page 17: Vibration Notification
Exit with save Exit without save 1.5 Vibration Notification The P7 barcode scanner is featured with vibration notification which is turned on by default, to indicate successful scanning. You can enable/disable this function and adjust the vibration strength. Turn off the vibration notification (*)Turn on the vibration notification (weak) -
Page 18: Scanning Modes
2 seconds and can be set to 1s, 2s, 3s and 5s. Yet the red light will be off soon if Inateck P7 scans a barcode. -
Page 19: Continuous Scanning Mode
The red light of the scanner will not go off until Inateck P7 scans a barcode. And the laser will go off once the scanner scans barcode successfully. And then the scanner will go into waiting mode, in which the waiting time (also known as intermittent time of continuous scanning), usually defaults to 2 seconds, and can be set to 400ms, 800ms,1s,2s,3s,5s, 10s and 15s. - Page 20 Example of setting the scanner into Continuous Scanning mode and setting the Intermittent time to 1s: 1. Read the "Enter Setup" barcode; 2. Read the "Continuous Scanning Mode" barcode; 3. Read the "Setup Intermittent time of Continuous scanning " barcode; 4.
-
Page 21: Manual Mode
3. Read the "Exit with Save" barcode. 1.6.4 Hands-free Mode Under the Hands-free Mode, the red light still stays on after the P7 reads a barcode successfully, but it won’t read it repeatedly. You can scan the barcode below to set the scanner into Hands-free Mode. -
Page 22: Types Of Keyboard
2) Scan “MacOS/iOS device mode” ; 3) Scan “Save and exit”. Note: If you are to use P7 with Android devices, make sure to apply Gboard as the input method. Apart from setting the scanner under “Windows/Android” mode, you also need to set the scanner keyboard language as American English that supports “Gboard”... - Page 23 (*)US Keyboard German Keyboard French Keyboard Spanish Keyboard Italian Keyboard UK Keyboard Japanese Keyboard(Roman al phabet ) Canadian Keyboard Example of setting the keyboard type into “German Keyboard”: 1. Scan the “ Enter Setup” barcode; 2. Scan the “German Keyboard” barcode; 3.
-
Page 24: Symbologies Supported
1.8 Symbologies Supported Most of the popular barcode symbologies are supported by the Inateck P7 Scanner. You can check them in list below and check the details on Chapter 3. Symbologies Supported: Enable/Disable Defaults Codabar Enable Code 11 Disable Code 128... -
Page 25: Chapter 2 How To Connect
The P7 has been paired with its receiver before leaving the factory. If you replace the receiver, please re-pair it with the P7. The pairing method is flexible, which allows you to pair one or more P7 scanners with one receiver, also you can pair one scanner with multiple receivers (up to 8 receivers can be paired). - Page 26 Unplug the previous USB adapter. b. Scan “Enter Setup” barcode. c. Scan the barcode “Pair one scanner with multiple USB adapters”, and get the Inateck P7 as close as possible to the USB adapter (within 2 meters). d. Insert the USB adapter into a computer. The indicator of the adapter flashes along with a short high tone, which indicates a successful pairing.
-
Page 27: 433Mhz Wireless Channel Change
There are 6 channels available when the P7 is in the 433MHz wireless mode, and the default is "channel 0". If you want to use multiple P7 scanners in the same place, it is suggested to set every barcode scanner to different channels so as to avoid wireless signal interference. -
Page 28: Bluetooth Hid Mode
P7 will connect with the previous paired device automatically if you have done the pairing before. If you want to connect the P7 with other device, please read the barcode " Enter setup" and "Pair one or more scanners with one USB adapter", the P7 will enter into Bluetooth broadcasting mode, then you can get the P7 paired on your phone/computer. -
Page 29: Bluetooth Spp Mode
When switched to Bluetooth SPP mode, the P7 will enter into Bluetooth broadcasting mode and the blue LED indicator flashes. Then you can search the Bluetooth of P7 and get it paired on your phone/computer. After successful pairing, you need to run serial debugging tool on your computer, and select Open Bluetooth COM Port. - Page 30 To disconnect the Bluetooth, just close the serial debugging tool. To use the Bluetooth SPP mode of P7 on another computer, there is no more operation needed for P7, just disconnect the P7 on the previous connected computer, and then the P7 will enter Bluetooth broadcasting mode.
-
Page 31: Usb Mode
2.4 USB Mode If the P7 is connected to a computer via USB cable, the data transmission through USB mode is preferred. Under the USB connection mode, the P7 will respond with two or multiple long high tones which indicates the USB is being configured. You can begin to use the P7 scanner after the prompt tones stop. -
Page 32: Set The Bluetooth Name
Exit with save 2.6 Set the Bluetooth Name The Bluetooth name of P7 can be modified, but the number of the characters cannot exceed 32. To do that, please make sure the P7 works under Bluetooth HID mode or Bluetooth SPP mode. -
Page 33: Chapter 3 Symbology Settings
Chapter 3 Symbology Settings 3.1 Codabar Enable / Disable Codabar 3.1.1 Decide whether to enable Codabar through selecting correspondent barcode below. The Inateck P7 Scanner defaults enable Codabar contents. (*)Enable Codabar Disable Codabar Note: Scanning the "Disable Codabar" barcode will make the barcode scanner unable to read the Codabar barcode. -
Page 34: Start/Stop Transmission
3.1.2. Start/Stop Transmission Decide whether to include Start/Stop characters in the data being transmitted by scanning relevant barcodes below, with Transmit Codabar Start/Stop Characters as default. (*)Transmit Codabar Start/Stop Characters Do not Transmit Codabar Start/Stop Characters For example: Do Not Transmit Codabar Start/Stop Characters. 1. -
Page 35: Checksum Verification
(*)Disable Code 11 Note: Read the "Disable Code 11" barcode will make the scanner not being able to read the Code 11 barcode. Thus, if the scanner cannot read the Code 11 barcode, please try to scan "Enable Code 11" to reset. For example: Enable Code 11. - Page 36 If the scanner is set to "Verify with Output Checksum Character", the scanner will check the data based on the last one or two characters of the barcode data. Inateck P7 default outputs checksum characters. If the scanner is set to "Verify without Output Checksum Character", the scanner will not output checksum character.
-
Page 37: Code 128
Exit without save 3.3.2 Enable/Disable GS1-128 (UCC/EAN-128) The GS1-128 standard belongs to the application standard of Code 128, so it complies with the coding rules of Code 128. P7 disables GS1-128 by default. You can set whether to enable GS1-128. -
Page 38: Enable/ Disable Usps And Fedex
Enable GS1-128 (*)Disable GS1-128 When reading GS1-128 barcode, P7 will output FNC1 in GS1-128 as character "|" by default. You can also set "FNC1 output as ascii code 29" and FNC1 will be replaced by ascii code 29. FNC1 output as ascii code 29 (*)FNC1 output as character "|"... -
Page 39: Code 39
3.4 Code 39 3.4.1 Enable/Disable Code 39 Decide whether to enable Code 39. Inateck P7 Scanner defaults “Enable Code 39” (*)Enable Code 39 Disable Code 39 3.4.2 Start/Stop Transmission Decide whether to transmit the Start/Stop characters. Inateck P7 takes disabling transmitting Code39 Start/ Stop Characters as default. -
Page 40: Checksum Verification
3.4.3 Checksum Verification Checksum character is not enforced to be included in the data of Code 39. If checksum character is included, it should be the last character of the barcode data. As a calculate value based on all of the data, Checksum character is used to check whether the data is correct or not. If the scanner is set to "Do Not Verify Code 39”, which is the default, then the scanner will read all the Code 39 barcode. -
Page 41: Ascii Code Recognition Range Setting
3.4.4 ASCII Code Recognition Range Setting Code 39 can include all ASCII characters. By default, the P7 disables Code 39 Full ASCII which means it only reads some ASCII characters. You can enable Code 39 Full ASCII via setting. Enable Code 39 Full ASCII... -
Page 42: Code 32
Enter setup Exit with save Exit without save 3.4.6 Code 32 Code 32, usually applied to Italian medical products, is a special form of Code 39. Inateck P7 defaults “Disable Code 32”. Enable Code 32 (*)Disable Code 32 The first character of Code 32 is fixed to be “A”. Decide whether to output the first character of Code 32 via selecting correspondent barcode to scan. -
Page 43: Code 93
Exit with save Exit without save 3.5 Code 93 3.5.1 Enable/Disable Code 93 Decide whether to read Code 93 by scanning correspondent barcode below. Inateck P7 defaults Enable Code 93. (*)Enable Code 93 Disable Code 93 Note: Read the "Disable Code 93" barcode will make the scanner not able to read the Code 93 barcode. -
Page 44: Ean-8
Enter setup Exit with save Exit without save 3.6 EAN-8 3.6.1 Enable/Disable EAN-8 Decide whether to read EAN-8 by scanning correspondent barcode below. Inateck P7 defaults “Enable EAN-8”. (*)Enable EAN-8 Disable EAN-8 3.6.2 Checksum Verification Decide whether to transmit EAN-8 Checksum via selecting correspondent barcode below to scan. -
Page 45: Ean-13
3. Read the "Transmit EAN-8 Checksum" barcode; 4. Read the "Exit with Save" barcode. 3.7 EAN-13 3.7.1 Enable/Disable EAN-13 Decide whether to read EAN-13 via selecting correspondent barcode below to scan. Inateck P7 defaults enable EAN-13. (*)Enable EAN-13 Disable EAN-13 3.7.2 Checksum Verification... -
Page 46: Isbn
3.7.3 ISBN Decide whether to convert the EAN-13 to ISBN by scanning correspondent barcode below. Inateck P7 defaults “Do Not convert EAN-13 to ISBN”. Convert EAN-13 to ISBN (*)Do Not Convert EAN-13 to ISBN Operations are as below if you want to convert EAN-13 to ISBN: 1. -
Page 47: Msi
Exit with save Exit without save 3.8 MSI 3.8.1 Enable/Disable MSI Decide whether to enable MSI barcode by scanning correspondent barcode below. Inateck P7 defaults “Disable MSI barcode”. Enable MSI (*)Disable MSI Note: Read the "Disable MSI" barcode will make the scanner unable to read the MSI barcode. -
Page 48: Checksum Verification
If the scanner is set to "Verify MSI with Output Checksum Character", the scanner will output the checksum characters as the last one or two characters of normal data. Inateck P7 takes outputting checksum characters as default. If the scanner is set to "Verify without Output Checksum Character", the scanner will not output the checksum character. -
Page 49: Upc-A
4. Read the "Exit with Save" barcode. Enter setup Exit with save Exit without save 3.9 UPC-A 3.9.1 Enable/Disable UPC-A Decide whether to enable UPC-A barcode by scanning correspondent barcode below. Inateck P7 defaults “Enable UPC-A barcode”. (*)Enable UPC-A Disable UPC-A... -
Page 50: Upc-A Output "0
3.9.4 UPC-A Number System Digit The first digit of UPC-A is the number system digit. Decide whether to Transmit UPC-A number system digit by scanning correspondent barcode below. Inateck P7 defaults “Transmit UPC-A number system digit”. (*)UPC-A output number system digit... -
Page 51: Upc-E
3.10.2 Enable/Disable UPC-E1 Most of the start character of UPC-E is 0. If you want to read the barcode with the start character “1”, please set the scanner to enable UPC-E, then set to enable UPC-E1. Inateck P7 defaults “Disable UPC-E 1”. -
Page 52: Start Character Transmission
Inateck P7 defaults “Do Not Convert UPC-E to UPC-A”. Convert UPC-E to UPC-A (*)Do Not Convert UPC-E to UPC-A 3.10.5 Checksum Verification Decide whether to transmit UPC-E Checksum by scanning correspondent barcode below. Inateck P7 defaults “Transmit UPC-E Checksum”. (*)Transmit UPC-E Checksum Do Not Transmit UPC-E Checksum... -
Page 53: Iata 2 Of 5
If the scanner is set to "Verify IATA 25 with Output Checksum Character", and the scanner will check the data based on the last character of the barcode data. If the check passes, Inateck P7 will read and output the Checksum Character as the last character of normal data. However, it will not be able to read IATA 25 without checksum character. -
Page 54: Interleaved 2 Of 5
Verify IATA 25 without Output Checksum Character 3.12 Interleaved 2 of 5 3.12.1 Enable / Disable Interleaved 25 Decide whether to enable Interleaved 25 by scanning correspondent barcode below. Inateck P7 defaults to “Enable Interleaved 25”. (*)Enable Interleaved 25 Disable Interleaved 25 Operations are as below if you want to enable Interleaved 25: 1. -
Page 55: Checksum Verification
Enable Matrix 25 (*)Disable Matrix 25 3.13.2 Checksum Verification Checksum character is not enforced to be included in the Matrix 25 data. If checksum character is included, it should be the last character of the barcode data. As a calculate value bases on all the data, Checksum character is used to check if the data is correct or not. -
Page 56: Standard 2 Of 5 / Industrial 2 Of 5
3.14 Standard 2 of 5 / Industrial 2 of 5 Standard 2 of 5 is also known as Industrial 2 of 5. 3.14.1 Enable / Disable Standard 25 Decide whether to enable Standard 25 by scanning correspondent barcode below. Inateck P7 defaults to “Disable Standard 25”. Enable Standard 25 (*)Disable Standard 25... -
Page 57: China Postal Code
Verify Standard 25 without Output Checksum Character 3.15 China Postal Code 3.15.1 Enable/Disable China Postal Code Decide whether to enable China Postal Code by scanning correspondent barcode below. Inateck P7 defaults to “Disable China Postal Code”. Enable China Postal Code (*)Disable China Postal Code... -
Page 58: Plessey
Verify China Postal Code with Output Checksum Character Verify China Postal Code without Output Checksum Character 3.16 Plessey 3.16.1 Enable/Disable Plessey Decide whether to enable Plessey by scanning correspondent barcode below. Inateck P7 defaults to “Disable Plessey ”. Enable Plessey (*)Disable Plessey 3.16.2 Checksum Verification... -
Page 59: Telepen
Enter setup Exit with save 3.17 Telepen 3.17.1 Enable/Disable Telepen Decide whether to enable Telepen by scanning correspondent barcode below. Inateck P7 defaults to “Disable Telepen”. Enable Telepen (*)Disable Telepen 3.17.2 Checksum Verification Decide whether to verify the Telepen by scanning correspondent barcode below. Inateck P7 defaults to “Do Not Verify Telepen”. -
Page 60: Telepen Alpha
(*)Disable Telepen Alpha Enter setup Exit with save 3.18 GS1 DataBar 3.18.1 Enable/Disable GS1 DataBar Decide whether to enable GS1 DataBar by scanning correspondent barcode below. Inateck P7 defaults to “Enable GS1 DataBar”. (*)Enable GS1 DataBar Disable GS1 DataBar Enter setup... -
Page 61: Gs1 Databar Expanded
3.19 GS1 DataBar Expanded 3.19.1 Enable/Disable GS1 DataBar Expanded Decide whether to enable GS1 DataBar Expanded by scanning correspondent barcode below. Inateck P7 defaults to “Enable GS1 DataBar Expanded”. (*)Enable GS1 DataBar Expanded Disable GS1 DataBar Expanded Enter setup Exit with save 3.20 GS1 DataBar Limited... -
Page 62: Chapter 4 Defining Output Format
Telepen GS1 DataBar Expanded GS1 DataBar GS1 DataBar Limited Decide whether to add code ID in front of the data of barcode. Inateck P7 defaults to “Ignore Code ID”. Apply Code ID (*)Ignore Code ID Steps to apply Code ID are as below: 1). -
Page 63: Stop Code Of Barcode Setting
4.2 Stop Code of Barcode Setting Decide whether to apply Enter as the stop character of barcode data by scanning correspondent barcode below. Inateck P7 defaults to “Apply Enter as the stop character of barcode”. (*)Apply Enter as Stop Character... -
Page 64: Customized Settings Of Prefix And Suffix Code Of Barcode
4.3 Customized Settings of Prefix and Suffix Code of Barcode Customized 1 to 32 digits prefix / suffix setting is supported by Inateck P7. Though Inateck P7 takes recovering the prefix and suffix as default, Hiding the prefix and suffix is also available through scanning correspondent barcode. -
Page 65: Delete Character(S) On Output Result
4.4 Delete Character(s) on Output Result Inateck P7 can help users delete 0 to 99 digits from both the beginning and the ending characters before outputs result. As default setting, no character, or 0 digit will be deleted in the output result. - Page 66 7 digits 8 digits 9 digits Steps to delete 12 digits at the beginning and 4 digits at the end: 1. Read the “Enter setup” barcode; 2. Read “Delete Beginning Characters”; 3. Read “1 digit”; 4. Read “2 digits”; 5. Read “Delete Ending Characters”; 6.
-
Page 67: Letter Case Setting
4.5 Letter Case Setting Inateck P7 can change all the letter cases of barcode into uppercase or lowercase. Though it takes “Not to Alter the Letter Case of barcodes” as default, letter case of barcodes can be altered through scanning correspondent bar code below. -
Page 68: Additional Code
ISBN, ISSN, UPC-A and UPC-E. Being 2 or 5 characters, additional code is usually on the right side of the main code but with shorter height. Inateck P7 will only be able to read the main code if additional code is disabled. -
Page 69: Separator
4.7 Separator Decide whether to add separator “-” between a barcode data by selecting barcodes below to scan. This setting is only available for additional code, ISBN code and ISSN code. The Inateck P7 defaults to “Disable separator”. 打开两位附加码 Enable Separator (*)Disable Separator... -
Page 70: Caps Lock Control
Exit without save 4.9 Caps Lock Control When you operate Inateck P7 on a Windows system, the barcode output might change with the status of the key Caps Lock. To avoid mistakes caused this way, you can activate the “Rid Barcode of Caps Lock control”. -
Page 71: Output The Barcodes Start With Specific Characters
4.10 Output the barcodes start with specific characters P7 can output the barcodes that start with specific characters (6 digits at most). The supported characters are in Appendix I. By default, Inateck P7 outputs barcodes that start with any character. -
Page 72: Output Inverse Barcode
"Q" refers to Quantity. Inateck P7 can hide these specific start characters of code 128 and code 39, like D, K, P, Q, S, V, 1P, 1T, 10D, 17V, 2P and 4L. After hiding, they won't be output. Inateck P7 defaults "Output the specific start characters". -
Page 73: Time Stamp
Exit without save 4.13 Time Stamp The time stamp displays Time (hours, minutes, seconds) and Date (year, month, day). Inateck P7 defaults "Do Not output time stamp". You can decide whether to output the time stamp. Also, you can set to output Time only, output Date only, or both. After setting, the time stamp will be displayed in the 24-hour format and added to the end of each barcode. - Page 74 Due to the different time zone or dead battery, the problem that the time stamp and local time are not synchronized may occur. To solve this problem, please set the time stamp via scanning the barcodes below. Set Year in Time Stamp Set Month in Time Stamp Set Day in Time Stamp Set Hour in Time Stamp...
- Page 75 Number 4 Number 5 Number 6 Number7 Number 8 Number 9 Enter setup Exit with save For example, steps to set the Time Stamp “09:34:07 2019/04/18” are as follows: 1. Read the “Enter setup” barcode; 2. Read the “Set Year in Time Stamp”; 3.
-
Page 76: Shortcut Key
The shortcut key refers to outputting the characters marked below the barcodes in Appendix. For example, if you scan the barcode "Tab" in the Appendix, the characters "Tab" will be output. Inateck P7 defaults "Disable Shortcut Key". You can decide whether to enable the Shortcut Key. Enable Shortcut Key (*)Disable Shortcut Key... - Page 77 &...
- Page 78 < >...
- Page 81 Enter Backspace Delete ↑ ↓ ←= →...
- Page 82 Insert Home Page Up Page Down...
Need help?
Do you have a question about the P7 and is the answer not in the manual?
Questions and answers