Table of Contents
Advertisement
Advertisement
Table of Contents

Subscribe to Our Youtube Channel
Related Manuals for Inateck P6


Summary of Contents for Inateck P6
- Page 1 User Manual P6 Barcode Scanner English...
-
Page 2: Table Of Contents
Check Software Version Save Custom Settings Chapter 1 Features and Basic Setups 1.1. Battery 1.1.1. Mounting the battery (charging) 1.1.2. Basic operation of Inateck P6 Barcode Scanner 1.1.3. Auto Sleep Mode 1.2. Data Buffer 1.2.1. Wireless Mode 1.2.2. Inventory Mode 1.3. - Page 3 Chapter 2 How to Connect with Computer/phone/POS 2.1. USB Wired Data Transmission 2.2. Wireless Data Transmission 2.3. Transmission Speed Chapter 3 Symbology Settings 3.1. Codabar 3.1.1. Enable / Disable Codabar 3.2. Code 11 3.2.1. Enable/Disable Code 11 3.2.2. Checksum Verification 3.3.
- Page 4 3.11. IATA 2 of 5 3.11.1. Enable/ Disable IATA 25 3.11.2. Checksum Verification 3.12. Interleaved 2 of 5 3.12.1. Enable / Disable Interleaved 25 3.13. Matrix 2 of 5 3.13.1. Enable or Disable Matrix 25 3.13.2. Checksum Verification 3.14. Standard 2 of 5 / Industrial 2 of 5 3.14.1.
-
Page 5: Important Notice
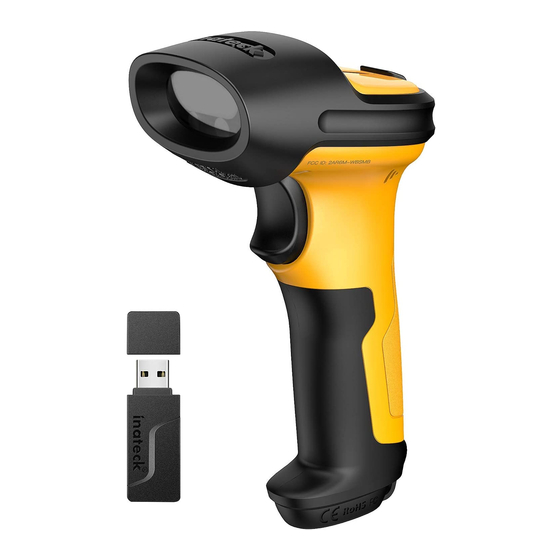
* The power Switch of the scanner should be switched to off mode before long term non-use. * You are suggested to write down the specific scenario and consult the maintenance person should you find the scanner abnormal. Overview of Inateck P6 barcode Scanner Appearance Laser Window Trigger... -
Page 6: Features Of The Scanner
Features of the Scanner * Featured by four types of scanning mode, including Auto Laser-off Mode, Auto- induction Mode, Continuous scanning Mode and Manual Mode. * Six international keyboards supported: North American Keyboard, German Keyboard, French Keyboard, Spanish Keyboard, Italian Keyboard, UK English Keyboard. * The volume of sound can be well adjusted through barcode settings. -
Page 7: Product Specification
Product Specification PHYSICAL CHARACTERISTICS Model Number Inateck P6 Material PC+TPU Length 92mm*Width 69mm* Height 162mm Size Weight 200g Color Black, Yellow DC 5V Voltage Battery Capacity 2600mAh PERFORMANCE CHARACTRISTICS Light Source Laser LED 655 ± 5nm Sensor Linear image sensor... -
Page 8: Correct Aiming
Correct Aiming Incorrect Aiming... -
Page 9: Quick Start
LED2 indicator will automatically be turned off. Exit with save Note: The Inateck P6 Barcode Scanner will respond with a long beep if any setup error occurs, for instance, none-setting barcodes are scanned under setting mode. Setup errors can be canceled by scanning barcode “Exit without Save”. -
Page 10: The Flow Chart Of Setup
“Enter setup” barcode will emerge in this and the following chapters of manual, the Inateck P6 scanner will go into setting mode once this barcode is scanned successfully. Once the barcode is scanned successfully, the Inateck P6 Barcode Scanner will respond with three chord sounds, and the LED2 indicator will be on with color becoming blue. -
Page 11: Exit With Save
“Exit without Save” barcode is suggested to scan when error setup occurs. And just like the response of scanning barcode “Enter with Save”, the Inateck P6 Barcode Scanner will respond with three chord sounds, and the LED2 indicator will be on with color turning blue if the barcode is scanned successfully. -
Page 12: Check Software Version
Check Software Version If you want to check the software version of Inateck P6, you should scan the “Enter Setup” and “Output Software Version” barcode: Enter Setup Output Software Version Checking the software version is usually done in the enter setup mode, so it is necessary to scan “Exit without Save”... - Page 13 2. If you want to restore to custom settings after resetting the barcode scanner, just read ‘Enter Setup’ → ‘Restore Custom Settings’ → ‘Exit with Save’ barcode in turn, and the custom settings will be restored. Enter Setup Restore Customs Settings Exit with save...
-
Page 14: Chapter 1 Features And Basic Setups
Switch the Power Switch to “On” mode to get the scanner turned on. Scan barcode Click the Trigger (the scan button), and Inateck P6 will emit a red laser. Turn off the scanner Switch the Power Switch to “Off” mode to turn the scanner off. -
Page 15: Auto Sleep Mode
1.1.3. Auto Sleep Mode In order to conserve battery power, user can specify the time interval for the scanner to automatically turn off. By default, it is set to be 3 minutes. 1 min (*) 3 min 5 min 10 min E g.: Steps to set 5 minutes for the scanner to be automatically turn off are as below: 1. - Page 16 Note: If you want to keep the scanner being powered on all the time, scan "Exit Auto Sleep mode" barcode instead of step 2 and 3. Exit Auto sleep mode...
-
Page 17: Data Buffer
1.2. Data Buffer During the 2.4GHz connection (Wireless Mode), the Inateck P6 Scanner uses a 256KB memory as a data buffer, and sends the collected data to the host computer one by one via the 2.4GHz. The 256KB transmit buffer on the scanner can hold as many as 5000 barcodes bases on Code128. -
Page 18: Inventory Mode
1.2.2. Inventory Mode If you want to keep the barcodes in the buffer of Inateck P6 for multiple uploading, you can choose inventory mode. In inventory mode, Inateck P6 will count the number of the barcodes automatically. Users may use inventory mode to keep scanned barcodes in the buffer of Inateck P6, and upload them to computer in batches. -
Page 19: Led Indicator
: 0.5s) Red LED stays on Inateck P6 scanner in charge (Red LED off when battery is full) 1.4. Beeper The beeper built in Inateck P6 can help the user to know about the current operation status. Beeping Meaning... -
Page 20: Beeper Volume
1.4.1. Beeper Volume Mute Minimum Volume (*) Medium Volume Maximum Volume For example: Steps to set Minimum Volume for beeper are as below: 1. Read the "Enter Setup" barcode; Enter Setup 2. Read the "Minimum Volume" barcode; Minimum Volume 3. Read the "Exit with Save" barcode. Exit with Save... -
Page 21: Scanning Modes
If the barcode is not successfully scanned, the laser will be off automatically after auto laser-off waiting time, which usually defaults to 2 seconds and can be setup to 1s, 2s, 3s and 5s. Yet the laser will be off as soon as Inateck P6 scans barcode. (*) Auto laser-off Mode... -
Page 22: Auto-Induction Mode
There’s no need to click the trigger under the Auto-induction Mode, the users just need to move the barcodes to be scanned in front of the light band of Inateck P6, in which a red light line will show up indicating the scanner is ready to scan. The scanning will not stop until the scanner is under the following situation: * Read a barcode successfully;... -
Page 23: Continuous Scanning Mode
The laser of the scanner will not go off until Inateck P6 scans barcode. And the laser will go off once the scanner scans barcode successfully. And then the scanner will go into... - Page 24 Enter setup Exit with Save Exit without Save For Example, steps to set the scanner into Continuous Scanning mode are as below: 1. Read the "Enter Setup" barcode; 2. Read the "Continuous Scanning Mode" barcode; 3. Read the "Exit with Save" barcode. Steps to set the scanner into Continuous Scanning mode and set the Intermittent time of Continuous scanning setup into 1s are as below: 1.
-
Page 25: Manual Mode
1.5.4. Manual Mode Under this Manual Mode, the Inateck P6 Scanner will emit a red light line which indicates the scanner could scan if the user keeps pressing the Trigger. And the scanning will not stop until the scanner under the following situation. -
Page 26: Types Of Keyboard
1. Scan the “ Enter Setup” barcode; 2. Scan the “German Keyboard” barcode; 3. Scan the “Enter with Save” barcode to end language setting. Note: The keyboard language of Inateck P6 should keep in consistent with that of computer, otherwise, garbled might appear in scanning result. -
Page 27: Symbologies Supported
1.7. Symbologies Supported Most of the popular barcode symbologies are supported by the Inateck P6 Scanner. You can check them in list below. Symbologies Supported: Enable/Disable Defaults Codabar Enable Code 11 Disable Code 128 Enable Enable Code 39 Code 93... -
Page 28: Chapter 2 How To Connect With Computer/Phone/Pos
The Inateck P6 supports 2.4GHzs wireless data transmission, yet this can only be realized after pairing with dongle. Since the pairing of our Inateck P6 has been finished when it was produced, All you need to do is to plug the dongle into a USB 2.0 or a USB 3.0 interface, and you are able to use the scanner to scan barcode or transmit data if an text on your computer is opened. -
Page 29: Transmission Speed
2.3. Transmission Speed By defaults, the Inateck P6 scanner is working with speedy data transmission so as to maximally improve your efficiency. If the Inateck P6 works with some lower speed devices, like some android, it is suggested to set the scanner to low speed transmission mode in case of data loss. -
Page 30: Chapter 3 Symbology Settings
Chapter 3 Symbology Settings 3.1. Codabar 3.1.1. Enable / Disable Codabar Decide whether to enable Codabar through selecting correspondent barcode below. The Inateck P6 Scanner defaults enable Codabar contents. (*)Transmit Codabar Start/Stop Do not Transmit Codabar Start/Stop Characters Characters Enter Setup... -
Page 31: Code
3.2. Code 11 3.2.1. Enable/Disable Code 11 Decide whether to include Enable/Disable characters in the data being transmitted by scanning relevant barcodes below, with disable Code 11 as default. Enable Code 11 Disable Code11 Enter Setup Exit with Save Exit without Save Note: Read the "Disable Code 11"... -
Page 32: Checksum Verification
If the check passes, the scanner will output the checksum characters as the last one or two characters of normal data. Inateck P6 default outputs checksum characters. If the scanner is set to "Verify without Output Checksum Character", the scanner will not output checksum character. - Page 33 For example, Operations are as below if you want to set Verify with two digits Output Checksum Character: 1). Scan the “Enter Setup” barcode; 2). Read the "Verify with one digit Output Checksum Character" barcode; 3). Read the "Verify without Output Checksum Character" barcode; 4) Read the "Exit with Save"...
-
Page 34: Code 128
3.3. Code 128 3.3.1. Enable / Disable Code 128 Decide whether to enable Code 128. Inateck P6 Scanner defaults “Enable Code 128”. (*) Enable Code 128 Disable Code 128 Enter Setup Exit with Save Exit without Save Note: Read the "Disable Code 128" barcode will make the scanner unable to read Code 128 barcode. -
Page 35: Code
3.4. Code 39 3.4.1. Enable/Disable Code 39 Decide whether to enable Code 39. Inateck P6 Scanner defaults “Enable Code 39”. (*) Enable Code 39 Disable Code 39 Enter Setup Exit with Save Exit without Save Note: Read the "Disable Code 39" barcode will make the scanner unable to read the Code 39 barcode. -
Page 36: Start/Stop Transmission
3.4.2. Start/Stop Transmission Decide whether to include the Start/Stop characters in the data being transmitted through selecting correspondent barcode below. Inateck P6 takes disabling transmitting Code39 Start/ Stop Characters as default. Transmit Code 39 Start/S top (*) Do Not Transmit Code 39 Start/... -
Page 37: Checksum Verification
3.4.3. Checksum Verification Checksum character is not enforced to be included in the data of Code 39. If checksum character is included, it should be the last character of the barcode data. As a calculate value based on all of the data, Checksum character is used to check whether the data is correct or not. -
Page 38: Ascii Code Recognition Range Setting
Decide whether to support Code 39 Full ASCII that includes all the alphanumeric and special character by selecting the correspondent barcodes below. The inateck P6 Scanner takes “Enable Code 39 Full ASCII” as defaults. It could Disable full ASCII Code 39 “via setting. -
Page 39: Vin
3.4.5. VIN Code 39 can be used to make VIN (short for Veterinary Information Network), which consists of 17 characters. Inateck P6 defaults “Disable VIN”. Enable VIN (*) Disable VIN Enter Setup Exit with Save Exit without Save Operations are as below if you want to enable VIN: 1. -
Page 40: Code
3.4.6. Code 32 Code 32, usually applied to Italian medical products, is a special form of Code 39. Inateck P6 defaults “Disable Code 32”. Enable Code 32 (*) Disable Code 32 Enter Setup Exit with Save Exit without Save Operations are as below if you want to enable Code 32: 1. - Page 41 Operations are as below if you want to enable first character of Code 32: 1. Read the "Enter Setup" barcode; 2. Read the "Enable first character of Code 32" barcode; 3. Read the "Exit with Save" barcode.
-
Page 42: Ean-8
3.6. EAN-8 3.6.1. Enable/Disable EAN-8 Decide whether to read EAN-8 by scanning correspondent barcode below. Inateck P6 defaults “Enable EAN-8”. (*) Enable EAN-8 Disable EAN-8 Enter Setup Exit with Save Exit without Save Operations are as below if you want to enable EAN-8: 1. -
Page 43: Checksum Verification
3.6.2. Checksum Verification Decide whether to transmit EAN-8 Checksum via selecting correspondent barcode below to scan. Inateck P6 defaults “Transmit EAN-8 Checksum”. (*)Transmit EAN-8 Checksum Do Not Transmit EAN-8 Checksum Enter Setup Exit with Save Exit without Save Operations are as below if you want to enable EAN-8 and transmit EAN-8 Checksum: 1. -
Page 44: Ean-13
3.7. EAN-13 3.7.1. Enable / Disable EAN-13 Decide whether to read EAN-13 via selecting correspondent barcode below to scan. Inateck P6 defaults enable EAN-13. Enable EAN-13 Disable EAN-13 Enter Setup Exit with Save Exit without Save Operations are as below if you want to enable EAN-13: 1. -
Page 45: Checksum Verification
3.7.2. Checksum Verification Decide whether to Transmit EAN-13 Checksum via selecting correspondent barcode below to scan. Inateck P6 defaults transmit EAN-13 Checksum. Transmit EAN-13 Checksum Do Not Transmit EAN-8 Checksum Enter Setup Exit with Save Exit without Save Operations are as below if you want to Enable EAN-13 and transmit EAN-13 Checksum: 1. -
Page 46: Isbn
3.7.3. ISBN Decide whether to convert the EAN-13 to ISBN by scanning correspondent barcode below. Inateck P6 defaults “Do Not convert EAN-13 to ISBN”. Convert EAN-13 to ISBN (*) Do Not Convert EAN-13 to ISBN Enter Setup Exit with Save... -
Page 47: Issn
3.7.4. ISSN Decide whether to convert the EAN-13 to ISSN by scanning correspondent barcode below. Inateck P6 defaults “Do Not convert EAN-13 to ISSN”. Convert EAN-13 toISSN (*) Do Not Convert EAN-13 to ISSN Enter Setup Exit with Save Exit without Save Operations are as below if you want to convert EAN-13 to ISSN: 1. -
Page 48: Msi
3.8. MSI 3.8.1. Enable / Disable MSI barcode Decide whether to enable MSI barcode by scanning correspondent barcode below. Inateck P6 defaults “Disable MSI barcode”. Enable MSI (*) Disable MSI Enter Setup Exit with Save Exit without Save Note: Read the "Disable MSI" barcode will make the scanner unable to read the MSI barcode. -
Page 49: Checksum Verification
Inateck P6 takes outputting checksum characters as default. If the scanner is set to "Verify without Output Checksum Character", the scanner will not output the checksum character. - Page 50 Operations are as below if you want to verify with one digit checksum character and do not transmit checksum character: 1. Read the "Enter Setup" barcode; 2. Read the "Verify with one digit Checksum Character" barcode; 3. Read the "Verify without Output Checksum Character" barcode; 4.
-
Page 51: Upc-A
3.9. UPC-A 3.9.1. Enable / Disable UPC-A Decide whether to enable UPC-A barcode by scanning correspondent barcode below. Inateck P6 defaults “Disable UPC-A barcode”. Enable UPC-A (*) Disable UPC-A Enter Setup Exit with Save Exit without Save Operations are as below if you want to enable UPC-A barcode: 1. -
Page 52: Upc-A Output "0
3.9.2. UPC-A output “0” Decide whether to add "0" in the output of UPC-A data by scanning correspondent barcode below. Inateck P6 takes UPC-A Do Not output “0” as default. UPC-A Output "0" (*) UPC-A Do Not Output "0" Enter Setup... -
Page 53: Checksum Verification
3.9.3. Checksum Verification Decide whether to Transmit UPC-A Checksum by scanning correspondent barcode below. Inateck P6 defaults “Transmit UPC-A Checksum”. (*) Transmit UPC-A Checksum Do Not Transmit UPC-A Checksum Enter Setup Exit with Save Exit without Save Operations are as below if you want to enable UPC-A and transmit UPC-A Checksum: 1. -
Page 54: Upc-E
3.10. UPC-E 3.10.1. Enable / Disable UPC-E Decide whether to Enable UPC-E by scanning correspondent barcode below. Inateck P6 defaults “Enable UPC-E” . (*) Enable UPC-E Disable UPC-E Enter Setup Exit with Save Exit without Save Operations are as below if you want to enable UPC-E barcode: 1. -
Page 55: Enable / Disable Upc-E 1
3.10.2. Enable / Disable UPC-E 1 Decide whether to Enable UPC-E 1 by scanning correspondent barcode below. Inateck P6 defaults “Disable UPC-E 1”. Enable UPC-E 1 (*) Disable UPC-E 1 Enter Setup Exit with Save Exit without Save Note: Most of the Start character of UPC-E is 0, Please Set the scanner to able to read the UPC-E barcode before enabling the UPC-E 1. -
Page 56: Start Character Transmission
3.10.3. Start Character Transmission Decide whether to include the Start character, which is limited to be “0”or “1”, in the data being transmitted. Inateck P6 defaults “Transmit UPC-E Start Characters”. (*) Transmit UPC-E Start Character Do Not Transmit UPC-E Start... -
Page 57: Convert Upc-E To Upc-A
3.10.4. Convert UPC-E to UPC-A Decide whether to convert the UPC-E to UPC-A by scanning correspondent barcode below. Inateck P6 defaults “Convert UPC-E to UPC-A”. (*) Convert UPC-E to UPC-A Do Not Convert UPC-E to UPC-A Enter Setup Exit with Save... -
Page 58: Checksum Verification
3.10.5. Checksum Verification Decide whether to transmit UPC-E Checksum by scanning correspondent barcode below. Inateck P6 defaults “Transmit UPC-E Checksum”. (*) Transmit UPC-E Checksum Do Not Transmit UPC-E Checksum Enter Setup Exit with Save Exit without Save Operations are as below if you want to transmit UPC-E Checksum: 1. -
Page 59: Enable/ Disable Iata
3.11. IATA 2 of 5 3.11.1. Enable/ Disable IATA 25 Decide whether to enable IATA 25 by scanning correspondent barcode below. ,Inateck P6 defaults “Disable IATA 25”. Enable IATA25 (*) Disable IATA 25 Enter Setup Exit with Save Exit without Save Operations are as below if you want to enable IATA 25 barcode: 1. -
Page 60: Checksum Verification
If the check passes, Inateck P6 will read but will NOT output the Checksum Character as the last character of normal data; However it will not be able to read IATA 25 without checksum character. -
Page 61: Interleaved 2 Of
3.12. Interleaved 2 of 5 3.12.1. Enable / Disable Interleaved 25 Decide whether to enable Interleaved 25 by scanning correspondent barcode below. Inateck P6 defaults to “Enable Interleaved 25”. (*) Enable Interleaved 25 Disable Interleaved 25 Enter Setup Exit with Save... -
Page 62: Matrix 2 Of
3.13. Matrix 2 of 5 3.13.1. Enable or Disable Matrix 25 Decide whether to enable Matrix 25 by scanning correspondent barcode below. Inateck P6 defaults to “Disable Matrix 25”. Enable Matrix 25 (*)Disable Matrix 25 Enter Setup Exit with Save... -
Page 63: Checksum Verification
3.13.2. Checksum Verification Checksum character is not enforced to be included in the Matrix 25 data. If checksum character is included, it should be the last character of the barcode data. As a calculate value bases on all the data, Checksum character is used to check if the data is correct or not. -
Page 64: Standard 2 Of 5 / Industrial 2 Of
Standard 2 of 5 is also known as Industrial 2 of 5. 3.14.1. Enable / Disable Standard 25 Decide whether to enable Standard 25 by scanning correspondent barcode below. Inateck P6 defaults to “Disable Standard 25”. Enable Standard 25 (*) Disable Standard 25... -
Page 65: Checksum Verification
3.14.2. Checksum Verification Checksum character is not enforced to be included in the data of Standard 25. If checksum character is included, it should be the last character of the barcode data. As a calculate value based on all the data, Checksum character is used to check whether the data is correct or not. -
Page 66: China Postal Code
3.15. China Postal Code 3.15.1. Enable/Disable China Postal Code Decide whether to enable China Postal Code by scanning correspondent barcode below. Inateck P6 defaults to “Disable China Postal Code”. Enable China Postal Code (*) Disable China Postal Code Enter Setup... -
Page 67: Checksum Verification
3.15.2. Checksum Verification Checksum character is not enforced to be included in the data of Standard 25. If checksum character is included, it should be the last character of the barcode data. As a calculate value based on all of the data, Checksum character is used to check whether the data is correct or not. -
Page 68: Chapter 4 Defining Output Format
IATA 2 of 5 Code 11 China Postal Code ISBN ISSN Decide whether to add code ID in front of the data of barcode. Inateck P6 defaults to “Ignore Code ID”. Apply Code ID (*) Ignore Code ID Enter Setup... - Page 69 Steps to apply Code ID are as below: 1). Read the "Enter Setup" barcode; 2). Read the "Apply Code ID" barcode; 3). Read the "Exit with Save" barcode.
-
Page 70: Stop Code Of Barcode Setting
4.2. Stop Code of Barcode Setting Decide whether to apply Enter as the stop character of barcode data by scanning correspondent barcode below. Inateck P6 defaults to “Apply Enter as the stop character of barcode”. (*) Apply Enter as Stop Character... -
Page 71: Customized Settings Of Prefix And Suffix Code Of Barcode
4.3. Customized Settings of Prefix and Suffix Code of Barcode Customized 1 to 8 digits prefix / suffix setting is supported by Inateck P6. Though Inateck P6 takes recovering the prefix and suffix as default, Hiding the prefix and suffix is also available through scanning correspondent barcode. -
Page 72: Delete Character(S) On Output Result
4.4. Delete Character(s) on Output Result Inateck P6 can help users delete 0 to 99 digits of both the beginning and the ending characters before outputs result. As default setting, no character, or 0 digit being deleted as output result. More details are as below. - Page 73 4) Scan “Exit with Save” Barcode Exit with Save Note: Refer to the setting of “delete 0 digit character” if no character should be deleted.
-
Page 74: Letter Case Setting
4.5. Letter Case Setting Inateck P6 can change all the letter cases of barcode into uppercase or lowercase. Though it takes “Not to Alter the Letter Case of barcodes” as default, letter case of barcodes can be altered through scanning correspondent bar code below. -
Page 75: Additional Code
8,EAN-13,ISBN,ISSN,UPC-A and UPC-E. Being 2 or 5 characters, additional code is usually on the right side of the main code but with shorter height. Inateck P6 will only be able to read the main code if additional code is disabled. -
Page 76: Five Digits Additional Code
4.6.2. Five digits Additional Code Decide whether to read five digits additional code, which applies to EAN-8, EAN-13, ISBN, ISSN, UPC-A and UPC-E, by scanning correspondent barcode below. Inateck P6 defaults to “Disable Five Digits Additional Code”. Enable Five Digits Additional Code... -
Page 77: Separator
Decide whether to add separator “-” between a barcode data by selecting barcodes below to scan. This setting is only available for additional code, ISBN code and ISSN code. The Inateck P6 defaults to “Disable separator”. Enable Separator (*) Disable Separator... -
Page 78: Short Barcode
39 and Codabar, is supported by Inateck P6. Though disabling the reading of short barcode is taken as default as it would increase the anti-jamming capability of Inateck P6 and prevent error scanning from happening. However, the following setting steps are suggested if unreadable short barcode occurs. -
Page 79: Appendix 1 Prefix/Suffix Number And Symbol List
Appendix 1 Prefix/Suffix number and symbol list Space ! “ &... - Page 80 <...
- Page 81 >...
- Page 85 Enter Backspace...
- Page 86 Delete...
-
Page 87: Contact Information
Tel.: +1 702-445-7528 Phone hours: Weekdays 9 AM to 5 PM (EST) Email: support@inateck.com Web: www.inateck.com Addr.: Inateck Technology Inc, 6045 Harrison Drive Suite 6, Las Vegas, Nevada 89120 Germany Tel.: +49 342-07673081 Fax.: +49 342-07673082 Phone hours: Weekdays 9 AM-5 PM (CET) Email: support@inateck.com...
Need help?
Do you have a question about the P6 and is the answer not in the manual?
Questions and answers