Table of Contents
Advertisement
Quick Links
IMPORTANT SAFETY NOTICES
PREVENTION OF PHYSICAL INJURY
1. Before disassembling or assembling parts of the copier and peripherals,
make sure that the copier power cord is unplugged.
2. The wall outlet should be near the copier and easily accessible.
3. Note that the optional anti-condensation heaters are supplied with
electrical voltage even if the main switch is turned off.
4. If any adjustment or operation check has to be made with exterior covers
off or open while the main switch is turned on, keep hands away from
electrified or mechanically driven components.
5. The inside and the metal parts of the fusing unit become extremely hot
while the copier is operating. Be careful to avoid touching those
components with your bare hands.
6. When the development unit, cleaning unit, drum unit, or the DF is
removed from the machine, the upper unit becomes lighter. If the upper
unit is released under this condition, it tends to open very abruptly. The
service engineer might be injured if he is leaning over the machine at this
time. Also, the machine might move due to the shock of the upper unit
opening abruptly. To avoid possible injury or machine damage, hold the
upper unit firmly when opening the unloaded upper unit.
7. Due to variation in the tolerance of the torsion springs, the upper unit
cannot be held at an angle of 16 degrees by itself when the DF is
installed. To avoid possible injury, always use the upper unit stand to
keep the upper unit open.
HEALTH SAFETY CONDITIONS
1. Never operate the copier without the ozone filter installed.
2. Always replace the ozone filter at 80K copy intervals.
3. Toner and developer are non-toxic, but if you get either of them in your
eyes by accident, it may cause temporary eye discomfort. Try to remove
with eye drops or flush with water as first aid. If unsuccessful, get medical
attention.
©1994 By Ricoh Company Ltd. All rights reserved
Advertisement
Table of Contents

Related Manuals for Ricoh Robin


Summary of Contents for Ricoh Robin
- Page 1 3. Toner and developer are non-toxic, but if you get either of them in your eyes by accident, it may cause temporary eye discomfort. Try to remove with eye drops or flush with water as first aid. If unsuccessful, get medical attention. ©1994 By Ricoh Company Ltd. All rights reserved...
-
Page 2: Observance Of Electrical Safety Standards
OBSERVANCE OF ELECTRICAL SAFETY STANDARDS 1. The copier and its peripherals must be installed and maintained by a customer service representative who has completed the training course on those models. – CAUTION – 2. The RAM pack has a lithium battery which can explode if handled incorrectly. -
Page 3: Overall Machine Information
SECTION 1 OVERALL MACHINE INFORMATION... -
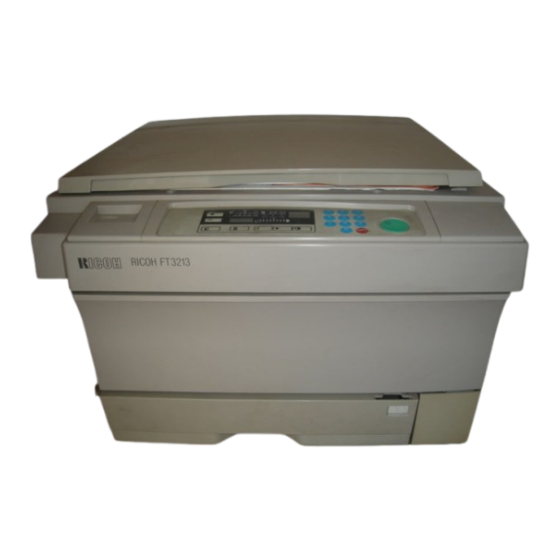
Page 4: Specifications
24 June 1994 SPECIFICATIONS 1. SPECIFICATIONS Configuration: Desk top Copy Process: Dry electrostatic transfer system Original Type: Sheet/Book Original Alignment: Left center Original Size: Maximum: A3/11" x 17" (lengthwise) – A152 copier B4/10" x 14" (lengthwise) – A151 copier Copy Paper Size: Maximum: B4/10"... - Page 5 SPECIFICATIONS 24 June 1994 Automatic Reset: 1 minute standard setting; can also be set to 3 minutes or no automatic reset. Energy Saver Function: Automatic Paper Capacity: Paper tray – 250 sheets Bypass feed table – 1 sheet Toner Replenishment: Cartridge exchange (320 g/cartridge) Copy Tray Capacity: 100 sheets (B4/10"...
- Page 6 24 June 1994 SPECIFICATIONS Weight: Copier only: 43 kg (94.8 lb) With DF: 50 kg (110.2 lb) Optional Equipment: Document feeder (A152 copier only) (Sales items) Key counter Optional Equipment: Drum anti-condensation heater (Service items) Optics anti-condensation heater Pre-transfer lamp Optics cooling fan (for A151 copier only) •...
-
Page 7: Copy Processes Around The Drum
COPY PROCESSES AROUND THE DRUM 24 June 1994 2. COPY PROCESSES AROUND THE DRUM 2. EXPOSURE 1. DRUM CHARGE 3. ERASE 8. QUENCHING 4. DEVELOPMENT 7. CLEANING 6. PAPER 5. IMAGE TRANSFER SEPARATION... - Page 8 24 June 1994 COPY PROCESSES AROUND THE DRUM 1. DRUM CHARGE In the dark, the charge corona unit gives a uniform negative charge to the organic photoconductive (OPC) drum. The charge remains on the surface of the drum because the OPC drum has a high electrical resistance in the dark.
-
Page 9: Copy Process Control
COPY PROCESS CONTROL 24 June 1994 3. COPY PROCESS CONTROL Exposure Lamp Development Bias Grid Voltage Erase Lamp Voltage Voltage Image Standard image Depends on Base exposure lamp Base bias voltage factor Density density grid voltage paper size voltage (Manual or ADS (Manual or ADS mode Control (–680 V) -
Page 10: Mechanical Component Layout
24 June 1994 MECHANICAL COMPONENT LAYOUT 4. MECHANICAL COMPONENT LAYOUT 20 21 22 23 24 25 26 1. Semicircular Feed Rollers 12. Hot Roller Strippers 24. Erase Lamp 2. Paper Tray 13. Exhaust Blower Motor 25. Drum 3. Registration Rollers 14. -
Page 11: Electrical Component Layout
ELECTRICAL COMPONENT LAYOUT 24 June 1994 5. ELECTRICAL COMPONENT LAYOUT 1. Paper Tray Switch 18. Optics Thermofuse 31. 4th/5th Mirror Motor (A152 copier only) 2. Relay Sensor 19. Auto Image Density Sensor 32. Main Motor Capacitor 20. Fusing Thermistor 3. Registration Clutch 33. -
Page 12: Electrical Component Descriptions
24 June 1994 ELECTRICAL COMPONENT DESCRIPTIONS 6. ELECTRICAL COMPONENT DESCRIPTIONS Motors INDEX SYMBOL NAME FUNCTION Drives all the main unit components except for the Main Motor optics unit and fans. (115/220–240 Vac [ac synchronous]) Scanner Motor Drives the scanners (1st and 2nd). (dc stepper) Positions the lens according to the selected magnification. - Page 13 ELECTRICAL COMPONENT DESCRIPTIONS 24 June 1994 Switches INDEX SYMBOL NAME FUNCTION Main Switch Supplies power to the copier. Front Cover Cuts the ac power line, when the front cover is Safety Switch open. Paper Tray Detects when the paper tray is set. Switch Sensors INDEX...
- Page 14 24 June 1994 ELECTRICAL COMPONENT DESCRIPTIONS Lamps INDEX SYMBOL NAME FUNCTION Applies high intensity light to the original for Exposure Lamp exposure. Fusing Lamp Provides heat to the hot roller. Neutralizes any charge remaining on the drum Quenching Lamp surface after cleaning. Discharge the drum outside of the image area.
-
Page 15: Drive Layout
DRIVE LAYOUT 24 June 1994 7. DRIVE LAYOUT G1: Main Motor Gear G2: Relay Gear G23: Timing Belt Drive G8: Relay Gear G10 Relay gear Gear G9: Relay Gear G11: Timing Belt Drive Gear BP1: Timing Belt Pulley BP5: Timing Belt Pulley TB1: Timing Belt Cleaning Unit TB3: Timing Belt... - Page 16 24 June 1994 DRIVE LAYOUT Paper Feed Section G24: Timing Belt Drive Gear BP2: Timing Belt Pulley G15: Registration CL BP3: Timing Belt Pulley G22: Relay Gear Gear TB2: Timing Belt Registration CL Paper Feed Section BP4: Timing Belt Pulley Registration Rollers G25: Relay Gear G21: Paper Feed CL...
-
Page 17: Power Distribution
POWER DISTRIBUTION 24 June 1994 8. POWER DISTRIBUTION AC Power (115V or 220V – 240V) Anti-condensation Heaters Main SW -Drum (Option) -Optics (Option) Cover Safety SW Scan Operation Panel Board Signal Sensors 5V (VC) 24V (VA) Switches Power Relay DF Interface Board (RA401) (A152 copier only) Thermistors... - Page 18 24 June 1994 POWER DISTRIBUTION The main board supplies dc power to all copier dc components. All sensors, switches, thermistors, and the DF interface board (option) operate on +5 volts. The operation panel operates on +5 volts supplied by the main board. All other dc components including the power relay (RA401) and the main motor relay (RA402) operate on +24 volts.
-
Page 19: Detailed Section Descriptions
SECTION 2 DETAILED SECTION DESCRIPTIONS... - Page 20 24 June 1994 DRUM 1. DRUM 1.1 DRUM CHARACTERISTICS An organic photoconductor (OPC) drum is used in this model. The OPC drum has the characteristics of: 1. Being able to accept a high negative electrical charge in the dark. (The electrical resistance of a photoconductor is high in the absence of light.) 2.
- Page 21 DRUM 24 June 1994 1.2 DRUM UNIT The drum unit [A] consists of an OPC drum [B], ID sensor board [C] and a pick-off pawl [D]. When the drum, the pick-off pawl, or the ID sensor is replaced or cleaned, the drum unit must be removed from the copier. Therefore, the drum has a coupling device which is connected to the drum drive gear [E].
-
Page 22: Drum Charge
24 June 1994 DRUM CHARGE 2. DRUM CHARGE 2.1 OVERVIEW This copier uses a double wire scorotron and a highly sensitive OPC drum [A]. The corona wires [B] generate a corona of negative ions when the CC/Grid/Bias power pack [C] applies a high voltage. The CC/Grid/Bias power pack also applies a negative high voltage to a stainless steel grid plate [D]. -
Page 23: Charge Corona Wire Cleaner Mechanism
DRUM CHARGE 24 June 1994 2.2 CHARGE CORONA WIRE CLEANER MECHANISM Pads [A] above and below the charge corona wires clean the wires as the charge unit is manually slid in and out. The cleaner pad bracket [B] rotates when the charge unit is fully extended and the bracket is pulled up against the rear endblock [C]. -
Page 24: Charge Corona Circuit
24 June 1994 DRUM CHARGE 2.3 CHARGE CORONA CIRCUIT CN1-1 CN119-7 VA [24] Charge Corona CN119-6 CN1-2 VC [5] CN1-3 CN119-5 Power Pack - CC Trig [ 24] CC/Grid/Bias Grid (P1) CN119-3 CN1-5 Grid Trig (PWM) [ 0→0/5] CN119-1 CN1-7 GND [0] Development Bias... -
Page 25: Grid Voltage Correction
DRUM CHARGE 24 June 1994 2.4 GRID VOLTAGE CORRECTION To maintain good copy quality over the drum’s life, the grid voltage is changed by the following: • Drum residual voltage correction (Vr correction) • Drum wear correction 2.4.1 Drum Residual Voltage Correction (Vr correction) During the drum’s life, the drum may fatigue electrically and residual voltage (Vr) on the drum may gradually increase. -
Page 26: Grid Voltage For Image Density Control
24 June 1994 DRUM CHARGE 2.4.2 Drum Wear Correction During the drum’s life, the photoconductive surface of the drum becomes worn by contact with the cleaning blade and developer on the development roller. This effects ability of the drum to hold a charge. This characteristic especially affects developing of the ID sensor pattern. - Page 27 DRUM CHARGE 24 June 1994 2.5.2 Drum Residual Voltage (Vr) Correction Factor Vr ratio (L) (%) (SP67) Change of grid voltage (volts) ±0 100 to 84 83 to 58 –40 57 to 41 –80 40 to 28 –120 27 to 0 –160 L = Vrp/Vsg x 100 (%) Vrp: ID sensor output for Vr pattern...
- Page 28 24 June 1994 DRUM CHARGE 2.6 GRID VOLTAGE FOR TONER DENSITY DETECTION AND RESIDUAL VOLTAGE (Vr) DETECTION The guid voltage is the same for both toner density detection and residual voltage correction. Grid voltage = Standard ID sensor grid voltage (–460 volts [SP62=4]) Drum wear correction factor (SP57) Drum Wear Correction Factor (SP57) Main motor rotation time (SP57)
- Page 29 OPTICS 24 June 1994 3. OPTICS 3.1 OVERVIEW During the copy cycle, an image of the original is reflected onto the drum surface through the optics assembly as follows. Light Path: Exposure Lamp [A] → Original → First Mirror [B] → Second Mirror [C] →...
- Page 30 24 June 1994 OPTICS The CPU monitors the temperature around the optics cavity through a thermistor which is located at the upper left rear side of the copier frame. When the temperature reaches 45°C, the optics cooling fan [J] (A152 copier only) starts rotating to draw cool air into the optics cavity.
-
Page 31: Scanner Drive
OPTICS 24 June 1994 3.2 SCANNER DRIVE 3.2.1 1st and 2nd Scanner Drive Mechanism This model uses a stepper motor [A] to drive the scanners. Both ends of each scanner are driven to prevent skewing. The scanners have sliders [B], which ride on guide rails. - Page 32 24 June 1994 OPTICS 3.3 LENS DRIVE (A152 copier only) : Reduction : Enlargement 3.3.1 Lens Drive The lens motor [A] (stepper motor) changes the lens [B] position through the lens drive wire [C] in accordance with the selected reproduction ratio to provide the proper optical distance between the lens and the drum surface.
- Page 33 OPTICS 24 June 1994 3.3.2 Lens Positioning Home Position (100%) (100% → 141/129%) (141/129% → 71/65%) (71/65% → 93%) (93% → 71/65%) (71/65% → 141/129%) (141/129% → 122/121%) (122/121% → 141/129%) (122/121% → 100%) (100% → 71/65%) (71/65% → 100%) Enlargement Side Reduction Side The lens home position sensor [A] informs the main board when the lens is at...
- Page 34 24 June 1994 OPTICS 3.4 4TH/5TH MIRROR DRIVE (A152 copier only) Home Position (100%) (100% → 141/129%) (141/129% → 71/65%) (71/65% → 93%) (93% → 71/65%) (71/65% → 141/129%) (141/129% → 122/121%) (122/121% → 141/129%) (122/121% → 100%) (100% → 71/65%) (71/65% →...
-
Page 35: Automatic Image Density Sensing
OPTICS 24 June 1994 3.5 AUTOMATIC IMAGE DENSITY SENSING Sampled area 70 mm Light from the exposure lamp is reflected from the original and travels to the lens [A] via the mirrors. The auto ID sensor [B], a photodiode, is mounted on the upper front frame. - Page 36 24 June 1994 OPTICS 3.6 EXPOSURE LAMP VOLTAGE CONTROL The main board controls the exposure lamp voltage through the ac drive board. The exposure lamp voltage is based on the base lamp voltage and various correction factors. The method of control is different depending on whether the image density is manually selected or the auto image density mode is selected.
- Page 37 OPTICS 24 June 1994 3.6.3 V Correction Factor The light intensity may decrease because of dust accumulated on the optics parts. This may cause dirty background on copies. To compensate for this phenomenon, V correction is done as follows: Whenever SP56 (ADS reference voltage adjustment) is performed, before sampling starts for the ADS adjustment, the auto ID sensor measures the amount of light reflected through the 1st, 2nd and 3rd mirrors from the white plate located under the left frame.
-
Page 38: Exposure Lamp Control Circuit
24 June 1994 OPTICS 3.7 EXPOSURE LAMP CONTROL CIRCUIT Main Board (PCB1) AC Drive Board (PCB2) T402 TP111 Zero R404 (EXPO) CN421 Cross CN107-1 240V D401 R405 CN114-2 CN401-7 D404 CN419-1 ~D407 Feed back Thermo- VR401 220V signal fuse (TF) C401 R406 220V Only... - Page 39 ERASE 24 June 1994 4. ERASE 4.1 OVERVIEW ± LE: Lead edge erase margin 1.5 mm ± SE: Side erase margin 2.0 mm on each side; total of both sides 4 mm or less LO: Original width LC: Charged width of drum EL: Lead edge erase ES: Side erase (A152 copier only) The erase lamp [A] consists of a single row of LEDs (29 LEDs) extending...
- Page 40 24 June 1994 ERASE a b c d e 4.1.1 Lead Edge Erase The entire line of LEDs turn on when the main motor turns on. They stay on until the erase margin slightly overlaps the lead edge of the original image area on the drum (Lead Edge Erase Margin).
- Page 41 ERASE 24 June 1994 – A152 copier– This machine has no sensors or switches to detect the copy paper size. Instead, the CPU measures the copy paper length using the registration sensor during the first copy cycle. Based on this length data, the CPU determines which copy paper size is used in the paper tray.
- Page 42 24 June 1994 ERASE – A151 copier – Since this model has only two modes for the erase lamp, full erase mode (all blocks on) and toner density detection cycle mode (all blocks on except block "g"), side erasing is not performed by the erase lamp. When making copies with the platen cover open condition, and the original and the copy paper is smaller than B4 (10"...
- Page 43 DEVELOPMENT 24 June 1994 5. DEVELOPMENT 5.1 OVERVIEW [C] [A] When the main motor turns on, the paddle roller [A], development roller [B], auger [C], and the agitator [D] start turning. The paddle roller picks up developer in its paddles and transports it to the development roller. Internal permanent magnets in the development roller attract the developer to the development roller sleeve.
-
Page 44: Drive Mechanism
24 June 1994 DEVELOPMENT 5.2 DRIVE MECHANISM When the main motor [A] turns, the rotation is transmitted from the development drive gear [B] to the development roller gear [C] through the development gear [D], timing belt [E] and relay gears. The rotation is transmitted from the development roller gear to the paddle roller gear [F] through an idler gear [G]. - Page 45 DEVELOPMENT 24 June 1994 5.3 CROSS-MIXING This copier uses a standard cross-mixing mechanism to keep the toner and developer evenly mixed. It also helps agitate the developer to prevent developer clumps from forming and helps create the triboelectric charge. The developer on the turning development roller is split into two parts by the doctor blade [A].
- Page 46 24 June 1994 DEVELOPMENT 5.4 DEVELOPMENT BIAS FOR IMAGE DENSITY CONTROL Image density is controlled by changing three items: (1) the amount of bias voltage applied to the development roller sleeve, (2) the amount of voltage applied to the exposure lamp, and (3) the amount of voltage applied to the grid plate.
- Page 47 DEVELOPMENT 24 June 1994 5.4.1 Base Bias Voltage Factor In Manual Image Density Mode Darker Lighter Manual ID Level Base Bias Voltage (volts) –120 –160 –160 –160 –160 –200 –240 *Note Vo ±0 Exposure Lamp Data Vo –4 Vo –4 Vo –2 Vo +2 Vo+2...
- Page 48 24 June 1994 DEVELOPMENT Base Bias Voltage (volts) Normal or Darker (SP34 = 0 or 1) Lighter (SP34 = 2) K ≥ TL1 –160 –200 TL1 > K ≥ TL2 –200 –240 TL2 > K ≥ TL3 –240 –280 TL3 > K ≥ TL4 –280 –320 TL4 >...
- Page 49 DEVELOPMENT 24 June 1994 5.4.4 Drum Residual Voltage (Vr) Correction Factor During the drum’s life, drum residual voltage (Vr) will gradually increase. The Vr correction compensates for the residual voltage on the drum. The Vr correction is done every 1,000 copies. The following table shows how the development bias voltage changes depending on the Vr ratio.
-
Page 50: Development Bias Circuit
24 June 1994 DEVELOPMENT 5.5 DEVELOPMENT BIAS CIRCUIT CN1-1 CN119-7 VA [24] Charge Corona CN119-6 CN1-2 VC [5] Power Pack - CN1-4 CN119-4 CC/Grid/Bias Bias Trig (PWM) [ 0→0/5] Grid (P1) CN119-2 CN1-6 Bias FB CN1-7 CN119-1 GND [0] Development Bias Main Board (PCB1) PWM Duty cycle... -
Page 51: Toner Density Detection And Toner Supply
TONER DENSITY DETECTION AND TONER SUPPLY 24 June 1994 6. TONER DENSITY DETECTION AND TONER SUPPLY 6.1 OVERVIEW Original Lead Sensor Edge Pattern Original Development Bias ID Sensor Pattern Leading Edge Erase RAM Clear Toner Density Detection Toner Density Detection Toner Density Detection Low Toner Density... - Page 52 24 June 1994 TONER DENSITY DETECTION AND TONER SUPPLY 6.2 ID SENSOR FUNCTION 6.2.1 Detect Supply Mode Main Board ID Sensor +24V (V +5V (V CN112-2 Toner CN110-2 Supply Clutch TP 110 (PSE) MSC1 CN112-1 ID Sensor Output VR102 CN110-1 CN112-3 ID Sensor LED Vsg 4V...
-
Page 53: Abnormal Condition In Toner Density Detection
TONER DENSITY DETECTION AND TONER SUPPLY 24 June 1994 6.2.2 Fixed Supply Mode When SP30 is set to "1" (factory setting = "0"), the fixed supply mode is selected. In this case, a fixed amount of toner is added every copy cycle depending on the selected toner supply ratio (SP32) and the paper size in use. - Page 54 24 June 1994 TONER DENSITY DETECTION AND TONER SUPPLY 6.4 DEVELOPMENT BIAS VOLTAGE FOR TONER DENSITY DETECTION The development bias for toner density detection can be adjusted by SP33 in order to change the toner density level. The following table shows the development bias voltage corresponding to setting of SP33.
-
Page 55: Toner Supply And Agitator Drive Mechanism
TONER DENSITY DETECTION AND TONER SUPPLY 24 June 1994 6.5 TONER SUPPLY AND AGITATOR DRIVE MECHANISM The toner supply clutch gear [A] turns when the main motor [B] is on. The transmission of this rotation to the toner supply drive gear [C] is controlled by the toner supply clutch [D]. - Page 56 24 June 1994 TONER DENSITY DETECTION AND TONER SUPPLY 6.6 TONER SUPPLY AMOUNT This copier has two different ways of controlling the amount of toner supplied. Normally, the detect supply mode controls toner supply; however, a fixed supply mode also can be selected by SP30. 6.6.1 Detect Supply Mode (SP30 = 0) The amount of toner supplied depends on the ID sensor data and the detect toner supply ratio data.
- Page 57 TONER DENSITY DETECTION AND TONER SUPPLY 24 June 1994 Detect Toner Supply Ratio Data (SP31) Data (SP31) Toner supply ratio at toner supply level 3 Toner supply ratio data For example: Vsp = 0.45 volts, which means the toner supply level is "2" and the ID sensor data is 44. The data of SP31 is set to "0".
- Page 58 24 June 1994 TONER DENSITY DETECTION AND TONER SUPPLY 6.6.2 Fixed Supply Mode (SP30 = 1) The amount of toner supplied depends on the fixed toner supply ratio data and the paper size data. The toner supply clutch on time in each copy cycle is calculated as follows: Toner Supply Clutch ON Time = T x P x 2 (pulses) Where:...
- Page 59 TONER DENSITY DETECTION AND TONER SUPPLY 24 June 1994 6.7 TONER END CONDITION The image density sensor is used to detect a toner end condition in both detect and fixed supply modes. 6.7.1 Near Toner End Condition When the Vsp/Vsg x100 becomes greater than 15.2, the toner density detection cycle changes from every 10 copies to 5 copies.
- Page 60 24 June 1994 TONER DENSITY DETECTION AND TONER SUPPLY When the Vsp/Vsg x 100 becomes greater than 28.0 for two consecutive toner detection cycles, the CPU determines immediately that there is a toner end condition and copying is inhibited. This causes the Add Toner indicator to light and the Start indicator turns red.
-
Page 61: Image Transfer And Paper Separation
IMAGE TRANSFER AND PAPER SEPARATION 24 June 1994 7. IMAGE TRANSFER AND PAPER SEPARATION [C] [B] [A] 7.1 IMAGE TRANSFER A high negative voltage (–5.0 kilovolts) is applied to the transfer corona wire [A], and the corona wire generates negative ions. These negative ions are applied to the back side of the copy paper. - Page 62 24 June 1994 IMAGE TRANSFER AND PAPER SEPARATION 7.3 TRANSFER/SEPARATION CORONA CIRCUIT CN1-1 CN117-15 VA [24] CN117-14 CN1-2 SC [ 24] Power Pack CN117-13 - TC/SC CN1-3 Transfer TC [ 24] (P2) Control CN117-12 CN1-4 GND [0] Main Board (PCB1) Separation Corona To apply the negative charge for the transfer corona, the main board outputs...
-
Page 63: Drum Cleaning
DRUM CLEANING 24 June 1994 8. DRUM CLEANING 8.1 OVERVIEW This copier uses the counter blade system for drum cleaning. The cleaning blade [A] is angled against drum rotation. This counter blade system has the following advantages: • Less wearing of the cleaning blade edge. •... - Page 64 24 June 1994 DRUM CLEANING 8.2 DRIVE MECHANISM The rotation of the main motor [A] is transmitted to the cleaning unit through the main motor gear [B], the relay gears [C], and the cleaning drive gear [D]. The gear [E] driven by the cleaning drive gear passes the rotation to the toner collection roller gear [F].
- Page 65 DRUM CLEANING 24 June 1994 8.3 USED TONER OVERFLOW DETECTION The CPU uses the toner end counter and an overflow counter to detect the used toner overflow. A used toner overflow condition is detected when either of the following conditions occur. (1) When the overflow counter reaches 80K copies.
-
Page 66: Paper Feed And Registration
24 June 1994 PAPER FEED AND REGISTRATION 9. PAPER FEED AND REGISTRATION 9.1 OVERVIEW This copier has one paper feed station and a by-pass feed table [A]. The paper feed station uses a paper tray [B] which can load 250 sheets. The by-pass feed table can load 1 sheet. -
Page 67: Paper Lift Mechanism
PAPER FEED AND REGISTRATION 24 June 1994 9.2 PAPER LIFT MECHANISM When the paper tray [A] is closed after paper is loaded, the plate release slider [B], which is mounted on the bottom part of the paper tray, is pushed by the projection [C] of the copier frame and the release slider comes off the bottom plate hook [D] Once the release slider comes off, the bottom plate is raised by the pressure... -
Page 68: Paper Length Detection (Paper Feed Station)
24 June 1994 PAPER FEED AND REGISTRATION 9.3 PAPER LENGTH DETECTION (Paper Feed Station) The paper length is measured by the registration sensor and is stored in memory while paper is fed past the registration sensor. This is performed only during the first copy after the following actions: 1. -
Page 69: Paper Feed Drive Mechanism
PAPER FEED AND REGISTRATION 24 June 1994 9.4 PAPER FEED DRIVE MECHANISM Through several gears and a timing belt, main motor rotation is transmitted to the relay gear [A], paper feed clutch gear [B] and then the relay roller clutch gear [C]. - Page 70 24 June 1994 PAPER FEED AND REGISTRATION 9.5 BY-PASS FEED TABLE (By-pass Auto Feed Mechanism) The by-pass feed table [A] can load only one sheet of paper. When a sheet of copy paper is set in the by-pass feed table, the leading edge of the copy paper activates the relay sensor [B] which sends a low signal to the main board.
- Page 71 PAPER FEED AND REGISTRATION 24 June 1994 9.6 PAPER REGISTRATION Main motor rotation is transmitted to the timing belt [A] through a series of gears. The timing belt rotates the relay gear [B] and then the registration roller clutch gear [C]. When the registration clutch [D] is energized, the rotation of the clutch gear is transmitted to the lower registration roller [E].
-
Page 72: Paper Feed And Misfeed Detection Timing
24 June 1994 PAPER FEED AND REGISTRATION 9.7 PAPER FEED AND MISFEED DETECTION TIMING 1st Copy = B4 2nd Copy = A4/8 "x 11" The relay sensor, registration sensor and exit sensor are used for misfeed detection. If the CPU detects a misfeed, the Check Paper Path and the Misfeed Location Number (PE, J1, J2) indicators turn on. -
Page 73: Image Fusing
IMAGE FUSING 24 June 1994 10. IMAGE FUSING 10.1 OVERVIEW After the image is transferred, the copy paper enters the fusing unit. The image is fused to the copy paper by the process of heat and pressure through the use of a hot roller [A] and pressure roller [B]. The CPU monitors the hot roller surface temperature through a thermistor [C] which is in contact with the hot roller’s surface. - Page 74 24 June 1994 IMAGE FUSING 10.2 FUSING DRIVE MECHANISM AND COVER SAFETY SWITCH When the upper unit is closed the fusing engagement lever [A] is pressed down and an idler gear [B] engages with the hot roller gear [C]. Rotation passes from the hot roller gear through the idle gears [D] to the exit roller gear [E].
-
Page 75: Fusing Lamp Control Circuit
IMAGE FUSING 24 June 1994 10.3 FUSING LAMP CONTROL CIRCUIT Main Board (PCB1) AC Drive Board (PCB2) CN118-2, 3 Fusing T402 Thermistor TP102 (HET) CN107-1 T405 CN118-1, 4 Zero R112 +24V Cross Thermo- switch IC104 R107 Fusing Lamp R110 R108 R412 CN114-8 CN401-1... - Page 76 24 June 1994 IMAGE FUSING 10.3.1 Phase Control Mode AC Power Zero Cross Trigger Low Temp Fusing Lamp Power Trigger High Temp Fusing Lamp Power The main board sends the fusing lamp trigger pulse (LOW active) (C) to the ac drive board. PC402 activates TRC402, which provides ac power to the fusing lamp at the trailing edge of each trigger pulse.
-
Page 77: Fusing Lamp Control
IMAGE FUSING 24 June 1994 10.4 FUSING LAMP CONTROL Temp 198°C 195°C 170°C 150°C Fusing Lamp Exposure Lamp Start key Time Ready Start key pressed pressed When the main switch is turned on, the CPU starts sending a trigger pulse to turn on the fusing lamp. -
Page 78: Energy Saver Function
24 June 1994 IMAGE FUSING 10.5 ENERGY SAVER FUNCTION When the copier is not in use, the energy saver function reduces the power consumption by decreasing the fusing temperature. The energy Saver indicator turns on and all the other indicators turn off. For this copier, the energy saver function cannot be entered manually. -
Page 79: Installation
SECTION 3 INSTALLATION... -
Page 80: Installation Requirements
24 June 1994 INSTALLATION REQUIREMENTS 1. INSTALLATION REQUIREMENTS 1.1 ENVIRONMENT 1. Temperature Range: 10°C to 30°C (50°F to 86°F) 2. Humidity Range: 15% to 90% RH 3. Ambient Illumination: Less than 1500 lux (do not exposure to direct sunlight) 4. Ventilation: Room of more than 20 m . -
Page 81: Minimum Space Requirements
INSTALLATION REQUIREMENTS 24 June 1994 1.3 MINIMUM SPACE REQUIREMENTS 10 cm (3.9") 30 cm (11.8") 60 cm (23.6") 70 cm (27.6") 1. Front: 70 cm (27.6") 2. Back: 10 cm (3.9") 3. Right: 60 cm (23.6") 4. Left: 30 cm (11.8") NOTE: A space of at least 10cm (3.9") at the rear of the machine is necessary for smooth air inlet into the machine. -
Page 82: Installation Procedure
24 June 1994 INSTALLATION PROCEDURE 2. INSTALLATION PROCEDURE 2.1 ACCESSORY CHECK Check the quantity and condition of the accessories in the box according to the following list: 1. Copy Tray ............1 2. Envelope for NECR (–17 Only) ...... 1 3. -
Page 83: Copier Installation Procedure
INSTALLATION PROCEDURE 24 June 1994 2.2 COPIER INSTALLATION PROCEDURE 1. Remove the strips of tape from the copier as shown. 2. Pull out the paper tray [A], then remove the foam block [B] and tapes. Close the paper tray. - Page 84 24 June 1994 INSTALLATION PROCEDURE 3. Open the platen cover [A] and remove the lock pins [B]. (A151 copier: 2 pins, A152 copier: 4 pins) NOTE: Save the lock pins for future shipping use. 4. Open the front cover [C], and remove the foam block [D]. 5.
- Page 85 INSTALLATION PROCEDURE 24 June 1994 7. Pull out the development unit [A] while pulling the left side of the development cover [B] (2 screws), and place it on a clean sheet of paper. 8. Remove the toner supply unit [C] from the development unit [D] (2 screws).
- Page 86 24 June 1994 INSTALLATION PROCEDURE CN421 220 ∼230V 240V 11. Reinstall the development unit. 12. Shake the toner cartridge [A] well and insert the cartridge while pulling off the seal [B]. 13. Close the front cover. CAUTION: This procedure (step 14) must be done only in 240 volt areas.
- Page 87 INSTALLATION PROCEDURE 24 June 1994 4) Plug in the machine and turn on the main switch, then lower the platen cover. 5) Enter the SP mode as follows: a) Enter "71" using the numeral keys. b) Press and hold the Clear/Stop key until a dot (•) appears in the top left corner of the copy counter.
- Page 88 24 June 1994 INSTALLATION PROCEDURE 16. Place the symbol explanation decal [A] on the platen cover as shown, or when the DF [B] is installed on the machine, place the decal on the DF as shown. 17. Install the copy tray [C]. 18.
-
Page 89: Key Counter Holder Installation (Option)
INSTALLATION PROCEDURE 24 June 1994 2.3 KEY COUNTER HOLDER INSTALLATION (OPTION) NOTE: To install the key counter holder, the following parts are required. • Key counter bracket [A] • Key counter harness [B] • Two M3X6 sunken head screws [C] 1. -
Page 90: Service Tables
SECTION 4 SERVICE TABLES... -
Page 91: Service Remarks
24 June 1994 SERVICE REMARKS 1. SERVICE REMARKS 1.1 GENERAL CAUTION 1. To prevent physical injury, keep hands away from the mechanical drive components when the main switch is on (especially during the warm-up cycle). If the Start key is pressed before the copier finishes the warm-up cycle, (Start indicator starts blinking) the copier starts making copies as soon as the warm-up cycle is completed. -
Page 92: Charge Corona
SERVICE REMARKS 24 June 1994 7. Never expose the drum to corrosive gases such as ammonia gas. 8. Always keep the drum in the protective sheet when inserting or pulling the drum unit out of the copier to avoid exposing it to bright light or direct sunlight. - Page 93 24 June 1994 SERVICE REMARKS 1.4 OPTICS 1. The position of following parts are very difficult to adjust. Do not adjust them. a) 4th/5th Mirror Home Position Sensor b) Lens Home Position Sensor c) Lens and 4th/5th Mirror Guide Rails NOTE: Before removing a sensor bracket to replace a sensor, mark the position of the bracket.
-
Page 94: Toner Supply
SERVICE REMARKS 24 June 1994 1.5 DEVELOPMENT 1. Be careful not to nick or scratch the development roller sleeve. 2. Place the development unit on a sheet of paper after removing it from the copier. This prevents any small metal objects (staples, chips, E-rings, etc.) from being attracted to the development roller and getting inside the unit. -
Page 95: Transfer And Separation
24 June 1994 SERVICE REMARKS 1.7 TRANSFER AND SEPARATION 1. Clean the corona wires and casing with water or dry cloth. 2. When adjusting the corona current, always make sure that the center of the drum shoe is aligned with the corona wire. 1.8 CLEANING UNIT 1. -
Page 96: Document Feeder
SERVICE REMARKS 24 June 1994 1.10 PAPER FEED 1. Do not touch the feed and relay rollers with oily hands. 2. A worn out registration roller crease paper. Worn rollers should be replaced. 3. The side fences and the end fence of the paper tray should be positioned correctly so that they securely hold the paper. - Page 97 24 June 1994 SERVICE REMARKS 7. Tighten securely the screws used for grounding the following PCBs when reinstalling them. • AC Drive Board • DC Power Supply Board • TC/SC Power Pack • CC/Grid/Bias Power Pack 8. The RAM pack must be handled as follows: WARNING: The RAM pack has a lithium battery which can explode if handled incorrectly.
-
Page 98: Service Program Mode Operation
SERVICE PROGRAM MODE 24 June 1994 2. SERVICE PROGRAM MODE 2.1 SERVICE PROGRAM MODE OPERATION The service program (SP) mode is used to check electrical data and change modes or adjustment values. 2.1.1 Service Program Access Procedure There are two ways to access an SP mode. (1) By key operation (2) By turning on DPS101-2 on the main board All SP modes except for SP98, and SP99 can be accessed by key operation. - Page 99 24 June 1994 SERVICE PROGRAM MODE Access Procedure 2 - DPS101-2 1. Turn the main switch off. 2. Remove the upper rear cover and turn on DPS101-2, then turn on the main switch. "5" will blink in the Copy Counter. 3.
- Page 100 SERVICE PROGRAM MODE 24 June 1994 2.1.3 Memory Clear Procedure – Clear Counters (SP98) – NOTE: This SP mode clears the following counters: • SP88: PM Counter Display • SP100: By-pass Feed Copies • SP101: Paper Tray Copies • SP103: Total Copies •...
- Page 101 24 June 1994 SERVICE PROGRAM MODE – Clear All Memory (SP99) – CAUTION: Memory all clear mode (SP99) clears all the correction data for process control and software counters, and returns all the modes to the default settings. Normally, SP99 should not be used.
- Page 102 SERVICE PROGRAM MODE 24 June 1994 10. Perform the following SP modes in sequence: (1) SP66: Drum Initial Setting (2) SP65: Developer Initial Setting (3) SP48: Light Intensity Adjustment (4) SP56: ADS Voltage Adjustment (5) SP54: Vsg Adjustment (6) SP42: Registration Adjustment (7) SP41: Leading Edge Erase Margin Adjustment (8) SP43: Vertical Magnification Adjustment (9) SP44: Horizontal Magnification Adjustment (A152 copier only)
-
Page 103: Service Program Mode Table
24 June 1994 SERVICE PROGRAM MODE 2.2 SERVICE PROGRAM MODE TABLE 1. A " " after the mode name means that copies can be made while in the SP mode. (Copies can be made by pressing the Start key after pressing the Auto Image Density key.) 2. - Page 104 SERVICE PROGRAM MODE 24 June 1994 Mode No. Function Data Open No function. Reduce/Enlarge Specifies whether reduction or enlargement is 0: Reduction Key Function selected first when the Reduce/Enlarge key is 1: Enlargement (A152 copier pressed. only) ADS Priority Specifies whether the copier defaults to ADS or 0: ADS manual mode when the main switch is turned on.
- Page 105 24 June 1994 SERVICE PROGRAM MODE Mode No. Function Data Lead Edge Adjusts the lead edge erase margin. 0–15 Erase Margin Default = 8 0.4 mm per step. (–3.2 mm to +2.8 mm) Adjustment Registration Adjusts registration. 0–15 Adjustment Default = 8 0.4 mm per step.
- Page 106 Mode No. Function Data Vsg & Vsp Displays the Vsg and Vsp readings. Display The Vsg reading is displayed while the "0" key is held down. A151 copier displays the Vsp reading while the "1" key is held down. To stop this mode, press the C/S key.
- Page 107 24 June 1994 SERVICE PROGRAM MODE Mode No. Function Data Developer Agitates new developer for about 5 minutes. Initial Setting "50" is displayed on the copy counter when the Auto Image Density key is held down. Press the Start key to start the initial setting. Initial setting must be done when new developer is installed.
- Page 108 SERVICE PROGRAM MODE 24 June 1994 Mode No. Function Data Energy Saving Selects energy saving ratio. 0: 56% Ratio 1: 47% The greater the saving ratio, the longer the 2: 37% waiting time until the copier returns to the ready 3: 25% condition.
- Page 109 24 June 1994 SERVICE PROGRAM MODE Mode No. Function Data 102 Open No function. 103 Total Copies Displays the total number of copies. Refer to NOTE 5. 106 DF Originals Displays the total number of originals fed from the (A152 copier only) Refer to NOTE 5.
- Page 110 SERVICE PROGRAM MODE 24 June 1994 NOTE 3: The A151 copier displays the SP mode data in the Copy Counter. Since the Copy Counter has only 2 digits, "•" is displayed instead of "1" in the Copy Counter when the data exceeds "99".
-
Page 111: Sp Mode 8-Input Check
24 June 1994 SERVICE PROGRAM MODE 2.3 SP MODE 8–INPUT CHECK – How to check sensor/switch data – 1. Enter "8" by the numeral key, then press the Auto Image Density key. 2. Enter the desired number given in the following table. 3. -
Page 112: Sp Mode 9-Output Check
SERVICE PROGRAM MODE 24 June 1994 2.4 SP MODE 9–OUTPUT CHECK – How to turn electrical components on/off – 1. Enter "9" by the numeral key, then press the Auto Image Density key. 2. Enter the desired number given in the following table. 3. -
Page 113: Service Call And User Code Table
24 June 1994 SERVICE PROGRAM MODE 2.5 SERVICE CALL AND USER CODE TABLE Service Call Code SP Mode No. E-code Contents (SC Counter) Exposure Lamp Error SP122 The feed back signal becomes higher than 4.2 volts (rms) (Exposure Lamp) for 1.0 second when the exposure lamp is on, or it becomes higher than 1.0 volt (rms) for 1.0 second when the exposure lamp is off. - Page 114 SERVICE PROGRAM MODE 24 June 1994 SP Mode No. E-code Contents (SC Counter) Fusing Warm-up Error SP124 The temperature detected by the thermistor does not (Fusing) reach 150°C within 45 seconds after the main switch is Refer to NOTE. turned on. Fusing Overheat The temperature detected by the thermistor becomes higher than 240°C.
-
Page 115: Test Points
24 June 1994 SERVICE TABLES 3. SERVICE TABLES 3.1 TEST POINTS Copier Main Board NUMBER FUNCTION TP102 HET (Fusing Thermistor) TP103 TP106 ADS (Auto Image Density Sensor) Adjust the voltage to +2.5 ± 0.1 volts by VR101. TP107 AVSS (GND) TP110 PSE (ID Sensor Voltage) Adjust the voltage to +4.0 ±... -
Page 116: Dip Switches And Jumper Switches
SERVICE TABLES 24 June 1994 3.2 DIP SWITCHES AND JUMPER SWITCHES Copier Main Board DIP SWITCH NORMAL FUNCTION DPS101-1 Free run DPS101-2 Service program mode access JUMPER SWITCH NORMAL FUNCTION JPS101-R (Upper) Open Factory use JPS101-C (Lower) Open To clear counters by SP98 or to clear all memory by SP99 DF Main Board FUNCTION... -
Page 117: Variable Resistors
24 June 1994 SERVICE TABLES 3.3 VARIABLE RESISTORS Copier Main Board NUMBER FUNCTION Adjusts ADS voltage (+2.5 ± 0.1 volts) VR101 Adjusts ID sensor voltage (+4.0 ± 0.2 volts) VR102 CC/Grid/Bias Power Pack NUMBER FUNCTION Adjusts charge corona current Adjusts standard grid voltage Adjusts standard development bias voltage TC/SC Power Pack NUMBER... -
Page 118: Special Tools And Lubricants
SPECIAL TOOLS AND LUBRICANTS 24 June 1994 4. SPECIAL TOOLS AND LUBRICANTS Part Number Description Q’ty A0069105 Drum Shoe Shaft A0069103 Scanner Wire Clamp (Omega Clamp) A0069104 Scanner Positioning Pin (4 pcs) 1 set A0089502 Grease G-40M 52039501 Grease (Shinetsu Silicone G-501) 54429106 Drum Shoe 54479104... -
Page 119: Preventive Maintenance Schedule
24 June 1994 PREVENTIVE MAINTENANCE SCHEDULE 5. PREVENTIVE MAINTENANCE SCHEDULE 5.1 PM TABLE R = Replace C = Clean I = Inspect 160K NOTES OPTICS Mirrors, Lens, Reflectors Silicone cloth, cotton pad with water, or blower brush Refer to NOTE 1 to clean 6th mirror. - Page 120 PREVENTIVE MAINTENANCE SCHEDULE 24 June 1994 160K NOTES PAPER FEED Registration Roller Water Relay Roller Water Registration Sensor Relay Sensor Paper Guide Plate Dry cloth Feed Roller Water Paper Tray Bottom Plate Pad Water FUSING UNIT Hot Roller Pressure Roller Stripper Pawls Fusing Entrance And Exit Suitable solvent...
- Page 121 24 June 1994 PREVENTIVE MAINTENANCE SCHEDULE NOTE 1: Clean the 6th mirror with silicone cloth as shown. NOTE 2: Apply setting powder evenly on the surface and edge of the blade as shown to prevent damaging the drum. 4-31...
-
Page 122: Explanation Of Regular Pm
PREVENTIVE MAINTENANCE SCHEDULE 24 June 1994 5.2 EXPLANATION OF REGULAR PM Item Explanation Optics Unit Mirrors, Lens, Stains on any part of the optics unit result in a dirty Reflector, Exposure background, black lines, black spots, or areas of Glass, Platen Cover decreased sharpness on the copy image. - Page 123 24 June 1994 PREVENTIVE MAINTENANCE SCHEDULE Item Explanation Fusing Unit Thermistor If toner accumulates on the thermistor, fusing temperature control may not be accurate. Inspect the thermistor at regular intervals. Stripper Pawls Toner or dust adhering to the stripper pawls can cause a paper jam.
-
Page 124: Regular Pm Procedure
PREVENTIVE MAINTENANCE SCHEDULE 24 June 1994 5.3 REGULAR PM PROCEDURE Every 80 K Every 160 K Make a copy of OS-A4 test chart at manual image 1. Make a Copy density level 4. 1. Clean the mirrors, lens and reflectors by using 2. - Page 125 24 June 1994 PREVENTIVE MAINTENANCE SCHEDULE 1. Remove the old developer. 5. Development Unit 2. Clean the entrance seal. (every 80 K) 3. Clean the drive gears on the development unit. 4. Install the new developer. 1. Clean the registration roller and relay roller. 6.
-
Page 126: Replacement And Adjustment
SECTION 5 REPLACEMENT ADJUSTMENT... -
Page 127: Exterior And Inner Covers
24 June 1994 EXTERIOR AND INNER COVERS 1. EXTERIOR AND INNER COVERS 1.1 EXTERIOR COVER REMOVAL 1.1.1 Front Cover 1. Open the front cover [A]. 2. Remove the front cover (1 snap ring [B]). 1.1.2 Right Cover 1. Open the front cover. 2. - Page 128 EXTERIOR AND INNER COVERS 24 June 1994 1.1.3 Upper Left Cover 1. Remove the upper left cover [A] (2 screws). 1.1.4 Lower Left Cover 1. Take out the copy tray [B]. 2. Remove the lower left cover [C] (2 screws). 1.1.5 Upper Rear Cover 1.
- Page 129 24 June 1994 EXTERIOR AND INNER COVERS 1.1.7 Upper Cover 1. Remove the platen cover or DF. 2. Remove the left side scale (2 screws). 3. Remove the exposure glass. (See Exposure Glass Removal.) 4. Remove the upper rear cover (2 screws). 5.
-
Page 130: Inner Cover Removal
EXTERIOR AND INNER COVERS 24 June 1994 1.2 INNER COVER REMOVAL 1. Open the front cover [A]. 2. Open the upper unit by pushing the release lever [B]. 3. Remove the inner cover [C] (5 screws) as shown. -
Page 131: Exposure Glass Removal
24 June 1994 OPTICS 2. OPTICS 2.1 EXPOSURE GLASS REMOVAL 1. Take off the left scale [A] (2 shoulder screws). 2. Grasp the left edge of the exposure glass [B] and lift it up slightly. Slide the other edge out from under the right glass holder [C]. Remove the exposure glass. -
Page 132: 1St Mirror Removal
OPTICS 24 June 1994 2.2 1ST MIRROR REMOVAL 1. Turn off the main switch. 2. Remove the exposure glass. (See Exposure Glass Removal.) 3. Move the first scanner to the cutout position (150 mm from the left scale). 4. Move the 1st scanner to the front side. Then, while holding the scanner, press up on the rear spring plate [A] with a finger and remove the plate with a pair of pliers. - Page 133 24 June 1994 OPTICS – To reinstall – 1. Insert the 1st mirror into the rear side plate cutout. Then insert the front side of the mirror into the front spring plate. NOTE: Make sure when installing the mirror that the reflecting surface [A] is on the upper side as shown.
-
Page 134: 2Nd And 3Rd Mirror Removal
OPTICS 24 June 1994 2.3 2ND AND 3RD MIRROR REMOVAL 1. Turn off the main switch. 2. Remove the exposure glass. (See Exposure Glass Removal.) 3. Slide the 1st scanner two thirds of the way to the right. 4. Remove the front spring plate [A] of the 2nd mirror [B]. 5. - Page 135 24 June 1994 OPTICS – To reinstall – 1. Position the 2nd mirror [A]/3rd mirror [B] in the front and rear side plate cutouts. NOTE: Make sure that the reflecting surface [C] faces the lens. 2. Set the rear spring plate [D] in the rear side plate cutout while holding the mirror and set the front spring plate [E] in the front side plate cutout.
-
Page 136: 4Th And 5Th Mirror Replacement
OPTICS 24 June 1994 2.4 4TH AND 5TH MIRROR REPLACEMENT 1. Turn off the main switch. 2. Remove the exposure glass. (See Exposure Glass Removal.) 3. Remove the lens cover [A] (2 screws). 4. Remove the 4th and 5th mirror assembly drive gear [B] (1 E-ring). 5. -
Page 137: Exposure Lamp Replacement
24 June 1994 OPTICS 2.5 EXPOSURE LAMP REPLACEMENT 1. Turn off the main switch and unplug the copier. 2. Remove the exposure glass. (See Exposure Glass Removal.) 3. Move the first scanner to the cutout position at the rear frame [A] and move the first scanner toward the front side as shown. - Page 138 OPTICS 24 June 1994 8. Install a new lamp [A]. Use a strip of paper as shown to hold the lamp. Set the front terminal [B] first. NOTE: a) Make sure that the exposure lamp is properly positioned at the front and rear [C] terminals.
-
Page 139: Thermofuse Replacement
24 June 1994 OPTICS 2.6 THERMOFUSE REPLACEMENT 1. Turn off the main switch and unplug the copier. 2. Remove the exposure glass. (See Exposure Glass Removal.) 3. Replace the thermofuse [A] (2 screws). NOTE: When installing a new thermofuse, make sure that the thermofuse [B] is in contact with the reflector [C] as shown. -
Page 140: Scanner Drive Wire Replacement
OPTICS 24 June 1994 2.7 SCANNER DRIVE WIRE REPLACEMENT 2.7.1 Wire Removal 1. Remove the following covers and parts. Platen cover (if installed) Document feeder (if installed) Upper rear cover Upper cover Exposure glass Operation panel 2. Loosen the screw securing the rear first scanner wire clamp [A]. 3. - Page 141 24 June 1994 OPTICS 2.7.2 Wire Installation 1. Put the bead at the end of the dark silver wire [1] in slot [A]. 2. Put the bead of the light silver wire [2] in slot [B]. 3. Wind the dark silver wire [1] clockwise half a turn around the pulley. Wind the light silver wire [2] clockwise one complete turn around the pulley.
- Page 142 OPTICS 24 June 1994 6. Put the bead of the dark silver wire [3] in slot [A], directly below the slot that holds the end of the light silver wire [2]. 7. Put the bead of the light silver wire [4] in the other slot [B], directly below the slot that holds the end of the dark silver wire [1].
- Page 143 24 June 1994 OPTICS 11. Manually move the first and second scanners to home position. 12. Insert the four positioning pins [A] in the holes on the scanner guide rails to secure the first and second scanners. 13. Loosen the wire tension bracket fixing screw [B] and the wire tension adjusting screw [C].
- Page 144 OPTICS 24 June 1994 16. Place the dark silver wires ([1] and [3]) around the pulleys as shown. 17. Attach wire [3] to the rear wire fixing plate [A], then hook one end of tension spring [B] to the fixing plate and the other end to the frame projection.
- Page 145 24 June 1994 OPTICS 20. Adjust the tension in the second scanner wire. (1) Insert positioning pin [A] in the hole at the front end of the second scanner. (2) Loosely insert positioning pin [B] in the hole at the rear end of the second scanner.
- Page 146 OPTICS 24 June 1994 21. Adjust the first scanner wire clamps. (1) Loosen the front and rear first scanner wire clamps [A]. (2) Insert the front and rear positioning pins [B] (2 pcs). (3) Tighten the wire clamps. 22. Reassemble. NOTE: Always adjust the first scanner wire clamps after adjusting the tension in the second scanner wire.
-
Page 147: Scanner Motor Replacement
24 June 1994 OPTICS 2.8 SCANNER MOTOR REPLACEMENT 1. Turn off the main switch. 2. Remove the platen cover or DF. 3. Remove the upper rear cover and the upper cover. 4. Remove the 6P connector [A] from the main board (CN 105) and remove the scanner motor harness from the harness clamps. -
Page 148: Lens Drive Motor Replacement
OPTICS 24 June 1994 2.9 LENS DRIVE MOTOR REPLACEMENT (A152 Copier only) 1. Turn off the main switch. 2. Remove the exposure glass and the lens cover. 3. Remove the tension spring [A] and the lens drive wire [B]. 4. Remove the upper rear cover (2 screws). 5. -
Page 150: Development And Toner Supply
24 June 1994 DEVELOPMENT AND TONER SUPPLY 3. DEVELOPMENT AND TONER SUPPLY 3.1 DEVELOPMENT UNIT REMOVAL 1. Open the front cover. 2. Take out the development unit [A] while pulling the left side of the development cover [B] (2 screws). 5-25... -
Page 151: Toner Supply Unit Removal
DEVELOPMENT AND TONER SUPPLY 24 June 1994 3.2 TONER SUPPLY UNIT REMOVAL 1. Take out the development unit. (See Development Unit Removal.) 2. Remove the toner supply unit [A] (2 screws). NOTE: When reinstalling, make sure that there is no gap [B] between the toner supply unit and the development unit. -
Page 152: Developer Replacement
24 June 1994 DEVELOPMENT AND TONER SUPPLY 3.3 DEVELOPER REPLACEMENT 1. Take out the development unit (2 screws). 2. Set the development unit on a large sheet of paper [A]. 3. Remove the toner supply unit (2 screws). (See Toner Supply Unit Removal.) 4. -
Page 153: Inlet Seal Removal
DEVELOPMENT AND TONER SUPPLY 24 June 1994 3.4 INLET SEAL REMOVAL 1. Take out the development unit. 2. Remove the inlet seal plate [A] by working a small slotted screwdriver as shown. NOTE: To install a new inlet seal plate, remove the covering from the double-sided tape [B] and affix the inlet seal [C] to the development unit lower casing. -
Page 154: Toner Supply Clutch Replacement
24 June 1994 DEVELOPMENT AND TONER SUPPLY 3.5 TONER SUPPLY CLUTCH REPLACEMENT 1. Turn off the main switch. 2. Remove the upper rear cover and main board (all connectors and 3 locking supports). 3. Remove the toner supply clutch bracket [A] (3 screws). 4. -
Page 155: Development Bias Voltage Adjustment (Sp9-38)
DEVELOPMENT AND TONER SUPPLY 24 June 1994 3.6 DEVELOPMENT BIAS VOLTAGE ADJUSTMENT (SP9-38) ADJUSTMENT STANDARD Adjusting VR SP mode DC –500 ± 10 V SP9-38 NOTE: VR3 on the CC/Grid/Bias power pack spare parts is pre-adjusted. Usually it is not necessary to adjust VRB when the CC/Grid/Bias power pack is replaced. -
Page 156: Cleaning Unit Removal
24 June 1994 CLEANING 4. CLEANING 4.1 CLEANING UNIT REMOVAL NOTE: The bottom plate of the cleaning unit may be hot from the heat of the fusing unit. Remove the unit by supporting your left hand on the cushion [A] attached under the bottom plate as shown. 1. -
Page 157: Cleaning Blade Replacement
CLEANING 24 June 1994 4.2 CLEANING BLADE REPLACEMENT 1. Remove the cleaning unit [A]. (See Cleaning Unit Removal.) 2. Remove the cleaning blade [B] (1 shoulder screw). NOTE: a) Do not touch the edge of a new cleaning blade, as it is damaged easily. -
Page 158: Used Toner Collection
24 June 1994 CLEANING 4.3 USED TONER COLLECTION CAUTION: After disposing of the toner in the used toner tank, SP83 must be done to clear the memory counter (SP58). 1. Remove the cleaning unit. (See Cleaning Unit Removal.) 2. Set the cleaning unit on a large sheet of paper [A]. 3. -
Page 159: Entrance Seal Replacement
CLEANING 24 June 1994 4.4 ENTRANCE SEAL REPLACEMENT less than 0.5mm 1. Remove the cleaning unit. (See Cleaning Unit Removal.) 2. Remove the used toner. (See Used Toner Collection.) 3. Clean the cleaning unit a vacuum cleaner. 4. Remove the two seals [A] and the entrance seal [B] together with the strip of double-sided tape securing it to the lower casing [C]. -
Page 160: Paper Feed
24 June 1994 PAPER FEED 5. PAPER FEED 5.1 FEED ROLLER REPLACEMENT 1. Turn off the main switch. 2. Remove the 1st paper tray. 3. Remove the front cover. 4. Open the upper unit by pushing the release lever. 5. Remove the harness cover [A] (2 screws). 6. - Page 161 PAPER FEED 24 June 1994 9. Remove the lower rear cover [A] (2 screws). 10. While turning the main motor [B] clockwise (viewed from the front), turn the feed rollers [C] until you can remove the feed roller screws [D]. 11.
-
Page 162: Paper Tray Switch Replacement
24 June 1994 PAPER FEED 5.2 PAPER TRAY SWITCH REPLACEMENT 1. Turn off the main switch. 2. Remove the paper tray. 3. Open the front cover. 4. Open the upper unit by pushing the release lever. 5. Remove the lower rear cover (2 screws). 6. -
Page 163: Relay Sensor And Registration Sensor Replacement
PAPER FEED 24 June 1994 5.3 RELAY SENSOR AND REGISTRATION SENSOR REPLACEMENT 1. Turn off the main switch. 2. Open the front cover. 3. Open the upper unit by pushing the release lever. 4. Remove the harness cover [A] (2 screws). 5. - Page 164 24 June 1994 PAPER FEED 8. Remove the relay sensor [A] from the guide plate [B] as shown. 9. Remove the registration sensor bracket [C] (1 screw and 1 connector [D]). 10. Remove the registration sensor [E] from the bracket as shown. 5-39...
-
Page 165: Relay Roller Clutch, Paper Feed Clutch And Registration Clutch Replacement
PAPER FEED 24 June 1994 5.4 RELAY ROLLER CLUTCH, PAPER FEED CLUTCH AND REGISTRATION CLUTCH REPLACEMENT 1. Turn off the main switch. 2. Open the front cover. 3. Open the upper unit by pushing the release lever. 4. Remove the lower rear cover (2 screws). 5. - Page 166 24 June 1994 PAPER FEED 8. Remove the registration clutch [A] (1 E-ring). 9. Remove the relay roller clutch [B] (1 allen screw). 10. Remove the clutch stopper [C] (1 screw). 11. Remove the timing belt tightener [D] (1 spring [E]). 12.
-
Page 167: Around The Drum
AROUND THE DRUM 24 June 1994 6. AROUND THE DRUM 6.1 DRUM REPLACEMENT 1. Open the front cover 2. Remove the following units: • Development unit (See Development Unit Removal.) • Cleaning unit (See Cleaning Unit Removal.) • Charge corona unit [A] and wire cleaner (1 screw) 3. - Page 168 24 June 1994 AROUND THE DRUM 9. Set the new OPC drum [A] in the unit without removing the protective sheet [B]. NOTE: When setting the drum in the unit, be careful not to strike it against the rail. 10. Reinstall the front drum holder [C] (2 screws). NOTE: Do not bend the grounding plate [D].
-
Page 169: Quenching Lamp Replacement
AROUND THE DRUM 24 June 1994 6.2 QUENCHING LAMP REPLACEMENT 1. Open the front cover. 2. Remove the following parts: • Inner cover • Development unit • Cleaning unit • Charge corona unit • Upper rear cover 3. Hold down the top of the upper unit and open the upper unit by pushing the release lever. -
Page 170: Erase Lamp Replacement
24 June 1994 AROUND THE DRUM 6.3 ERASE LAMP REPLACEMENT 1. Remove the upper rear cover (2 screws). 2. Remove the main board [A] (all connectors and 3 locking supports). 3. Remove the erase lamp [B] (1 screw). NOTE: Do not use alcohol to clean the erase lamp. This damages the resin in the covers of the LEDs. -
Page 171: Charge Corona Wire Replacement
AROUND THE DRUM 24 June 1994 6.4 CHARGE CORONA WIRE REPLACEMENT 1. Open the front cover. 2. Remove the charge corona unit [A] together with the wire cleaner [B] (1 screw). 3. Remove the wire cleaner from the charge corona unit. 4. -
Page 172: Charge Corona Grid Plate Replacement
24 June 1994 AROUND THE DRUM 6.5 CHARGE CORONA GRID PLATE REPLACEMENT 1. Open the front cover. 2. Remove the charge corona unit together with wire cleaner (1 screw). 3. Unhook the grid plate anchor [A]. 4. Remove the grid plate [B] as shown. NOTE: a) Oils and chemicals from your hands will deteriorate the grid plate. -
Page 173: Transfer/Separation Corona Wire Replacement
AROUND THE DRUM 24 June 1994 6.6 TRANSFER/SEPARATION CORONA WIRE REPLACEMENT 1. Open the front cover. 2. Open the upper unit by pushing the release lever. 3. Pull the transfer/separation (TC/SC) corona unit [A] toward the registration roller side (1) and release the left positioning tabs [B] of the TC/SC unit from the left holders [C] in the transport unit (2). - Page 174 24 June 1994 AROUND THE DRUM 6. Replace the transfer corona wire [A] and the separation corona wire [B]. NOTE: a) When installing the separation corona wire, make sure that the wire junction [C] is positioned inside the rear endblock. b) The transfer and separation corona wires must be in the grooves of the front and rear endblock as shown.
- Page 175 AROUND THE DRUM 24 June 1994 7. Reinstall the TC/SC corona unit [A]. NOTE: a) When reinstalling the TC/SC corona unit, first set the right positioning tabs [B] of the TC/SC corona unit into the right holders [C] in the transport unit, then set the left positioning tabs [D] into the left holders [E] by pulling the TC/SC corona unit towards the registration roller side.
-
Page 176: Id Sensor Replacement
24 June 1994 AROUND THE DRUM 6.7 ID SENSOR REPLACEMENT 1. Remove the drum unit, then remove the drum from the unit. (See Drum Replacement.) NOTE: Cover the drum with paper to prevent the drum from being exposed to light. 2. -
Page 177: Pick-Off Pawl Replacement
AROUND THE DRUM 24 June 1994 6.8 PICK-OFF PAWL REPLACEMENT 1. Remove the drum unit, then separate the drum from the unit. (See Drum Replacement.) NOTE: Cover the drum with paper after removing it from the drum unit. This prevents the drum from being exposed to light. 2. -
Page 178: Transfer/Separation Power Pack Replacement
24 June 1994 AROUND THE DRUM 6.9 TRANSFER/SEPARATION POWER PACK REPLACEMENT 1. Remove the paper tray [A]. 2. Remove the front cover [B] (1 snap ring). 3. Remove the drum unit. (See Drum Replacement.) 4. Remove the transfer/separation corona unit. (See Transfer/Separation Corona Wire Replacement.) 5. - Page 179 AROUND THE DRUM 24 June 1994 8. Remove the T/S power pack [A] from the transport unit [B] (4 screws). NOTE: a) When reinstalling the transport unit in the copier, make sure the front [C] and rear [D] hooks are positioned correctly as shown.
-
Page 180: Corona Current Adjustment
24 June 1994 AROUND THE DRUM 6.10 CORONA CURRENT ADJUSTMENT NOTE: The corona current varies with environmental conditions such as humidity and atmospheric pressure. The corona current is adjusted at the factory and is suitable under a wide range of environmental conditions. - Page 181 AROUND THE DRUM 24 June 1994 NOTE: Do steps 4 – 10 before adjusting the transfer corona current, separation corona current or charge corona wire height: 4. Remove the drum from the drum unit. Cover the drum with paper. (See Drum Replacement.) 5.
- Page 182 24 June 1994 AROUND THE DRUM 6.10.1 Charge Corona Current Adjustment (SP9-2) ≈ 50 mm ≈ 40 mm – Wire Height Adjustment – NOTE: If the copy image is uneven from side-to-side in black solid areas after the front end block of the charge corona unit is replaced, check and adjust the wire height as follows: 1.
- Page 183 AROUND THE DRUM 24 June 1994 – Charge Corona Current Adjustment – ADJUSTMENT STANDARD Adjusting VR SP mode DC – 400 ± 3 µA SP9-2 NOTE: 1) VR1 on the CC/Grid/Bias power pack spare parts is pre-adjusted. Usually it is not necessary to adjust VRM when the CC/Grid/Bias power pack is replaced.
- Page 184 24 June 1994 AROUND THE DRUM 6.10.2 Grid Voltage Adjustment (SP9-48) ADJUSTMENT STANDARD Adjusting VR SP mode DC –880 ± 10 V SP9-48 NOTE: VR2 on the CC/Grid/Bias power pack spare parts is pre-adjusted. Usually it is not necessary to adjust VRG when the CC/Grid/Bias power pack is replaced.
- Page 185 AROUND THE DRUM 24 June 1994 6.10.3 Transfer Corona Current Adjustment (SP9-5) ADJUSTMENT STANDARD Adjusting VR SP mode DC –31.0 ± 0.5 µA SP9-5 1. Reinstall the TC/SC corona unit and position the drum shoe [A] on the center of the shaft so that the axis of the current detection plate [B] is aligned with the transfer corona wire as shown.
- Page 186 24 June 1994 AROUND THE DRUM 6.10.4 Separation Corona Current Adjustment (SP9-6) ADJUSTMENT STANDARD Adjusting VR SP mode AC 49 ± 1.0 µA SP9-6 1. Reinstall the TC/SC corona unit and position the drum shoe [A] on the center of the shaft so that the axis of the current detection plate [B] is aligned with the separation corona wire as shown.
-
Page 187: Exit Unit Removal
FUSING 24 June 1994 7. FUSING 7.1 EXIT UNIT REMOVAL 1. Remove the copy tray. 2. Loosen the screw [A] in the rear holder [B]. 3. Slide the rear holder toward the rear side and remove the exit unit [C]. 5-62... -
Page 188: Fusing Unit Removal
24 June 1994 FUSING 7.2 FUSING UNIT REMOVAL 1. Make sure that the main switch is turned off and the power supply cord is unplugged. 2. Remove the platen cover or DF. 3. Open the front cover. 4. Remove the following covers and units. Development unit Upper rear cover Charge corona unit and wire cleaner... - Page 189 FUSING 24 June 1994 11. Open the upper unit gently while holding it until the upper unit stops at the 90° position as shown. 12. Free the four fusing harnesses and remove the unit [A] as shown (2 screws). NOTE: Make sure the 3P connector harness [B] is free from the notch [C] in the frame before removing the fusing unit.
- Page 190 24 June 1994 FUSING 13. Reassemble. NOTE: 1) When reinstalling the fusing unit [A], make sure that the two positioning pins [B] and the positioning screw [C] fit through the two notches [D] and the hole [E] in the fusing frame. 2) When closing the upper unit, make sure that the torsion bars [F] are positioned on the front [G] and rear [H] brackets as shown.
-
Page 191: Hot Roller Replacement
FUSING 24 June 1994 7.3 HOT ROLLER REPLACEMENT 1. Remove the exit unit. (See Exit Unit Removal.) 2. Remove the fusing unit. (See Fusing Unit Removal.) 3. Remove the fusing cover [A] (1 screw). 4. Remove the thermoswitch bracket [B] (1 screw). 5. - Page 192 24 June 1994 FUSING 9. Remove the front [A] and rear [B] pressure springs. 10. Remove 1 C-ring [C] and 1 bearing [D] (front side). 11. Remove the relay gear [E] (1E-ring). 12. Slide the hot roller [F] to the rear. 13.
-
Page 193: Pressure Roller Replacement
FUSING 24 June 1994 7.4 PRESSURE ROLLER REPLACEMENT 1. Remove the hot roller. (See Hot Roller Replacement.) 2. Remove screw [A] securing the fusing entrance guide [B]. 3. Turn the entrance guide clockwise as shown. 4. Remove the pick-off pawl securing bracket [C] (2 screws). 5. -
Page 194: Fusing Lamp Replacement
24 June 1994 FUSING 7.5 FUSING LAMP REPLACEMENT 1. Make sure that the main switch is turned off and the power supply cord is unplugged. 2. Remove the drum unit. (See Drum Replacement.) 3. Remove the fusing cover [A] (1 screw). 4. -
Page 195: Fusing Thermoswitch Replacement
FUSING 24 June 1994 7.6 FUSING THERMOSWITCH REPLACEMENT 1. Turn off the main switch and unplug the power supply cord. 2. Remove the drum unit. (See Drum Replacement.) 3. Remove the fusing cover [A] (1 screw). 4. Remove the thermoswitch bracket [B] (1 screw). 5. -
Page 196: Fusing Thermistor Replacement
24 June 1994 FUSING 7.7 FUSING THERMISTOR REPLACEMENT 1. Turn off the main switch and unplug the power supply cord. 2. Remove the drum unit. (See Drum Replacement.) 3. Remove the fusing cover [A] (1 screw). 4. Remove the upper rear cover (2 screws). 5. -
Page 197: Fusing Pressure Adjustment
FUSING 24 June 1994 7.8 FUSING PRESSURE ADJUSTMENT 1. Turn off the main switch and unplug the power supply cord. 2. Open the front cover. 3. Open the upper unit by pushing the release lever. 4. Remove the fusing unit cover [A] (1 shoulder screw). 5. -
Page 198: Copy Quality Adjustment
24 June 1994 COPY QUALITY ADJUSTMENT 8. COPY QUALITY ADJUSTMENT – General Information – Image density is affected by the following factors: (1) Light Intensity (2) Bias Voltage (3) Toner Density (4) Grid Voltage (5) Charge Corona Current The items listed above must be kept in balance to maintain correct image density. -
Page 199: Light Intensity Adjustment
COPY QUALITY ADJUSTMENT 24 June 1994 8.1 LIGHT INTENSITY ADJUSTMENT 1. Every Call 2. When replacing the following parts When: Exposure Lamp AC Drive Board Main Board Drum Auto Image Density Sensor Purpose: To maintain the correct light intensity. Level 2 (E0.2) of the gray scale on the OS-A4 Adjustment chart should be slightly visible on the copy when Standard:... -
Page 200: Side-To-Side Exposure Adjustment
24 June 1994 COPY QUALITY ADJUSTMENT 8.2 SIDE-TO-SIDE EXPOSURE ADJUSTMENT When: The exposure is uneven side-to-side. Purpose: To maintain even exposure. Adjustment The side-to-side variation of the gray scales on Standard: the test chart should be less than one level. How to Adjust: Move the exposure adjustment plates. -
Page 201: Image Bias Voltage Adjustment
COPY QUALITY ADJUSTMENT 24 June 1994 8.3 IMAGE BIAS VOLTAGE ADJUSTMENT 1. The image is blurred even though the image density in black solid areas is acceptable. When: 2. Dirty background. The problem is not caused by excess toner and cannot be solved by adjusting the light intensity. -
Page 202: Toner Density Adjustment
24 June 1994 COPY QUALITY ADJUSTMENT 8.4 TONER DENSITY ADJUSTMENT The customer wants to change the overall image When: density of the copies. To change the toner concentration inside the Purpose: development unit. How to Adjust: SP33 Changes the ID pattern bias voltage and either How it works: raises/lowers the toner supply threshold. -
Page 203: Id Sensor (Vsg) Adjustment
COPY QUALITY ADJUSTMENT 24 June 1994 8.7 ID SENSOR (Vsg) ADJUSTMENT 1. Check Vsg at every call, and adjust Vsg if it is out of the adjustment standard. 2. At replacement of the following parts: • When: ID sensor • Main board •... -
Page 204: Ads (Auto Image Density Sensor) Adjustment
24 June 1994 COPY QUALITY ADJUSTMENT 8.8 ADS (Auto Image Density Sensor) ADJUSTMENT 1. After light intensity adjustment When: 2. ADS voltage is not within the adjustment standard. Purpose: To maintain correct ADS mode operation. Adjustment ADS Reference Voltage = 2.5 ± 0.1 volts Standard: How to Adjust: SP56... -
Page 206: Vertical Magnification Adjustment
24 June 1994 COPY QUALITY ADJUSTMENT – A152 copier – 1. Change the value of SP44 to 8 (default value). 2. Confirm that the scanner wire clamps are positioned correctly using the scanner positioning pins. (See Scanner Wire Installation.) 3. Place a 150 mm scale parallel to the left scale on the exposure glass. 4. -
Page 207: Focus Adjustment
COPY QUALITY ADJUSTMENT 24 June 1994 8.11 FOCUS ADJUSTMENT The copy image is out of focus. When: After adjusting the horizontal magnification. Purpose: To maintain proper focus. Adjustment Copy image in focus. Standard: 1. Loosen a screw and move the 4th/5th mirror How to Adjust: assembly position ... -
Page 208: Leading Edge Erase Margin Adjustment
24 June 1994 COPY QUALITY ADJUSTMENT 8.12 LEADING EDGE ERASE MARGIN ADJUSTMENT The leading edge erase margin is not within the When: adjustment standard. Purpose: To maintain the correct leading erase margin. Adjustment 2.5 ± 1.5 mm (0.1 ± 0.06") Standard: How to Adjust: SP41 (0.4 mm/step, 16 steps) -
Page 209: Side-To-Side Registration Adjustment
COPY QUALITY ADJUSTMENT 24 June 1994 8.14 SIDE-TO-SIDE REGISTRATION ADJUSTMENT Side-to-side registration is out of the adjustment When: standard. Purpose: To maintain the proper side-to-side registration Adjustment 0 ± 2 mm (0 ± 0.08") Standard: 1. Change the lens position. How to Adjust: 2. - Page 210 24 June 1994 COPY QUALITY ADJUSTMENT 6. Remove the pinion gear [A] (1 screw). 7. Remove the front [B] and rear [C] side fences. 8. Remove the registration adjustment plate [D] (2 screws) and set it in the desired position. NOTE: When reinstalling the pinion gear [A], the lines [E] on the gear must fit the lines [F] of the rack gears [G].
- Page 211 COPY QUALITY ADJUSTMENT 24 June 1994 – Lens Position Adjustment – 1. Turn off the main switch and remove the exposure glass. (See Exposure Glass Removal.) 2. Remove the lens cover (2 screws) and lens housing cover (A152 copier only) [A] (2 screws). 3.
-
Page 213: Ozone Filter Replacement
OTHERS 24 June 1994 9. OTHERS 9.1 OZONE FILTER REPLACEMENT 1. Open the front cover. 2. Remove the cleaning unit. (See Cleaning Unit Removal.) 3. Hold down the top of the upper unit and open the upper unit by pushing the release lever. - Page 214 24 June 1994 OTHERS 9.2 220∼230/240V CONVERSION CN421 220 ∼230V 240V 1. Remove the upper rear cover [A] (2 screws). 2. Disconnect the short connector [B] (2P/White) on the ac drive board [C] from CN421 and reconnect it to CN421 as shown in the illustration. 3.
-
Page 215: Optional Equipment Installation
OTHERS 24 June 1994 9.3 OPTIONAL EQUIPMENT INSTALLATION 9.3.1 Optics Anti-condensation Heater Installation 1. Turn off the main switch. 2. Remove the upper rear cover (2 screws). 3. Remove the exposure glass. (See Exposure Glass Removal.) 4. Install the optics heater [A] in the optics cavity as shown (2 screws). 5. - Page 216 24 June 1994 OTHERS 9.3.2 Drum Anti-condensation Heater Installation 1. Open the front cover. 2. Open the upper unit by pushing the release lever. 3. Pull the transfer/separation (TC/SC) corona unit [A] toward the registration roller side (1) and release the left positioning tabs [B] of the TC/SC corona unit from the holders [C] of the transport unit (2).
- Page 217 OTHERS 24 June 1994 9.3.3 Pre-transfer Lamp (PTL) Installation 1. Remove the upper rear cover (2 screws). 2. Open the front cover. 3. Hold down the top of the upper unit and open the upper unit [A] by pushing the release lever. 4.
-
Page 218: Troubleshooting
SECTION 6 TROUBLESHOOTING... -
Page 219: Copy Quality
24 June 1994 COPY QUALITY 1. COPY QUALITY 1.1 BLANK COPY (WHITE COPY) - Problem - White or almost white copy. - Possible Causes - 1. Charge is not applied. CC/Grid/bias power pack (charge or grid) failure • • Poor contact of power pack lead wires Broken charge corona wire •... - Page 220 COPY QUALITY 24 June 1994 - Action - Are the charge and TC/SC corona units correctly installed? Install the charge and TC/SC corona units correctly. Do the charge corona unit terminal and the springs of the TC/SC corona unit properly contact the receptacle terminals? Replace the defective parts.
- Page 221 24 June 1994 COPY QUALITY Check the following points: CN119-5 (Charge trigger line) and CN119-3 (Grid trigger line) • (1) If the signal stays HIGH after the Start key is pressed, replace the main board. (2) If the charge corona does not turn on even if the signal changes to LOW, replace the CC/Grid/Bias power pack.
-
Page 222: Dirty Background
COPY QUALITY 24 June 1994 1.2 DIRTY BACKGROUND - Problem - 1. Dirty background at image density level 4 (manual setting). 2. When newspapers are copied, the background is dirty even at level 7. 3. ADS copies have a dirty background. - Possible Causes - 1. - Page 223 24 June 1994 COPY QUALITY - Action - Make a copy in reduction mode at manual image density level 4. Is the non-image area dirty? Is the optics section dirty? Clean the optics and perform the necessary SP modes in order (SP95, 48, and 56). Is the exposure lamp light intensity too weak due to deterioration? Replace the exposure lamp.
- Page 224 COPY QUALITY 24 June 1994 If dirty background occurs only in ADS mode, do the following: If the ADS voltage is not within ± 0.1 volts of the standard voltage (2.5 • V), readjust the ADS voltage. If the signal at CN101-5 stays HIGH, check the harness and sensor, •...
-
Page 225: Uneven Image Density
24 June 1994 COPY QUALITY 1.3 UNEVEN IMAGE DENSITY - Problem - Uneven image density appears on the copies. - Possible Cause - 1. Dirty optics 2. Uneven exposure adjustment plates 3. Dirty corona wires or grid 4. Uneven height of the charge corona wire - Action - Does the uneven image area shift when a reduction copy is made? Is the optics section dirty? -
Page 226: Vertical Black Bands
COPY QUALITY 24 June 1994 1.4 VERTICAL BLACK BANDS - Problem - Vertical black bands appear on the copy. - Possible Causes - 1. Dirty optics 2. Dust between the cleaning blade and drum 3. Edge of the cleaning blade deformed 4. -
Page 227: Vertical Black Lines
24 June 1994 COPY QUALITY 1.5 VERTICAL BLACK LINES - Problem - Thin black lines appear on the copy. - Possible Causes - 1. Scratched cleaning blade 2. Dirty or scratched exposure glass or dirty or scratched mirrors 3. Scratched or dirty drum 4. -
Page 228: Vertical White Lines Or Bands-1 (Dull Or Blurred)
COPY QUALITY 24 June 1994 1.6 VERTICAL WHITE LINES OR BANDS—1 (DULL OR BLURRED) - Problem - Dull or blurred white lines appear on the copy. - Possible Causes - 1. Dirty or deteriorated charge corona wire 2. Dirty or deformed grid plate 3. -
Page 229: Vertical White Lines Or Bands-2 (Thin, Distinct)
24 June 1994 COPY QUALITY 1.7 VERTICAL WHITE LINES OR BANDS—2 (THIN, DISTINCT) - Problem - Vertical white lines appear on the copy. - Possible Causes - 1. Paper dust on the edge of the cleaning blade 2. Scratched drum 3. -
Page 230: Horizontal Black/White Lines
COPY QUALITY 24 June 1994 1.8 HORIZONTAL BLACK/WHITE LINES - Problem - Black or white lines perpendicular to the paper feed direction appear on the copy image. - Possible Causes - 1. Drum is scratched. If black lines appear at 251 mm intervals, the cause is a scratched drum or toner build up. - Page 231 24 June 1994 COPY QUALITY 1.9 JITTER - Problem - Jitter appears on the copy. - Possible Causes - 1. Drum not turning smoothly 2. Scanner not moving smoothly - Action - Does the jitter interval change when a reduction copy is made? Check drum drive mechanisms such as the drum drive belt and drum pulleys.
-
Page 232: Black Spots On The Copy Image
COPY QUALITY 24 June 1994 1.10 BLACK SPOTS ON THE COPY IMAGE - Problem - The grid voltage is not applied correctly. • Poor contact between the charge corona casing and grid plate CC/G/B power pack defective • Main board defective •... -
Page 233: Skewed (Optical) Copy Image
24 June 1994 COPY QUALITY 1.11 SKEWED (OPTICAL) COPY IMAGE - Problem - IMAGE The copy image is skewed (parallelogram shape). The sides of the copy image are straight, but the leading and trailing edges are skewed. (This differs from skewing originating in the paper path.) - Possible Causes - 1. -
Page 234: Toner Density Too High
COPY QUALITY 24 June 1994 1.12 TONER DENSITY TOO HIGH - Problem - 1. Dirty background appears on the copy. 2. The image density of black solid areas is too high. 3. Toner has built up on the endblock covers of the TC/SC corona unit and also on the upper cover of the development unit. - Page 235 24 June 1994 COPY QUALITY Is the copier in fixed mode? Change the value of SP30 from "1" to "0". Is the charge corona current correct? Readjust the charge corona current. Is the grid voltage correct? Readjust the grid voltage. Check SP33.
-
Page 236: Toner Density Too Low
COPY QUALITY 24 June 1994 1.13 TONER DENSITY TOO LOW - Problem - 1. Light copy 2. Carrier on the copy. 3. Light spots appear in black solid areas. - Possible Causes - 1. The light intensity of the exposure lamp is too low. 2. - Page 237 24 June 1994 COPY QUALITY Is the setting of SP30 "1"? Change the setting of SP30 from "1" to "0". Go to A Is the setting of SP33 "1"? Change the setting of SP33 from "1" to "0". Go to A Is the charge corona current correct? Readjust the charge corona current.
-
Page 238: Toner Scattering
COPY QUALITY 24 June 1994 1.14 TONER SCATTERING - Problem - Toner scatters from the development unit. - Possible Causes - 1. The toner density is too high. 2. The inlet seal on the development unit is out of position. 3. -
Page 239: Unfused Copy Image
24 June 1994 COPY QUALITY 1.15 UNFUSED COPY IMAGE - Problem - Solid images rub off easily. - Possible Causes - 1. The fusing pressure is too weak. 2. The fusing temperature is too low. 3. The thermistor is malfunctioning. - Action - Adjust the position of the pressure springs to increase the fusing pressure. -
Page 240: Paper Misfeed
COPY QUALITY 24 June 1994 1.16 PAPER MISFEED - Phenomenon - 1. The misfeed location number indicator (PE, J1, J2) turns on when the main switch is turned on, even if there is no paper in the copier. 2. The misfeed location number indicator (PE, J1, J2) always turns on at the same location when copies are made. -
Page 241: Transfer Failure
24 June 1994 COPY QUALITY 1.17 TRANSFER FAILURE – Problem – Poor image transfer or separation jams occur continuously. – Possible Causes – 1. The transfer or separation corona wire/casing is dirty. 2. Improper transfer on separation corona output. 3. Damp paper. 4. -
Page 242: Df Original Misfeed Or Skew
COPY QUALITY 24 June 1994 1.18 DF ORIGINAL MISFEED OR SKEW - Problem - When the DF is in use, the original stops on the exposure glass or is skewed even if the electrical components are functioning normally. - Possible Causes - 1. -
Page 243: Service Call Conditions
24 June 1994 SERVICE CALL CONDITIONS 2. SERVICE CALL CONDITIONS 2.1 CODE #11 — EXPOSURE LAMP ERROR - Definition - The feedback signal becomes higher than 4.2 volts (rms) for 1.0 • second when the exposure lamp is on. The feedback signal becomes higher than 1.0 volt (rms) for 1.0 second •... - Page 244 SERVICE CALL CONDITIONS 24 June 1994 Open Replace the exposure lamp. Is the thermofuse open? Open Replace the thermofuse. Is the exposure lamp harness defective? Replace the exposure lamp harness. Replace the main board. 6-26...
- Page 245 24 June 1994 SERVICE CALL CONDITIONS 2.2 CODE #12 — EXPOSURE LAMP ERROR - Definition - The feedback signal falls below 0.5 volt (rms) for 1.0 second when the • exposure lamp is on. The exposure lamp stays on for longer than 10 seconds. •...
- Page 246 SERVICE CALL CONDITIONS 24 June 1994 2.3 CODE #13 — ZERO CROSS SIGNAL ERROR - Definition - The CPU does not receive the zero cross signal within 0.56 second. - Possible Causes - • Defective main board Defective dc power supply board •...
- Page 247 24 June 1994 SERVICE CALL CONDITIONS 2.4 CODE #21 — SCANNER HOME POSITION ERROR - Definition - The scanner home position sensor’s output remains LOW (de-actuated) for 9 seconds after the main switch is turned on. - Possible Causes - Scanner home position sensor failure •...
- Page 248 SERVICE CALL CONDITIONS 24 June 1994 Check the voltage at CN105-2 to 5 on the main board when the main switch is turned on. 17 volts 24 volts Replace the main board. Replace the scanner motor. Is there 5 volts at CN103-11 on the main board when the scanner H.P. sensor is actuated.
- Page 249 24 June 1994 SERVICE CALL CONDITIONS 2.5 CODE #22 — SCANNER HOME POSITION ERROR - Definition - The scanner home position sensor’s output remains HIGH (actuated) for 1.0 second after the scanner starts. - Possible Causes - Scanner home position sensor failure •...
- Page 250 SERVICE CALL CONDITIONS 24 June 1994 Check the voltage at CN105-2 to 5 on the main board when the main switch is turned on. 17 volts 24 volts Replace the main board. Replace the scanner motor. Check that CN103 and CN105 on the main board are correctly connected. Correct Incorrect Connect CN103 and CN105...
- Page 251 24 June 1994 SERVICE CALL CONDITIONS 2.6 CODE #28 — LENS HOME POSITION ERROR (A152 COPIER ONLY) - Definition - The lens home position sensor’s output remains LOW (de-actuated) for 6.0 seconds after the lens moves to the home position. - Possible Causes - Lens home position sensor failure •...
- Page 252 SERVICE CALL CONDITIONS 24 June 1994 Is there 5 volts at CN103-8 on the main board when the lens H.P. sensor is actuated? Replace the lens H.P. sensor. Replace the main board. 6-34...
- Page 253 24 June 1994 SERVICE CALL CONDITIONS 2.7 CODE #29 — LENS HOME POSITION ERROR (A152 COPIER ONLY) - Definition - The lens home position sensor’s output remains HIGH (actuated) for 4.0 seconds after the lens leaves the home position. - Possible Causes - Lens home position sensor failure •...
- Page 254 SERVICE CALL CONDITIONS 24 June 1994 Check that CN103 on the main board is correctly connected. Correct Open Connect CN103. Is there 0 volts at CN103-8 on the main board when the lens H.P. sensor is deactuaed? Replace the main board. Check whether the dc harness (signal line) for the sensor is defective.
- Page 255 24 June 1994 SERVICE CALL CONDITIONS 2.8 CODE #2A — 4TH/5TH MIRROR HOME POSITION ERROR (A152 COPIER ONLY) - Definition - The 4th/5th mirror home position sensor’s output remains LOW (de-actuated) for 2.5 seconds after the 4th/5th mirror assembly moves to the home position. - Possible Causes - 4th/5th mirror home position sensor failure •...
- Page 256 SERVICE CALL CONDITIONS 24 June 1994 Is there 5 volts at CN102-2 on the main board when the 4th/5th mirror H.P. sensor is actuated? Replace the 4th/5th mirror H.P. sensor. Replace the main board. 6-38...
- Page 257 24 June 1994 SERVICE CALL CONDITIONS 2.9 CODE #2B — 4TH/5TH MIRROR HOME POSITION ERROR (A152 COPIER ONLY) - Definition - The 4th/5th mirror home position sensor’s output remains HIGH (actuated) for 4.0 seconds after the 4th/5th mirror assembly leaves the home position. - Possible Causes - 4th/5th mirror home position sensor failure •...
- Page 258 SERVICE CALL CONDITIONS 24 June 1994 Check that CN102 and CN104 on the main board are correctly connected. Correct Incorrect Connect CN102 and CN104. Is there 0 volts at CN102-2 on the main board when the 4th/5th mirror H.P. sensor is deactuated? Replace the main board.
- Page 259 24 June 1994 SERVICE CALL CONDITIONS 2.10 CODE #40 – OPTICS THERMISTOR ERROR -Definition- The optics thermistor is open. -Possible Cause- • Defective thermistor Defective main board • CN113 on the main board is not correctly connected. • -Action- Check the resistance between CN113 pin 1 and pin 2. ∞Ω(Open) Approx.
- Page 261 SERVICE CALL CONDITIONS 24 June 1994 2.12 CODE #53 — FUSING OVERHEAT - Definition - The temperature detected by the thermistor becomes higher than 240°C. - Possible Causes - • Thermistor short Defective ac drive board • Defective main board •...
- Page 262 24 June 1994 SERVICE CALL CONDITIONS 2.13 CODE #55 — FUSING THERMISTOR OPEN - Definition - The temperature value output by the thermistor does not reach 2°C within 20 seconds after the main switch is turned on. - Possible Causes - Thermistor open •...
- Page 263 SERVICE CALL CONDITIONS 24 June 1994 Check the voltage at CN114-6 on the main board. 0 volts 24 volts Replace the main board. Check the voltage at CN114-4 on the main board. 0 volts 24 volts Replace the main board. Check the voltage at CN114-8 on the main board.
- Page 264 24 June 1994 SERVICE CALL CONDITIONS 2.14 CODE #96 — DF TIMING PULSE ERROR - Definition - The DF CPU does not receive a DF timing pulse within 100 milliseconds. - Possible Causes - • Defective DF main board Defective DF motor •...
- Page 265 SERVICE CALL CONDITIONS 24 June 1994 Check that CN113 on the DF main board and CN121 on the pulse generator sensor are correctly connected. Correct Incorrect Connect CN113 and CN121. Turn on DIP switches 1, 3 and 4 on the DF main board and turn on the lift switch.
-
Page 266: Df Communication Error
24 June 1994 SERVICE CALL CONDITIONS 2.15 DF COMMUNICATION ERROR - Problem - The original misfeed indicator blinks (no SC code is indicated). - Definition - The DF CPU does not receive the "DF confirmed" signal from the copier CPU when the main switch is turned on. - Page 267 SERVICE CALL CONDITIONS 24 June 1994 2.16 ABNORMAL CONDITION IN TONER DENSITY DETECTION - Problem - The Auto ID indicator or the selected manual ID level blinks. (No SC Code is indicated.) - Definition - If Vsg goes below 2.5 volts or Vsp goes above 2.5 volts five times in a row. - Possible Causes - Incorrect Vsg voltage •...
- Page 268 24 June 1994 SERVICE CALL CONDITIONS Is Vsg less than 2.5 volts when checking TP110 on the main board with SP Readjust Vsg to 4.0 ± 0.2 volts. Check whether the ID sensor has a short. No short Short Replace the ID sensor. Replace the main board.
- Page 269 SERVICE CALL CONDITIONS 24 June 1994 2.17 OPTICS OVER HEAT PROTECTION (A151 Copier Only) - Problem - The Energy Saver Function key blinks. (No SC code is indicated.) - Definition - The optics thermistor has detected a high temperature condition as shown below.
-
Page 270: Electrical Component Defects
24 June 1994 ELECTRICAL COMPONENT DEFECTS 3. ELECTRICAL COMPONENT DEFECTS 3.1 SENSORS Component Condition Symptom Scanner Home Position Stays HIGH SC code (E22) is displayed. Sensor (CN103-11) (S1) Stays LOW SC code (E21) is displayed. (CN103-11) Lens Home Position Stays HIGH SC code (E29) is displayed. - Page 271 ELECTRICAL COMPONENT DEFECTS 24 June 1994 3.2 SWITCHES OR OTHER ELECTRICAL COMPONENTS Component Condition Symptom Main Switch OPEN The copier does not turn on. (SW1) SHORT The copier does not turn off. Front Cover Safety Switch OPEN The copier does not turn on. (SW2) SHORT The copier does not turn off when the front...
-
Page 272: Fuses And Circuit Breakers
24 June 1994 ELECTRICAL COMPONENT DEFECTS 3.3 FUSES & CIRCUIT BREAKERS Component Circuit Symptom FU201 (250 V/2 A) +5 V (VC) The copier does not turn on even when the (dc power supply board) power supply main switch is turned on. FU202 (250 V/4 A) +24 V (VA) The copier displays E22 on the operation...
Need help?
Do you have a question about the Robin and is the answer not in the manual?
Questions and answers