Epson TM-P60II Technical Reference Manual
With peeler
Hide thumbs
Also See for TM-P60II:
- User manual ,
- Technical reference manual (142 pages) ,
- Installation manual (27 pages)
Table of Contents
Advertisement
Quick Links
Technical Reference Guide
with Peeler
Product Overview
Describes features of the product.
Setup
Describes setup and installation of the product.
Advanced Usage
Describes advanced usage methods for the product.
Application Development Information
Describes how to control the printer and necessary
information when you develop applications.
Handling
Describes how to handle the product.
Replacement of the TM-P60
Describes information for replacement.
Appendix
Describes general specifications and character code
tables.
M00060908
Rev. H
Advertisement
Table of Contents

Subscribe to Our Youtube Channel
Related Manuals for Epson TM-P60II


Summary of Contents for Epson TM-P60II
- Page 1 with Peeler Technical Reference Guide Product Overview Describes features of the product. Setup Describes setup and installation of the product. Advanced Usage Describes advanced usage methods for the product. Application Development Information Describes how to control the printer and necessary information when you develop applications.
- Page 2 Neither is any liability assumed for damages resulting from the use of the information contained herein. Neither Seiko Epson Corporation nor its affiliates shall be liable to the purchaser of this product or third parties for damages, losses, costs, or expenses incurred by the purchaser or third parties as a result of: accident, misuse, or abuse of this product or unauthorized modifications, repairs, or alterations to this product, or (excluding the U.S.) failure to strictly comply with Seiko Epson Corporation’s operating and...
-
Page 3: For Safety
Never disassemble or modify this product. Tampering with this product may result in injury or fire. Be sure to use the dedicated AC adapter, Epson PS-11. Connection to an improper power supply may cause fire. Do not allow foreign matter to fall into the equipment. Penetration by foreign objects may lead to fire. -
Page 4: Safety Precautions On The Rechargeable Battery Pack
Do not connect cables in ways other than those mentioned in this manual. Different connections may cause equipment damage and burning. When connecting a USB cable, do not stress the connector part. Doing so may damage that part. CAUTION Be careful not to drop this product. The product may break or cause injury if it is dropped. Do not use in locations subject to high humidity or dust levels. -
Page 5: Restriction Of Use
Consult your dealer or an experienced radio/TV technician for help. Never disassemble or modify this product. Seiko Epson Corporation shall not be liable for interference to radio/TV resulting from changes or modifica- tions to this product not expressly approved by Seiko Epson Corporation. -
Page 6: About This Manual
About this Manual Aim of the Manual This manual was created to provide information on the development, design, and installation of POS systems and the development and design of printer applications for developers. Manual Content The manual is made up of the following sections: Chapter 1 Product Overview Chapter 2... -
Page 7: Table Of Contents
Contents ■ For Safety..........................3 Key to Symbols..................................3 Safety Precautions ................................3 Safety Precautions on the Rechargeable Battery Pack ..................4 ■ Restriction of Use ........................5 ■ Note about interference ......................5 ■ About this Manual ........................6 Aim of the Manual ................................6 Manual Content .................................. - Page 8 ■ Useful Functions for Smart Devices.................. 27 NFC Tag....................................27 QR Code ....................................27 Setup....................... 28 ■ Flow of Setup ........................28 ■ Installing the Printer......................29 Notes on Using the Wi-Fi Models..........................29 ■ Changing the Paper Width ....................30 ■...
- Page 9 Application Development Information............73 ■ Controlling the Printer ......................73 ePOS-Print XML.................................73 ESC/POS....................................73 ■ Software and Manuals ......................74 Development Kits ................................74 Drivers ....................................75 Utilities ....................................75 Others....................................76 Download ...................................76 ■ iOS Application Development and Distribution ............77 Handling ......................78 ■ Charging Battery ........................78 ■...
- Page 10 ■ Specifications of Interfaces and Connectors ..............100 USB Interface...................................100 Wireless LAN Interface ..............................101 Bluetooth Wireless Interface............................104 NFC Tag....................................108 ■ Character Code Tables....................... 109...
-
Page 11: Product Overview
NFC tag built into the printer unit for printing to a touched printer. Printing triggered by bar code scan by smart device camera. Utility for iOS/Android provides a user-friendly wizard to simplify the connection for smart devices. (Epson TM Utility for iOS/Android™) ... - Page 12 Environment Has a paper-saving function.
-
Page 13: Product Configurations
Chapter 1 Product Overview Product Configurations Interfaces Wi-Fi (IEEE802.11a/b/g/n) + USB interface model Bluetooth (Ver. 2.1 + EDR) + USB interface model NFC Tag You can perform wireless setup for terminals that support NFC by placing the terminal close to the NFC tag (mark) on the printer. - Page 14 Options Battery pack (OT-BY60II) AC adapter (PS-11) Battery charger (OT-CH60II)
-
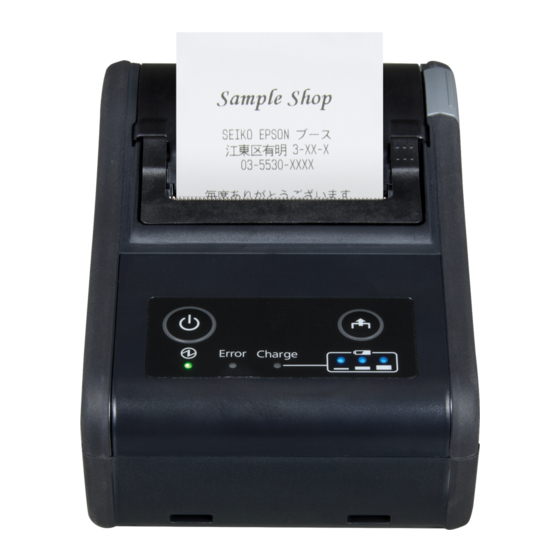
Page 15: Part Names And Functions
Chapter 1 Product Overview Part Names and Functions Paper sensor Roll paper holder Label peeler sensor Roll paper cover Peeler cover Open button Control panel NFC Tag Peeler holder Peeler switch lever Manual cutter Battery cover USB connector cover Connector for AC Belt clip Control Panel Feed button... - Page 16 Buttons Power Button Press this button to turn the printer on. Press this button for 2 seconds or more to turn the printer off. After the power button is pressed, it takes the following time before the printer is initialized. Time to establish the communication is not included.
-
Page 17: Online And Offline
Chapter 1 Product Overview Error LED (Orange) Lights or flashes when the printer is offline. Lights after the power is turned on or after a reset (offline). Automatically goes out when the printer is ready. Lights when the remaining battery charge is at E level or zero (no remaining battery charge). (For details about battery charge levels, see "Operation Mode When Battery is Low"... - Page 18 The Error LED lights during offline. However, it flashes when an error has occurred. For details about the battery charge levels and operation modes, see "Operation Mode When Battery is Low" on page The buzzer beeps five times when there is no more paper or an error has occurred. You can dis- able the buzzer with the memory switches.
-
Page 19: Switching Issuing Mode
Chapter 1 Product Overview Switching Issuing Mode With the roll paper cover and peeler cover open, you can switch the issuing mode between the label continuous issuing mode and the label peeler issuing mode by folding the peeler holder under the peeler cover or using the peeler switch lever. -
Page 20: Power Functions
Power Functions You can customize the printer using the power functions, the auto-power off function and battery charge mode function to save the battery power or minimize the battery deterioration. Auto-Power Off The printer turns off the power automatically after the specified amount of time elapses in the power saving sta- tus. -
Page 21: Operation Mode When Battery Is Low
Chapter 1 Product Overview Operation Mode When Battery is Low The printer acts differently depending on the remaining battery charge and the operation mode when battery is low. The printer has two modes and is initially set to the mode 1. ... -
Page 22: Mode 2
Mode 2 : On : Flash : Off Remaining Battery LED Error LED Printing Communication battery charge Level H Approx. 60 ~ 100% Possible Possible Level M Approx. 40 ~ 60% Possible Possible Level L Approx. 20 ~ 40% Possible Possible Level S Approx. -
Page 23: Error Status
Chapter 1 Product Overview Error Status When an error occurs, the printer stops operating, goes offline, and the Error LED flashes. There are three possible error types: automatically recoverable errors, recoverable errors, and unrecoverable errors. Automatically Recoverable Errors Printing is no longer possible when automatically recoverable errors occur. They can recover easily, as described below. -
Page 24: Unrecoverable Errors
Printing is no longer possible when unrecoverable errors occur. If the same error occurs again even after turn- ing the power back on, contact your dealer or a Epson service center. Immediately turn off the power and remove the battery when unrecoverable errors occur. -
Page 25: Nv Memory (Non-Volatile Memory)
Graphics, such as shop logos to be printed on receipts, can be stored. Even if communication speed is low, high speed graphic printing is possible. Use the TM-P60II Utility to register graphics. You can also print and confirm the registered graphics in the TM- P60II Utility or NV graphics memory print mode. -
Page 26: Customized Values And Memory Switches
P60II Utility, the Status API of the APD, or OPOS ADK to use it for periodical checks or part replacement. Maintenance counter values can also be checked with TM-P60II Utility or by executing a self-test. Maintenance counter values are usually saved every two minutes except in the power saving sta- tus. -
Page 27: Useful Functions For Smart Devices
See the "Epson ePOS SDK for Android/iOS User's Manual" and the Epson ePOS SDK sample program for more details. The sample program also contains a sample implementation method for reading an NFC tag and capturing a QR code. You can try a demo of these functions by using Epson TM Utility for iOS/Android. -
Page 28: Setup
Setup This chapter describes setup and installation of the product and peripherals. Flow of Setup This chapter consists of the following sections, along with the setup flow of the product. Installing the Printer (page 29) Changing the Paper Width (page 30) Installing the Battery (page 32) Installing or Replacing the Roll Paper (page 34) Connecting the Printer (page 42) -
Page 29: Installing The Printer
Chapter 2 Setup Installing the Printer You can install the printer horizontally or vertically. You can also carry it using the belt clip on the back of the printer to hang the printer on your belt. When you install the printer vertically, only the orientation shown below is available. Do not install the printer upside down. -
Page 30: Changing The Paper Width
Changing the Paper Width The printer is initially set to print on 58 mm {2.28"} width paper. When using 29.5 mm {1.16"}, 36 mm {1.82"}, 42 mm {1.65"}, 48.5 mm {1.91"}, 55 mm {2.17"}, or 58 mm {2.28"} width paper, adjust the spacer to the position matching the width of your paper by following the steps below. - Page 31 Chapter 2 Setup Move the spacer to the position matching the width of the paper you are using. Paper width: 58 mm 55 mm 48.5 mm 42 mm 36 m 29.5 mm Insert the top of the spacer and press it down until it clicks.
-
Page 32: Installing The Battery
Installing the Battery The printer does not operate without a charged battery installed. Follow the steps below to install the battery. Be sure to use the battery OT-BY60II. Using a battery other than the one specified may cause fire, explosion, leakage, overheating or other damage. - Page 33 Chapter 2 Setup Close the battery cover. To charge the battery, see "Charging Battery" on page...
-
Page 34: Installing Or Replacing The Roll Paper
Installing or Replacing the Roll Paper Follow the steps below to install or replace the roll paper. When installing or replacing the roll paper, take care not to injure your fingers on the man- ual cutter. CAUTION Use paper that meets the printer specifications. For details about paper specifications, see "Paper Specifications"... - Page 35 Chapter 2 Setup When installing the printer horizontally Set a new roll of paper in the correct direction inside the roll paper holder, and pull the leading edge of the roll paper. Close the roll paper cover. Close the peeler cover. When closing the peeler cover, make sure to close it firmly, pressing both ends.
- Page 36 When using the label continuous issuing mode, you can tear off the paper. When installing the printer vertically Set a new roll of paper in the correct direction inside the roll paper cover. Be sure that roll paper side is at the bottom when you install the printer vertically. Pull the leading edge of the roll paper, and align the left edge of the roll paper with the edge of the cover.
- Page 37 Chapter 2 Setup Close the roll paper cover. Close the peeler cover. When closing the peeler cover, make sure to close it firmly, pressing both ends When using the label continuous issuing mode, you can tear off the paper.
-
Page 38: When Using The Label Peeler Issuing Mode
When Using the Label Peeler Issuing Mode Press the open button to open the roll paper cover and the peeler cover. Remove the used roll paper core if there is one. Press the peeler switch lever to lift the peeler holder. Peeler holder Peeler switch lever If you hang the printer vertically on a belt using a belt clip on the back of the printer, see... - Page 39 Chapter 2 Setup Close the roll paper cover. Close the peeler cover. When closing the peeler cover, make sure to close it firmly, pressing both ends.
- Page 40 When installing the printer vertically Set a new roll of paper in the correct direction inside the roll paper cover. Remove the first label off. If the first label is not removed when using the label peeler issuing mode, the thickness of the label and the backing paper overloads the peeler holder, possibly stopping the paper feed motor.
- Page 41 Chapter 2 Setup Close the roll paper cover. Close the peeler cover. When closing the peeler cover, make sure to close it firmly, pressing both ends. When the label peeler sensor detects the label at power on, the printer goes in the label removal waiting state and the Error LED flashes.
-
Page 42: Connecting The Printer
Connecting the Printer The TM-P60II has dual interfaces: a built-in USB interface and another interface selected by the customer, wireless LAN or Bluetooth interface. See the corresponding section for the interface you selected. Wi-Fi models: "USB Interface" on page 42 "Wireless LAN Interface"... -
Page 43: Wireless Lan Interface
Wireless LAN Interface Using Epson TM Utility, you can easily connect the printer to the network from an iOS or Android devices. We also recommend connecting using a USB cable from a Windows computer, and setting up the wireless LAN using the network setup tool (EpsonNet Config). -
Page 44: Bluetooth Interface
Use a tool, such as a built-in Bluetooth connection tool of your device to establish the connection with the ® printer. If your device is a Windows computer, use EPSON TM Bluetooth Connector, which is a utility to easily pair a terminal and the printer. - Page 45 ® ® Connector, see the TM Bluetooth Con- nector User’s Manual. The device name and passkey are editable with the TM-P60II Utility. Setting up from a Smart Device Necessary Items Prepare the following items. Printer: TM-P60II Device for setting: iOS or Android device ...
- Page 46 Turn on the printer. ® Start TM Bluetooth Connector. Select [Search all printers around this computer], and then click [Search]. Select the printer to be paired ( Not been paired yet), and then click [Connect]. If the window to enter a passkey appears, enter a passkey and click [OK]. Select the port to be used from the pull-down list, and then click [OK].
- Page 47 Chapter 2 Setup Printing method Port name APD print queue ESDPRTxxx (TM-P60II: Queue name) UPOS ESDPRTxxx (UPOS for TM-P60II) ESC/POS command Displayed virtual COM port (e.g. COM4) The “Connection complete” window appears. Click [Test Buzzer] or [Test Printing] to check operation.
-
Page 48: Advanced Usage
With the customized values and memory switches, which are software settings for this printer, you can set the various functions. For an outline of those functions, see the following section. Use TM-P60II Utility, Software setting mode, or ESC/POS commands, to set the customized values and mem- ory switches. - Page 49 Chapter 3 Advanced Usage User NV memory capacity 1 KB (initial setting) 64 KB 128 KB 192 KB NV graphics memory capacity None 64 KB 128 KB 192 KB 256 KB ...
- Page 50 Selectable from: automatic selection, fixed to wireless LAN/Bluetooth interface, or fixed to built-in USB. The TM-P60II has dual interfaces: a built-in USB interface and another interface selected by the customer, wireless LAN or Bluetooth. The tables below describe the modes you can set for the printer to control the dual interfaces.
- Page 51 Chapter 3 Advanced Usage Command execution during offline When this function is enabled, you can execute specified commands even if the printer is offline due to speci- fied causes. Enabled (initial setting) Disabled Automatic paper reduction Extra upper space reduction: disabled (initial setting) or enabled ...
- Page 52 Select “battery status levels for the TM-P60, ” if you replace a TM-P60 with a TM-P60II. Battery status levels for the TM-P60II (initial setting) Battery status levels for the TM-P60 While the battery status for the TM-P60II has 6 levels, that for the TM-P60 has 4 levels.
- Page 53 Chapter 3 Advanced Usage Transmission of Status notice Transmits (initial setting) Does not transmit Buzzer settings Buzzer sounds for low battery warning: disabled or enabled (initial setting) Buzzer sounds for roll paper end warning: disabled or enabled (initial setting) ...
-
Page 54: Paper Layout Setting
Paper Layout Setting Before printing, it is necessary to set the layout information for paper type and size in the printer. Doing paper feeding or printing without this layout setting may result in a paper out (no paper left) or an error. In all of the following cases, therefore, make layout settings before use. -
Page 55: Settings/Check Mode
Chapter 3 Advanced Usage Settings/Check Mode As well as print mode, the following modes are also provided for making various printer settings and checking items. Self-test mode NV graphics information print mode Software settings mode Radio field intensity check mode (Wi-Fi model only) ... -
Page 56: Self-Test Mode
In 1 and 2, the following guidances are printed, the Power LED flashes, and instructs the user's operations. 1. Continuing self-test guidance 2. Mode selection guidance Self-test mode You can check the following items using the self-test. Firmware version ... -
Page 57: Nv Graphics Information Print Mode
Chapter 3 Advanced Usage NV graphics information print mode Prints the following NV graphic information registered to the printers. NV graphics capacity NV graphics usage capacity NV graphics free capacity NV graphics registration Key code for each data, number of X direction dots, number of Y direction dots ... -
Page 58: Software Settings Mode
Software settings mode Set the printer's memory switch (customized value). Print density Command execution during offline Automatic paper reduction Transmission of status notice Interface selection Buzzer control USB communications settings Automatic power off setting ... - Page 59 Chapter 3 Advanced Usage After briefly pressing the FEED button (less than one second) for the number of times shown in the print result, hold down the button for more than one second, and then select the setting items. The setting selected as the setting item, the current settings and initial settings are printed. Depending on the setting item, you may need to continue selecting the setting item before the set- tings are printed.
-
Page 60: Radio Field Intensity Check Mode
Radio field intensity check mode Information on the strength of the wireless LAN radio field is printed. (Wi-Fi model only) The radio field intensity check mode can only be executed in the label continuous issuing mode. If it is executed in the label peeler issuing mode, a paper layout error occurs when paper is detected by the label peeler sensor. -
Page 61: Wireless Module Setup Mode
Chapter 3 Advanced Usage Wireless module setup mode You can change settings or reset the wireless communication settings. For Wi-Fi models, you can change or reset the wireless LAN settings, and for Bluetooth models, you can change or reset the Bluetooth settings. For USB connections, the settings are not reset. - Page 62 SimpleAP mode (SimpleAP) In Wi-Fi model, select 2: SimpleAP to start in SimpleAP mode (the same as the factory default setting). Select this to use Quick connection for Wi-Fi model. For information on the Quick connection function, see "Useful Functions for Smart Devices" on page Auto re-connect to iOS device (Bluetooth) In Bluetooth model, select 2: Bluetooth and set in 1: Auto Re-Connect iOS, you can select whether to enable or disable auto reconnection to iOS devices.
- Page 63 Chapter 3 Advanced Usage Bluetooth Security Settings (Bluetooth) When the firmware version is 6.14 ESC/POS or later, you can change the Bluetooth security settings. (iOS Blue- tooth model only) When the security settings are changed, the link key (pairing information) is removed. You can also change the settings using the printer Utility and TM Utility for iOS/Android.
- Page 64 Pairing method when the security is set to High (from the host) When the security is set to High and the printer is ready to be paired, perform the following procedure. Search for the printer on the Bluetooth settings screen on the host device. Select the printer you want to pair with.
-
Page 65: Hexadecimal Dumping Mode
Chapter 3 Advanced Usage Hexadecimal dumping mode In hexadecimal dumping mode, data from the host computer is printed in hexadecimal numbers and charac- ters. By comparing the print outs and the program, you can check whether or not data is being sent to the printer correctly. -
Page 66: Dynamic Status Sheet Print Mode
Dynamic Status Sheet Print Mode Wi-Fi Model In the dynamic status sheet print mode, the printer prints the dynamic status sheet indicating the wireless LAN settings. Do not run this mode while communicating with the wireless LAN interface. Otherwise, printing might not be performed normally. -
Page 67: Bluetooth Model
Chapter 3 Advanced Usage Bluetooth Model In the dynamic status sheet print mode, the printer prints the dynamic status sheet indicating the Bluetooth set- tings. Dynamic status sheet can be printed when the firmware version is 6.14 ESC/POS or later. Make sure the printer is turned on. -
Page 68: Epsonnet Config (Web Version)
66. For details on the self-test mode, see "Software Settings" on page A user name and a password will be required on the authentication screen. Enter “epson” for both the user name and the password. You can change the password with [Password] in the Optional configuration menu. -
Page 69: Settings
Chapter 3 Advanced Usage Settings Select from the menu list on the left to check or configure the settings. Enable the time server when using a certificate. Otherwise, the printer's Stored Date/Time may not be set correctly and the wireless LAN may be unavailable. If this happens, enable the time server, or initialize the Stored Date/Time from one of the following: ... - Page 70 Configuration menu You can configure the settings as shown in the table below. Menu Settings Wireless Settings (Communication Standard, Network Mode, SSID, Chan- nel, Encryption Type) WPA Pre-Shared Key, Default WEP Key, WEP Key 1/2/3/4, Authentication Algorithm Wireless Power Save Roaming AP Density Server Certificate, Encryption Strength, Automatic Redirect HTTP to...
- Page 71 Chapter 3 Advanced Usage [Roaming] and [AP Density] in the [Wireless] menu can be set only when the Wi-Fi model's firmware is version 1.17 or later. [Wellknown Community Name] in the [SNMP] menu can be set only when the Wi-Fi model's firmware is version 1.19 or later.
-
Page 73: Application Development Information
EPSON Advanced Printer Driver (APD) ePOS-Print XML ePOS-Print XML is the Epson original control command system for POS printers defined in XML. With ePOS- Print XML commands, you can print in environments where http communication is available and from OS applications. -
Page 74: Software And Manuals
Because controlling POS peripherals with original com- mands is not required on the application side, efficient system development is possible. EPSON OPOS ADK for .NET The OPOS ADK for .NET is a POS industry standard Bluetooth model, Wi-Fi model printer driver compatible with Microsoft POS for .NET. -
Page 75: Drivers
In addition to ordinary Windows printer driver functions, this driver Windows Driver (APD) has controls specific to POS. The Status API (Epson original DLL) that monitors printer status and sends ESC/POS commands is also attached to this driver. EPSON TM Virtual Port Driver... -
Page 76: Others
TM printers at the same time. Monitoring Tool Use to check a list of status for the Epson printers connected to the network. Windows You can also update certificates for multiple printers used for WPA-Enterprise in a batch. -
Page 77: Ios Application Development And Distribution
Application Development and Distribution If registering an application that uses Bluetooth in the App Store, Epson must submit an application to Apple in advance. Please apply for each application you want to register in the App Store from the URL below. -
Page 78: Handling
Handling This chapter describes basic handling of the printer. Charging Battery Follow the steps below to charge the battery. You can charge the battery using the printer itself with the AC adapter (PS-11) or using the optional multi-charger (OT-CH60II). Be sure to use the battery OT-BY60II. Using a battery other than the one specified may cause fire, explosion, leakage, overheating or other damage. -
Page 79: Cleaning The Printer
Cleaning the Thermal Head Epson recommends cleaning the thermal head periodically (generally every 3 months) to maintain receipt print quality. After printing, the thermal head can be very hot. Do not touch it and let it cool before you clean it. -
Page 80: Cleaning The Platen Roller/Paper Sensor
Cleaning the Platen Roller/Paper Sensor When paper dust accumulates on the platen roller or the paper sensor, follow the steps below to clean them. To maintain good functional capabilities, clean them regularly (generally every 3 months). Turn off the printer, and open the roll paper cover and the peeler cover. Clean the platen roller and the paper sensor with a cotton swab lightly moistened with water. -
Page 81: Cleaning The Peeler Unit
Chapter 5 Handling Cleaning the Peeler Unit After the peeler is used for a prolonged period of time, the glue from the labels accumulates on the roller or the peeler holder of the peeler unit. If you leave the roller or the peeler holder in such a condition, the glue may stick to issued labels, or a paper jam may occur. -
Page 82: Replacement Of The Tm-P60
Replacement of the TM-P60 The TM-P60II is designed so that it can smoothly replace the TM-P60. This chapter describes useful informa- tion for the replacement. Compatibility TM-P60 TM-P60II Paper width Changeable (29.5 mm {1.16"}, 36 mm {1.82"}, 42 mm {1.65"}, 48.5 mm {1.91"}, 55 mm {2.17"}, 58 mm {2.28"}, 60 mm {2.36"}) - Page 83 Available with the Wi-Fi models Startup time Approx. 2 sec. Wi-Fi models: Approx. 10 sec. Bluetooth models: Approx. 2 sec. ESC/POS commands You can control a TM-P60II with the ESC/POS commands that you used for a TM-P60. Drivers Available Available OPOS ADK...
- Page 84 TM-P60 TM-P60II Battery LIP-2500 OT-BY60II Time for battery charging by printer Approx. 4 hours Approx. 2.5 hours dpi: dots per inch cpl: Characters per line...
-
Page 85: Additional Functions And Functional Improvements
Approx. 20 hours Approx. 56 hours Mass (including the battery) Approx. 640 g Approx. 613 g Battery charge LED Not available Orange LED EPSON TM Virtual Port Driver Not available Available Utilities TM-P60II Utility Not available Available EpsonNet Config Not available... -
Page 86: Appendix
Appendix Product Specifications Printing Specifications Printing method Thermal line printing Dot density 203 × 203 dpi Feeding method Friction feed Paper width* 29.5 mm {1.16"}, 36 mm {1.82"}, 42 mm {1.65"}, 48.5 mm {1.91"}, 55 mm {2.17"}, 58 mm {2.28"} (default), 60 mm {2.36"} Printing width 54.0 mm {2.13"} maximum, 432 dots (when the paper width is 60 mm) 48.5 mm {1.91"} dots, 388 dots (when the label width is 54 mm and the paper width... -
Page 87: Character Specifications
Appendix For changing the paper width, see "Changing the Paper Width" on page Printing speed may be slower, depending on the data transmission speed and the combination of control commands. Character Specifications Number of characters Alphanumeric characters: 95 Extended graphics: 128 ×... -
Page 88: Paper Specifications
Paper Specifications Type Thermal paper: Die-cut label paper (without black mark) Die-cut label paper (with black mark) Receipt paper (without black mark) Receipt paper (with black mark) Form Roll paper Size Width* 29.5 mm paper width: 29.0 ± 0.5 mm {1.14 ± 0.02"} 36.0 mm paper width: 35.5 ±... - Page 89 Appendix Requirement for die-cut label (without black mark) Die-cut label interval = 28.4- 153mm Die-cut label length = 25.4 - 150 mm Dimension of liner portion between die-cut labels = 3 ± 0.5 mm (gap between labels) Requirement for die-cut label (with black mark) Die-cut label interval = 28.4- 153mm Die-cut label length = 25.4 - 150 mm...
- Page 90 Requirement for black mark printing (2) Reverse side (1) Reverse side Paper feed direction Reverse side pre- printable area 30 - 150 15 or more 3 - 5 [Units: mm] The allowable relation between the reflecting rate in the black mark portion (1) and the non black mark portion (2) must be as shown in the table below: Allowable combination of the reflecting rate [units: %] Black mark portion (1)
-
Page 91: Printable Area
Appendix Printable Area Die-cut label paper Example: Liner width: 57.5 mm/Label width: 54 mm Printable area Printable area [Units: mm] Example: Liner width: 59.5 mm/Label width: 56 mm Printable area Printable area [Units: mm] The printable area may be out of alignment by 2.8 mm {0.11"} maximum (left or right), due to the paper position or tolerance of parts. - Page 92 Liner width and printable area (recommended) Liner width (mm) 48.5 29.5 Liner width (design value) (mm) 5 9 . 5 ± 5 7 . 5 ± 54.5 ± 4 8 . 0 ± 4 1 . 5 ± 3 5 . 5 ±...
- Page 93 Appendix Receipt paper Printing is automatically performed in one to four-part energization depending on the printing conditions. During printing with two to four-part energization, a maximum misalignment (horizontal ruled line shift) of 1/4 to 1/2 dot might occur in the paper feeding direction due to segmented printing.
- Page 94 Paper width and printable area Paper width (mm) Paper width (design value) (mm) 59.5 ± 0.5 57.5 ± 0.5 Printable area (mm) 52.5 Left margin (mm) 2.75 2.75 Right margin (mm) 2.75 2.25 Positioning dot number 1 to 432 1 to 420 Total number of dots Characters per line Font A...
-
Page 95: Printing And Cutting Positions
Appendix Printing and Cutting Positions Manual cutter When a peeler is used: Label When a label is issued continuously: Liner + Label or receipt Label peeler sensor Peeler shaft Peeling position Peeler roller When a peeler is used: Liner When a label is issued continuously: Nothing is fed Platen Platen head... -
Page 96: Electrical Characteristics
Electrical Characteristics Be sure to install the battery in the printer. The printer does not operate with the AC adapter only. Be sure to use the optional PS-11 as the AC adapter. Dedicated battery Model: D141A Rated voltage: DC 7.4 V (OT-BY60II) Capacity: 2000 mAh Model: D161A... -
Page 97: Reliability
Appendix Reliability Life* Printer mechanism When printing labels: 500,000 labels issued (When the length of the label in the paper feeding direction is 25.4 mm {1"} through 100 mm {3.94"}. The value above corresponds to approximately 14 km to 50 km {8.71 to 31.1 miles] of running length. -
Page 98: Environmental Conditions
Acoustic noise During operation Approximately 50 dB (bystander position) Note: The values above are measured in the Epson evaluation condition. Acoustic noise differs depending on the paper used, print- ing contents, and the setting values, such as print speed or print density. -
Page 99: External Dimensions And Mass
Width: Approximately 103 mm {4.06"} Depth: Approximately 159 mm {6.26"} Height: Approximately 65 mm {2.56"} (the belt clip excluded) Mass: Approximately 613 g {1.35 lb} (the battery and belt clip included; roll paper excluded) [Units: mm] Colors EBCK (Epson Black) -
Page 100: Specifications Of Interfaces And Connectors
USB vendor-defined class USB printer class Vendor ID 04B8h 04B8h Product ID 0202h 0E0Eh String Descriptor Manufacturer EPSON EPSON Product TM-P60IIPeeler Wi-Fi TM-P60IIPeeler Wi-Fi TM-P60IIPeeler Bluetooth TM-P60IIPeeler Bluetooth Serial number Character string based on the Character string based on the... -
Page 101: Wireless Lan Interface
Appendix Wireless LAN Interface Countries where Wireless LAN can be used are limited. Since notes are provided for each country, check the sheet supplied with the product. Specification IEEE802.11a/b/g/n (2.4 GHz band or 5 GHz band) compliant wireless LAN communication compatible ... - Page 102 Settings in SimpleAP mode (Factory default settings) Parameter Setting value SSID EPSON_Printer Passphrase 12345678 IP Address 192.168.192.168 Subnet mask 255.255.255.0 Printing communication protocol LP, LPR: Transfers printing data TCP Socket Port: Transfers printing data and printer status via bidirectional direct socket communication. LP, LPR ...
- Page 103 Appendix Notes on Wireless LAN connection Because not all the combinations of the printer and wireless LAN devices have been checked for operation, the operation of the printer in combination with all the wireless LAN devices is not guaranteed. Especially in the ad-hoc mode, the printer may not operate normally, depending on the combination of the device to connect with.
-
Page 104: Bluetooth Wireless Interface
Bluetooth Wireless Interface Countries where Bluetooth can be used are limited. Since notes are provided for each country, check the sheet supplied with the product. Specification Bluetooth 2.1 (EDR supported) Bluetooth Power Class 2 Built-in antenna Pass key setting is possible ... - Page 105 Appendix Auto Reconnect Enabled Disabled Feature Printer operations P e r f o r m t h e f o l l o w i n g r e c o n n e c t i o n Wait for a connection from the Bluetooth when Bluetooth is dis- sequence.
- Page 106 Solution Do not send data to the printer if the printer is not ready to print. For developers using the SDK from Epson, see the SDK's User's Manual - Chapter 3 Programming Guide - "Printing After Checking the Printer Status".
- Page 107 When data is sent to the iOS device before it switches to power-saving mode (less than approx. 30 seconds) after the printer has received data from the iOS device When using the SDK from Epson (however, this may occur when receiving data from a printer using a com- mand transmission/reception API)
-
Page 108: Nfc Tag
Solution The solution differs depending on the iOS device being used. See the following table. iOS Device Solution iPhone 5s This situation can be avoided by using one of the fol- lowing methods. iPhone 5c Use a product with the following firmware. iPhone 5 6.12 ESC/POS or later iPad Air... -
Page 109: Character Code Tables
Appendix Character Code Tables Refer to the following URL regarding the character code table. http://www.epson-biz.com/pos/reference/charcode/...
Need help?
Do you have a question about the TM-P60II and is the answer not in the manual?
Questions and answers