MES SQA-V Gold User Manual
Hide thumbs
Also See for SQA-V Gold:
- Service manual (44 pages) ,
- Service manual (40 pages) ,
- Quick start manual (3 pages)

Related Manuals for MES SQA-V Gold


Summary of Contents for MES SQA-V Gold
- Page 1 User Guide Version 2.60 I-Button U S E R G U I D E V e r s i o n 2 . 6 0 I - B u t t o n W H O 5 t h Catalog # V-A-00734-00 September 21, 2015 Revision 21_Sep_2015...
-
Page 2: Table Of Contents
User Guide Version 2.60 I-button WHO 5th Table of SECTION 1: System Specifications and Requirements Contents Sperm Quality Analyzer SQA-V Version 2.60 SECTION 2: System Overview Front Panel Key Pad Navigation Rear Panel Measurement Capillary Slide Adaptor Semen Parameters Reportable Range SECTION 3: Technology Concentration Measurement Motility Measurement... - Page 3 User Guide Version 2.60 I-button WHO 5th SECTION 10: Error Messages and Warning Messages Stabilization Failed Self-Test Failed Electronic Noise Concentration Out of Range APPENDIX Filling the SQA-V Capillary with a Normal Volume Sample APPENDIX Filling the SQA-V Capillary with a Low Volume Sample APPENDIX Using Standard Slides in the Visualization System APPENDIX...
-
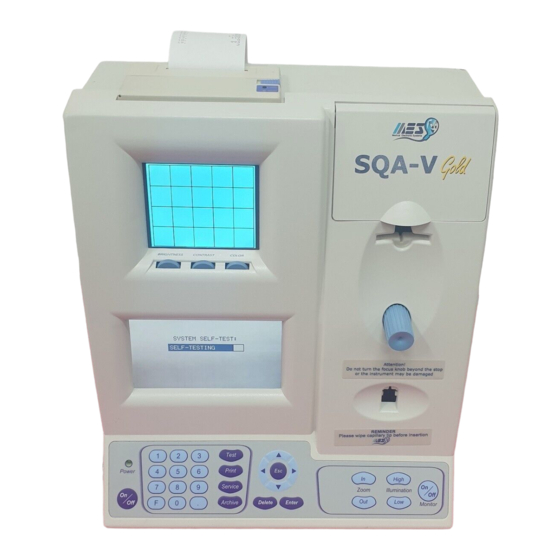
Page 4: Front Panel
Chamber standard: 2 Printing Options: Automatic CONTROLS: Control Media: Latex Beads, Stabilized Sperm CAP or MES (Lot #, Target Values, +/- Ranges set up by user) Front Panel Displays: LCD video display and controls, LCD operational display. Testing: Measurement compartment, Visualization compartment. - Page 5 User Guide Version 2.60 I-button WHO 5th Visualization Compartment White LED illumination system CCD, 330 TV lines Objective: Standard, x20 Signal Output: PAL standard Zoom system for smooth magnification transition between x300 and x500 Focus regulator Maintenance Schedule ...
- Page 6 Run daily prior to testing or per laboratory protocol. Runs assayed latex bead control: "QwikCheck™-beads" (product of Medical Electronic Systems) for concentration and negative control for motility/concentration OR non-assayed: Latex beads or stabilized sperm CAP or MES for concentration. Sample Testing ...
-
Page 7: Keypad Navigation
User Guide Version 2.60 I-Button SECTION 2: System Overview The SQA-V is a high performance analytical medical device that combines technology in electro-optics, computer algorithms and video microscopy. The system performs a 75- second semen analysis and has the ability to print test results and archive up to 500 patient records. -
Page 8: Measurement Capillary
User Guide Version 2.60 I-Button SQA-V Measurement Capillary Components Leur Adaptor Syringe Motility Section Cuvette Separating Directing Section Valve Runner Disposable, designed to collect and test samples in a biologically safe manner. Motility is measured in the 0.3 mm (thin) "Capillary Section." This section requires 20 micro liters of semen. -
Page 9: Semen Parameters
Progressively Motile Sperm with Normal M/ml (#SPERM/SAMPLE VOLUME: MOTILE, Morphology (FSC) IMMOTILE AND TOTAL) Table of the Reportable Range of the SQA-V Reportable REPORTABLE RANGE OF THE SQA-V Gold Range SAMPLE SPERM CONC in M/ml MSC in M/ml Motility % FRESH 2-400 or <... -
Page 10: Section 3: Technology
These light disturbances are converted into electronic signals with “peaks and valleys.” The electronic signal peaks are analyzed by microprocessor software based on a proprietary MES algorithm and translated into motility parameters. -0.2 -0.4 -0.6... -
Page 11: Section 4: Getting Started / Set-Up
User Guide Version 2.60 I-Button SECTION 4: Getting Started / Set-Up Getting Started Power-On Attach factory supplied electrical cable to the outlet on the rear panel. Plug cable into a grounded electrical source. Turn on SQA-V by pressing the main switch located on the rear panel. The Power indicator will illuminate and the following screen will be displayed. -
Page 12: Set-Up System Defaults: Time, Date, Printing, Who, Chamber Standard
User Guide Version 2.60 I-button WHO 5th Set-up System Defaults SQA-V system defaults are set-up through V-Sperm GOLD software. Therefore a connection needs to be established between the SQA-V and the PC. From the MAIN MENU, select SERVICE > SERVICE DATA. SERVICE MENU SERVICE DATA SERVICE PERSONNEL... -
Page 13: Section 5: Testing Semen Samples
User Guide Version 2.60 I-Button SQA-V System Default settings: Date Format (DD/MM/YY) or (MM/DD/YY) NOTE: All Set-up fields must have data in Local date setting order to transfer information to the Conc./Chamber Standard 1 or 2 (See appendix section for more information). SQA-V. -
Page 14: Sample Information
Exception: Low volume samples diluted 1:2 (1+1) with volume, which results QwikCheck dilution media can be used according to User Guide instructions. in a 1:2 dilution. MES has included (1+1) to WASHED – Sample enriched or prepared for artificial insemination using a further define this commercial media to replace seminal plasma. - Page 15 User Guide Version 2.60 I-Button Low Volume If the sample is < 0.5 ml two options are available: Run as a low volume sample Samples and obtain just motility parameters or dilute the sample 1:2 (1+1) with QwikCheck Dilution media and obtain a report of all parameters. ...
-
Page 16: Testing
User Guide Version 2.60 I-button WHO 5th The SQA-V algorithm compensates for the sample dilution as long as the sample has been diluted accurately (If the total sample volume is 0.4 ml then 0.4 ml of a clear media such as Earle’s buffer must be added). ... -
Page 17: Test Results: Normal, Low Quality
User Guide Version 2.60 I-button WHO 5th Test Results TEST RESULTS SPERM CONC. 32.6 M/ml TOTAL MOTILITY <PR+NP> PROG. MOTILITY <PR> NONPROG. MOTILITY <NP> IMMOTILITY <IM> MORPH. NORM. FORMS, WHO 5 TEST RESULTS 9.1 M/ml 2.5 M/ml VELOCITY 9 mic/sec 6.3 M/ml PMSC TOTALS PER VOLUME... -
Page 18: Printing, Saving And Transferring Results To V-Sperm Gold
User Guide Version 2.60 I-Button Printing If the SQA-V default was set to automatically print/save test results, the screen Saving and below will now be activated. Transferring Test Results to V-Sperm DATA SAVED AND NOW PRINTING Immediately after saving/printing test results, an option to transfer the results of the test just completed to V-Sperm is displayed on the SQA-V. -
Page 19: Postvasectomy Test
User Guide Version 2.60 I-button WHO 5th Post Postvasectomy Test Vasectomy The SQA-V runs a five minute POSTVASECTOMY test that can detect the presence of a Testing very small number of motile cells. Once the automated test has been performed, the user is given the option to follow the POSTVASECTOMY protocol outlined below and "scan"... - Page 20 User Guide Version 2.60 I-button WHO 5th Leave the testing capillary in the POSTVASECTOMY visualization chamber and transfer the test results to V-Sperm to capture and # SPERM/SCAN: attach a video clip of the sample in the MOTILE > 30 patient’s record.
-
Page 21: Section 6: Controls And Qc
User Guide Version 2.60 I-Button Controls SECTION 6: Controls Set-Up and Testing External quality control samples (CONTROLS) are run on the RUN CONTROLS mode from the MAIN MENU of the SQA-V. Commercially available latex beads or stabilized Please note: sperm CAP can be run as non-assayed controls. QwikCheck™ beads produced by Medical Electronic Systems are assayed for the SQA-V. -
Page 22: Set-Up: Non Assayed Control
User Guide Version 2.60 I-button WHO 5th Set-Up: Non-Assayed Material to Establish the target value and +/- range This is also the set-up procedure for sperm concentration proficiency challenge Please note: Follow the same Steps 1-5 for “Set-up: Assayed Control” above. To run 10 replicates: Step 6: Enter the following information from the product labeling... -
Page 23: Electronic Self-Test And Auto-Calibration
User Guide Version 2.60 I-button WHO 5th Electronic Self-Test and Auto Calibration The SQA-V automatically runs a series of tests to check calibration settings and the internal operating system. Tests are run when the system is turned on and prior to testing a sample. Start-up: Stabilization and auto calibration: Checks system stability and reference... - Page 24 User Guide Version 2.60 I-button WHO 5th Refer to the table below. Enter numbers in the "SQA-V Value" column that corresponds to the SQA-V system parameters printout. Compare the values. If the value from the SQA-V is within range mark the ...
-
Page 25: Transferring The Sqa-V Archive To V-Sperm
User Guide Version 2.60 I-button WHO 5th Archive SECTION 7: Transferring the SQA-V Archive to V-Sperm The SQA-V automatically prints PATIENT and CONTROL test results when a test is completed. Only PATIENT TEST results (not CONTROL test results) are saved in the SQA-V archive when the testing cycle is complete. -
Page 26: Section 8: Service Menu
User Guide Version 2.60 I-button WHO 5th SECTION 8: Service Menu Service Menus System set-up, maintenance and calibration can be performed from the SERVICE MENU. To activate this screen, press SERVICE in the MAIN MENU. SERVICE MENU SERVICE DATA SERVICE PERSONNEL PRINT SELF-TEST DATA ADD I-BUTTON TESTS Service Data... -
Page 27: Section 9: Operating The Visualization System (Video Display) Introduction
User Guide Version 2.60 I-button WHO 5th Visualization SECTION 9: Operating the Visualization System (Video Display) System The SQA-V Visualization System with video display (upper screen) is used to view and count sperm cells. The visualization system is a critical "link" to V-Sperm GOLD where enhanced, real time video can be displayed on a PC monitor. - Page 28 User Guide Version 2.60 I-button WHO 5th Set the: BRIGHTNESS, CONTRAST & COLOR knobs of the video display: Please note: The visualization COLOR knob: Turn clockwise to the end (maximum color), screen grid of the b. CONTRAST: Turn counterclockwise to the end (maximum contrast), SQA-V is calibrated to a CONC BRIGHTNESS knob: Turn clockwise from the darkest setting until the...
-
Page 29: Stabilization Failed
User Guide Version 2.60 I-button WHO 5th Error and SECTION 10: Error Messages, Warning Messages and General Warning Warning Messages General Warning: The SQA-V equipment’s built-in protection for the operator and the environment is ONLY operational if the SQA-V is operated properly following the manufacturer’s specifications. -
Page 30: Electronic Noise
User Guide Version 2.60 I-button WHO 5th Call technical support if this message is displayed again. Prepare for technical support by printing a copy of the SQA-V SERVICE DATA: Press the SERVICE key on the SQA-V keypad to activate the SERVICE MENU screen. -
Page 31: Appendix 1: Filling The Sqa-V Capillary With A Normal Volume Sample
User Guide Version 2.60 I-button WHO 5th APPENDIX 1: Filling the SQA-V Capillary with a Normal Volume Sample Sample size, collection container and preparation: Sample volume should be at least .5 ml If sample volume is less than .5 ml see Appendix 2. Sample container should be wide-necked and deep enough to facilitate inserting the capillary into the sample at the bottom of the container. - Page 32 User Guide Version 2.60 I-button WHO 5th 3. Holding the capillary in a vertical position (Figure 3), visually confirm that the sample has completely filled the thin section (without a meniscus) and the cuvette section and appears in the Luer adaptor. Tap on the syringe to make sure there are no air bubbles in the sample.
-
Page 33: Appendix 2: Filling The Sqa-V Capillary With A Low Volume Sample
User Guide Version 2.60 I-button WHO 5th APPENDIX 2: Filling the SQA-V Capillary with a Low Volume Sample Sample size, collection container and preparation: 1. A sample as small as 20 micro liters can be tested for motility parameters by filling ONLY the thin section of the testing capillary (Figure 1). -
Page 34: Appendix 3: Using Standard Slides In The Visualization System
User Guide Version 2.60 I-button WHO 5th APPENDIX 3: Using Standard Slides in the Visualization System Introduction The SQA-V has a specially designed slide adaptor that enables the user to use standard slides to view semen samples in the SQA-V visualization compartment. A slide is "seated" in a stable and secure manner as described below and the slide adaptor is inserted into the SQA-V for testing. -
Page 35: Appendix 4: Counting Cells Using The Sqa-V Visualization System
User Guide Version 2.60 I-button WHO 5th APPENDIX 4: Counting Cells using the SQA-V Visualization System Follow the WHO Manual instructions for semen sample collection and preparation. Thoroughly mix the sample before step #2. Pipette 10uL of the semen sample onto a standard slide and cover with a 22x22 mm cover slip. Prepare a new slide if air bubbles or liquid spillage occurs. -
Page 36: Appendix 5: Cleaning The Capillary/Slide Compartment
User Guide Version 2.60 I-button WHO 5th APPENDIX 5: Cleaning the Capillary / Slide Fig. 1: Long cleaning brush Compartments When to clean: DAILY (step 1), WEEKLY (step 2) Or if SELF-TEST or any other failure occurs Or if System becomes contaminated with semen Cleaning kit components: Fig. -
Page 37: Appendix 6: Reference Values Of Semen Variables
Total Progressively Motile Sperm PROG. SPERM ≥12 M MES* Total Functional Sperm FUNC. SPERM MORPH. NORM. Total Morphologically Normal Sperm ≥2 M MES* SPERM The ranges established above are based on WHO 5 reference values or MES (for proprietary semen parameters). Revision 21_Sep_2015... -
Page 38: Appendix 7: Measuring Wbc's In Semen Using Qwikcheck Test Strips
This chemical reaction is not affected by bacteria, trichomonads or erythrocytes present in the specimen. QwikCheck test strips were evaluated by Medical Electronic Systems Ltd. (MES) for use as a qualitative indicator (WBC's >1M/ml) of WBC's in human semen. To test this application WBC's were isolated from blood and re-suspended in seminal plasma. -
Page 39: Appendix 8: Dilution Media: QwikcheckDilution
User Guide Version 2.60 I-button WHO 5th APPENDIX 8: Dilution Media Revision 21_Sep_2015... -
Page 40: Appendix 9: Treating Viscous Samples: Qwikcheck™ Liquefaction
User Guide Version 2.60 I-button WHO 5th APPENDIX 9: Treating Viscous Samples PRODUCT INSERT INTRODUCTION AND INTENDED USE The QwikCheck Liquefaction Kit can be used to accelerate the liquefaction of viscous semen samples that remain viscous thirty minutes after collection. High viscosity can impact the accurate measurement of motility and concentration. -
Page 41: Appendix 10: Assayed Control - Qwikcheck-Beads
User Guide Version 2.60 I-button WHO 5th APPENDIX 10: Assayed Control: QwikCheck™ Beads Revision 21_Sep_2015... -
Page 42: Appendix 11: Concentration Standard: Counting Chambers
User Guide Version 2.60 I-button WHO 5th Appendix 11: Concentration Standard: Counting Chambers A number of commercially available counting chambers are used in laboratories for manually counting sperm cells. These chambers vary by depth and one type requires a diluted sample. It has been clinically established that counts vary by approximately 30% depending on the chamber used. -
Page 43: Appendix 12: Postvasectomy Protocol
User Guide Version 2.60 I-button WHO 5th Appendix 12: Post-vasectomy Protocol The SQA-V runs a five minute POSTVASECTOMY test that can detect the presence of a very small number of motile cells. Once the automated test has been performed the user is given the option to follow the POSTVASECTOMY protocol outlined below (also refer to the Appendix section of this guide) and "scan"... -
Page 44: Appendix 13: Globozoospermic Samples
User Guide Version 2.60 I-button WHO 5th APPENDIX 13: GLOBOZOOSPERMIC SAMPLES Revision 21_Sep_2015... -
Page 45: Appendix 14: Service Report
Calibration parameters: Fill-in the USER REPORT column with the calibration parameters found in the INTERNAL DATA SECTION of the SERVICE DATA REPORT run on the “defective” SQA-V. Contact MES for the initial calibration parameters. These parameters should not have changed. - Page 46 Go to the V-Sperm navigation buttons: UTILITIES>SELF TEST DATA Select PRINT Verify that the parameters listed below fall within the established range Highlight the discrepancies and report to MES S/W Ver. 2.60 SQA-V Self-Test Parameter Criteria Parameters Ref.
-
Page 47: Appendix 15: Sqa-V Test Report Printouts
User Guide Version 2.60 I-button WHO 5th APPENDIX 15: SQA-V Reports Semen Analysis Report Service Data Report Revision 21_Sep_2015... -
Page 48: Appendix 16: Printer Ribbon/Paper Installation
User Guide Version 2.60 I-button WHO 5th APPENDIX 16: Printer Ribbon/Paper Installation Installing the Printer Ribbon: Installing Printer Paper: Turn off the power and open the Ribbon Cover – 1. Open the front cover to expose the paper holder and roller remove old ribbon cassette 2. Cut the edge of the paper as shown below Cut away any paper that is obstructing the ribbon installation area Confirm that the new ribbon cassette is placed in the correct way (see below) 3. Insert the paper into the printer mechanism as shown below. The paper will automatically advance OR press the Insert the new ribbon between the printing head and FEED SWITCH to advance the paper (advance one line at a the platen – press the cassette down from the knob time by pressing once; press and hold to feed continuously) side 4. Load the paper roll into the brackets – make sure the paper Remove the ribbon slack by turning the ribbon in roll is feeding paper in the correct direction – see example ... - Page 49 /QwikCheck GOLD or (ii) the SQA/QwikCheck GOLD is used, operated, opened or serviced other than as directed by MES or is damaged as a result of use, careless transportation (not in its original box, or within the allowed temperature range, operation or servicing other than as directed by MES, the foregoing warranties shall be void and of no further force or effect.
-
Page 50: Appendix 18: Product Performance Data
User Guide Version 2.60 I-button WHO 5th APPENDIX 18: Product Performance Data Abbreviations: TSC: Sperm Concentration (Count) MSC: Motile Sperm Concentration PMSC: Progressive Motile Sperm Concentration Morph Norm Forms: Morphologically Normal Forms Optical Density Millivolt Performance Data Summary The performance the SQA-V is summarized in the text, tables and graphs below. All values concerning sperm concentration measurements are expressed as x10 sperm cells per milliliter (M/ml). - Page 51 0.66 on WHO 3 and 5 standards and MES protocols. Four independent clinical trials were conducted at MES lab, Tel Morphology WHO 4 0.49* Hashomer andrology dept and Ramat Marpe lab (Israel) and ART laboratory, University Hospital of Nantes (France). A total of 0.79...
- Page 52 User Guide Version 2.60 I-button WHO 5th Method comparison: SQA-V was compared to the microscope based on WHO 3 (Trial #1), 4 (Trial #2) and WHO 5 (Trial #4) guidelines. Sensitivity and Specificity were calculated using ROC curves with the cutoffs based on the reference values of WHO and 5 guidelines (see Table #1)....
- Page 53 User Guide Version 2.60 I-button WHO 5th SQA-V Automated System and Visualization System Visualization System only Microscope only SQA-V Linearity Clinical claims: Linear Sperm Concentration throughout the SQA-V dynamic range of 2M/ml to 400M/ml: Squared regression coefficient of Dilution Curve R ≥0.9.
- Page 54 U S E R G U I D E V e r s i o n 3 . 6 0 I - B u t t o n W H O Catalog # V-A-00733-00 April 2016 Release: 12_APR_2016...
- Page 55 User Guide Version 3.60 I-button Table of SECTION 1: Overview Contents V-Sperm Features and Benefits System Requirements SECTION 2: Log-on SECTION 3: Navigating through V-Sperm SECTION 4: Patient Data Locating, Selecting and Authorizing Records Patient List Enter Patient Name Attach Video/Picture to a Test Record Graph Semen Parameters Enter Data (Manual Test/Patient Input) Test Report...
-
Page 56: System Requirements
User Guide Version 3.60 I-button SECTION 1: Overview Features and Benefits Import patient and control data from the SQA-V in a large archive. Import test results on-line. Attach a sperm image to a consolidated semen analysis report. ... -
Page 57: Section 2: Log-On
User Guide Version 3.60 I-button SECTION 2: Log-on After successfully installing V-Sperm, an icon will appear on the desktop of the computer. To start the program: Double click the V-SPERM icon Enter the system from the log-on screen NOTE: Each V-Sperm by typing in: user can be set-up with ... -
Page 58: Enter Patient Name
User Guide Version 3.60 I-button The Patient Data Screen will now PATIENT DATA > PATIENT LIST > then appear and display all of the test records select a patient record for the selected patient. to view the: PATIENT DATA SCREEN The title bar above each test displays the sample number and icons indicating various attachments to the file such as... -
Page 59: Enter Data (Manual Test/Patient Input)
User Guide Version 3.60 I-button PATIENT DATA > Enter Data: Patient Data>Patient PATIENT LIST > then List>Enter Data select a patient record to view the: Select a test record before clicking the enter data button. Please note that there can be PATIENT DATA SCREEN in order to: more than one test per patient in the data... -
Page 60: View/Attach Images
User Guide Version 3.60 I-button View/Attach Images: Patient Data> Patient List>View/Attach Images To view an image: From the Patient Data Screen select a test record with a Click this icon to attach video/camera icon displayed in the title a picture to a report bar. -
Page 61: Deleting Records
From the Controls screen select: Control Media – Latex Beads or Control Set-up This icon indicates that Stabilized Sperm CAP or MES a test has been selected to include in Control Level – Level 1, 2 or the Control Test Negative Control Report. -
Page 62: Section 6: Video
User Guide Version 3.60 I-button SECTION 6: Video Click on the VIDEO navigation button to view semen samples "live" from the SQA-V visualization system and to determine the video settings. Real Time Video – activates the video so samples can be viewed. Double click the NOTE: mouse to maximize the image to full The optimal video... -
Page 63: Section 8: Set-Up
User Guide Version 3.60 I-button Click CONTINUE on the opened V-Sperm Import SQA-V Archive screen. Select YES or NO to delete the SQA-V archive once the tests have been imported to V-Sperm. Exporting the SQA-V data: The Export data option allows the user to Export the Patient data archive and the Controls archive to an external file (Excel format) on the PC: ... -
Page 64: Report
ARROW pointing to the ranges have been set by the manufacturer as parameter to be set. a factory default based on WHO or MES guidelines (see SQA-V User Guide). The Normal Range Settings screen will The user can input values based on appear. -
Page 65: Testing Facility
User Guide Version 3.60 I-button Testing Facility: Set-up>V- Sperm>Report>Testing Facility Enter the details of the testing facility that is to be displayed on the semen analysis report. Check the Show in Report box. Click Apply to save the changes. Language: Set-up>V- Sperm>Report>Language ... -
Page 66: Sqa-V Set-Up
User Guide Version 3.60 I-button SQA-V Set-up (SQA-V version 2.60): In order to set-up SQA-V (patient testing and controls) defaults both the SQA-V and V-Sperm must be connected and activated: Activate the SERVICE DATA screen of the SQA-V by going to: MAIN MENU > SERVICE >... -
Page 67: Section 9: Utilities
User Guide Version 3.60 I-button SECTION 9: Utilities To view and print the SQA-V SELF TEST DATA for technical support purposes: Click on the UTILITIES navigation button Select: SELF TEST DATA Select: PRINT or SAVE SECTION 10: Log-Off LOG-OFF V-Sperm by clicking the navigation button and confirming with a click. -
Page 68: Section 12: Install Software And Hardware
User Guide version 3.60 SECTION 12: Installation of V-Sperm Software and Hardware Overview: The Video Capture Device should be installed prior to using V-Sperm! Step 1: Video Capture Device Installation V-Sperm requires that the user install the video capture device provided by the manufacturer. For video capture device installation instructions, please refer to the package insert in the V-Sperm package. - Page 69 User Guide Version 3.60 I-button SQA-V Communications Cable Step 1: Connect one end of the RS232 communication cable to the PC (Refer to picture: Communication Cable Connect Ver. 1 image) or to the USB to RS232 convertor (Refer to picture: Communication Cable Connect Ver.
-
Page 70: Section 13: Uninstall Software
Control Set-up (from the manufacturer’s labeling): Select type of control: Latex beads or Stabilized Sperm CAP or MES depending on what controls will be run routinely (for proficiency testing, other options can be selected just to run those samples). -
Page 71: Section 14: Usb To Rs232 Converter Installation
User Guide Version 3.60 I-button SECTION 14: Installation Instructions: USB to RS232 Converter General Description The USB to RS232 device provides the connection between the SQA-V and V-Sperm required to import test results which then can be viewed and analyzed from the V-Sperm PC. In order to properly install the USB to RS232 device, please follow the instructions below.
Need help?
Do you have a question about the SQA-V Gold and is the answer not in the manual?
Questions and answers