YOKOGAWA AXG1A Installation Manual

YOKOGAWA AXG1A Installation Manual

Magnetic flowmeter, size: 25 to 400 mm 1 to 16 in.
Hide thumbs Also See for AXG1A:

Advertisement

User's
Manual
Integral Flowmeter
(AXW###)
Remote Transmitter
(AXG1A)
Remote Transmitter
(AXFA11G)
This manual outlines the basic guidelines for installation and
wiring procedures. For the items which are not covered in this
manual, read the user's manuals and the general specifi ca-
tions as listed in Table 1.1.
For explosion protection type, also read the applicable user's
manual as listed in Table 1.1.
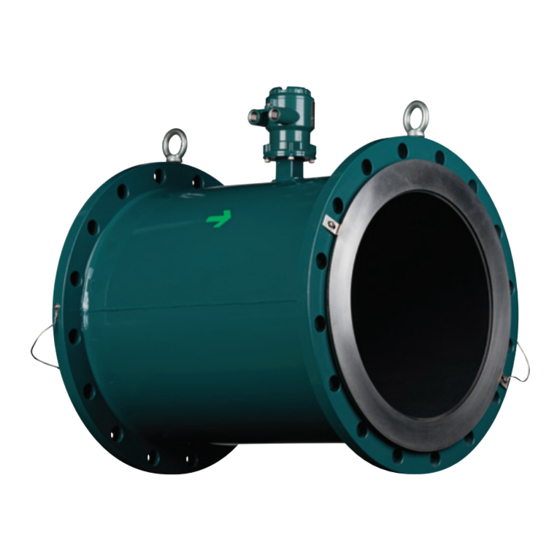
ADMAG TI Series
AXW Magnetic Flowmeter
[Size: 25 to 400 mm (1 to 16 in.)]
Installation Manual
Contents
1.
2.
3.
Remote Sensor
(AXW###)
4.
Remote Transmitter
(AXW4A)
5.
6.
7.
1.1
For Safe Use of Product ................................................3
1.2
Warranty .........................................................................6
1.3
Transmitter .....................................................................6
2.1
Model and Specifi cations Check ...................................7
2.2
Storage Precautions ......................................................8
3.1
Piping Design Precautions ............................................9
3.2
Handling Precautions ...................................................11
3.2.1
General Precautions .......................................11
3.2.2
Flowmeter Piping ........................................... 12
3.3
3.3.1
Wafer Type .................................................... 13
3.3.2
Flange Type ................................................... 18
3.3.3
Gasket Size(customer pipe) .......................... 24
3.4
Remote Transmitter Installation .................................. 25
3.4.1
Installation Location ....................................... 25
3.4.2
Mounting of AXW4A Transmitter ................... 25
3.4.3
Mounting of AXG1A Transmitter .................... 25
3.4.4
Mounting of AXFA11 Transmitter ................... 26
3.5
Changing Direction of Cable Entry ............................. 26
3.6
Changing Direction of Display Unit ............................. 27
4.1
Wiring Precautions ...................................................... 29
4.2
Cables ......................................................................... 30
4.3
Cable Entries .............................................................. 31
4.4
Flowmeter and Remote Transmitter ........................... 35
4.5
Transmitter (Sensor Side) ........................................... 42
4.6
Input and Output ......................................................... 45
5.1
Operation by Display unit ............................................ 48
5.2
Display and Basic Confi guration ................................. 48
5.3
Display Mode and Setting Mode ................................. 51
5.4
Parameter Setting from Display Panel ....................... 52
5.5
microSD Card Setting ................................................. 53
5.6
BRAIN Confi guration Tool ........................................... 54
5.7
HART Confi guration Tool ............................................ 54
5.8
Modbus Confi guration Tool ......................................... 55
5.9
fi eldbus Confi guration Tool ..................... 56
6.1
Pre-operation Zero Adjustment ................................... 57
6.2
Zero Adjustment from Display Unit ............................. 57
6.3
Hardware Switch Setting ............................................ 58
IM 01E24A01-01EN
4th Edition
IM 01E24A01-01EN
1
2
3
4
5
6
7

Advertisement

Table of Contents
loading
Need help?

Need help?

Do you have a question about the AXG1A and is the answer not in the manual?

Questions and answers

Subscribe to Our Youtube Channel

Summary of Contents for YOKOGAWA AXG1A

  • Page 1: Table Of Contents

    3.4.1 Installation Location ........25 3.4.2 Mounting of AXW4A Transmitter ....25 3.4.3 Mounting of AXG1A Transmitter ....25 3.4.4 Mounting of AXFA11 Transmitter ....26 Changing Direction of Cable Entry ......26 Changing Direction of Display Unit ......27...
  • Page 2: Introduction

    General Specifications specifications as listed in Table 1.1. These documents AXF Series can be downloaded from the website of YOKOGAWA. To Magnetic Flowmeter IM 01E20A21-01Z1 ensure correct use of the product, read these manuals...
  • Page 3 The following symbols are used in the Product and the permission. manual to indicate the accompanying safety precautions: • YOKOGAWA makes no warranty of any kind with Protective grounding terminal regard to this manual, including, but not limited to, Functional grounding terminal (This terminal should implied warranty of merchantability and fitness for a not be used as a protective grounding terminal.)
  • Page 4: For Safe Use Of Product

    • Wiring work should be done adequate wire, sleeve In such cases, YOKOGAWA shall not be liable for any crimp and torque force. Use terminal with insulating indirect or consequential loss incurred by either using or cover for the power supply wiring and protective not being able to use the Product.
  • Page 5 • Install an external switch or circuit breaker as a means to turn the power off (capacitance: 15A, • For AXG1A, impact resistance rating of glass on the conforming to IEC60947-1 and IEC60947-3). display cover is IK06, metal housing is IK08.
  • Page 6 • Do not physically shock, bend, or pinch the • Do not modify this product. microSD card. • YOKOGAWA will not be liable for malfunctions or • During reading/writing of data, do not turn off the damage resulting from any modification made to this power, apply vibration or shock, or pull out the product by the customer.
  • Page 7: Warranty

    - Failure or damage due to modification or repair situations. by any party except YOKOGAWA or an approved Be sure to read the user's manual of the applicable representative of YOKOGAWA. explosion protection type as listed in Table 1.1 - Malfunction or damage from improper relocation of before handling the products.
  • Page 8: Receiving And Storage

    Part name Qty. Be sure you have the model code and serial number AXW4A Mounting Bracket 1 set available when contacting YOKOGAWA. Blanking Plug (*2) 0 to 2 pcs. The model and specification described on the nameplate AXG1A Mounting Bracket 1 set are those of the state at the time of shipment.
  • Page 9: Storage Precautions

    <2. Receiving and Storage> F0204.ai F0203.ai Figure 2.3 Name Plate (AXW4A Remote Transmitter) Figure 2.4 Name Plate (AXG1A Remote Transmitter) F0205.ai Figure 2.5 Name Plate (AXFA11 Remote Transmitter) Storage Precautions If the product is to be stored for a long period of time after delivery, observe the following points.
  • Page 10: Piping Design Precautions

    <3. Installation> Installation Piping Design Precautions WARNING IMPORTANT Installation of the magnetic flowmeter must be performed by expert engineer or skilled personnel. No operator shall be permitted to perform procedures Design piping correctly, referring to the following to relating to installation. prevent damage to sensors and to assure accurate measuring.
  • Page 11 <3. Installation> (3) Required Lengths of Straight Runs (5) Precautions for Use of Liquid Sealing Compounds Based on JIS B 7554 “Electromagnetic Flowmeters” and our piping condition test data, we recommend the piping IMPORTANT conditions as shown in the following figures. This is not always enough when the piping line incorporates multiple Care must be taken in using liquid sealing compounds conditions at the same time.
  • Page 12: Handling Precautions

    <3. Installation> (9) Mounting Positions  Mounting orientation IMPORTANT  Pipes must be fully filled with liquids. IMPORTANT If electrodes are perpendicular to the ground, air bubbles near the top or precipitates at the bottom may It is essential that pipes remain fully filled at all times, cause measurement errors.
  • Page 13: Flowmeter Piping

    <3. Installation> (5) Long-term Non-use CAUTION IMPORTANT In order to lift a magnetic flowmeter that is fitted with eyebolts, proceed as in Figure 3.2.1. Never lift it using It is not desirable to leave the flowmeter unused a bar passed through the sensor as this damages the for a long term after installation.
  • Page 14: Integral Flowmeter And Remote Sensor Installation

    “Reverse” at the parameter “Flow direct”. Read the NOTE user's manual of the applicable communication type (for AXW/AXW4A/AXG1A) or the hardware/software edition • The tightening torque of gasket varies depending (for AXFA11) as listed in Table 1.1. on the type and the external dimensions of the lining Display Menu Path (AXW/AXW4A/AXG1A): and the gasket.
  • Page 15 <3. Installation> (3) Installation of Gasket and Grounding • Installation: Natural hard rubber lining type and Metal pipe Device When a magnetic flowmeter with natural hard The gaskets (supplied by customer) used for connection rubber lining is installed to metal pipe without with customer pipes differ by the presence or absence of lining, installation method without grounding ring is grounding device (grounding ring) and the specifications...
  • Page 16 <3. Installation> • Installation: Natural soft rubber/Polyurethane rubber lining type and Metal pipe When a magnetic flowmeter with natural soft rubber or polyurethane rubber lining is installed to metal pipe without lining, installation method without grounding ring is recommended. In the case grounding ring is not used, it is recommended to use no gasket between the pipe and the sensor.
  • Page 17 <3. Installation> *Nut (eight units) *Through-bolt (four units) *: These items can be ordered optionally. If they are provided by the user, choose nuts and Piping-side flange bolts in compliance with the flange ratings. Centering device (two units) Horizontal mounting Mini-flange *Gasket (two units) F0314.ai...
  • Page 18 <3. Installation> Table 3.3.2 Wafer Type Tightening Torque Values for Metal Piping Tightening torque values for Natural Hard Rubber/Natural Soft Rubber/Polyurethane Rubber lining (N·m) Natural Soft Rubber/Polyurethane Rubber lining: No gasket (Standard) Gasket types within sensor Natural Hard Rubber lining: Non-asbestos gasket, PTFE-sheathed non-asbestos gasket, or the equivalent in hardness Gasket types Non-asbestos gasket, PTFE-sheathed non-asbestos gasket (Optional code BSF), or the equivalent in hardness for user’s flange...
  • Page 19: Size 25 To 400 Mm (1 To 16 In.), Flange Type

    (for 150 to 400 (6 to 16 in.) 3 to 5 AXW/AXW4A/AXG1A) or the hardware/software edition (for AXFA11) as listed in Table 1.1. For size 25 to 125 mm, the grounding ring has mounting fixing brackets (See Figure 3.3.4).
  • Page 20 <3. Installation> Size 150 to 200 mm (6 to 8 in.) is specified, hang the • Installation: PTFE/Natural hard rubber lining type grounding rings with their flange type printings outer side and Metal pipe of the magnetic flowmeter. When a magnetic flowmeter with PTFE or natural Set the angle of both handles symmetrically to be top.
  • Page 21 <3. Installation> • Installation: Natural soft rubber/Polyurethane (3) Tightening Nuts rubber lining type and Metal pipe Tighten the nuts according to the torque values for the When a magnetic flowmeter with natural soft rubber metal piping in Table 3.3.6. For plastic piping, using the or polyurethane rubber lining is installed to metal gaskets for plastic piping (optional code GA, GC or GD), pipe without lining, the installation method without...
  • Page 22 <3. Installation> Table 3.3.6 Flange Type Tightening Torque Values for Metal Piping Tightening torque values for PTFE/Natural Hard Rubber/Natural Soft Rubber lining (N·m) Natural Soft Rubber lining: No gasket (Standard) Gasket types within sensor PTFE/Natural Hard Rubber lining: Non-asbestos gasket, PTFE-sheathed non-asbestos gasket, or the equivalent in hardness Gasket types Non-asbestos gasket, PTFE-sheathed non-asbestos gasket, or the equivalent in hardness for user’s flange...
  • Page 23 <3. Installation> Tightening torque values for Polyurethane Rubber lining (N·m) Gasket types No gasket (Standard) within sensor Gasket types Non-asbestos gasket, PTFE-sheathed non-asbestos gasket, or the equivalent in hardness for user’s flange Flange Rating JIS 10K ASME Class 150 EN PN10 JIS 20K ASME Class 300 EN PN16...
  • Page 24 <3. Installation> Table 3.3.7 Flange Type Tightening Torque Values for Plastic Piping Tightening torque values for PTFE lining (N·m) Gasket types Fluororubber gasket (Optional codes GA, GC, or GD) within sensor Gasket types Fluororubber gasket, chloroprene rubber gasket, or the equivalent in hardness for user’s flange Flange Rating JIS 10K...
  • Page 25: Gasket Size(Customer Pipe)

    <3. Installation> 3.3.3 Gasket Size(customer pipe) WARNING All gaskets used for piping of Magnetic Flowmeters should be prepared by customers except in some cases. Be sure to choose a gasket with an inner and outer diameter that does not protrude inside the piping. If the inner diameter of the gasket is too large, or outer diameter of the gasket is too small, fluid leakage may result.
  • Page 26: Remote Transmitter Installation

    1. Fix the product on the mounting fixture using four on a wall or ceiling shall withstand a force of four times screws. the weight of the equipment (AXG1A: 3.5 kg (7.7 lb)). 2. Fix the mounting fixture with the product installed on a 2-inch pipe using a U-bolt.
  • Page 27: Mounting Of Axfa11 Transmitter

    F0329.ai Figure 3.4.5 Panel Mounting 1. Fit the AXG1A into the panel. 2. Attach the mounting fixture to the AXG1A using the screw and the washer, and secure the product with the two clamp screws. 3.4.4 Mounting of AXFA11 Transmitter...
  • Page 28: Changing Direction Of Display Unit

    <3. Installation> Changing Direction of (4) Rotate the transmitter or the terminal box in the desired direction. The direction can be changed to -90 Display Unit degrees, +90 degrees or +180 degrees. NOTE (1) Removing the Cover • The following tool is required. The transmitter and the terminal box can be rotated -90 Hexagonal wrench (nominal size 3) degrees to +180 degrees at every 90 degrees from the...
  • Page 29 <3. Installation> IMPORTANT To preserve the safety, do not touch the electrical circuit and cable of shaded area.ntry after delivery. WARNING • To prevent electric shocks and maintain performance, do not remove safety cover Cover locking screw F0333.ai (3) Installing the Cover Figure 3.6.1 Removing the Display Cover (Integral Flowmeter) •...
  • Page 30: Wiring

    • If there is any unused cable entry, use the blanking plug to cover which comes with this product or Once all wiring is completed, check the connections which is supplied by YOKOGAWA. The blanking before applying power to the product. Improper plug should be fastened into the unused cable arrangements or wiring may cause a unit malfunction or entry without any mistake.
  • Page 31: Cables

    Finished diameter: 10.5 mm (0.413 in.) shall be used only for connection to PROTECTIVE Maximum length: CONDUCTOR TERMINALS. Conform to IEC227, Combination with the AXG1A/AXFA11 transmitter: IEC245 or equivalent national authorization. 200 m (660 ft) Unit : mm Combination with the AXW4A transmitter: (approx.
  • Page 32: Cable Entries

    70 (2.8) 50 (2.0) For AXW4A Integral Type Flowmeter 70 (2.8) 25 (1.0) 50 (2.0) 60 (2.4) For AXG1A AX01C-B  AXW (Size: 25 to 400 mm (1 to 16 in.)) 70 (2.8) 25 (1.0) 50 (2.0) 60 (2.4) For AXFA11 AX01C-D ...
  • Page 33 Remote Transmitter (AXW4A) the cable entry. Optional code: EG4, EG5 Washer Gasket Waterproof gland Cable F0407.ai Remote Transmitter (AXG1A/AXFA11) Optional code: EG5 (AXG1A), EG (AXFA11) Washer Gasket Waterproof gland Cable F0408.ai IM 01E24A01-01EN...
  • Page 34 Optional code: EU4, EU5 Gasket Gasket G1/2 Plastic gland F0415.ai Remote Transmitter (AXG1A/AXFA11) Washer Optional code: EP5 (AXG1A), EP (AXFA11) Tightening gland Cable When working on conduit or flexible tube (G1/2 only) F0411.ai Remote Transmitter (AXG1A/AXFA11) Optional code: EU5 (AXG1A), EU (AXFA11) Washer Plastic gland F0416.ai...
  • Page 35 * When connecting G1/2, remove the conversion plug and connect directly to cable entry. F0417.ai Drain valve Remote Transmitter (AXG1A/AXFA11) F0419.ai Optional code: EW5 (AXG1A), EW (AXFA11) Figure 4.3.1 Integral Flowmeter When working on conduit or flexible tube (G3/4) G1/2 G3/4...
  • Page 36: Connecting To External Products Of Integral Flowmeter And Remote Transmitter

    WARNING cable For explosion protection type products, please be sure to read the user's manual of the applicable explosion AXG1A remote transmitter F0423.ai protection type as listed in Table 1.1. Figure 4.4.1 Power Cable Wiring 4.4.2 DC Power Connection When using DC power as the power supply for the transmitter, pay attention to the following points.
  • Page 37 For detailed parameter setting, read the user’s manual of the applicable communication type (for AXW/ (2) Required Power Supply Voltages AXW4A/AXG1A) or the hardware/software edition (for AXFA11) as listed in Table 1.1. IMPORTANT Display Menu Path (AXW/AXW4A/AXG1A): • For the 24 V power supply version (power supply Device setup ►...
  • Page 38 CAUTION Protective grounding terminals F0427.ai Figure 4.4.5 Position of Protective Grounding Terminal (AXG1A Remote Transmitter) • The grounding should satisfy grounding resistance requirement, 100 Ω or less (Class D grounding). • For explosion protection type, the grounding must satisfy the domestic electrical requirements as regulated in each country.
  • Page 39 <4. Wiring> 4.4.4 Connecting to External Products WARNING • Before wiring with external products, be sure to turn off the power supply of the magnetic flowmeter. • Be sure the power supply of the external products is turned off, and then start wiring. Read Section 4.6 for connection to external products.
  • Page 40 <4. Wiring> (2) Terminal Configuration AXW4A Remote Transmitter: (Integral Flowmeter and AXW4A Transmitter) <To be wired to Remote Sensor> Protective Protective Grounding Terminal Grounding Terminal Integral Flowmeter AXW4A Remote Transmitter Integral Type/AXW4A Remote Transmitter: <To be wired to Power Supply and I/Os> Terminal Symbol Description M4 Screw Type...
  • Page 41 <4. Wiring> (3) For AXG1A Remote Transmitter Table 4.4.1 Terminal Symbols (AXG1A Remote Transmitter) 1) Removing the Cover Terminal Symbol Description While supporting the front of the cover with your hand, flip the connecting screw protective cover over, and remove the four connecting screws.
  • Page 42 <4. Wiring> 3) Installing the Cover Table 4.4.2 Terminal Symbols (AXFA11 Remote Transmitter) While supporting the front of the cover with your hand, flip the connecting screw protective cover Terminal Symbol Description over, and tighten the four connecting screws. (4) For AXFA11 Remote Transmitter SIGNAL Flow signal input 1) Removing the Cover...
  • Page 43: Connecting To Remote Sensor And Remote Transmitter (Sensor Side)

    <4. Wiring> Connecting to Remote (2) Terminal Configuration When the cover is removed, the connection Sensor and Remote terminals will be visible as shown below. Transmitter (Sensor Side) Remote Sensor: <To be wired to Remote Transmitter> WARNING Non Explosion Protection Use For explosion protection type products, please be sure to read the user’s manual of the applicable explosion protection type as listed in Table 1.1.
  • Page 44 SA and SB on the remote sensor side. Remote sensor F0444.ai Figure 4.5.4 Wiring Diagram (AXG1A Remote Transmitter) 3) Connection with AXFA11 Remote Transmitter Connect wiring as shown in the figure below. Remote sensor I– SO1+ SO2+ AL–...
  • Page 45 <4. Wiring> (4) Grounding CAUTION WARNING • The grounding should satisfy grounding resistance requirement, 100 Ω or less (Class D grounding). For the wiring of protective grounding, terminate the • For explosion protection type, the grounding must cable finish with round shaped crimp terminal with satisfy the domestic electrical requirements as insulation cover (for M4 screw), and connect it to the regulated in each country.
  • Page 46: Input And Output

    “For magnetic counter” to “Normal”. For detailed parameter setting, read the user’s manual of the applicable communication type as listed in Table 1.1. Display Menu Path (AXW/AXW4A/AXG1A): Device setup ►Detailed setup ►Pulse/Status out ►PO2/SO2 ►Active pulse IM 01E24A01-01EN...
  • Page 47 <4. Wiring> Output signal type Specification Passive pulse output Connection of an electronic counter [P/Sout]: Maximum voltage and correct polarity must be observed for wiring. Maximum load current 200 mA or less Power supply 30 V DC or less Maximum pulse rate 10,000 pulses/s Maximum frequency output rate 12,500 Hz...
  • Page 48 <4. Wiring> (2) Input signals Input signal type Specification Status input IMPORTANT [Sin]: [Si11 or Si12]: The status input detects a signal without voltage. Loading voltage during the switching status "Close" may result in damage on the electrical circuit. The status input is used for connecting to the following no-voltage contacts. Switching status Resistance Closed...
  • Page 49: Basic Operating Procedures

    The display unit of AXW Integral Flowmeter and AXW4A/ (for AXW/AXW4A) or the hardware/software edition (for AXG1A Remote transmitter has various functions below. AXFA11) as listed in Table 1.1. 5.2.1 Display microSD card...
  • Page 50 Communication protocol Remote Transmitter: Adhesion diagnostic Level (Alarm at Level 4) AXW4A- AO1(*1) Analog output value 1 AXG1A-G0001 Count value of totalizer 1 Display code Selectable display language Count value of totalizer 2 English, French, German, Italian, Spanish, Count value of totalizer 3...
  • Page 51 <5. Basic Operating Procedures> (3) Display Line Setting (4) Date Display Formant Setting Display Menu Path: Display Menu Path: Device setup ► Detailed setup ► Display set ► Optional config ► Device setup ► Detailed setup ► Display set ► Optional config ► Line mode Format date Available to select the number of lines of process value to...
  • Page 52: Display Mode And Setting Mode

    <5. Basic Operating Procedures> Display Mode and Setting [Passcode Confirmation and Change] The confirmation and change of the passcode are Mode allowed only by parameter setting from the display unit. Display Menu Path: The device runs in the Display Mode when the power Device setup ►...
  • Page 53: Parameter Setting From Display Panel

    <5. Basic Operating Procedures> Parameter Setting from 5.4.1 Setting example of Select type Data: Flow rate unit Display Panel The following is the procedure of changing the flow This section explains how to specify the parameters from rate unit as Select type parameter according to the display panel.
  • Page 54: Microsd Card Setting

    Be sure to set the Flow rate unit in the beginning when the Flow rate unit and Flow span value are changed at Use only micro SD cards sold by YOKOGAWA. the same time. Operation cannot be guaranteed when other cards are When the unit is changed, the value of flow rate span is used.
  • Page 55: Brain Configuration Tool

    <5. Basic Operating Procedures> BRAIN Configuration Tool HART Configuration Tool The connection of the BRAIN configuration tool The connection of the HART configuration tool (BRAIN TERMINAL (BT200) or FieldMate (Versatile (FieldMate (Versatile Device Management Wizard)) Device Management Wizard)) is shown as below. is shown as below.
  • Page 56: Modbus Configuration Tool

    Protocol revision supported by HART configuration tool AXG1A: 2 must be the same protocol revision or later than that of * : The DTM is included in Yokogawa DTM Library HART 6.5 the device. If it is not, communication error occurs. later.
  • Page 57: Foundation Fieldbus Configuration Tool

    Device Revision The connection of the F fieldbus configuration OUNDATION * : The DTM is included in Yokogawa DTM Library 7.8 or later. tool is shown as below. Read the user’s manual of Modbus communication type NOTE as listed in Table 1.1 for the detailed parameter setting via fielebus communication.
  • Page 58: Operation

    <6. Operation> Operation Zero Adjustment from After the installation of sensor into process piping, the wiring of input/output terminals, the configuration of Display Unit required parameters, and the zero adjustment prior to peration, the flowmeter outputs a flow signal from its A procedure of executing zero adjustment is as follows;...
  • Page 59: Hardware Switch Setting

    <6. Operation> Hardware Switch Setting NOTE NOTE When the zero adjustment result exceeds defined value, the warning [092: AZ wam] is indicated. The integral type is explained as an example. Pay same attention to the AXW4A remote transmitter. Zero adjustment can be executed with the following parameter.
  • Page 60 <6. Operation> (4) Taking care not to entangle the cables, tighten the two ● Setting of Simulation Switch (Only for screws on the display. fieldbus communication) OUNDATION (5) Install the cover. The simulation function simulates the input of a function block and lets it operate as if the data was received from the transducer block.
  • Page 61 <6. Operation> ● Setting of Line Termination Switch (SW2) NOTE This switch is only available for the product with Modbus communication. Line terminations of two ends on the bus are required to • If the hardware switch is set to “ON”, the condition of communicate Modbus.
  • Page 62 <6. Operation> 6.3.2 AXG1A Remote Transmitter (1) Setting of Burnout Switch The burnout function sets the direction of current output in IMPORTANT situations where the CPU has become damaged. Upon shipment from the manufacturing plant, the burnout • Removing and installing the cover are necessary for direction is set to High (i.e., >21.6 mA);...
  • Page 63 <6. Operation> 6.3.3 AXFA11 Remote Transmitter NOTE IMPORTANT On the front of the amplifier, the burnout switch (i.e., Switch 1) and the write protect switch (i.e., Switch 2) are • Removing and installing the cover are necessary for located adjacent to each other. Accordingly, special care hardware switches.
  • Page 64: Errors And Countermeasures (Display Unit)

    Check the ambient temperature of display is within the range. If the 028:Ind bd FAIL Failure of indicator board was detected. problem does not improve, contact Yokogawa service center. Turn on the power again within the temperature range. If the problem 029:Ind bd EEP FAIL Failure of EEPROM (indicator board) was detected.
  • Page 65 <7. Errors and Countermeasures (Display unit)>  Process Alarm The device works normally and some issue of process causes abnormal measurement. Maintenance work is needed. Error Message NE107 Error Description Countermeasure Status Display 050:Signal overflow Failure of input signal was detected. Check signal cable and grounding.
  • Page 66 <7. Errors and Countermeasures (Display unit)>  Setting Alarm The device works normally but parameter setting error occurs. Parameter setting is needed. Error Message NE107 Error Description Countermeasure Status Display Setting error of flow span was detected. (fulfill "0.05 m/s < 060:Span cfg ERR Check or change span parameter setting.
  • Page 67 <7. Errors and Countermeasures (Display unit)> Error Message NE107 Error Description Countermeasure Status Display 338:IT2 Not Schedule IT2 Block is not scheduled. Schedule IT2 Block. Change the DI1 Block Mode.Target (DI1.MODE_BLK.Target) to Auto 340:DI1 O/S Mode DI1 Block is in O/S mode. or other mode.
  • Page 68 Misconnection of cable was detected. Check the signal cable and excitation cable connection. 086:Coil insulation Insulation deterioration of coil was detected. Contact Yokogawa service center. The resistance value of electrode exceeded Level 3. 087:Adhesion lv 3 Recommend cleaning electrode. (Adhesion detection of insulation to electrode) 088:LC warn Decrease of conductivity was detected.
  • Page 69 Add the explanation of hardware switch setting for Modbus communication type. 59 to 61 Revise the table of error messages. July 2019 Front page Add AXG1A. Add AXG1A. Add Fieldbus to Trademarks. Add EN number to (1). Add Fieldbus to *2.

This manual is also suitable for:

Axw4aAxw seriesAdmag ti seriesAxfa11gAx01c

Table of Contents