Table of Contents
Advertisement
Advertisement
Chapters
Table of Contents
Troubleshooting

Subscribe to Our Youtube Channel
Related Manuals for Omron SYSMAC LINK C1000H-SLK21-V1


Summary of Contents for Omron SYSMAC LINK C1000H-SLK21-V1
- Page 1 Cat. No. W174-E1-07 SYSMAC C-Series SYSMAC LINK SYSTEM MANUAL...
- Page 3 C-series SYSMAC LINK System Manual Revised September 2003 SLK11 SLK21-V1 SLK24 SLK14...
- Page 4 Buyer indemnifies Omron against all related costs or expenses. rights of another party. 10. Force Majeure. Omron shall not be liable for any delay or failure in delivery 16. Property; Confidentiality. Any intellectual property in the Products is the exclu-...
- Page 5 OMRON. No patent liability is assumed with respect to the use of the information contained herein. Moreover, because OMRON is constantly striving to improve its high-quality products, the information contained in this manual is subject to change without notice.
-
Page 7: Table Of Contents
........OMRON Network Systems .......... -
Page 8: Inspection
TABLE OF CONTENTS SECTION 6 Data Read/Write Services ......About Data Read/Write Services ..........NETWORK READ/WRITE Instructions . - Page 9 About this Manual: This manual describes the installation and operation of C-series SYSMAC LINK Units and includes the sections described below. Please read this manual completely and be sure you understand the information provide before attempt- ing to install and operate a C-series SYSMAC LINK System. Section 5 Introduction introduces the features and operations possible with SYSMAC LINK Units.
-
Page 11: Precautions
PRECAUTIONS This section provides general precautions for using the Programmable Controller and related devices. The information contained in this section is important for the safe and reliable application of the PC. You must read this section and understand the information contained before attempting to set up or operate a PC system. 1 Intended Audience . -
Page 12: Intended Audience
It is extremely important that a PC and all PC Units be used for the specified purpose and under the specified conditions, especially in applications that can directly or indirectly affect human life. You must consult with your OMRON representative before applying a PC system to the above-mentioned applications. -
Page 13: Operating Environment Precautions
Application Precautions Operating Environment Precautions Caution Do not operate the control system in the following locations: • Locations subject to direct sunlight. • Locations subject to temperatures or humidity outside the range specified in the specifications. • Locations subject to condensation as the result of severe changes in tempera- ture. - Page 14 Application Precautions • Always use the power supply voltages specified in this manual. An incorrect voltage may result in malfunction or burning. • Take appropriate measures to ensure that the specified power with the rated voltage and frequency is supplied. Be particularly careful in places where the power supply is unstable.
-
Page 15: Introduction
PCs and other Link Units. OMRON Network Systems .......... -
Page 16: Omron Network Systems
PCs to more powerful host computers in LANs that control entire production processes. OMRON provides 3 types of network systems for large, medium, and small- scale networks. SYSMAC NET Link System The SYSMAC NET Link System is a high-speed, high-capacity LAN. -
Page 17: Sysmac Link System Features
SYSMAC LINK System Features Section 1-2 SYSMAC LINK System Features SYSMAC LINK Units are equipped with a variety of special features. High Speed, Reliability, and The specialized communications LSIs used in all SYSMAC LINK Units deliver Flexibility high speed, reliability, and flexibility in an advanced data link system, while opti- cal fiber cable systems provide high-speed communications with unparalleled immunity to noise. -
Page 18: System Configuration
System Configuration Section 1-3 System Configuration Up to 62 nodes (including all PCs and, in coaxial systems, computers) can be connected in a SYSMAC LINK Network via SYSMAC LINK Units or Network Service Boards. One of the Units in the network will function as the polling unit and the remainder will be polled units. - Page 19 System Configuration Section 1-3 1-3-2 Multilevel System Each PC can have up to two SYSMAC LINK Units mounted. Each SYSMAC LINK Unit will connect it to a SYSMAC LINK Network, i.e., if a PC has two SYSMAC LINK Units mounted, it is part of two SYSMAC LINK Networks and the overall system is considered a Multilevel SYSMAC LINK System.
-
Page 20: Unit Compatibility
Unit Compatibility Section 1-4 Unit Compatibility There are some restrictions regarding the models and versions of PCs to which SYSMAC LINK Units can be mounted. There are also limitations in using SYSMAC LINK Units together with other Link Units. These limitations are described in this section. -
Page 21: Other
Unit Compatibility Section 1-4 When combining Units as shown above, use the following models. Name Model Remarks SYSMAC LINK Unit C1000H-SLK11 Optical type C1000H-SLK21-V1 Coaxial type SYSMAC NET Link Unit C500-SNT31-V4 Other versions cannot be used. Rack-mounting Host Link Units C500-LK103 Other versions cannot C500-LK103-P... -
Page 22: Precautions
Precautions Section 1-5 Precautions • A Bus Connector is required to mount the C200HW-SLK13, C200HW-SLK14, C200HW-SLK23, or C200HW-SLK24. Refer to Section 3 Installation for details. • Be sure to set different operating levels when mounting a SYSMAC LINK Unit on the same PC with a SYSMAC NET Link Unit, Host Link Unit (Rack-mount- ing type), or PC Card Unit. -
Page 23: Unit Components And Switch Settings
SECTION 2 Unit Components and Switch Settings The names and functions of the SYSMAC LINK Units’ components and switch settings are described in this section. C1000H-SLK11/SLK21-V1 Components ........C200HW-SLK13/14/23/24 Components . -
Page 24: C1000H-Slk11/Slk21-V1 Components
C1000H-SLK11/SLK21-V1 Components Section 2-1 C1000H-SLK11/SLK21-V1 Components Front C1000H-SLK11 C1000H-SLK21-V1 SLK11 SLK21-V1 Indicators Indicate operational status. Node number switches Used to set the node number. Reset switch Used to reinitialize the SYSMAC LINK Unit. DIP switch 1 Remove this cover to gain access to DIP switch 1. - Page 25 C1000H-SLK11/SLK21-V1 Components Section 2-1 Back The backs of the C1000H-SLK11 and C1000H-SLK21-V1 are identical. Mounting screw Secures Unit to Backplane Connector Used to connect the SYSMAC LINK Unit to the Rack. Mounting screw Secures Unit to Backplane...
-
Page 26: C200Hw-Slk13/14/23/24 Components
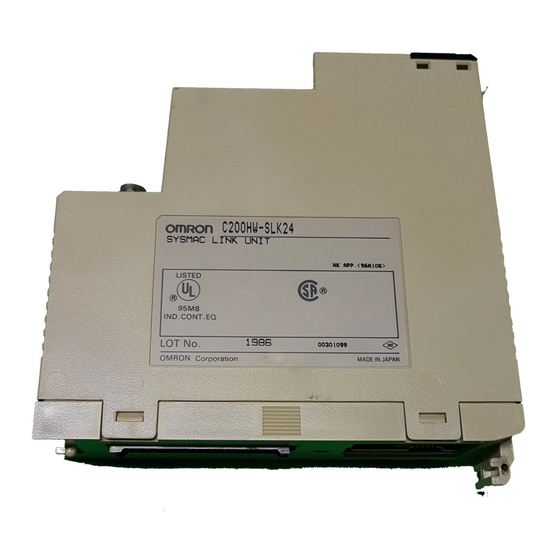
C200HW-SLK13/14/23/24 Components Section 2-2 C200HW-SLK13/14/23/24 Components Front C200HW-SLK13/14 C200HW-SLK23/24 SLK14 SLK24 Indicators Indicate operational status. Node number switches Used to set node number. DIP switch 1 Remove this cover to gain access to DIP switch 1. The switch is used to set a variety of operating parameters. -
Page 27: Indicators
Indicators Section 2-3 Indicators The status of the SYSMAC LINK Unit is indicated by the indicators shown below. The Units that use coaxial cables (C1000H-SLK21-V1 and C200HW-SLK23/24) are not equipped with the P/S indicator. C1000H-SLK11 C1000H-SLK21-V1 C200HW-SLK13/14 C200HW-SLK23/24 Indicator Meaning Name Color Condition... -
Page 28: Switches
Switches Section 2-4 Switches 2-4-1 C1000H-SLK11/SLK21-V1 DIP switch 1 can be accessed by removing the cover from the front of the Unit with a standard screwdriver. NODE NO. Node number switches Used to set node number. RESET DIP switch 1 Standard screwdriver 2-4-2 C200HW-SLK13/14/23/24 The node number switches and DIP switch 1 are located on the front of the... -
Page 29: Setting Switches
Setting Switches Section 2-5 Back DIP switch 2 Setting Switches Switch settings determine how the SYSMAC LINK Units will work together in a Network. Be sure to turn the power off to the PC before setting the switches. Errors in switch settings, which may not always be detected by the System, can cause faulty data communications. -
Page 30: C1000H-Slk11/Slk21-V1 Dip Switch 1
Setting Switches Section 2-5 2-5-2 C1000H-SLK11/SLK21-V1 DIP Switch 1 Turn off the power to the PC before setting the DIP switch. DIP switch 1 is used to control the communications test, data link activation, operating level, PC operating mode when power is applied, network parameter initialization, and polling/polled unit operation. -
Page 31: Installation
SECTION 3 Installation This section explains how to install SYSMAC LINK Systems. Mounting Position ............3-1-1 C1000H . -
Page 32: Mounting Position
Mounting Position Section 3-1 Mounting Position Note 1. Turn off power to the PC before mounting Units to the Backplane. 2. Tighten Backplane mounting screws firmly. 3-1-1 C1000H The C1000H-SLK11/SLK21-V1 can be mounted in one of the first three slots to the left of (i.e., next to) the CPU Unit when using the 3G2A5-BC081/051 Backplane, and in one of the first five slots to the left of the CPU Unit when using a C500-BC082/052 Backplane. -
Page 33: C200Hx/C200Hg/C200He
Mounting Position Section 3-1 If only one Unit is mounted, it must in the slot immediately to the left of the CPU Unit. If two SYSMAC LINK Units, or one together with a SYSMAC NET Link Unit, are mounted, the SYSMAC LINK Unit can be mounted in either of the two slots immediately to the left of the CPU Unit. -
Page 34: Power Supply Unit Connection
Power Supply Unit Connection Section 3-2 2. A Communications Board equipped with a Link Interface (C200HW- COM01/04-EV1) is required when mounting a SYSMAC LINK Unit to a C200HX, C200HG, or C200HE PC. Power Supply Unit Connection SYSMAC LINK Units that are connected with optical fiber cable (the C1000H-SLK11 and C200HW-SLK13/14) can be connected to an Auxiliary Power Supply Unit to provide backup power. - Page 35 Power Supply Unit Connection Section 3-2 Auxiliary Power Supply Unit Components C1000H-APS01 The diagram below shows the components of the C1000H-APS01 Auxiliary Power Supply Unit and their functions. APS01 Indicators Indicate operational status. Power supply connector 1 P/S1 Supplies backup power to a SYSMAC LINK Unit. Power supply connector 2 P/S2 Supplies backup power to a SYSMAC LINK Unit.
-
Page 36: Installation And Wiring
Power Supply Unit Connection Section 3-2 Power Cables The following table shows which power cables are included with the C1000H-APS01 and C200H-APS03 as accessories. Unit Power cable Notes C1000H-APS01 C1000H-CN111 1 cable provided C200H-APS03 C200H-CN111 1 cable provided (for 1 SYSMAC LINK Unit) When connecting 2 SYSMAC LINK Units to an Auxiliary Power Supply Unit, order the following cables separately as required. - Page 37 Power Supply Unit Connection Section 3-2 In the following diagram, a Power Supply Unit is connected to just one SYS- MAC LINK Unit. APS SLK CPU PS Wiring The Power Supply Unit and SYSMAC LINK Unit are connected by a power sup- ply cable, as shown below.
- Page 38 Power Supply Unit Connection Section 3-2 One Power Supply Unit can supply backup power to two SYSMAC LINK Units. In this case an optional power cable that will supply the two SYSMAC LINK Units must be purchased separately. One branch of the cable will reach two slots from the Power Supply Unit, as shown below.
-
Page 39: Bus Connector (C200Hx/Hg/He/Hs/H Only)
Bus Connector (C200HX/HG/HE/HS/H only) Section 3-3 Bus Connector (C200HX/HG/HE/HS/H only) A Bus Connector is required to connect a C200HW-SLK13/14/23/24 SYS- MAC LINK Unit to the CPU Unit of a C200HX, C200HG, C200HE, C200HS, or C200H PC. There are three models of Bus Connector available. One is used when a single SYSMAC LINK Unit is being mounted on the CPU Rack, one is used when two Units are being mounted (either two SYSMAC LINK Units or a SYSMAC LINK Unit and a SYSMAC NET Link Unit), and one is used when a... -
Page 40: Cable Connection
Cable Connection Section 3-4 Cable Connection SYSMAC LINK Units can be connected with either coaxial cable or optical fiber cable. This section describes the procedures required to connect both types of cable. 3-4-1 Coaxial Cable The diagram below shows a SYSMAC LINK System connected by coaxial cables. - Page 41 Cable Connection Section 3-4 3. Connect the F Adaptors to the SYSMAC LINK Units by firmly pushing the adapter onto the coax connector on the Unit and turning the locking ring to the right until it locks. Start at one end of the network and connect the F Adapters to the other end in order.
-
Page 42: Optical Fiber Cable
Cable Connection Section 3-4 5. Any bends in the coaxial cable must be 45 mm in radius or greater (six times the outer diameter of the cable). When laying the cable, make wider bends of 110 mm in radius or greater (15 times the outer diameter of the cable). Radius >... - Page 43 Name Model number Recommended Manufacturer replacement models Optical S3200-COCF2011 S3200-COCF2071 OMRON Connector S3200-COCF2511 S3200-COCF2571 OMRON Optical Connector Assembly Follow the instructions provided with the S3200-CAK1062 Optical Connector Assembly Tool Set. Connection Procedure The connection procedure is described briefly below. Begin with the highest node in the network and connect the lower nodes in order.
-
Page 44: Mounting
Cable Connection Section 3-4 5. Align the cable’s Optical Connectors so that the tabs are on the left and insert them into the Unit’s Optical Connectors. Terminal Mounting bracket Tension wires Note Tighten the screws on the mounting bracket firmly. C200HW-SLK13/14 1, 2, 3... - Page 45 Cable Connection Section 3-4 6. If the cable has tension wires, tighten the terminal screws to secure them. Terminal Mounting bracket Tension wires Note Tighten the screws on the mounting bracket firmly. Precautions 1, 2, 3... 1. Use only the Hard Plastic-clad Optical Fiber Cable (H-PCF) listed in Appen- dix A Standard Models .
- Page 46 Cable Connection Section 3-4 4. As shown in the diagram below, begin connecting the highest node of the network and connect the lower nodes in order. Cover the upper connector (SL1) of the highest node, and connect SL2 to SL1 of the next node. Con- tinue connecting this way until the lowest node is reached and cover SL2 of the lowest node.
-
Page 47: Dimensions
Dimensions Section 3-5 Dimensions Dimensions for the SYSMAC LINK Units are shown below. All dimensions are in millimeters. C1000H-SLK11 34.5 SLK11 C200HW-SLK13/14 34.5 SLK14... - Page 48 Dimensions Section 3-5 C1000H-SLK21-V1 34.5 SLK21-V1 C200HW-SLK23/24 34.5 C200H-TL001 F Adapter SLK24 Attachment Stirrup 8.25...
-
Page 49: Basic Communications
SECTION 4 Basic Communications A description of the token bus method of communications used in SYSMAC LINK Systems is described briefly in this sec- tion. The basic settings necessary for operation are also explained. SYSMAC LINK System Communications ........Setting Node Numbers . -
Page 50: Sysmac Link System Communications
SYSMAC LINK System Communications Section 4-1 SYSMAC LINK System Communications SYSMAC LINK Units communicate through the SYSMAC LINK Network, a token bus LAN. This section describes the token bus communications used in the SYSMAC LINK Network. Token Bus Communications In token bus communications, individual nodes are connected to a main trunk line as a common bus line, as shown in the figure below. -
Page 51: Setting Node Numbers
Setting Node Numbers Section 4-2 When the control cycle is completed, the polling unit once again sends out the token, beginning the next token cycle. Together the token cycle and con- trol cycle make up the communications cycle, and the time required for the communications cycle is known as the communications cycle time. -
Page 52: Operating Levels
PC Mode at Start-up (C1000H only) Section 4-4 3. The token is passed from node to node according to node numbers, so the more dispersed the node numbers are, the greater distance the token has to travel. In optical fiber systems, the communications cycle time depends on the distance the token has to travel, so set node numbers according to the nodes positions in the network if possible. -
Page 53: Polling Unit Setting
Polling Unit Setting Section 4-5 Pin 5 Other unit connected Setting on other unit PC mode at start-up OFF (0) None Programming Console MONITOR MONITOR PROGRAM PROGRAM Host Link Unit DIP switch 1, pin 8: ON (1) (CPU Unit-mounting type) DIP switch 1, pin 8: OFF (0) PROGRAM Host Link Unit... -
Page 54: Setting Network Parameters
Setting Network Parameters Section 4-6 C200HW Units The polling unit is set with DIP switch 2, pin 4 on the C200HW-SLK13/14/23/24 Units, as shown below. DIP switch 2, pin 4 Polling unit operation ON (1) Polled unit OFF (0) Polling unit Note Always turn the PC’s power off before changing the polling unit setting Setting Network Parameters The operation of the SYSMAC LINK Network is determined by the network... -
Page 55: Network Parameter Initialization
Network Parameter Initialization Section 4-7 Setting Network Parameters Network parameters are set with Peripheral Devices such as the SSS/CVSS. For details, refer to the Peripheral Device’s Operation Manual . Set the network parameters after installing the network. The network parameters must be set after the network has been assembled, and while data links are halted. -
Page 56: Active Node Flags
Active Node Flags Section 4-8 Active Node Flags The AR Area of the PC contains a record of the nodes that are active in the SYSMAC LINK System at the current time. Words AR 08 to AR 11 contain information on operating level 0, and words AR 12 to AR 15 contain informa- tion on operating level 1. -
Page 57: Data Links
SECTION 5 Data Links The operation of data links, procedures required to establish data links, and methods of monitoring data link operations are explained in this section. Data Link Overview ............Creating Data Links . -
Page 58: Data Link Overview
Data Link Overview Section 5-1 Data Link Overview Data links can be created between the PCs in the same SYSMAC LINK Network to exchange data between the PCs. This data is transferred between intercon- nected PCs automatically without requiring the use of normal I/O Units. A region of the LR and/or DM Areas is set aside as the data link area in each PC that is in the data link. -
Page 59: Creating Data Links
Creating Data Links Section 5-2 The following diagram shows the operation of a data link among four nodes in a network. This data link was generated manually. Node 2 Node 5 Node 6 Node 8 Data link area LR Area LR Area LR Area LR Area... -
Page 60: Automatic Generation Of Data Link Tables
Automatic Generation of Data Link Tables Section 5-3 Basic specifications for data links are provided in the following table. Item Description No. of data link nodes 62 max., 2 min. No. of linked words per node LR area: 64 words max. (128 bytes) DM area: 254 words max. - Page 61 Automatic Generation of Data Link Tables Section 5-3 Allocated Words If automatic generation is specified by bits AR 0700/0701 or AR 0704/0705, the words allocated to each Unit are determined by the node number of the Unit and the Words per Node settings in the AR word shown above. Words are allocated as shown in the following table.
-
Page 62: Manual Generation Of Data Link Tables
Manual Generation of Data Link Tables Section 5-4 The example below shows a configuration consisting of four nodes that have been set to link 8 words per node in the LR area only. Of the eight possible nodes, only nodes #2, #4, #5, and #6 are actually in the System. Words normally allo- cated to nodes #1, #7, and #8 can therefore be used as work words, but words normally allocated to node #3 cannot, because they are refreshed by the Sys- tem. - Page 63 Manual Generation of Data Link Tables Section 5-4 It is possible to transfer the common link parameters from the node to which the CVSS is connected to all the nodes designated by the CVSS. Parameter Description Communications cycle The data link communications time between 5 and time 255 ms.
-
Page 64: Table Back-Up
Manual Generation of Data Link Tables Section 5-4 Refresh Parameters Refresh parameters are set for each node to determine what links will actually be created for that node, i.e., the words whose contents will be automatically trans- ferred from other nodes. Enter the link words in the LR and DM Areas for the local node as well as all of the nodes that the local node will link to. -
Page 65: Data Link Table Examples
Data Link Table Examples Section 5-5 Data Link Table Examples Three examples of manually generated data links are presented in this section. In the first, identical data link tables are set up in all nodes. In the second, a differ- ent data link table is set up in each node. -
Page 66: Different Data Link Tables
Data Link Table Examples Section 5-5 5-5-2 Different Data Link Tables In this example, the refresh parameters differ from node to node, so the data link tables will also differ from node to node. There are four nodes in the network (2, 5, 6, and 8), but some nodes will not receive data from others. - Page 67 Data Link Table Examples Section 5-5 Common Link Parameters These parameters are set from a SSS/CVSS, and need to be set only once for a SYSMAC LINK Network. Enter the communications cycle time and the number of DM and LR Area link words for each node in the data link, as shown below. (Setting the number of LR Area link words to zero for node 8 means that node 8 will be able to receive but not send data.) With manual data link table generation, the number of link words sent from each...
- Page 68 Data Link Table Examples Section 5-5 Node #5 In node 5, the data link area will be allocated to nodes 2, 5, and 6 in that order, so the node 5 refresh parameters are set as shown below. DM Area allocation is set to begin at DM 0020.
-
Page 69: Restrictions On C200Hw-Slk13/14/23/24 Data Link Areas
Restrictions on C200HW-SLK13/14/23/24 Data Link Areas Section 5-6 5-5-3 Multiple Data Link Groups The refresh parameters can be set up to simulate two or more groups of data links within one Network. Although the common link parameters must designate all the words to be transmitted by all nodes that are part of a data link, the refresh parameters can be set up so the PCs in the Network are separated into groups of PCs that only receive data from other PCs in the same group. - Page 70 Restrictions on C200HW-SLK13/14/23/24 Data Link Areas Section 5-6 Case 1 C200HX: C200HW-SLK13/23 C1000H: C1000H-SLK11/21-V1 C200HX C200HX C200HX C1000H C1000H C200HX Node #13 Node #7 Node #6 Node #1 Node #11 Node #4 Nodes marked with an X cannot be in the data link. Common parameter table Receivable data 918 words...
- Page 71 Restrictions on C200HW-SLK13/14/23/24 Data Link Areas Section 5-6 Case 2 C200HX: C200HW-SLK13/23 C1000H: C1000H-SLK11/21-V1 C200HX C200HX C1000H C1000H C200HX C200HX C1000H Node #17 Node #2 Node #18 Node #7 Node #4 Node #10 Node #1 Nodes marked with an X cannot be in the data link.
-
Page 72: Controlling Data Links
Controlling Data Links Section 5-7 Case 3 C1000H: C1000H-SLK11/21-V1 CV1000 CV500-SLK11/21 C200HX: C200HW-SLK13/23 C1000H C1000H CV1000 C200HX C200HX C200HX Node #1 Node #2 Node #3 Node #4 Node #5 Node #6 All nodes can be in the data link. Common parameter table 918 words In this example node numbers 1 through 6 can all be in the data link. -
Page 73: Data Link Precautions
Data Link Precautions Section 5-8 5-7-2 DATA LINK START/HALT Commands Data link operations can be initiated by issuing a DATA LINK START command from a CV-series PC or CVSS to the start-up node. Data link operation can be stopped by issuing a DATA LINK HALT command from a CV-series PC or CVSS to the start-up node. -
Page 74: Data Link Status
Data Link Status Section 5-9 Data Link Status The operational status of the data links in operating levels 0 and 1 is indicated in the data link operating flags. SR 25202 is turned ON when a data link is active in operating level 0 and SR 25205 is turned ON when a data link is active in operat- ing level 1. -
Page 75: Data Link Characteristics
Data Link Status Section 5-9 Flag for the local node, a NC input of the Communications Error Flag for each node, and a NO input of the Data Link Operating Flag for each node. Node A: Data link participation Local Node Node A Node A Data Link Operating... -
Page 76: Automatic Data Link Table Generation
Data Link Status Section 5-9 5-9-1 Automatic Data Link Table Generation When data link tables are generated automatically, data link status is output to SR 238 through SR 241 for the operating-level-0 data link. And to SR 242 through SR 245 for the operating-level-1 data link. Level 0 Level 1 Bits... -
Page 77: Data Link Characteristics
Data Link Characteristics Section 5-10 Each of the above sets of four bits contains the four flags indicating data link sta- tus for a node, as shown below. Bits Flag Function 00, 04, 08, or 12 PC Mode* Turned ON to indicate the PC is in RUN or MONITOR mode. - Page 78 Data Link Characteristics Section 5-10 The communications cycle time can be set either automatically (the default) or controlled externally. Automatic Generation When data link tables have been generated automatically, the communications time will be as follows for systems using coaxial cable: No.
-
Page 79: Data Exchange Timing
Data Link Characteristics Section 5-10 Note Data links might not operate correctly if the communications cycle time is set to a value shorter than that generated automatically by the system. Changing the Communications Cycle Time When the communications cycle time is generated automatically, it can be changed by changing the other network parameters at the SSS/CVSS. -
Page 80: Data Link I/O Response Time
Data Link Characteristics Section 5-10 The timing relationship between program execution and the exchange of data between the PC and the SYSMAC LINK Unit’s buffer memory is illustrated in the diagram below. 1 cycle Program Program Program Program executed executed executed executed Data exchange... - Page 81 Data Link Characteristics Section 5-10 Node #7 PC Cycle Time The cycle time of the PC at node #7 is 50 ms or 15 ms. Minimum Response Time The following diagram illustrates the data flow that will produce the minimum response time, i.e., the time required if all signals and data transmissions are processed as soon as they occur.
- Page 82 Data Link Characteristics Section 5-10 Maximum Response Time The maximum data link I/O response time is calculated for four cases. Case 1 The following diagram illustrates the data flow that will produce the maximum data link I/O response time when the cycle time of the PC at nodes #1 and 7 are greater than the communications cycle time.
- Page 83 Data Link Characteristics Section 5-10 Case 2 The following diagram illustrates the data flow that will produce the maximum data link I/O response time when the cycle time of the PC at node #1 y the com- munications cycle time and the cycle time of the PC at node #7 t the commu- nications cycle time.
- Page 84 Data Link Characteristics Section 5-10 Case 3 The following diagram illustrates the data flow that will produce the maximum data link I/O response time when the cycle time of the PC at node #1 t the com- munications cycle time and the cycle time of the PC at node #7 y the commu- nications cycle time.
- Page 85 Data Link Characteristics Section 5-10 Case 4 The following diagram illustrates the data flow that will produce the maximum data link I/O response time when the cycle time of the PC at node #1 t the com- munications cycle time and the cycle time of the PC at node #7 t the commu- nications cycle time.
-
Page 87: Delay Times
SECTION 6 Data Read/Write Services The data read/write services include the SEND(90) and RECV(98) instructions and CV-mode commands. SYSMAC LINK Units can receive but not transmit CV-mode commands. The data read/write services allow data transmission between nodes and distributed control. About Data Read/Write Services . -
Page 88: About Data Read/Write Services
NETWORK READ/WRITE Instructions Section 6-2 About Data Read/Write Services In addition to SEND(90) and RECV(98) instructions, a C-series PC equipped with a SYSMAC LINK Unit* can receive but not issue CV-mode commands. With these data read/write services, data can be transmitted between PCs and CVSS or CV-series PCs in the network and operation at other nodes can be controlled remotely. -
Page 89: Instruction Specifications
NETWORK READ/WRITE Instructions Section 6-2 Broadcasting Data It is possible to transfer the same data to all nodes in a network simultaneously by designating the destination node as 00. This transmission is called broad- casting. No responses are returned to broadcasts. (Broadcasting cannot be per- formed with the RECV(98) instruction.) Broadcast data Node 1... -
Page 90: Network Write - Send(90)
NETWORK READ/WRITE Instructions Section 6-2 Note The data transfer area must not exceed the above ranges. 6-2-3 NETWORK WRITE - SEND(90) The ladder diagram programming symbols, operand names, and allowable data areas for SEND(90) are shown below. Operand Data Areas Ladder Symbols S: Source beginning word SEND(90) -
Page 91: Network Read - Recv
NETWORK READ/WRITE Instructions Section 6-2 4. Indirectly Addressed Beginning Reception Flag: The CV-series PC has a larger data area than the C-series PC. Therefore, the beginning reception word of the destination node cannot be always des- ignated by the operand of the SEND(90). If the beginning reception word cannot be designated, set the indirectly addressed beginning reception flag to 1 (ON: indirect addressing), in which case the second operand (D) will be the indirect beginning reception word, and it will be possible to designate the... - Page 92 NETWORK READ/WRITE Instructions Section 6-2 Bit 15 of C+1 determines whether the instruction is for a SYSMAC NET Link System or a SYSMAC LINK System. Word Bits 00 to 07 Bits 08 to 15 Number of words (0 to 256 in 4-digit hexadecimal, i.e., 0000 0100 Response time limit (0.1 and 25.4 Bits 08 to 11:...
-
Page 93: Response Codes
NETWORK READ/WRITE Instructions Section 6-2 6-2-5 Response Codes When SEND(90) or RECV(98) is used in a SYSMAC LINK System, a response code is returned to indicate that the data transfer was completed successfully or identify the nature of the error when communications are not completed successfully. -
Page 94: Network Instruction Status Flags
NETWORK READ/WRITE Instructions Section 6-2 6-2-6 Network Instruction Status Flags SEND(90) and RECV(98) are based on command/response processing. That is, the transmission is not complete until the sending node receives and acknowledges a response from the destination node. Operation without a response is also possible for SEND(90), if desired. - Page 95 NETWORK READ/WRITE Instructions Section 6-2 00000 25204 12802 12800 prevents execution of SEND(90) until KEEP(11) 12800 RECV(98) (below) is completed. IR 00000 is (Enable Flag) turned ON to start transmission. 12801 12800 @MOV(21) #000A Data is placed into control data words to spec- DM 0000 ify the 10 words to be transmitted to node 3 in @MOV(21)
- Page 96 NETWORK READ/WRITE Instructions Section 6-2 Indirect Addressing of Beginning Words for C200H/C200Hj PCs The transmission program is started when IR 00000 25204 12802 KEEP(11) 00000 goes provided that 12800 SEND(90)/RECV(98) Enable Flag is ON (indi- (Enable Flag) cating RECV(98) isn’t being executed). 12801 IR 12800 is ON while SEND(90) is being 12800...
- Page 97 NETWORK READ/WRITE Instructions Section 6-2 (Continued from previous page) 12802 Data moved into control data words to specify @MOV(21) the 16 words to be transmitted from node 4 in #0010 operating level 0. DM 0003 DM 003 0 0 1 0 16 words @MOV(21) DM 004...
-
Page 98: Delay Times
NETWORK READ/WRITE Instructions Section 6-2 6-2-7 Delay Times The two charts which follow indicate the sequence of processing which will enable users to calculate the maximum delay time to be expected between the time SEND(90) or RECV(98) is executed and the time the data is stored in the remote or local node’s memory area, ready for use by other instruc- tions in the program. - Page 99 NETWORK READ/WRITE Instructions Section 6-2 Example In this example, the maximum transmission delay is calculated for an instruction sending 256 words of data in a system with 32 nodes. Network specifics are detailed below: Max. node number: Number of nodes: Number of polled units: 4 Number of words: Communications:...
-
Page 100: Cv-Mode Command/Response Format
CV-mode Command/Response Format Section 6-3 Note 1. When the data link is halted. Refer to 5-10-1 Data Link Communications Cycle Time for details on the communications cycle time when the data link is operating. 2. The I/O response time might increase due to noise or restrictions on the number of frames that can be transmitted while the data link is operating. -
Page 101: List Of Cv-Mode Commands For Pcs
CV-mode Command/Response Format Section 6-3 6-3-1 List of CV-mode Commands for PCs Command Name PC mode Page code MONITOR PROGRAM MEMORY AREA READ Valid Valid Valid MEMORY AREA WRITE Valid Valid Valid MULTIPLE MEMORY AREA READ Valid Valid Valid PARAMETER AREA WRITE Not valid Not valid Valid... -
Page 102: Memory Area Designations
Memory Area Designations Section 6-4 6-3-3 CV-mode Response Codes A 2-byte response code is returned with all responses. The first byte contains the main code indicating the general category of the response, and the second byte contains the sub-code giving more specific information. The table below shows the main codes. -
Page 103: Word/Bit Addresses
Memory Area Designations Section 6-4 2. The memory area codes for the EM Area are as follows: codes 90 through 97 specify banks 0 through 7 and code 98 specifies the current bank. 6-4-1 Word/Bit Addresses Each word/bit address specifies a specific bit or word. The rightmost two digits of the address specify bit 00 to 15 (or 00 if not required), and leftmost four digits specify the word address. -
Page 104: Cv-Mode Commands For Pcs
CV-mode Commands for PCs Section 6-5 CV-mode Commands for PCs 6-5-1 MEMORY AREA READ Reads the contents of the specified number of consecutive memory area words starting from the specified word. All words must be in the same memory area (here, all memory areas with the same memory area code are considered as one area). -
Page 105: Multiple Memory Area Read
CV-mode Commands for PCs Section 6-5 2. When data is written to the Timer/Counter PV Area, the Completion Flags will be turned OFF (0). Command Block Command First word No. of items Data code Memory area code Response Block Command Response code code... -
Page 106: Parameter Area Write
CV-mode Commands for PCs Section 6-5 Response Block Command Response Data Data code code Memory area code Memory area code Parameters Memory area code (command): The data area to read. Address (command): The addresses of the words/bits/flags to read. Data (response): The response returns the memory area code(s) paired with the data from the specified memory area(s). -
Page 107: Program Area Write
CV-mode Commands for PCs Section 6-5 Command Block Command Program First word No. of code bytes Response Block Command Response Program First word No. of Data (512 bytes max.) code code bytes Parameters Program no. (command and response): Set to 0000. First word (command and response): The program area begins at 00000000. -
Page 108: Run
CV-mode Commands for PCs Section 6-5 Parameters Program no. (command and response): Set to 0000. First word (command and response): The program area begins at 00000000. The first word must be an even number and will be returned as is in the response. No. -
Page 109: Controller Data Read
CV-mode Commands for PCs Section 6-5 6-5-9 CONTROLLER DATA READ Reads the following data: • PC model and version • Area data • PC status Command Block Command code Response Block 20 bytes 20 bytes 16 bytes 10 bytes 65 bytes Command Response PC model... - Page 110 CV-mode Commands for PCs Section 6-5 Command Block Command code Response Block 16 bytes Command Response Fatal error Non-fatal FAL no. Error code code data error data message Status Mode Parameters Status (response): The operating status of the PC as follows: 00: Stop (program not being executed) 01: Run (program being executed) 80: CPU Unit on standby (the start switch is OFF or the CPU Unit is waiting...
-
Page 111: Clock Read
CV-mode Commands for PCs Section 6-5 6-5-11 CLOCK READ Reads the clock. This command can be used with the C200H, C200HS, C200HX, C200HG, and C200HE PCs only. Command Block Command code Response Block Command Response Year Month Date Hour Minute Second Day code code Parameters... -
Page 112: Error Clear
CV-mode Commands for PCs Section 6-5 6-5-13 ERROR CLEAR Clears errors from the PC. Command Block Command Error reset code Response Block Command Response code code Parameters Error reset (command): The code must be FFFF. 6-5-14 FILE MEMORY INDEX READ Reads out the indices of a specified number of blocks stored in file memory. -
Page 113: File Memory Block Read
CV-mode Commands for PCs Section 6-5 Kind of data (response): The kind of data in this block, as follows: Kind of data (see table below) 1: Protected 1: Block contains END(01) (program data only) Kind of data Bits 0 to 2 indicate the kind of data, as shown in the following table. Bit status Kind of data None... -
Page 114: File Memory Block Write
CV-mode Commands for PCs Section 6-5 Kind of data Bits 0 to 2 indicate the kind of data, as shown in the following table. Bit status Kind of data None I/O data Program Comments No. of comments (response): If the block contains comments data, this byte indicates the number of comments. -
Page 115: Forced Set/Reset
CV-mode Commands for PCs Section 6-5 No. of comments (command): If the block contains comments data, indicate the number of comments in this byte. Block no. (command): The block number of the block to which data will be writ- ten. The block no. must be between 0000 and 03E7 (0 to 999 decimal) for 1000 block file memory, or 0000 and 07CF (0 to 1999 decimal) for 2000 block file memory. -
Page 116: Forced Set/Reset Cancel
CV-mode Commands for PCs Section 6-5 Memory Areas The bits (flags) in the following memory areas can be forced set/reset or released (refer to 6-4 Memory Area Designations for memory area designa- tions): Memory area Data Memory area Bytes/ code item IR, SR, LR, HR, and AR Bit status... -
Page 117: Cv-Mode Commands For Sysmac Link Units
CV-mode Commands for SYSMAC LINK Units Section 6-6 No. of items (command and response): The number of items to be read. The number of items must be 0001 to 0040 (1 to 64 decimal).The forced status of up to 64 consecutive words or 512 flags can be read. Data (response): The forced status data from the specified words or flags is returned in sequence starting from the first word/flag. -
Page 118: Reset
CV-mode Commands for SYSMAC LINK Units Section 6-6 Response Block Command Response code code 6-6-3 RESET Resets the SYSMAC LINK Unit. No response is returned when this command is executed. Command Block Command code 6-6-4 CONTROLLER DATA READ Reads the following data from the SYSMAC LINK Unit: •... -
Page 119: Controller Status Read
CV-mode Commands for SYSMAC LINK Units Section 6-6 Cable type and RAM size (response): The type of cable being used and the size of the RAM buffer in the controller are provided as follows: Cable type RAM size (see table below) 0: Coaxial 1: Optical fiber Bit status... - Page 120 CV-mode Commands for SYSMAC LINK Units Section 6-6 Second byte: Power supply status: 0: No power 1: Power supplied Third byte: 1: Node number range error 1: Node number duplication error 1: Network parameter mismatch error A network parameter mismatch error occurs when the parameters set in the Unit at initialization do not match those of the currently operating network.
-
Page 121: Network Status Read
CV-mode Commands for SYSMAC LINK Units Section 6-6 Member node list (response): These eight bytes indicate which node numbers are members of the network. When a bit in the following matrix is ON, the corre- sponding node is in the network. Bits 6 and 7 of the eighth byte are always OFF. First byte 16 15 14 13 12 11 10 9 Second byte... -
Page 122: Data Link Status Read
CV-mode Commands for SYSMAC LINK Units Section 6-6 Note *Bit 1/5 is used to indicate why the node is not in the network when bit 0/4 is OFF. Communications cycle time (response): The actual communications cycle time is provided here in 4-digit hexadecimal in increments of 100 ms. Current polling unit node number (response): The node number of the unit that currently is the polling unit. -
Page 123: Internode Echo Test
CV-mode Commands for SYSMAC LINK Units Section 6-6 Parameters Status flags (response): This byte contains flags providing information on overall data link status, as follows: 1: Data link table error 1: No data link table 1: Automatic link word allocation (0: Allocation via data link tables) 1: Data link is active. -
Page 124: Broadcast Test Results Read
CV-mode Commands for SYSMAC LINK Units Section 6-6 response differs from that transmitted in the command, an error occurred in the internode echo test. 6-6-9 BROADCAST TEST RESULTS READ Reads the results (number of receptions for each node) of the broadcast tests carried out using the BROADCAST TEST DATA SEND command. -
Page 125: Special Services
SECTION 7 Special Services Information on remote programming and monitoring and RAS functions is provided in this section. Remote Programming and Monitoring ........RAS Functions . -
Page 126: Remote Programming And Monitoring
PCs in the same Network. In addition, the CVSS (CV Support Soft- ware, see note following diagram) running on an IBM-PC/AT or compatible can be used. The abbreviations in the diagram below indicate the following OMRON products: SLK:... -
Page 127: Ras Functions
RAS Functions Section 7-2 The SSS can only access PCs within the Network of which the PC it is con- nected to is a part. In the following diagram SSS A is attached to PC 1 and can remotely program and monitor PCs 1, 2, 3, 4, 5, 6, 7, and 8. SSS B is attached to PC 2 and can program and monitor only PCs 1, 2, 3, and 4. - Page 128 RAS Functions Section 7-2 Internode Test Execution The test is initiated by moving the node number of the destination PC to IR 232 (IR 040 in the C200H and IR 500 in the C200HS, C200HX, C200HG, or C200HE) and then turning ON pin 1 of DIP switch 1. The overall procedure is listed below.
-
Page 129: Broadcast Test
RAS Functions Section 7-2 Number of times not able to transmit is the number of times transmission was impossible because the destination node or the local node were not part of the Network, or node did not have the right to transmit. Number of busy responses is number of times the node was unable to transmit because destination node was busy. -
Page 130: Failed Node Bypass (Optical Networks Only)
In the example shown below, node 3 fails, but communications continue by bypassing node 3. The abbreviations in the diagram below indicate the fol- lowing OMRON products: SLK: SYSMAC LINK Unit (optical type) -
Page 131: Error Processing
SECTION 8 Error Processing Information to help identify and correct errors that might occur is provided in this section. Troubleshooting ............Network Troubleshooting . -
Page 132: Troubleshooting
Troubleshooting Section 8-1 Troubleshooting Error Indications The table below lists error conditions, their probable cause, and possible reme- dies. Error indicator Probable cause Remedy RUN indicator not SYSMAC LINK Unit faulty. Replace Unit. PC not connected to power supply. Connect to power supply (check connectors). PC’s power supply voltage too low. -
Page 133: Send (90)/Recv (98)
Troubleshooting Section 8-1 Send (90)/RECV(98) Errors The table below lists response codes returned after execution of the SEND(90) and RECV(98) instructions, the probable cause of errors, and recommended remedies. Response code Item to check Probable cause Remedy 00: Normal completion 01: Parameter Local node parameter is outside Set the parameter correctly. -
Page 134: Maximum Number Of Frames
Troubleshooting Section 8-1 Main code Sub- Probable cause Remedy code 01: Local node error Local node not part of Network. Add to Network. Token time-out, node number too Set the local node’s node number below high. the maximum node number. Number of transmit retries exceeded. - Page 135 Troubleshooting Section 8-1 Main code Sub- Probable cause Remedy code 10: Command format The command is longer than the max. Check the command format of the error permissible length. command and set it correctly. The command is shorter than min. Check the command format of the permissible length.
- Page 136 Troubleshooting Section 8-1 Main code Sub- Probable cause Remedy code 25: Unit error 26: Command error The service is being executed. Execute the command again after the service has been completed or aborted. Service cannot be executed from local Execute the service from a node that is node because the local node is not part of the data link.
- Page 137 Troubleshooting Section 8-1 Error Point to check Probable cause Remedy Communications AR 1114 for Noise or environmental influences. Run an internode echo test; if an Controller error operating level 0 error occurs, recheck the operating environment. AR 1514 for Consider replacing communications-re- Reinitialize the SYSMAC LINK Unit operating level 1 lated hardware if one of the following...
-
Page 138: Network Troubleshooting
Network Troubleshooting Section 8-2 Network Troubleshooting Use the headings in this section to troubleshoot problems that occur in the Net- work and find a list of the probable causes of the problem. Unable to operate network Check indicators on the entire Network. RUN indicator not lit •... - Page 139 Network Troubleshooting Section 8-2 • In coaxial cable systems, check whether the Terminators are connected prop- erly. • Check whether all cables are connected properly. • Check whether the cables transmit properly. Data link cannot be started Data link does not operate properly. Check indicators on the data link nodes. LNK indicator is not lit and RUN indicator not lit •...
- Page 140 Network Troubleshooting Section 8-2 • Check whether the Unit is mounted in a permissible slot on the Rack. • Check whether the Unit operates normally when mounted on another PC. • If none of the actions above solve the problem, replace suspect SYSMAC LINK Units.
- Page 141 Network Troubleshooting Section 8-2 INS indicator not lit • Check whether local node number is greater than the maximum node number setting. If it is, lower local node number or increase maximum node number. • Check whether the same node number has been assigned twice. •...
-
Page 143: Inspection And Maintenance
SECTION 9 Inspection and Maintenance This section contains information describing periodic maintenance required by the System and how to replace a SYSMAC LINK Unit. Periodic Inspection ............Replacing SYSMAC LINK Units . -
Page 144: Periodic Inspection
Periodic Inspection Section 9-1 Periodic Inspection SYSMAC LINK Units must be inspected on a regular basis to ensure correct operation. SYSMAC LINK Units are built primarily of solid-state components and contain almost no parts subject to wear. Nevertheless, the life span of some solid-state components can be shortened as a result of adverse envi- ronmental conditions. -
Page 145: Replacing Sysmac Link Units
Replacing SYSMAC LINK Units Section 9-2 Replacing SYSMAC LINK Units Note 1. Data link tables and network parameters are stored in the EEPROM in the SYSMAC LINK Unit. Be extremely careful when removing this component from the old SYSMAC LINK Unit and inserting it in the new Unit. 2. -
Page 147: A Standard Models
Appendix A Standard Models SYSMAC LINK Units Name Specifications Model SYSMAC LINK Unit Use optical fiber cable. Refer to the tables below for accessories. C200HW-SLK13 C200HW-SLK14 Includes to secures the optical fiber cables to the Unit. Includes to secures the optical fiber cables to the Unit. C1000H-SLK11 Use coaxial cable. - Page 148 Standard Models Appendix A Accessories The required number of each of the following is included with the Auxiliary Power Supply Units. Replacement parts can be ordered using the following model numbers. Name Specifications Model Power Supply Cable (Supplies one Unit.) One is included with the C1000H-APS01.
- Page 149 Standard Models Appendix A 2. The S3200-COCF2071/2571 Connectors can be assembled using the S3200-CAK1062 by adding the JRFK-57PWS (made by Sumitomo Electric Industries, Ltd.). Coaxial-type Units Name Specifications Model BNC Connector Crimp-on connector. BNC-P-5C-CR10-B Crimping Tool Attaches the connector. CR-H-1130 Cables Optical Fiber Cable The following table lists the Hard Plastic-clad Optical Fiber Cables that can be used with the C200HW-SLK13/14...
-
Page 151: B Specifications
Appendix B Specifications Communications Specifications Item Specification C200HW-SLK23/SLK24 and C200HW-SLK13/SLK14 and C1000H-SLK21-V1 C1000H-SLK11 Communications method Token ring (N:N) Transmission method Manchester encoding, baseband Data transmission rate 2 Mbps Media Coaxial cable (5C-2V) Hard-plastic-clad quartz optical fiber cable Transmission path Daisy chain No. -
Page 153: C Internal Configuration
Appendix C Internal Configuration The diagrams below show the configuration of the internal components of SYSMAC LINK Units. Optical Units System Commu- nications controller CPU bus C200H or Buffer connector C1000H memory Interface EEPROM* Optical Optical interface module Optical module Note *Network parameters and data link tables are backed up in EEPROM. -
Page 155: Glossary
Glossary address A number used to identify the location of data or programming instructions in memory or to identify the location of a node on a network. All-glass optical fiber cable; also known as crystal optical fiber cable. allocation The process by which the PC assigns certain bits or words in memory for various functions. - Page 156 Glossary A communications path used to pass data between any of the Units connected to it. byte A unit of data equivalent to 8 bits, i.e., half a word. central processing unit A device that is capable of storing programs and data, and executing the instruc- tions contained in the programs.
- Page 157 Glossary An acronym for clear-to-send, a signal used in communications between elec- tronic devices to indicate that the receiver is ready to accept incoming data. CTS signal A signal used in communications between electronic devices to indicate that the receiver is ready to accept incoming data. CV Support Software A programming package run on an IBM PC/AT or compatible to serve as a Pro- gramming Device for CV-series PCs.
- Page 158 Glossary DIP switch Dual in-line package switch, an array of pins in a signal package that is mounted to a circuit board and is used to set operating parameters. distributed control A automation concept in which control of each portion of an automated sys- tem is located near the devices actually being control, i.e., control is decentralized and ‘distributed’...
- Page 159 Glossary I/O allocation The process by which the PC assigns certain bits in memory for various func- tions. This includes pairing I/O bits to I/O points on Units. I/O bit A bit in memory used to hold I/O status. Input bits reflect the status of input termi- nals;...
- Page 160 Glossary input device An external device that sends signals into the PC System. input point The point at which an input enters the PC System. Input points correspond physically to terminals or connector pins. input signal A change in the status of a connection entering the PC. Generally an input signal is said to exist when, for example, a connection point goes from low to high volt- age or from a nonconductive to a conductive state.
- Page 161 Glossary Link System A system that includes one or more of the following systems: SYSMAC LINK System, Remote I/O System, PC Link System, Host Link System, or NET Link System. Link Unit Any of the Units used to connect a PC to a Link System. These are SYSMAC LINK Units, Remote I/O Units, I/O Link Units, PC Link Units, Host Link Units, and NET Link Units.
- Page 162 Glossary OFF delay The delay between the time when a signal is switched OFF (e.g., by an input device or PC) and the time when the signal reaches a state readable as an OFF signal (i.e., as no signal) by a receiving party (e.g., output device or PC). The status of an input or output when a signal is said to be present.
- Page 163 Glossary PC Link Subsystem All of the PCs that share the same part of the LR are in a PC Link System. PC Link Subsystems exist within a PC Link System when one or more of the PCs in the System has two PC Link Units mounted to it. If Subsystems exist, the System is considered a Multilevel PC Link System.
- Page 164 Glossary protocol The parameters and procedures that are standardized to enable two devices to communicate or to enable a programmer or operator to communicate with a device. Rack An assembly of various Units on a Backplane that forms a functional unit in a building-block PC System.
- Page 165 The distance that a signal can be transmitted. Unit In OMRON PC terminology, the word Unit is capitalized to indicate any prod- uct sold for a PC System. Though most of the names of these products end with the word Unit, not all do, e.g., a Remote Terminal is referred to in a col- lective sense as a Unit.
- Page 166 Glossary word A unit of data storage in memory that consists of 16 bits. All data areas consists of words. Some data areas can be accessed only by words; others, by either words or bits. word address The location in memory where a word of data is stored. A word address must specify (sometimes by default) the data area and the number of the word that is being addressed.
-
Page 167: Index
Index command set BROADCAST TEST DATA SEND, 110 BROADCAST TEST RESULTS READ, 110 applications, precautions, xiii CLOCK READ, 97 CLOCK WRITE, 97 AR Area CONTROLLER DATA READ, 95, 104 reading, 90, 91 CONTROLLER STATUS READ, 95, 105 writing, 90 DATA LINK START, 103 automatic generation of data link tables, 46 DATA LINK STATUS READ, 108 Auxiliary Power Supply Unit, 20... - Page 168 98 NET Link Units, compatibility with SYSMAC LINK Units, 6 FINS commands. See CV-mode commands network other OMRON network systems, 2 flags reading network status, 107 Active Node Flags, 42 troubleshooting, 124...
- Page 169 Index example, 80 processing, 80 specifications, 137 Auxiliary Power Supply Unit, 20 changing to PROGRAM mode, 94 changing to RUN mode, 94 standard models, 133 compatible CPUs, 6 start-up node, definition, 36 PC memory address. See Memory Areas reading CV-series PC status, 95 status, data link, 60 reading various CV-series PC data, 95 switches, 14...
-
Page 171: Revision History
Revision History A manual revision code appears as a suffix to the catalog number on the front cover of the manual. Cat. No. W174-E1-07 Revision code The following table outlines the changes made to the manual during each revision. Page numbers refer to the previous version. -
Page 172: Model Numbers
Revision History Revision code Date Revised content Updated the Precautions . March 2000 Page 60: Added information on data link status, including table describing flag operation and programming examples. Page 110: Added comment that remote programming or monitoring of CVM1 and CV-series PCs is not possible . Page 116: Changed description of ERC indicator. - Page 174 W174-E1-07...
- Page 175 Mouser Electronics Authorized Distributor Click to View Pricing, Inventory, Delivery & Lifecycle Information: Omron C200HW-SLK13 C200HW-SLK24 C200HW-SLK23 C200HW-SLK14 C500-LK009V1...
Need help?
Do you have a question about the SYSMAC LINK C1000H-SLK21-V1 and is the answer not in the manual?
Questions and answers