ITS Telecom PanCam-C Installation And Programming Manual

ITS Telecom PanCam-C Installation And Programming Manual

Hide thumbs Also See for PanCam-C:

Advertisement

PanCam-C
PanCam-T
Pantel
Pancode
Installation and Programming Manual

Advertisement

Table of Contents
loading
Need help?

Need help?

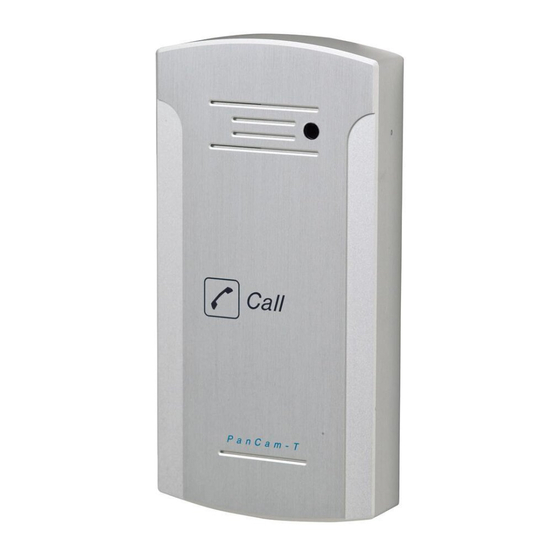
Do you have a question about the PanCam-C and is the answer not in the manual?

Questions and answers

איילת
March 9, 2025

תכנות קוד חדש

User image 67cd45896afed

Summary of Contents for ITS Telecom PanCam-C

  • Page 1 PanCam-C PanCam-T Pantel Pancode Installation and Programming Manual...
  • Page 2: Table Of Contents

    Table of Contents Introduction ............1 PanCam ..............1 1.1.1 General Features............1 1.1.2 PanCam-C Features..........1 1.1.3 PanCam-T Features ..........2 1.1.4 PanCam Physical Description ........2 Pantel................3 1.2.1 Features ..............3 1.2.2 Physical Description..........4 Pancode ..............4 1.3.1 Features ..............4 1.3.2 Physical Description..........5 Installation..............6 Installation Instructions ..........6 2.1.1...
  • Page 3: Introduction

    Pancode Outdoor unit Pancode Indoor unit PanCam The PanCam unit is available in two versions: PanCam-C (with keypad) and PanCam-T (one button). Both are wall mounted access control door phones, connected to an analog port of a PBX or a Key Telephone System, with an internal black &...
  • Page 4: Pancam-T Features

    Introduction Two different operation modes, standard/speed-dial High quality speaker phone with volume control Entry access code Work in conjunction with card readers and security devices Simple to operate and program Smart looking durable design Internal black & white or color high-quality pinhole camera 1.1.3 PanCam-T Features...
  • Page 5: Pantel

    Introduction The front panel of the PanCam-T unit incorporates a speaker, microphone, and Call button. The PanCam-C unit also features a keypad. The front panel is attached to the wall using a bracket and screws. The PanCam units are hardwired units powered by an external 12V AC transformer, which is provided in the package.
  • Page 6: Physical Description

    Introduction 1.2.2 Physical Description Speaker Call button Microphone Outdoor Unit Indoor Unit Figure 1-2. Pantel Front Panel The front panel of the Pantel unit incorporates a speaker, microphone, and Call button. The front panel is attached to the wall using a bracket and screws. The Pantel unit is a hardwired unit powered by an external 12V AC transformer, which is provided in the package.
  • Page 7: Physical Description

    Introduction Door opening from any extension Programmable day and night destinations Two different operation modes, standard/speed-dial High quality speaker phone with volume control Outdoor or indoor installation Work in conjunction with card readers and security devices Simple to operate and program Smart looking durable design 1.3.2 Physical Description...
  • Page 8: Installation

    Installation The PanCam/Pantel/Pancode is mounted to the installation bracket provided; this mounting bracket should be installed with the arms of the bracket positioned at the bottom. Outdoor Unit Bracket Indoor Unit Bracket Figure 2-1. Installation brackets To Install the PanCam/Pantel/Pancode wall bracket Measure and mark the location on the wall where the holes will be drilled for the mounting bracket.
  • Page 9: Pancam Schematic Setup

    Caution To avoid damage to the camera, make sure to connect the correct polarity to the connector (see Figure 2-2). -12V Camera connector 12V DC +12V Figure 2-2. Camera connector 2.1.2 PanCam Schematic setup The following pictures show the schematic setup of the PanCam unit.
  • Page 10: Pantel/Pancode

    Installation 2.1.3 Pantel/Pancode The Pantel/Pancode can be installed as the individual access control or can be used with adjacent access-control devices, such as card reading devices. For more information on adjacent access-control device installation, see section 2.2, Adjacent Access-Control Device. A 12V AC external power supply is included with the Pantel/Pancode unit.
  • Page 11: Adjacent Access Control Device

    the proper terminal and tighten the terminal screw. This will crimp the wire connection. Caution To avoid damage to the Pantel/Pancode, the power supply should be turned off prior to connecting wires to the Pantel/Pancode unit. To Install the Pantel/Pancode Remove the cover from the Pantel/Pancode unit and disconnect the wire connector, found at the base of the internal component.
  • Page 12: Adding Pantel/Pancode To An Access Control Device

    Installation For this type of installation, the access-control device “N.O.” output wires are connected to the Pantel/Pancode Switch terminals (see Figure 2-5.) Lock Relay Pancode/ Pantel N.O. Output Switch Figure 2-5. Pantel/Pancode – Controlling Lock Relay 2.2.2 Adding Pantel/Pancode to an Access Control Device The access-control device opens the door when the Pantel/Pancode triggers the access-control device.
  • Page 13: Volume Control

    Option 2: For use with an external device, which requires the Pancode to be set up as “Normally Open” Option 3: For use with powered-unlocked-state lock relay (most common) Option 4: For use with powered-locked-state lock relay (recommended for safety purposes in an emergency situation) The following schematic diagram shows the wiring plan for these four options.
  • Page 14: Programming

    Programming Programming Programming can be done from any telephone or extension on the PBX, using keypad DTMF tones. The following programming functions are discussed in this section: Day/Night Mode Selection Entering Programming Mode Resetting the PanCam/Pantel/Pancode Day/Night Mode Selection Day and Night mode specify which of the programmed destination numbers, Day or Night number, will be called when the Call button is pressed.
  • Page 15: Resetting The Pancam/Pantel/Pancode

    Dial *151. A confirmation tone will be heard. Exit programming mode. To Reset the Unit in “speed dial” mode (only PanCam-C and Pancode) Enter programming mode (see section 3.2, Entering Programming Mode). Dial *152. A confirmation tone will be heard.
  • Page 16: Pancam-C/Pancode Setup

    X = 2 camera powered when call button is pressed PanCam-C/Pancode Setup The PanCam-C/Pancode can work in two modes of operation: Standard and Speed-dial. In Standard mode, which is the default, the keypad requires direct dialing of extensions and numbers.
  • Page 17: Selecting The Mode Of Operation

    3.4.1 Selecting the Mode of Operation To Set the PanCam-C/Pancode Operation Mode Dial the PanCam-C/Pancode line/extension from any touch-tone telephone. Wait until the PanCam-C/Pancode answers and beeps. Dial *900. Enter the Programming Access Password (default password is 1234.) For Standard Mode, dial *151 (See 3.5.2 for...
  • Page 18 (Do Not use * or # as prefix digit) extensions dialing. When To cancel this operation, input to the enter: PanCam-C/ *170 + # Pancode begins with these digits, the PanCam-C/ Pancode will process them as extension...
  • Page 19: Speed-Dial Setup

    0 through 9. Do not use the * or # keys. *For *620 + X X = 0 camera always off PanCam-C Camera X = 1 camera always on instructions X = 2 camera powered when call button is pressed 3.4.3...
  • Page 20 Programming PBX Parameter Commands OPERATION COMMAND DEFAULT Assigning a No default *120 + X + DN + # Speed-dial X = a digit 1 through 9 destination DN = Destination number. number (DN) = Up to This command 20 digits, including *, #, must be entered Pause, and A-D separately for...
  • Page 21 OPERATION COMMAND DEFAULT Delete a *360 + X + # destination where: number assigned X = 1 Day to Day, Night, or X = 2 Night Error DNs. This X = 3 Error command must be entered separately for each X value For Pancode *371 Indoor only...
  • Page 22: Entering Special Characters Dtmf

    The allowable characters are 0 through 9. Do not use the * or # keys. *For PanCam-C *620 + X Camera X = 0 camera always instructions X = 1 camera always on...
  • Page 23: Specifications

    Specifications General Specifications 12V AC@1.6A (supplied with unit) Power Supply (External) 12-24V DC@1.6A (optional) 24-72V DC Line Voltage < 10 ?A DC Leakage 0-100V DC > 5M? On-Hook Insulation 100-200 V DC > 30 K? (Resistance Between Line 500V AC/50Hz > 20K? Terminal and Ground) 100V AC/25Hz >...
  • Page 24: Camera Specifications

    Specifications Camera Specifications 4.2.1 Black and White Model no. MK-03261C Image Sensor Device 1/3” interline transfer CCD 4.8mm x 3.6mm Image Sensor Area Horizontal Frequency 15.625KHz 50Hz Vertical Frequency 542(H) x 582(V) Total Pixels 625 lines, 50 fields/sec CCIR Scanning System Resolution 420 TVL horizontal 0.5 Lux at F2.0...
  • Page 25: 4.2.2 Color

    DC 12V Pin 3: Red 4.2.2 Color MTV-54K0PI Model no. TV System ¼-inch CCD Image Sensor Image Sensor 542(H) x 586(V) CCD Total Pixels 625 lines, 50 fields/sec Scanning System SYNC System Internal 0.5 Lux F1.2 5600°K Minimum Illumination 380 TVL/470 TVL Resolution (Enhanced) 52dB (MIN)/60dB(TYP)
  • Page 26: Feature Overview

    32(W) x 32(H) x 19.5(D) mm Dimensions + 12V Pin 1: Red Pin 2: Black Video Pin 3: White Pin 4: Black Feature Overview PanCam Pancode Pantel PanCam-C PanCam-T Outdoor Indoor Outdoor Indoor Installation Outdoor Outdoor Outdoor Indoor Outdoor Indoor...

This manual is also suitable for:

Pancam-tPantelPancode

Table of Contents