Jungheinrich DFG 320 Operating Instructions Manual
Hide thumbs
Also See for DFG 320:
- Operating instructions manual (186 pages) ,
- Operating instructions manual (15 pages) ,
- Operating instructions manual (103 pages)
Table of Contents
Advertisement
Advertisement
Table of Contents

Related Manuals for Jungheinrich DFG 320


Summary of Contents for Jungheinrich DFG 320
- Page 1 DFG/TFG 316/320/425/430/435 08.07- Operating Instructions 51077668 09.08...
- Page 2 Used to indicate standard equipment. Used to indicate optional equipment. Our trucks are subject to ongoing development. Jungheinrich reserves the right to alter the design, equipment and technical features of the truck. No guarantee of particular features of the truck should therefore be inferred from the present operating instructions.
-
Page 4: Table Of Contents
Table of contents Correct Use and Application Truck Description Application ................... B 1 Assemblies and functional description ..........B 2 Truck ....................B 3 Standard version specifications ............B 5 Performance data DFG 316-320 ............B 5 Engine Data ..................B 12 Tyres .................... - Page 5 Operational Fault Displays ..............E 18 3.10 Stopping the engine1................E 19 Industrial Truck Operation ..............E 20 Safety regulations for truck operation ..........E 20 Travel ....................E 22 Steering ....................E 24 Braking ....................E 24 Mast and Attachment Operation ............E 25 Collecting, transporting and depositing loads ........
- Page 6 13.2 During decommissioning: ..............F 35 13.3 Returning the truck to operation after decommissioning ..... F 35 Safety checks to be performed at regular intervals and following any unusual incidents ................F 36 Final de-commissioning, disposal ............F 36 HUSS FS - MK Series Diesel Particle Filter Operating Instructions ..F 37 16.1 Important General Instructions ............
-
Page 8: A Correct Use And Application
A Correct Use and Application The “Guidelines for the Correct Use and Application of Industrial Trucks” (VDMA) are supplied with the truck. The guidelines form part of these operating instructions and must be observed. National regulations apply in full. It must be used, operated and serviced in accordance with the present instructions. All other types of use lie beyond the scope of application and can result in damage to personnel, the truck or property. -
Page 10: B Truck Description
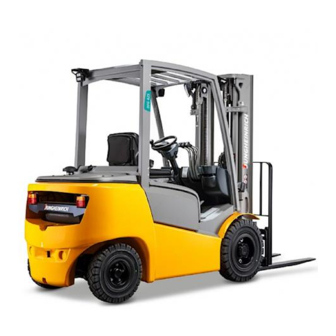
B Truck Description Application The DFG/TFG series are IC engine, 4-wheel rider trucks. The DFG series are diesel engine trucks, while the TFG series are equipped with a petrol engine for LPG operation. The DFG/TFG 316-435 is equipped with a hydrodynamic drive system. The left pedal is a combination of crawl speed and brake pedal, and activates the rapid lift function during slow travel. -
Page 11: Assemblies And Functional Description
Assemblies and functional description Item Description Item Description 1 t Driver’s seat 8 t Fork 2 t Steering column 9 t Fork carriage 3 t Dashboard 10 t Drive axle 4 t Overhead guard 11 t Engine panel 5 t Mast 12 t Steering axle 6 t Load chain 13 t Trailer coupling... -
Page 12: Truck
Truck Chassis/superstructure: A rigid chassis which protects the units and controls, provides the truck with maximum static safety. A wide opening panel (11) facilitates service and maintenance work. The hydraulic oil reservoir is integrated on the right-hand side and the fuel tank for the DFG series on the opposite side in the chassis. - Page 13 Hydraulic system: The gear pump of the hydraulic system is powered by the engine through a power take off. The pump speed and hence the supply flow are controlled by the accelerator pedal through the engine speed. Hydraulic functions are controlled by the control lever through a multiple control valve. Electrical system: The 12 volt system consists of a starter battery and a threephase generator with integrated controller.
-
Page 14: Standard Version Specifications
Standard version specifications Technical specification details in accordance with VDI 2198. Technical modifications and additions reserved. Performance data DFG 316-320 Model DFG 316 DFG 320 Q Capacity 1600 2000 C Load centre of gravity distance Travel Speed 18/19 18/19 km/h w/w.o. - Page 15 Performance data DFG/TFG 425-435 Model DFG 425 DFG 430 DFG 435 Q Capacity 2500 3000 3500 C Load centre of gravity distance Travel Speed 17/19 18/19 18/19 km/h w/w.o. load Lift Speed 0.59/0.60 0.53/0.59 0.49/0.53 w/w.o. load Lower Speed 0.55/0.45 0.55/0.45 0.55/0.42 w/w.o.
- Page 17 Dimensions DFG Model DFG 316 DFG 320 a/2 Safety distance Mast height retracted 2185 2185 Free lift Lift 3300 3300 Mast height extended 3920 3920 Overhead guard height 2145 2145 Seat height (SIP) 1049 1049 Length including forks 3386 3416...
- Page 18 Dimensions Model DFG 425 DFG 430 DFG 435 a/2 Safety distance Mast height retracted 2080 2080 2180 Free lift Lift 2900 2900 3100 Mast height extended 3685 3685 3885 Overhead guard height 2220 2250 2250 Seat Height 1068 1068 1068 Length including forks 3690 3810...
- Page 19 TFG dimensions Model TFG 316 TFG 320 a/2 Safety distance Mast height retracted 2185 2185 Free lift Lift 3300 3300 Mast height extended 3920 3920 Overhead guard height 2145 2145 Seat height (SIP) 1049 1049 Length including forks 3386 3416 Headlength 2236 2266...
- Page 20 Model TFG 425 TFG 430 TFG 435 a/2 Safety distance Mast height retracted 2080 2080 2180 Free lift Lift 2900 2900 3100 Mast height extended 3685 3685 3885 Overhead guard height 2220 2250 2250 Seat height 1068 1068 1068 Length including forks 3690 3810 3945...
-
Page 21: Engine Data
Engine Data Engine - DFG316 - 320 Model S4Q2 four cylinder Ignition sequence 1 3 4 2 Capacity 2505 cc 2350 rpm (without load) Control speed 680 rpm (idle) Valve play Inlet and outlet 0.25 mm cold Oil volume 8.0 l Tank volume 48 l Coolant volume... - Page 22 Engine - TFG 316-320 Model 2.1 L L4 four cylinder, four stroke, LPG Ignition sequence 1 3 4 2 Capacity 2065 cc 2700 ±50 rpm (without load) Control speed 850 ±50 rpm (idle) Valve play Inlet and outlet 0.38 mm warm Spark plug type NGH FR2A-D Spark plug electrode distance...
-
Page 23: Tyres
Tyres Full rubber SE tyres DFG/TFG 316 DFG/TFG 320 (= Solid) Drive axle 6.50-10 6.50-10 Steering axle 18x7-8 18x7-8 Pneumatic tyres DFG/TFG 316 DFG / TFG 320 (diagonal tyres) Drive axle 6-50-10 14PR 6-50-10 14PR Steering axle 18x7-8 14PR 18x7-8 14PR Tyre pressure DFG / TFG 316 DFG / TFG 320 Drive axle... -
Page 24: Mast Versions
Mast Versions (all dimensions in mm) DFG/TFG 316/320 Mast table VDI 3596 Lift Free lift Extended height Retracted height h Description 2900 1985 3520 3100 2085 3720 3300 2185 3920 3600 2335 4220 3800 2435 4420 4000 2535 4620 4500 2835 5120 5000... - Page 25 DFG/TFG 425/430 Mast table VDI 3596 Lift Free lift Retracted height h Extended height Description 2900 2080 3510 3100 2180 3710 3300 2280 3910 3500 2380 4110 3700 2480 4310 4000 2630 4610 4300 2830 4910 4500 2930 5110 4700 3030 5310 5000...
- Page 26 DFG/TFG 435 Mast table VDI 3596 Lift Free lift Retracted height h Extended height Description 3100 2180 3870 3500 2380 4270 4000 2630 4770 4500 2930 5270 5000 3180 5770 4700 1417 2180 5463 5000 1517 2280 5763 5500 1717 2480 6263 6000...
-
Page 27: En Standards
EN standards Noise emission level: 79 dB(A) +/- 3dB (depending on tolerances and equipment) in accordance with EN 12053 as harmonised with ISO 4871. The noise emission level is calculated in accordance with standard procedures and takes into account the noise level when travelling, lifting and when idle. The sound pressure level is measured at the ear. -
Page 28: Identification Points, Warning Labels And Data Plates
Identification points, warning labels and data plates (mm) Q (kg) D (mm) Item Description Attention: Read operating instructions. Load fork, Capacity / Load Centre of Gravity / Lift Height diagram “Travel with raised load prohibited” / “Mast forward tilt with raised load prohibited”... -
Page 29: Truck Data Plate
Truck data plate Item Description Item Description Model Manufacturer’s logo Serial no. Net. weight Rated capacity (kg) Load centre of gravity (mm) Output (kW) Year of manufacture Manufacturer Option For queries regarding the truck or ordering spare parts always quote the truck serial number (29). -
Page 30: Attachment Load Diagram
The arrow shape markings (38 and 39) on the inner and outer masts show the driver when the specified lift limits have been reached. These arrows attached to all masts with a height- dependent capacity rating. Attachment load diagram The attachment load diagram gives the truck’s capacity Q in combination with the respective attachment in kg. - Page 31 B 22...
-
Page 32: C Transport And Commissioning
C Transport and Commissioning Lifting by crane Only use lifting gear with sufficient capacity (for transport weight see truck data plate). – Parking the truck securely (see Chapter E). – Attach the crane slings to the cross member of the mast (1) and the trailer coupling (2). -
Page 33: Securing The Truck During Transport
Securing the truck during transport. The truck must be securely fastened when being transported on a lorry or a trailer. The lorry / trailer must have fastening rings and a wooden floor. Loading shall be carried out by staff especially trained for that purpose in accordance with recommendations... -
Page 34: Using The Truck For The First Time
Using the truck for the first time Commissioning and driver instruction must be performed by trained personnel. If several trucks have been delivered, make sure that always the serial numbers of the load handlers, masts and basic trucks match each other. To prepare the truck after delivery or after transport, proceed as follows: –... -
Page 36: D Fuelling The Truck
D Fuelling the Truck Safety regulations for handling fuel Before filling up or replacing the LPG bottle, first park the truck securely (see Chapter E). Fire protection: When handling fuels and LPG, smoking, naked flames and other ignition sources are strictly prohibited in the immediate vicinity. Labels indicating the hazard zone must be positioned where they are clearly visible. -
Page 37: Filling With Diesel
Filling with diesel The truck must only be filled at locations specifically designed for this purpose. – Park the truck securely before filling up (see Chapter E). – Open the cap (1). – Fill up with clean diesel. Do not overfill the tank. Capacities: DFG 316 - 320= 48 l DFG 425 - 435= 58l... -
Page 38: Replace The Lpg Bottle
Replace the LPG bottle The LPG bottle must only be replaced at designated areas by trained and authorised personnel. – Park the truck securely before filling up (see Chapter E). – Close the shut-off valve (3) securely. – Start the engine and allow the LPG system to run empty in neutral. - Page 39 “Rotarex” gas limit display operating instructions Functional description The gas limit display is a threshold device for the fluid phase, known as an MLD (Minimum Liquid Detector). The MLD indicates when there is just a small amount of gas left in the container.
- Page 40 Reusable LPG bottles with central filling device Refillable liquid gas bottles contain a dispensing valve (10), a filling stop valve (11), a relief valve (12) and a level display (13). To fill the tank close the dispensing valve, unscrew the cover of the filling stop valve and insert the nozzle of the LPG pump into the filling port.
-
Page 42: E Operation
E Operation Safety regulations for the operation of industrial trucks Permission to operate: The industrial truck may only be used by suitably trained personnel, who have demonstrated to the proprietor or his representative that they can drive and handle loads and have been authorised to operate the truck by the proprietor or his representative. - Page 43 15 14 13 12 11 10 12 11 10 26 25 24 23...
-
Page 44: Controls And Displays
Controls and displays Item Control /Display Function When lit, indicates that the air filter Air filter indicator is contaminated. When lit, indicates insufficient engine Engine oil pressure indicator t lubricant oil pressure. When lit, indicates that the battery Charging current indicator is not charged. - Page 45 15 14 13 12 11 10 12 11 10 26 25 24 23...
- Page 46 Item Control /Display Function Applies / releases parking brake. To engage, turn switch to position 1. 16 Parking brake lever To release, turn switch to position 0. Pull up lever to engage. Push lever forward to release. t Steers truck in desired direction. 17 Steering wheel Steering column adjusting t Adjusts the steering column tilt.
- Page 47 Travel direction switch When the travel direction switch (28) is in the central position, the transmission is in idle. – To select the forward gear, push the switch forward. – To select the reverse gear, push the switch back. The engine will not start if a travel direction is pre-selected.
- Page 48 Heating and Fan – Turn thermostat control button (31) anti-clockwise to increase the temperature in the driver’s cab. – Press the switch (30) to activate the fan. Horn – To activate the horn press the warning button (27) in the hydraulic lever.
-
Page 49: Starting Up The Truck
Starting up the truck Before the truck can be started, operated or a load lifted, the driver must ensure that there is nobody within the hazardous area. Daily checks and operations to be performed before starting work Truck – The entire truck (in particular wheels and load handler) must be inspected for damage. - Page 50 Covers may need to be opened for the inspection. Checking the fuel supply - DFG – Set the ignition / starter key (19) to the “I” position. – Read off the fuel supply from the fuel gauge (15). – If necessary, diesel (see...
-
Page 51: Adjusting The Driver's Seat
Adjusting the driver’s seat Standard seat MSG 65 To achieve optimal seat damping the driver’s seat must be adjusted according to the driver’s weight. Adjusting the seat to the driver's weight: – Sit on the driver’s seat. When the correct weight adjustment has been made, the arrow of the driver weight display (37) will be above the calibration line. -
Page 52: Safety Restraint Belt
Safety restraint belt The driver must check the operation and condition of the seat belt every day before using the industrial truck. Faulty operation can only be detected in good time through regular inspection. Put on the safety restraint belt each time before starting the industrial truck. The belt protects against serious injury. - Page 53 How to act in unusual situations If the truck is about to tip over, never undo the restraint belt and try to jump out. This will only increase the risk of injury. Correct procedure: – Lean your upper body over the steering wheel.
-
Page 54: Adjust Steering Column
Adjust steering column – Release the steering column adjusting lever (18) in the direction of the arrow (L). – Tilt the steering column (38) forward or backward as required. – Push the steering column adjusting lever in the direction of the arrow (F). E 13... -
Page 55: Starting The Truck
Starting the truck Before starting the truck If the engine has not been run for several weeks or if the oil filter has been changed, start the engine (see section 3.7 or 3.8) and leave it to run in idle for a few minutes before starting. -
Page 56: Starting Procedure For The Tfg
Starting procedure for the TFG Note the safety regulations for handling liquid gas (see Chapter D, section 1). – Slowly open the shutoff valve on the LPG bottle. – Put the key in the ignition / starter switch (19). – Set the ignition / starter key to the “I”... -
Page 57: Starting Procedure For The Dfg
Starting procedure for the DFG – Put the key in the ignition / starter switch (19). – Set the ignition / starter key to the “I” position. – Press the horn button (27) and test the horn. – After setting ignition / starter (19) to the I position, the charging current (3), engine... - Page 58 After starting the engine, carry out a test run and check the following functions: – Test the parking brake (16) and the slow travel /brake pedal (29+21). – Test the engine speed with the accelerator pedal (22) over a range of speeds while checking the freedom of movement of the pedal.
-
Page 59: Operational Fault Displays
Operational Fault Displays When the following indicators are lit: – Engine oil pressure (2), – Charging current (3), – Coolant temperature (10), – Transmission oil temperature (4), engine must stopped immediately. The engine should only be started again once the fault has been removed. For troubleshooting procedures, see section 5. -
Page 60: Stopping The Engine1
As soon as the permissible coolant temperature is exceeded, proceed as follows: Remove the truck from the hazardous area if necessary Lower the fork carriage and load securely Switch the drive to neutral and apply the parking brake Run the engine at a slightly higher speed (to improve the cooling effect of the fan) until the temperature drops back to the normal level. -
Page 61: Industrial Truck Operation
Industrial Truck Operation Safety regulations for truck operation Travel routes and work areas: Only use lanes and routes specifically designated for truck traffic. Unauthorised third parties must stay away from work areas. Loads must only be stored in places specially designated for this purpose. Driving conduct: The driver must adapt the travel speed to local conditions. - Page 62 Towing trailers: see chapter 4.8, page E35. Exhaust emissions: The truck must only be operated in well ventilated areas. If the truck is operated in enclosed areas, this can lead to a build-up of harmful exhaust emissions, resulting in dizziness, tiredness and even death. The user must comply with legal requirements, technical standards and health and safety regulations when operating an IC engine powered lift truck in closed rooms.
-
Page 63: Travel
Travel Adapt the travel speed to the conditions of the travel lane, the work area and the load – Set the travel direction switch (28) to neutral. – Raise the fork carriage approx. 200 mm so that the fork tines are clear of the ground. - Page 64 Braking - Take your foot off the accelerator pedal (22). - Depress the brake pedal (21). Slow travel with the slow travel / brake pedal Sensitive application of the slow travel / brake pedal (29) allows for excellent shunting in confined areas and rapid lifting at a slow travel speed. The slow travel / brake pedal can also actuate the drum brakes but this is only intended as a crawl speed aid.
-
Page 65: Steering
Steering Very little steering force is required for the hydrostatic steering, therefore turn the steering wheel (17) with caution. Braking Service brake brake pedal hydraulically actuates the drum brakes of the front wheels. - When the brake pedal (21) is applied the drum brakes are applied without disengaging... -
Page 66: Mast And Attachment Operation
Mast and Attachment Operation The control levers must only be operated from the driver’s seat. The lifting device is operated from the control levers on the right-hand side of the driver's seat. Lifting/lowering the fork carriage Never reach through the mast! –... - Page 67 Auxiliary hydraulics ZH3 Use button (1) to toggle control lever (23) from ZH2 to ZH3. To activate ZH3, press button (1) when the control lever is in the neutral position and apply the lever. When the button is depressed, ZH3 is permanently activated. If the button is released after moving the control lever out of its neutral position, ZH3 will only remain activated until the control...
- Page 68 Operating the integrated sideshift (ISS) The integrated sideshift allows the fork carriage to be moved to the side.Sideshift left (as seen by driver): – Push the control lever (24) forward. Sideshift right (as seen by driver): – Pull the control lever (24) back. Integrated fork positioner The integrated fork positioner allows the distance between the forks to be set.
- Page 69 Controlling the speed of the lifting device Moving control lever changing the engine speed governs the operating speed of the hydraulic cylinders. When control levers released (23, 24) they automatically revert to neutral and the lifting device remains in the position it has reached.
-
Page 70: Collecting, Transporting And Depositing Loads
Collecting, transporting and depositing loads The control levers must only be operated from the driver’s seat. Before collecting a load, the driver must ensure that it is correctly palletised and that the capacity of the truck is not exceeded. Note the load chart Adjusting the forks Adjust the fork tines in such a way that both are equally distanced from the... - Page 71 Lifting loads Do not lift other people with the lifting device. – Carefully approach the load to be lifted. – Set the travel direction switch (28) to neutral. – Raise the forks to the correct height for the load. – Set the mast vertical. –...
- Page 72 – Lower the load as far as is absolutely necessary transport (ground clearance approx. 150...200 mm). – Tilt the mast fully backward: The higher the load is transported, the less the operating safety of the truck. Transporting loads If the load is stacked up so high that it affects forward visibility, you must reverse.
- Page 73 Depositing a load – Drive the truck carefully up to the rack. – Set the travel direction switch (28) to neutral. – Raise the forks to the correct height for the rack space. – Set the travel direction switch (28) to forward.
-
Page 74: Parking The Truck Securely
Parking the truck securely When you leave the truck it must be securely parked even if you only intend to leave it for a short time. Never park and abandon a truck with a raised load. – Drive the truck onto a level surface. LPG powered trucks must not be operated on ground floors with a basement. - Page 75 Stopping the engine DFG – Set the ignition / starter switch (19) to “0”. – Remove the key from the ignition / starter switch (19). Stopping the engine TFG – Close the shut-off valve (42) of the LPG bottle securely. –...
-
Page 76: Towing Trailers
Towing trailers The truck is designed only for occasional towing of trailers within commercial premises. The max. tow load is the capacity indicated on the capacity plate (see decals diagram on page B21). The tow load consists of the weight of the trailer and the capacity load. If a load is transported on the forks, the tow load must be reduced by the same amount. -
Page 77: Troubleshooting
Troubleshooting This chapter is designed to help the user identify and rectify basic faults or the results of incorrect operation. When locating a fault, proceed in the order shown in the table. Fault Probable Cause Action Starter does – Travel direction switch –... - Page 78 Fault Probable Cause Action Engine oil – Engine oil level too low – Check engine oil level, top up if indicator lit necessary during operation Engine – Engine oil level too low – Check engine oil level, top up if temperature necessary display in red...
- Page 79 If the truck cannot be restored to operation despite carrying out the remedies above, please contact the manufacturer's service department. Additional troubleshooting must only be performed by the manufacturer’s specialist service engineers. The manufacturer has a customer service department specially trained for these tasks.
-
Page 80: F Industrial Truck Maintenance
F Industrial Truck Maintenance Operational safety and environmental protection The servicing and inspection duties contained in this chapter must be performed in accordance with the intervals indicated in the servicing checklists. Any modifications to the industrial truck assemblies, in particular the safety mechanisms, is prohibited. - Page 81 End users, both private and commercial, are legally obliged to return used truck starter batteries to the battery manufacturer through the trade, i.e. wherever batteries are sold, or through authorized disposal agents. If in doubt, contact the Jungheinrich service department.
-
Page 82: Servicing And Inspection
The application conditions of an industrial truck have a considerable impact on the wear of the service components. We recommend that a Jungheinrich customer adviser carries out an application analysis on site to work out specific service intervals to prevent damage due to wear. -
Page 83: Dfg/Tfg Maintenance Checklist
DFG/TFG maintenance checklist Maintenance intervals = t W A B C Standard Brake 1.1 Check effectiveness of operating and parking brakes, adjust where necessary and measure braking distance. 1.2 Check brake lining wear and check brake drum diameter 1.3 Check brake fluid level in container and top up if necessary 1.4 Change brake fluid annually, bleed the system if required... - Page 84 Maintenance intervals = t W A B C Standard Hydraulic 5.1 Check mast bearings operation 5.2 Check setting of slide pieces and stops, and adjust if necessary 5.3 Visually inspect the mast rollers and check contact surface wear level 5.4 Check lateral clearance of mast connections and of fork carriage 5.5 Check load chain setting and tighten if necessary 5.6 Check forks and fork carriage for wear and damage...
-
Page 85: Dfg Maintenance Checklist
DFG maintenance checklist Maintenance intervals = t W A B C Standard Travel 7.1 Check engine for noise and leaks 7.2 Check engine oil level, top up if necessary 7.3 Change engine oil 7.4 Replace engine oil filter 7.5 Check valve play, adjust if necessary 7.6 Test glow plugs, electric 7.7 Check V belt for tension and damage 7.8 Check maximum speed (without load), adjust if... -
Page 86: Tfg Maintenance Checklist
TFG maintenance checklist Maintenance intervals = t W A B C Standard Travel 8.1 Check engine for noise and leaks 8.2 Replace spark plugs 8.3 Check ignition system and ignition point 8.4 Check valve play, adjust if necessary 8.5 Check engine oil level, top up if necessary 8.6 Change engine oil 8.7 Replace engine oil filter 8.8 Check V belt for tension and damage... -
Page 87: Coolant Specification
Coolant specification The quality of the coolant has a considerable effect on the efficiency and useful life of the cooling system. The following instructions are designed to provide the best servicing in terms of frost and corrosion protection. – Always use clean, soft water. –... -
Page 88: Dfg Fuel Specifications
When handling anti-freeze always observe the following safety measures: – NEVER swallow anti-freeze. If anti-freeze is accidentally swallowed, seek IMMEDIATE medical attention. – Avoid prolonged skin contact with anti-freeze. – Wipe off spray from the skin immediately. – If anti-freeze is sprayed into the eyes, rinse them immediately. –... -
Page 89: Lubrication Schedule
Lubrication Schedule E(cardan shaft) (steering axle) Contact surfaces Transmission oil filler neck Grease nipple Transmission oil drain plug Mineral oil filler neck for brake Hydraulic oil filler neck system Hydraulic oil drain plug Oil dipstick F 10... -
Page 90: Consumables
Consumables Handling consumables: Consumables must always be handled correctly. Follow the manufacturer’s instructions. Improper handling is hazardous to health, life and the environment. Consumables must only be stored in appropriate containers. They may be flammable and must therefore not come into contact with hot components or naked flames. Only use clean containers when filling up with consumables. - Page 91 Bio oils Bio-degradeable hydraulic oils may only be used after consultation with the relevant JH service department. Grease data Code Saponification Dew point Worked NLG1 class Applicationtemp °C erature °C penetration at 25 °C Lithium 265-295 -35/+120 F 12...
-
Page 92: Maintenance And Repairs
Maintenance and repairs 10.1 Preparing the truck for maintenance and repairs All necessary safety measures must be taken to avoid accidents when carrying out maintenance and repairs. The following preparations must be made: – Park the truck securely (see Chapter E). –... -
Page 93: Engine Panel
10.2 Engine panel Before opening the motor panel the steering column and the steering column adjustment lever (18) must be pushed forward fully. Push the driver’s seat forward. The stop bolt on the left hand seat guide rail should engage facing up. –... -
Page 94: Servicing The Engine Dfg
10.4 Servicing the engine DFG Checking the engine oil - DFG – Remove the dipstick (8). – Wipe the dipstick with a lint-free cloth and put in back fully into its port. – Remove the dipstick again and check whether the oil level is between the MIN and MAX markings. - Page 95 Replacing the engine oil and engine oil filter Only change the engine oil when the engine is at operating temperature and the truck is horizontal. Always replace the engine oil and engine oil filter together. Draining the engine oil – Unscrew the (2) lid. –...
- Page 96 Adding engine oil – Add fresh engine oil through the filler port accordance with consumables table. Capacity: 8,0 l Check the engine oil level with the dipstick (1) and adjust as necessary. Screw the lid backon. – Fully insert the dipstick (1). After changing the oil and the oil filter, note the engine oil pressure indicator (9) when you run the engine again and...
- Page 97 Replacing the fuel filter Drain the fuel from the filter into a suitable container. Undo the fuel filter (13) with a filter wrench and manually unscrew it. Dispose of the fuel filter and fuel in accordance with environmental regulations. – Thoroughly clean the raised faces of the filter flange.
-
Page 98: Engine Servicing Tfg
10.5 Engine servicing TFG Checking the engine oil - TFG – Remove the oil dipstick (32). – Wipe the dipstick with a lint-free cloth and put in back fully into its port. – Remove the dipstick again and check whether the oil level is between the MIN and MAX markings. - Page 99 Replacing the engine oil filter – Undo the oil filter (20) with a filter wrench and manually unscrew it. Collect any emerging oil and dispose of the oil and oil filter in accordance with environmental regulations. – Thoroughly clean the raised faces of the oil filter flange.
- Page 100 Replacing spark plugs – Remove spark plug connector (19) . – Thoroughly clean around the spark plugs on the cylinder head. – Unscrew the spark plugs. – Check the electrode distance of the new spark plugs with a feeler gauge, and adjust as required.
-
Page 101: Checking The Hydraulic Oil Level
10.6 Checking the hydraulic oil level If the oil is cold – Fully raise and lower the mast in one operation. – Stop the engine. – Remove the dipstick (35) and clean it with a clean cloth. Check the hydraulic oil level. -
Page 102: Gas System Drain Tap
10.7 Gas system drain tap The gas system drain tap must always be closed during operation (it should only be opened by service personnel for maintenance purposes). If the drain is opened gas may escape! Drain closed Drain open F 23... -
Page 103: Checking The Coolant Level
10.8 Checking the coolant level – Open the cover lock and turn it to the right – Remove the panel – Check the coolant level on the reservoir. The coolant should lie between the MIN and MAXmarkings (36). If the coolant is below the MIN marking, this indicates possible leakage in the radiator system. -
Page 104: Checking The Coolant Concentration
10.9 Checking the coolant concentration Do not open the radiator lid when the engine is hot. To prevent the build up of lime as well as front and corrosion damage, and to raise the boiling point temperature, the cooling circuit must be filled each year with a mixture of water and anti-freeze with anti-corrosion additives. -
Page 105: 10.11 Cleaning/Replacing The Air Filter Cartridge
10.11 Cleaning/replacing the air filter cartridge Carry out all maintenance work with the engine switched off. Do not start the engine if the air filter cartridge is removed. – Undo the quick release lock (29) and lift it up. – Raise the air filter housing. –... -
Page 106: 10.12 Dfg/Tfg Transmission
10.12 DFG/TFG transmission: It is important to check the oil level correctly. The oil is a lubricant which also acts as a coolant and operates the clutches. A low oil level will result in loss of transmission and pressure. It also causes overheating and resultant transmission failure. Checking the transmission oil level Only use clean, fresh oil from clean containers... -
Page 107: 10.13 Brake
10.13 Brake Checking the parking brake The parking brake (25) must be able to keep truck plus maximum permissible load on an incline of 15 %. If this is not the case, the parking brake must be adjusted. Checking the brake fluid level –... -
Page 108: 10.14 Checking The Wheel Attachments
10.14 Checking the wheel attachments. – Parking the truck securely (see Chapter E). – Tighten the wheel nuts (36) crosswise with a torque wrench. Torque VFG 316-320 VFG 425-435 Drive wheels 200 NM 380 NM Rear wheels 200 NM 200 NM 10.15 Hydraulic system Replacing the hydraulic oil filter –... -
Page 109: 10.17 Electrical Equipment
10.17 Electrical Equipment Checking the battery condition, the acid level and acid density Battery acid is highly corrosive. Therefore it is essential to avoid contact with battery acid. If clothing, skin or eyes have nevertheless come into contact with battery acid, immediately rinse the affected parts with water. - Page 110 Checking electrical fuses – Prepare the truck for maintenance and repair work (see “Preparing the Truck for Maintenance and Repairs” in this chapter) – for rear mounted fuses, open the rear panel lock and turn it to the right – Remove the panel –...
- Page 111 DFG main current Item Ref. Rati To protect: 9F11 Preheat fuse 70 A Engine running option relay 50 A Ignition on options relay 50 A 9F16 Key switch 20 A 9F17 Pre-fuse for F19 20 A 50A generator 50 A 9F19 80A generator 70 A...
- Page 112 Road traffic system fuse box Item Ref. To protect: Rating 62 4F5 Warning indicator system control fuse 10 A 63 4F6 Brake light control fuse 10 A 64 5F4 Tail light control fuse 65 5F4.1 Tail light control fuse 66 5F5 Lighting control fuse 7.5 A 67 5F5.1 Left lights control fuse...
-
Page 113: Exhaust System
Exhaust system The exhaust system must be checked for emissions at regular intervals. Black or blue exhaust smoke is an indicator of high emission levels. Seek assistance from specialist personnel. The soot filter must be serviced in accordance with manufacturer’s instructions (starting F37). -
Page 114: During Decommissioning
13.2 During decommissioning: Every 2 months: – Charge the battery. 13.3 Returning the truck to operation after decommissioning It is advisable to have the truck restored to service after decommissioning by an engineer of the manufacturer. – Thoroughly clean the truck. –... -
Page 115: Safety Checks To Be Performed At Regular Intervals And Following Any Unusual Incidents
Carry out a safety check in accordance with national regulations. Junheinrich recommends checks in accordance with FEM Guideline 4.004. Jungheinrich has a special safety department with trained personnel to carry out such checks. The truck must be inspected at least annually (refer to national regulations) or after any unusual event by a qualified inspector. -
Page 116: Huss Fs - Mk Series Diesel Particle Filter Operating Instructions
Optional HUSS FS - MK Series Diesel Particle Filter Operating Instructions 16.1 Important General Instructions Read the operating instructions carefully before using the soot particle filter. The general accident prevention and other health and safety regulations must be observed. The use of additive-based fuels can have a negative effect on the exhaust and thus the useful life of the diesel particle filter. -
Page 117: Functional Description
16.3 Functional description As the engine runs the diesel engine exhaust flows through the filter element which retains virtually all the harmful soot particles. The longer the diesel engine runs, the more the diesel particle filter fills up and the greater the backpressure on the exhaust. -
Page 118: Huss Control Operation
16.4 HUSS Control Operation The diesel particle filter is operated by the HUSS Control unit. The control unit is mounted within the operator’s field of vision. Important! The HUSS control system only workswith the igitionis switched on. Display screen The top line shows the functional stages; in the bottom line a bar indicates the condition of the filter (backpressure / regeneration time) Keys ontrol (control key ) -
Page 119: Huss Control Operating Instructions
16.5 HUSS Control Operating Instructions Normal operation Display Function LED Switch on the ignition. The Self test Green and buzzer sounds for min. 1 red LEDs lit second and both LEDs light up at the same time. If a message is stored it will be e.g. -
Page 120: Regeneration
Messages in normal mode that indicate the status of the diesel particle filter with this message>>> Filter condition Green LED Normal mode possible HHHHHHHH Flashes with this message>>> Regenerate Red LED flashing Regeneration required HHHHHHHH 10 regenerations had to be Call service department / made within the maximum White ash... - Page 121 Regeneration Display ---------------Function LED Park the truck on a level surface Switch off the engine. Start regeneration in 5 seconds Ignition ON: HUSS Control is energised. >>>>>>>>Green LED Press the “M” button and hold it down for 5 seconds. Regeneration starts after 5 seconds.
- Page 122 Regeneration Display ---------------Function LED Regeneration can be interrupted by switching off the ignition with the ignition key or by pressing the “F” button on the “Filter full” alarm >> control system. The display counts down red LED flashes from 5 seconds until the regeneration process is switched off.
-
Page 123: Maintenance
16.7 Maintenance The HUSS control displays the scheduled maintenance times. Call the JH service department to carry out maintenance. The Huss control system is factory-set for the truck. Only trained JH service engineers are authorised to make changes to these settings. F 44...
Need help?
Do you have a question about the DFG 320 and is the answer not in the manual?
Questions and answers