Table of Contents
Advertisement
Quick Links
Download this manual
See also:
User Manual
Advertisement
Table of Contents

Subscribe to Our Youtube Channel
Related Manuals for Lexmark B2650


Summary of Contents for Lexmark B2650
- Page 1 B2650, M3250, MS621, and MS622 printers 4600-830, -835, -895 Service Manual • Start diagnostics • Maintenance • Safety and notices • Trademarks • Index November 16, 2018 www.lexmark.com...
-
Page 2: Product Information
Trademarks Lexmark and the Lexmark logo are trademarks of Lexmark International, Inc., registered in the United States and/or other countries. PCL® is a registered trademark of the Hewlett-Packard Company. PCL is Hewlett-Packard Company’s designation of a set of printer commands (language) and functions included in its printer products. -
Page 3: Table Of Contents
4600-830, -835, -895 Table of contents Product information..................2 Edition notice....................2 Notices, conventions, and safety information.......... 9 Laser notice................................9 Conventions.................................12 Safety information.............................. 13 General caution statements..........................18 Change history.................... 19 Change history..............................19 General information..................21 Printer model configurations........................... 21 Finding the serial number..........................21 Paper support..............................22 Supported paper sizes............................... - Page 4 4600-830, -835, -895 Vertical light bands check ............................50 Vertical dark bands check............................51 Vertical dark streaks with print missing check ....................53 White streaks and voided areas check ......................... 55 Fine lines are not printed correctly (specifically Chinese characters) check ..........58 Clipped pages or images check..........................
- Page 5 4600-830, -835, -895 Service menus................... 137 Understanding the printer control panel....................137 Using the printer control panel..........................137 Understanding the status of the power button and indicator light ...............138 Using the home screen.............................138 Diagnostics menu............................140 Entering the Diagnostics menu ..........................140 Reports ..................................140 Advanced Print Quality Samples..........................140 Event Log..................................140...
- Page 6 4600-830, -835, -895 Left cover removal ..............................177 Main drive gearbox removal............................ 178 MPF gearbox removal ............................... 179 Fuser actuator removal.............................182 Reverse solenoid removal ............................183 Cartridge gearbox removal............................184 MPF solenoid removal ..............................185 Right side removals............................186 Right cover removal..............................186 Interconnect cable removal.............................188 Sensor (tray present) removal ..........................189 Cooling fan removal..............................190 Controller board removal ............................194...
- Page 7 4600-830, -835, -895 Redrive assembly removal............................236 Redrive gear plate removal ............................ 237 Top side removals............................238 Top cover removal..............................238 Printhead removal ..............................239 Optional 250/550-sheet tray removals....................242 Separator roller assembly removal........................242 Component locations................245 Printer configurations.............................245 Attaching cables..............................245 Printer roller locations............................247 Printer sensor locations..........................249 Controller board connectors........................
- Page 8 4600-830, -835, -895 Printer specifications................283 Power consumption............................283 Product power consumption ..........................283 Sleep Mode.................................283 Hibernate Mode.................................283 Off mode..................................284 Total energy usage ..............................284 Selecting a location for the printer......................284 Noise emission levels............................ 285 Temperature information..........................286 Options and features................287 Available internal options..........................
-
Page 9: Notices, Conventions, And Safety Information
4600-830, -835, -895 Notices, conventions, and safety information Laser notice The printer is certified in the U.S. to conform to the requirements of DHHS 21 CFR, Chapter I, Subchapter J for Class I (1) laser products, and elsewhere is certified as a Class I laser product conforming to the requirements of IEC 60825-1: 2014. - Page 10 4600-830, -835, -895 Aviso sobre laser Esta impressora foi certificada nos EUA por estar em conformidade com os requisitos do DHHS 21 CFR capítulo I, subcapítulo J, para produtos a laser de Classe I (1) e, nos demais países, foi certificada como um produto a laser de Classe I em conformidade com os requisitos da IEC 60825-1: 2014.
- Page 11 4600-830, -835, -895 Laser-Hinweis Der Drucker wurde in den USA zertifiziert und entspricht den Anforderungen der Vorschriften DHHS 21 CFR Kapitel I für Laserprodukte der Klasse I (1), andernorts ist er als Laserprodukt der Klasse I zertifiziert, das den Anforderungen von IEC 60825-1: 2014 entspricht. Laserprodukte der Klasse I werden nicht als gefährlich betrachtet.
-
Page 12: Conventions
4600-830, -835, -895 通常の操作、ユーザーによるメンテナンス、または所定のサービス条件の下で、ユーザーがクラス I レベル を超えるレーザー放射に絶対にさらされないように設計されています。 레이저 고지사항 프린터는 미국에서 레이저 제품용 DHHS 21 CFR Chapter I, Subchapter J의 요구 사항을 준수하며 이외 지역에 서 IEC 60825-1: 2014의 요구 사항을 준수하는 클래스 I(1) 레이저 제품으로 승인되었습니다. Class I 레이저 제품은 위험한 제품으로 간주되지 않습니다. 프린터에는 650~670 나노미터 범위의 파장 영역 에서... -
Page 13: Safety Information
4600-830, -835, -895 Safety information • The safety of this product is based on testing and approvals of the original design and specific components. The manufacturer is not responsible for safety in the event of use of unauthorized replacement parts. •... - Page 14 4600-830, -835, -895 PRECAUCIÓ. POSSIBLES DANYS: La bateria de liti d'aquest producte no ha estat dissenyada perquè se substitueixi. Hi ha perill d’explosió si no es substitueix correctament la bateria de liti. No recarregueu, desmunteu o incinereu una bateria de liti. Desfeu-vos de les bateries de liti usades d’acord amb les instruccions del fabricant i les regulacions locals.
- Page 15 4600-830, -835, -895 • È possibile che vi sia un maggior rischio di scosse elettriche e lesioni personali durante lo smontaggio e la manutenzione di questo prodotto. Il personale dell'assistenza deve comprendere questo rischio e prendere le precauzioni necessarie. ATTENZIONE - PERICOLO DI SCOSSE ELETTRICHE: Questo simbolo indica la presenza di un rischio per tensioni pericolose nell'area del prodotto in cui si lavora.
- Page 16 4600-830, -835, -895 Sicherheitshinweise • Die Sicherheit dieses Produkts basiert auf Tests und Zulassungen des Originaldesigns und der spezifischen Komponenten. Sofern nicht autorisierte Ersatzteile eingesetzt werden, übernimmt der Hersteller keinerlei Verantwortung in Bezug auf die Sicherheit dieses Produkts. • Die Wartungsinformationen für dieses Produkt wurden für ausgebildete Servicemitarbeiter zusammengestellt und dürfen nicht von anderen verwendet werden.
- Page 17 4600-830, -835, -895 FORSIKTIG – POTENSIELLE SKADER: Litiumbatteriet i dette produktet er ikke beregnet for å byttes. Det er fare for eksplosjon hvis litiumbatteriet skiftes ut på feil måte. Ikke lad opp, demonter eller destruer et litiumbatteri. Kast brukte litiumbatterier i henhold til produsentens instruksjoner og lokale regelverk.
-
Page 18: General Caution Statements
CAUTION—POTENTIAL INJURY: Only a Lexmark Inline Surge Protector that is properly connected between the printer and the power cord provided with the printer may be used with this product. The use of non-Lexmark surge protection devices may result in a risk of fire, property damage, or poor printer performance. -
Page 19: Change History
4600-830, -835, -895 Change history Change history November 16, 2018 • Controller board (MS622) (41X2512) was added to the Electronics 1 Parts catalog. Notes regarding compatibility were also added. • 41X1369 FRU PN was changed to 41X2526 on the Control panel Parts catalog. September 14, 2018 •... - Page 20 4600-830, -835, -895...
-
Page 21: General Information
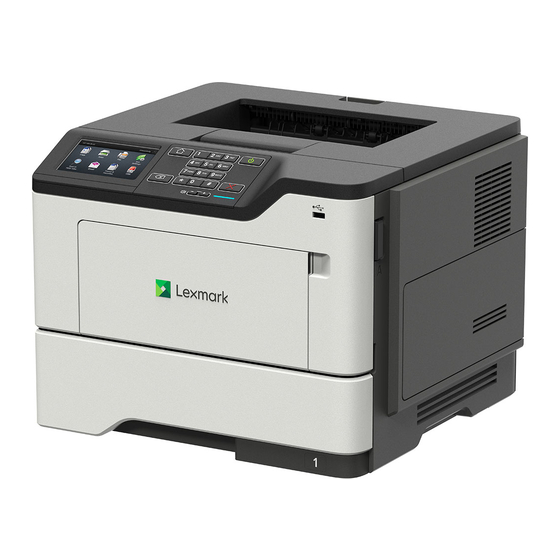
4600-830, -835, -895 General information Printer model configurations The Lexmark MS622de, MS621dn, B2650dn, and M3250 printers are network‑capable, multifunction laser printers. The printers support monochrome printing and are embedded with home screen solutions and applications. All information in this service manual pertains to all models unless explicitly noted. -
Page 22: Paper Support
4600-830, -835, -895 Paper support The following tables provide information on standard and optional paper sources and the sizes, types, and weights of paper they support. Note: For an unlisted paper size, select the closest larger listed size. Supported paper sizes Paper size Tray Multipurpose feeder... -
Page 23: Supported Paper Types
4600-830, -835, -895 Paper size Tray Multipurpose feeder Two‑sided printing 9 Envelope 98 x 225 mm (3.9 x 8.9 in.) 10 Envelope 105 x 241 mm (4.1 x 9.5 in.) DL Envelope 110 x 220 mm (4.3 x 8.7 in.) C5 Envelope 162 x 229 mm (6.4 x 9 in.) B5 Envelope... -
Page 24: Supported Paper Weights
4600-830, -835, -895 Paper type Tray Multipurpose feeder Two‑sided printing Rough/Cotton Envelope Rough envelope One‑sided paper labels designed for laser printers are supported for occasional use. It is recommended to print 20 or fewer pages of paper labels per month. Vinyl, pharmacy, and two‑sided labels are not supported. Bond and Heavy Paper are supported in two‑sided printing up to 90‑g/m (24‑lb) paper weight. -
Page 25: Diagnostics And Troubleshooting
Before you start the troubleshooting procedures, perform the following checks: • Use genuine Lexmark supplies and parts for the best results. Third-party supplies or parts may affect the performance, reliability, or life of the printer and its imaging components. •... -
Page 26: Initial Print Quality Check
4600-830, -835, -895 • “Blank pages check” on page 29 • “Print is too dark check” on page 35 • “Print is too light check” on page 37 • “Paper curl check” on page 40 • “Folded or wrinkled paper check” on page 41 •... -
Page 27: Gray Background Or Toner Fog Check
Step 2 Go to step 4. Go to step 3. Check if the printer is using a genuine and supported Lexmark toner cartridge. Note: If the printer is using a third‑party cartridge, then refer the users to their cartridge supplier. - Page 28 4600-830, -835, -895 Actions Step 4 Go to step 5. Go to step 6. Remove any packing material left on the imaging unit, including the red separator plastic (A). Note: You may need a pair of pliers to remove a piece of broken plastic inside the imaging unit.
-
Page 29: Blank Pages Check
4600-830, -835, -895 Actions Step 8 Go to step 9. The problem is solved. Reseat the connections. Does the problem remain? Step 9 Go to step 10. The problem is solved. Note: Poor electrical contact to the photoconductor is the most likely source of a full page background defect. - Page 30 Step 1 Go to step 3. Go to step 2. Check if the printer is using a genuine and supported Lexmark toner cartridge. Note: If the printer is using a third‑party cartridge, then refer the users to their cartridge supplier.
- Page 31 4600-830, -835, -895 Actions Step 5 Go to step 6. Go to step 7. Check the coupler to make sure that it is not stuck in the retracted position. While slowly closing the door, observe the coupler to see if it moves inward. Note: With the imaging unit removed, the coupler should retract with the door open and move inward when the front door is closed.
- Page 32 4600-830, -835, -895 Actions Step 6 Go to step 7. The problem is solved. Reach inside the printer and manually reposition the coupler in the direction of the red arrow as shown. Does the problem remain? Step 7 Go to step 8. Contact the next level of support.
- Page 33 4600-830, -835, -895 Actions Step 10 Go to step 11. The problem is solved. Replace the cable. Does the problem remain? Step 11 Go to step 13. Go to step 12. Check the transfer roller for proper installation. If necessary, remove and then reinstall the transfer roller.
- Page 34 4600-830, -835, -895 Actions Step 15 Go to step 16. The problem is solved. Check the coupler for signs of damage. The coupler is located on the main drive motor. • Good condition • Bad condition If the coupler is damaged, then replace the main drive motor. Does the problem remain? Step 16 Go to step 17.
-
Page 35: Print Is Too Dark Check
Step 1 Go to step 3. Go to step 2. Check if the printer is using a genuine and supported Lexmark toner cartridge. Note: If the printer is using a third‑party cartridge, then refer the users to their cartridge supplier. - Page 36 4600-830, -835, -895 Actions Step 6 Go to step 7. The problem is solved. Check if the paper loaded has texture or rough finishes. From the control panel, set the paper texture in the Paper menu to match the texture of the paper loaded. Does the problem remain? Step 7 Go to step 8.
-
Page 37: Print Is Too Light Check
Step 1 Go to step 3. Go to step 2. Check if the printer is using a genuine and supported Lexmark toner cartridge. Note: If the printer is using a third‑party cartridge, then refer the users to their cartridge supplier. - Page 38 4600-830, -835, -895 Actions Step 4 Go to step 5. The problem is solved. Remove the toner cartridge and imaging unit. Push either side of the transfer roller , located below the imaging unit, to check if it depresses and bounces back into place.
- Page 39 4600-830, -835, -895 Actions Step 9 Go to step 10. The problem is solved. Clean the printhead lens. See “Cleaning the printhead lenses” on page 257. Note: This is applicable only to models installed with a galvo LSU. To determine whether the LSU is galvo, check the serial number of the printer.
-
Page 40: Paper Curl Check
Step 1 Go to step 3. Go to step 2. Check if the printer is using a genuine and supported Lexmark toner cartridge. Note: If the printer is using a third‑party cartridge, then refer the users to their cartridge supplier. -
Page 41: Folded Or Wrinkled Paper Check
Go to step 2. The problem is solved. Check if the printer is using a non-Lexmark toner cartridge. Note: If the printer is using a third‑party cartridge, then do not replace the imaging unit. Refer the users to their cartridge supplier. -
Page 42: Solid Black Pages Check
4600-830, -835, -895 Actions Step 2 Go to step 3. The problem is solved. Check if the paper loaded is from a fresh package. Note: The amount of moisture in paper affects both print quality and printer ability to feed paper correctly. Make sure that the printer supports the paper loaded. - Page 43 Step 1 Go to step 3. Go to step 2. Check if the printer is using a genuine and supported Lexmark toner cartridge. Note: If the printer is using a third‑party cartridge, then refer the users to their cartridge supplier.
- Page 44 4600-830, -835, -895 Actions Step 5 Go to step 6. The problem is solved. Replace the imaging unit. Does the problem remain? Step 6 Go to step 7. Go to step 8. Check if the imaging unit contact (C) is contaminated, broken, or bent out of proper position.
-
Page 45: Repeating Defects Check
4600-830, -835, -895 Repeating defects check Note: Before performing this print quality check, go to the control panel home screen and navigate to Settings > Troubleshooting > Print Quality Test Pages, and then perform the Initial print quality check. See “Initial print quality check”... -
Page 46: Skewed Print Check
4600-830, -835, -895 Skewed print check Note: Before performing this print quality check, go to the control panel home screen and navigate to Settings > Troubleshooting > Print Quality Test Pages, and then perform the Initial print quality check. “Initial print quality check” on page Actions Step 1 Go to step 3. - Page 47 4600-830, -835, -895 Actions Step 7 Go to step 8. The problem is solved. Perform a print test. From the Diagnostics menu, select PRINT TESTS > Tray [x]. Note: [x] refers to the tray where the skewed prints are sourced from.
-
Page 48: Streaked Vertical Lines Appear On Prints Check
Step 1 Go to step 3. Go to step 2. Check if the printer is using a genuine and supported Lexmark toner cartridge. Note: If the printer is using a third‑party cartridge, then refer the users to their cartridge supplier. -
Page 49: Horizontal Light Bands Check
Step 1 Go to step 3. Go to step 2. Check if the printer is using a genuine and supported Lexmark toner cartridge. Note: If the printer is using a third‑party cartridge, then refer the users to their cartridge supplier. -
Page 50: Vertical Light Bands Check
4600-830, -835, -895 Actions Step 4 Go to step 5. Contact the next level of support. Check the imaging unit contact block (A), including the white and red wires, for damage or improper installation. Is the imaging unit contact block free of damage and properly installed? Step 5 Contact the next... -
Page 51: Vertical Dark Bands Check
Actions Step 1 Go to step 3. Go to step 2. Check if the printer is using a genuine and supported Lexmark toner cartridge. Note: If the printer is using a third‑party cartridge, refer the users to their cartridge supplier. - Page 52 Step 1 Go to step 3. Go to step 2. Check if the printer is using a genuine and supported Lexmark toner cartridge. Note: If the printer is using a third‑party cartridge, then refer the users to their cartridge supplier.
-
Page 53: Vertical Dark Streaks With Print Missing Check
Step 1 Go to step 3. Go to step 2. Check if the printer is using a genuine and supported Lexmark toner cartridge. Note: If the printer is using a third‑party cartridge, then refer the users to their cartridge supplier. - Page 54 4600-830, -835, -895 Actions Step 3 Go to step 4. Go to step 5. Remove any packing material left on the imaging unit, including the red separator plastic (A). Note: You may need a pair of pliers to remove a piece of broken plastic inside the imaging unit.
-
Page 55: White Streaks And Voided Areas Check
4600-830, -835, -895 Actions Step 6 Go to step 7. Go to step 8. Check if the imaging unit contacts (C) are contaminated or bent out of proper position. Are the contacts contaminated and bent out of proper position? Step 7 Go to step 8. - Page 56 Step 1 Go to step 3. Go to step 2. Check if the printer is using a genuine and supported Lexmark toner cartridge. Note: If the printer is using a third‑party cartridge, do not replace the imaging unit. Refer the users to their cartridge supplier.
- Page 57 4600-830, -835, -895 Actions Step 5 Go to step 6. Go to step 7. Check the shutter tab (A) on the toner cartridge for signs of damage. Is the shutter tab damaged? Step 6 Go to step 7. The problem is solved.
-
Page 58: Fine Lines Are Not Printed Correctly (Specifically Chinese Characters) Check
4600-830, -835, -895 Actions Step 9 Contact the next The problem is level of support. solved. Clean or repair the imaging unit contacts. Does the problem remain? Step 10 Go to step 12. Go to step 11. Check connection JPS1 on the controller board and all the connections on the power supply. -
Page 59: Clipped Pages Or Images Check
Step 1 Go to step 3. Go to step 2. Check if the printer is using a genuine and supported Lexmark toner cartridge. Note: If the printer is using a third‑party cartridge, then refer the users to their cartridge supplier. - Page 60 Step 1 Go to step 3. Go to step 2. Check if the printer is using a genuine and supported Lexmark toner cartridge. Note: If the printer is using a third‑party cartridge, then refer the users to their cartridge supplier.
-
Page 61: Compressed Images Appear On Prints Check
4600-830, -835, -895 Actions Step 7 Go to step 8. Contact the next level of support. Check the imaging unit contact block (B) for damage or improper installation. Is the imaging unit contact block damaged or improperly installed? Step 8 Contact the next The problem is level of support. -
Page 62: Incorrect Margins On Prints Check
4600-830, -835, -895 Actions Step 1 Go to step 2. Go to step 3. Remove the imaging unit, and then inspect the white photoconductor coupler (A). The coupler should be firmly connected to the imaging unit and should not freely rotate. Does the coupler move freely or appear damaged? Step 2 Go to step 3. -
Page 63: Toner Rubs Off Check
4600-830, -835, -895 Actions Step 1 Go to step 2. The problem is solved. Adjust the guides in the tray according to the size of the paper loaded. Does the problem remain? Step 2 Go to step 3. The problem is solved. -
Page 64: Toner Specks Appear On Prints Check
Step 1 Go to step 3. Go to step 2. Check if the printer is using a genuine and supported Lexmark toner cartridge. Note: If the printer is using a third‑party cartridge, then refer the users to their cartridge supplier. - Page 65 Step 1 Go to step 3. Go to step 2. Check if the printer is using a genuine and supported Lexmark toner cartridge. Note: If the printer is using a third‑party cartridge, then refer the users to their cartridge supplier.
-
Page 66: Paper Jams
4600-830, -835, -895 Actions Step 8 Contact the next The problem is level of support. solved. Using an approved toner vaccum cleaner, completely clean the printer, toner cartridge, and imaging unit of toner contamination. Does the problem remain? Paper jams Avoiding jams Load paper properly •... -
Page 67: Identifying Jam Locations
4600-830, -835, -895 • Do not slide paper into the tray. Load paper as shown in the illustration. • Make sure that the paper guides are positioned correctly and are not pressing tightly against the paper or envelopes. • Push the tray firmly into the printer after loading paper. Use recommended paper •... -
Page 68: Paper Jam In Door A
4600-830, -835, -895 Jam location Standard bin Rear door Tray [x] Multipurpose feeder Door A Paper jam in door A Remove the tray. Diagnostics and troubleshooting... - Page 69 4600-830, -835, -895 Open door A. Remove the toner cartridge. Remove the imaging unit. Warning—Potential Damage: Do not expose the imaging unit to direct light for more than 10 minutes. Extended exposure to light may cause print quality problems. Warning—Potential Damage: Do not touch the photoconductor drum. Doing so may affect the quality of future print jobs.
- Page 70 4600-830, -835, -895 Remove the jammed paper. CAUTION—HOT SURFACE: The inside of the printer might be hot. To reduce the risk of injury from a hot component, allow the surface to cool before touching it. Note: Make sure that all paper fragments are removed. Insert the imaging unit.
-
Page 71: Paper Jam In The Rear Door
4600-830, -835, -895 Note: Use the arrows inside the printer as guides. Insert the toner cartridge. Note: Use the arrows inside the printer as guides. Close door A. Insert the tray. Paper jam in the rear door Open the rear door. CAUTION—HOT SURFACE: The inside of the printer might be hot. -
Page 72: Paper Jam In The Standard Bin
4600-830, -835, -895 Remove the jammed paper. Note: Make sure that all paper fragments are removed. Close the rear door. Paper jam in the standard bin Remove the jammed paper. Note: Make sure that all paper fragments are removed. Diagnostics and troubleshooting... -
Page 73: Paper Jam In The Duplex Unit
4600-830, -835, -895 Paper jam in the duplex unit Remove the tray. Remove the jammed paper. Note: Make sure that all paper fragments are removed. Insert the tray. Diagnostics and troubleshooting... -
Page 74: Paper Jam In Trays
4600-830, -835, -895 Paper jam in trays Remove the tray. Remove the jammed paper. Note: Make sure that all paper fragments are removed. Insert the tray. Paper jam in the multipurpose feeder Remove paper from the multipurpose feeder. Remove the jammed paper. Note: Make sure that all paper fragments are removed. -
Page 75: 200 Paper Jams
4600-830, -835, -895 Flex, fan, and align the paper edges before loading. Reload paper, and then adjust the paper guide. 200 paper jams 200 paper jam messages Error code Description Action 200.02 Paper fed from the MPF was detected earlier “MPF to sensor (input) jam at leading edge than expected at the sensor (input). - Page 76 4600-830, -835, -895 Error code Description Action 200.13 Paper fed from tray 1 was detected later than “Tray 1 to sensor (input) jam at leading edge expected or was never detected at the sensor service check” on page (input). 200.14 Paper fed from tray 1 cleared the sensor (input) “Tray 1 to sensor (input) jam at trailing edge earlier than expected.
- Page 77 4600-830, -835, -895 MPF to sensor (input) jam at leading edge service check Action Step 1 Go to step 2. The problem is solved. Make sure that the paper is loaded properly. Use the recommended paper. See “Avoiding jams” on page Does the problem remain? Step 2 Go to step 10.
- Page 78 4600-830, -835, -895 Action Step 9 Go to step 10. The problem is solved. Replace the MPF solenoid. See “MPF solenoid removal” on page 185. Does the problem remain? Step 10 Go to step 13. Go to step 11. Enter the Diagnostics menu, and then navigate to: Printer diagnostics and adjustments >...
- Page 79 4600-830, -835, -895 MPF to sensor (input) jam at trailing edge service check Action Step 1 Go to step 2. The problem is solved. Make sure that the paper is loaded properly. Use the recommended paper. See “Avoiding jams” on page Does the problem remain? Step 2 Go to step 8.
- Page 80 4600-830, -835, -895 Action Step 9 Go to step 10. Go to step 11. Reinstall or replace the transfer roller. See “Transfer roller removal” on page 206. Does the problem remain? Step 10 Contact the next Go to step 11. level of support.
- Page 81 4600-830, -835, -895 Action Step 6 Go to step 7. The problem is solved. Replace the separator roller assembly. Does the problem remain? Step 7 Go to step 9. Go to step 8. Enter the Diagnostics menu, and then navigate to: Printer diagnostics and adjustments >...
- Page 82 4600-830, -835, -895 Action Step 5 Go to step 7. Go to step 6. Check the transfer roller and its spring for improper installation and damage. Is the transfer roller properly installed and free of damage? Step 6 Go to step 7. The problem is solved.
- Page 83 4600-830, -835, -895 Optional tray to sensor (input) jam at leading edge service check Action Step 1 Go to step 2. The problem is solved. Make sure that the paper is loaded properly. Use the recommended paper. See “Avoiding jams” on page Does the problem remain? Step 2 Go to step 7.
- Page 84 4600-830, -835, -895 Action Step 9 Contact the next Go to step 10. level of support. Reseat the optional tray motor (pick/lift) cable. Check if the motor is functional and free of damage. Is the motor (pick/lift) functional and free of damage? Step 10 Contact the next The problem is...
- Page 85 4600-830, -835, -895 Action Step 6 Go to step 7. The problem is solved. Reinstall or replace the transfer roller. See “Transfer roller removal” on page 206. Does the problem remain? Step 7 Go to step 9. Go to step 8. Check if the fuser cam is functional and free of damage.
-
Page 86: 202 Paper Jams
4600-830, -835, -895 Sensor (input) static jam service check Action Step 1 Go to step 2. The problem is solved. Make sure that the paper is loaded properly. Use the recommended paper. See “Avoiding jams” on page Does the problem remain? Step 2 Contact the next Go to step 3. - Page 87 4600-830, -835, -895 Error code Description Action 202.33 Paper fed from tray 3 never reached the sensor “Sensor (fuser exit) jam at leading edge (fuser exit). service check” on page 202.35 Paper fed from tray 3 never cleared the sensor “Sensor (fuser exit) jam at trailing edge (fuser exit).
- Page 88 4600-830, -835, -895 Action Step 6 Go to step 7. The problem is solved. Check the fuser for problems. See “Fuser error service check” on page 110. Does the problem remain? Step 7 Contact the next The problem is level of support. solved.
- Page 89 4600-830, -835, -895 Sensor (fuser exit) static jam service check Action Step 1 Go to step 2. The problem is solved. Make sure that the paper is loaded properly. Use the recommended paper. See “Avoiding jams” on page Does the problem remain? Step 2 Go to step 3.
-
Page 90: 230 Paper Jams
4600-830, -835, -895 230 paper jams 230 paper jam messages Error code Description Action 230.03 Paper fed from the MPF never reached the sensor “Sensor (duplex) jam at leading edge (duplex). service check” on page 230.05 Paper fed from the MPF never cleared the sensor “Sensor (duplex) jam at trailing edge service (duplex). - Page 91 4600-830, -835, -895 Action Step 3 Go to step 6. Go to step 4. Enter the Diagnostics menu, and then navigate to: Printer diagnostics and adjustments > Motor tests Select the solenoid (Redrive Solenoid), and then touch Start. Does the solenoid run? Step 4 Go to step 6.
- Page 92 4600-830, -835, -895 Action Step 10 Contact the next The problem is level of support. solved. Replace the duplex assembly. See “Duplex assembly removal” on page 218. Does the problem remain? Sensor (duplex) jam at trailing edge service check Action Step 1 Go to step 2.
-
Page 93: 240-241 Paper Jams
4600-830, -835, -895 Sensor (duplex) static jam service check Action Step 1 Go to step 2. The problem is solved. Make sure that the paper is loaded properly. Use the recommended paper. See “Avoiding jams” on page Does the problem remain? Step 2 Contact the next Go to step 3. - Page 94 4600-830, -835, -895 MPF pick failure service check Action Step 1 Go to step 2. The problem is solved. Make sure that the paper is loaded properly. Use the recommended paper. See “Avoiding jams” on page Does the problem remain? Step 2 Go to step 3.
- Page 95 4600-830, -835, -895 Action Step 8 Go to step 10. Go to step 9. Reseat the sensor cable from the controller board. Check the sensor and its actuator for improper installation and damage. Is the sensor properly installed and free of damage? Step 9 Go to step 10.
- Page 96 4600-830, -835, -895 Sensor (MPF paper present) static jam service check Action Step 1 Go to step 2. The problem is solved. Make sure that the paper is loaded properly. Use the recommended paper. See “Avoiding jams” on page Does the problem remain? Step 2 Contact the next Go to step 3.
-
Page 97: 242-244 Paper Jams
4600-830, -835, -895 Action Step 4 Contact the next The problem is level of support. solved. Replace the motor. See “Pick/lift motor gearbox removal” on page 232. Does the problem remain? 242-244 paper jams 242 paper jam messages Error code Description Action 242.26... - Page 98 4600-830, -835, -895 Error code Description Action 242.95 Paper cleared the sensor (tray 2 pass-through) “Optional tray sensor (tray x pass-through) later than expected. Paper source is jam at trailing edge service check” on undetermined. page 101. 242.96 Paper was picked but it never reached the “Optional tray sensor (tray x pass-through) sensor (input).
- Page 99 4600-830, -835, -895 Error code Description Action 243.97 Paper never cleared the sensor (tray 3 pass- “Optional tray sensor (tray x pass-through) through). Paper source is undetermined. jam at trailing edge service check” on page 101. 244 paper jam messages Error code Description Action...
- Page 100 4600-830, -835, -895 Optional tray sensor (tray x pass-through) jam at leading edge service check Action Step 1 Go to step 2. The problem is solved. Make sure that the paper is loaded properly. Use the recommended paper. See “Avoiding jams” on page Does the problem remain? Step 2 Go to step 3.
- Page 101 4600-830, -835, -895 Optional tray sensor (tray x pass-through) jam at trailing edge service check Action Step 1 Go to step 2. The problem is solved. Make sure that the paper is loaded properly. Use the recommended paper. See “Avoiding jams” on page Does the problem remain? Step 2 Go to step 4.
-
Page 102: User Attendance Messages (0-99.99)
4600-830, -835, -895 Action Step 3 Go to step 4. Go to step 7. Reseat the source tray pick motor cable from the optional tray controller board. Check if the motor (pick) of the source tray is functional and free of damage. -
Page 103: Unsupported Or Unresponsive Toner Cartridge Service Check
Action Step 1 Go to step 3. Go to step 2. Check whether the toner cartridge installed is genuine. Is the cartridge a genuine and supported Lexmark unit? Step 2 Go to step 3. The problem is solved. Install a genuine and supported Lexmark toner cartridge. - Page 104 4600-830, -835, -895 Action Step 3 Go to step 5. Go to step 4. Check the toner cartridge contacts for contamination. Check the toner cartridge for leaks and damage. Are the toner cartridge and its contacts free of contamination and damage? Step 4 Go to step 5.
-
Page 105: Unsupported Or Unresponsive Imaging Unit Service Check
Action Step 1 Go to step 3. Go to step 2. Check whether the imaging unit installed is genuine. Is the imaging unit a genuine and supported Lexmark unit? Step 2 Go to step 3. The problem is solved. Install a genuine and supported Lexmark imaging unit. -
Page 106: Mismatched Supplies Error Service Check
Action Step 1 Go to step 3. Go to step 2. Check whether the supplies installed are genuine. Are the supplies genuine and supported Lexmark units? Step 2 Go to step 3. The problem is solved. Install genuine and supported Lexmark units. -
Page 107: Printer Hardware Errors
4600-830, -835, -895 Action Step 4 Go to step 5. The problem is solved. Resolve the feed problem. Note: If a transfer roller was replaced, then make sure that the maintenance kit count is reset. Does the problem remain? Step 5 Contact the next The problem is level of support. -
Page 108: Errors
4600-830, -835, -895 Printhead error service check Action Step 1 Go to step 2. The problem is solved. Remove the top cover. See “Top cover removal” on page 238. Remove the right cover. See “Right cover removal” on page 186. Reseat the printhead cable from the printhead and the controller board. - Page 109 4600-830, -835, -895 Error code Description Action 121.09 Fuser did not reach the required temperature for “Fuser low temperature error service motors. check” on page 112. Note: Error is not applicable to standby mode. 121.10 Fuser did not reach the required temperature (during start of EWC/line voltage detection).
- Page 110 4600-830, -835, -895 Fuser error service check Action Step 1 Go to step 2. The problem is solved. Turn off the printer, and then unplug the power cord. Remove the rear door and cover. See “Rear door and cover removal” on page 234.
- Page 111 4600-830, -835, -895 Fuser high temperature error service check Action Step 1 Go to step 3. Go to step 2. Remove the right cover. See “Right cover removal” on page 186. Reseat the cooling fan cable on the controller board. Check the cooling fan for damage.
- Page 112 4600-830, -835, -895 Action Step 6 Go to step 8. Go to step 7. Turn off the printer, and then unplug the power cord. Remove the power supply. See “Power supply removal” on page 216. Check the power supply, including its fuse and capacitors, for damage.
- Page 113 4600-830, -835, -895 Action Step 3 Go to step 4. Go to step 5. Disconnect the fuser cable from the power supply, and then turn on the printer. Check if the voltage output of the fuser cable socket on the power supply is normal (100V, 110V, or 220V).
-
Page 114: 126 Errors
4600-830, -835, -895 126 errors 126 error messages Error code Description Action 126.05 The LVPS power dropped but the printer was not “LVPS service check” on page 114. in sleep mode. 126.06 LVPS 25V line error was detected. 126.07 LVPS 5V rail was down during power‑on. 126.10 No line frequency was detected. - Page 115 4600-830, -835, -895 Action Step 3 Go to step 4. Go to step 5. Disconnect the fuser cable from the power supply, and then turn on the printer. Check if the voltage output of the fuser cable socket on the power supply is normal (100V, 110V, or 220V).
-
Page 116: 128 Errors
4600-830, -835, -895 Action Step 2 Contact the next Go to step 3. level of support. Check the power rating label of the printer. Check the LVPS part number. Check if the power rating of this specific LVPS matches with the printer power rating. Do the printer and LVPS have matching power ratings? Step 3 Contact the next... - Page 117 4600-830, -835, -895 Toner density error service check Action Step 1 Go to step 2. The problem is solved. Reseat the toner density sensor cable. See “Sensor (toner density) removal” on page 222. Does the problem remain? Step 2 Go to step 3. Replace the affected toner cartridge and Remove the toner cartridge and imaging unit.
- Page 118 Does the problem remain? Step 6 Go to step 8. Go to step 7. Check whether the imaging unit installed is genuine. Is the imaging unit a genuine and supported Lexmark unit? Step 7 Go to step 8. The problem is solved.
-
Page 119: 133 Errors
4600-830, -835, -895 Action Step 9 Contact the next The problem is level of support. solved. Clean or replace the imaging unit. Does the problem remain? 133 errors 133 error messages Error code Description Action 133.04 CTLS timeout was detected at the imaging unit. “Imaging unit CTLS error service check”... -
Page 120: 140 Errors
4600-830, -835, -895 140 errors 140 error messages Error code Description Action 140.81 Motor (main) does not turn off. “Main drive failure service check” on page 120. 140.82 Motor (main) speed did not ramp up to the required level. 140.83 Motor (main) stalled. -
Page 121: 155 Errors
4600-830, -835, -895 155 errors 155 error messages Error code Description Action 155.80 Motor (cartridge) does not turn on. “Cartridge drive failure service check” on page 121. 155.81 Motor (cartridge) does not turn off. 155.82 Motor (cartridge) speed did not ramp up to the required level. -
Page 122: 16Y Errors
4600-830, -835, -895 Action Step 5 Go to step 6. The problem is solved. Remove the left cover. See “Left cover removal” on page 177. Remove the right cover. See “Right cover removal” on page 186. Reseat the cable from the motor (cartridge) and the controller board. - Page 123 4600-830, -835, -895 162‑164 error messages Error code Description Action 162.80 The motor (tray 2 pick) does not turn on. “Optional tray pick drive failure service check” on page 125. 162.81 The motor (tray 2 pick) does not turn off. 162.82 The motor (tray 2 pick) speed did not ramp up to the required level.
- Page 124 4600-830, -835, -895 166‑168 error messages Error code Description Action 166.80 The motor (tray 2 transport) does not turn on. “Optional tray pass‑through drive failure service check” on page 126. 166.81 The motor (tray 2 transport) does not turn off. 166.82 The motor (tray 2 transport) speed did not ramp up to the required level.
- Page 125 4600-830, -835, -895 Tray 1 pick/lift drive failure service check Action Step 1 Go to step 2. The problem is solved. Remove tray 1. Remove the right cover. See “Right cover removal” on page 186. Reseat the cable from the pick/lift motor gearbox and the controller board.
- Page 126 4600-830, -835, -895 Action Step 3 Go to step 5. Go to step 4. Remove the optional tray. Under the printer, check the interconnect cable for damage. Is the cable free of damage? Step 4 Go to step 5. The problem is solved.
-
Page 127: 171 Errors
4600-830, -835, -895 Action Step 3 Go to step 5. Go to step 4. Remove the optional tray. Under the printer, check the interconnect cable for damage. Is the cable free of damage? Step 4 Go to step 5. The problem is solved. -
Page 128: 6Yy Errors
4600-830, -835, -895 Cooling fan failure service check Action Step 1 Contact the next Go to step 2. level of support. Enter the Diagnostics menu, and then navigate to: Printer diagnostics and adjustments > Motor tests > Fan (main) Touch Start. Does the fan spin? Step 2 Go to step 3. - Page 129 4600-830, -835, -895 Error code Description Action 611.02 An Input ISR error occurred and the printhead was “Printhead communication error service not ready. check” on page 129. 611.32 Lost Hsync errors were detected. Laser safety interlock system may be the cause. 611.34 A mirror motor lock error was detected.
-
Page 130: Procedure Before Starting The 9Yy Service Checks
4600-830, -835, -895 Action Step 3 Go to step 4. The problem is solved. Update the firmware to the latest version. Does the problem remain? Step 4 Contact the next Go to step 5. level of support. Check the printhead and its cables for damage and improper installation. - Page 131 4600-830, -835, -895 B. Collecting the firmware logs (Fwdebug and logs.tar.gz) from the SE menu Notes: • Make sure that your printer is connected to a network or to a print server. • Some printers are designed to restart automatically after a 9yy error. On these printers, you can retrieve the secondary crash code information using the SE menu.
-
Page 132: 900 Errors
130. Determine the operating system used when the error occurred. If possible determine whether a PostScript or PCL file was sent to the device when the error occurred. Ask the customer which Lexmark Solutions applications are installed on the device. - Page 133 4600-830, -835, -895 Action Step 4 Go to step 5. Go to step 6. Properly connect the cables to the controller board. POR the printer into the Diagnostics menu. Does the error remain during startup? Step 5 Go to step 31. The problem is solved.
- Page 134 Does the error remain? Step 15 Go to step 31. The problem is solved. Install a Lexmark recommended memory option. Send a print job to the printer. Does the error remain? Step 16 Go to step 17. Go to step 21.
- Page 135 4600-830, -835, -895 Action Step 18 Go to step 19. The problem is solved. Upgrade the firmware if it was not upgraded in a previous step. Note: Contact your next level of support for the correct firmware level to use. POR the printer.
- Page 136 4600-830, -835, -895 Action Step 26 Go to step 27. The problem is solved. Are there any more ISP options to install? Step 27 Go to step 29. Go to step 28. Install the next ISP option. POR the printer. Does the error remain? Step 28 Go to step 29.
-
Page 137: Service Menus
4600-830, -835, -895 Service menus Understanding the printer control panel Using the printer control panel MS621 and B2650 Use the Display View printing options, printer status, and error messages. Arrow buttons Scroll through menus or move between screens and menu options. -
Page 138: Understanding The Status Of The Power Button And Indicator Light
4600-830, -835, -895 MS622 and M3250 Use the Display View printing options, printer status, and error messages. Home button Go to the home screen. Keypad Enter numbers or symbols in an input field. Power button Turn on or turn off the printer. Note: To turn off the printer, press and hold the power button for five seconds. - Page 139 4600-830, -835, -895 Touch Status/Supplies • Show a printer warning or error message whenever the printer requires intervention to continue processing. • View more information on the printer warning or message, and on how to clear it. Note: You can also access this setting by touching the top section of the home screen.
-
Page 140: Diagnostics Menu
4600-830, -835, -895 Diagnostics menu Entering the Diagnostics menu The Diagnostics menu contains tests that are used to help isolate issues with the printer. To access some of these tests, avoid POST tests that run at POR. Some POST tests can generate errors that prevent a diagnostic test from running. -
Page 141: Input Tray Quick Print
4600-830, -835, -895 Event Log > Display Log For non-touch-screen printer models, press to navigate through the settings. Print Log This setting lists an extended version of the various printer events. Enter the Diagnostics menu, and then navigate to: Event Log > Print Log For non-touch-screen printer models, press to navigate through the settings. -
Page 142: Output Bin Quick Feed
4600-830, -835, -895 Output bin quick feed This setting allows you to send a single or continuous test page to a bin. For non-touch-screen printer models, press to navigate through the settings. Enter the Diagnostics menu, and then touch Output bin quick feed. Select where you want to send the test page. - Page 143 4600-830, -835, -895 Enable edge-to-edge (copy) This setting determines whether the printer accepts the ADF or flatbed edge erase value when performing an ADF or flatbed copy. Enter the Diagnostics menu, and then navigate to: Printer Setup > Enable edge‑to‑edge (copy) For non-touch-screen printer models, press to navigate through the settings.
-
Page 144: Printer Diagnostics And Adjustments
4600-830, -835, -895 EP setup Warning—Potential Damage: Do not change this setting without specific instructions from the next level of support. This setting allows you to adjust the EP setup of the printer. For non-touch-screen printer models, press to navigate through the settings. Enter the Diagnostics menu, and then navigate to: Printer Setup >... - Page 145 4600-830, -835, -895 Motor tests For non-touch-screen printer models, press to navigate through the settings. Enter the Diagnostics menu, and then navigate to: Printer diagnostics & adjustments > Motor tests Select a motor, and then touch Start. Notes: • If the motor is activated, then it is properly working. •...
-
Page 146: Additional Input Tray Diagnostics
4600-830, -835, -895 For non-touch-screen printer models, press to navigate through the settings. Enter the Diagnostics menu, and then navigate to: Printer diagnostics & adjustments > Registration adjust Select a setting to adjust. Add-on cards tests This setting allows you to test the add-on cards installed on the printer. For non-touch-screen printer models, press to navigate through the settings. -
Page 147: Configuration Menu
4600-830, -835, -895 Find, and then manually toggle the sensor. Notes: • The sensor status on the screen toggles between 1 and 0 when the sensor is properly working. • If a sensor test fails, the test failure may not indicate a failed sensor. Further troubleshooting may be required. - Page 148 4600-830, -835, -895 Menu item Description USB Configuration Set the USB port to run at full speed and disable its high‑speed capabilities. USB Speed Full Auto* Tray Configuration Set the printer to link the trays that have the same paper type and paper size settings.
- Page 149 4600-830, -835, -895 Menu item Description Printer Emulations Set the printer to recognize and use the PPDS data stream. PPDS Emulation Off* Print Configuration Set a text point-size value below which the high‑frequency screens are used when printing font data. Font Sharpening For example, if the value is 24, then all fonts sized 24 points or 0–150(24*)
-
Page 150: Service Engineer Menu
4600-830, -835, -895 Service Engineer menu Entering Invalid engine mode This mode allows the printer to load the correct firmware code. Turn off the printer. From the control panel, press and hold the 3, 4, and 6 while turning on the printer. Release the buttons after 10 seconds. - Page 151 4600-830, -835, -895 Top level menu Intermediate menu TCP/IP • netstat • • Allow SNMP Set • • Meditech Mode • RAW LPR Mode Wireless Enable Wi‑Fi Direct Sigma Control Agent Ping Test • Ping • Ping6 Other Actions • ifconfig •...
- Page 152 4600-830, -835, -895...
-
Page 153: Parts Removal
4600-830, -835, -895 Parts removal Removal precautions CAUTION—SHOCK HAZARD: This product uses a soft power switch. It does not physically disconnect the input AC voltage. To avoid the risk of electrical shock, always remove the power cord from the printer when removal of the input AC voltage is required. CAUTION—SHOCK HAZARD: To avoid the risk of electrical shock and to prevent damage to the printer, remove the power cord from the electrical outlet and disconnect all connections to any external devices before you connect or disconnect any cable, electronic board, or assembly. -
Page 154: Handling Esd-Sensitive Parts
Request the customer to sign the Customer Retention form. Note: You can get printed copies of the form from your Lexmark partner manager. Take a photo of the signed form, and then upload it to the Service Request debrief tool. -
Page 155: Controller Board/Control Panel Replacement
Note: The software bundle contains the latest version of the firmware, applications, and software licenses from the Lexmark Virtual Solutions Center (VSC). The printer firmware may be at a different level from what was used before replacing the controller board. - Page 156 4600-830, -835, -895 Enter the printer serial number, and then submit the information. Note: Make sure that the serial number that appears on the verification screen is correct. Save the zip file. Note: Make sure that the serial number in the zip file matches the serial number of the printer being restored.
- Page 157 4600-830, -835, -895 Extract the contents of the zip file, open the Readme file, and then follow the instructions in the file. Notes: • Perform the install instructions on the Readme file in the exact order shown. Restart the printer only if the file says so.
-
Page 158: Restoring Solutions, Licenses, And Configuration Settings
4600-830, -835, -895 Restoring solutions, licenses, and configuration settings To load the zip files that are extracted from the Service Restore Tool, do the following: Open a web browser, and then type the printer IP address. Click Import Configuration, and then click Browse. Parts removal... -
Page 159: Updating The Printer Firmware
4600-830, -835, -895 Navigate to the folder where the zip files are extracted from the Service Restore Tool. Select the file to import, and then click Import. Repeat step 2 through step 4 for the other files that are included in the extracted zip file. Updating the printer firmware Warning—Potential Damage: Before updating the printer firmware, ask the next level of support for the correct code. -
Page 160: Backing Up Esf Solutions And Settings
4600-830, -835, -895 Using a network computer Using the File Transfer Protocol (FTP) Make sure that the printer is in ready state before flashing the printer. Turn on the printer. Obtain the IP address: • From the home screen • From the TCP/IP section of the Network/Ports menu From the command prompt of a network computer, open an FTP session to the printer IP address. -
Page 161: Disconnecting Ribbon Cables
4600-830, -835, -895 Importing eSF solutions and settings file After replacing the controller board, import back to the printer the eSF solutions and settings that were exported. Reset the printer into Invalid engine mode. See “Entering Invalid engine mode” on page 150. -
Page 162: Horizontal Top Contact Connector
4600-830, -835, -895 Warning—Potential Damage: Do not insert the cable so that the contacts are facing the locking actuator. The contacts always face away from the actuator. Warning—Potential Damage: Do not insert the cable diagonally into the ZIF socket. This can cause damage to the contacts on the cable. - Page 163 4600-830, -835, -895 Inserting a cable into the horizontal top contact connector When installing the cable, check the locking actuator to ensure it is in the unlocked position. The tabs on the ends of the actuator are vertical when the actuator is unlocked. Insert the cable with the contacts on the cable facing up.
- Page 164 4600-830, -835, -895 Rotate the locking actuator to the locked position. The cable should not move while this step is performed. If the cable moves, open the actuator, reposition the cable, and then close the actuator to the down position. Parts removal...
-
Page 165: Horizontal Bottom Contact Connector
4600-830, -835, -895 Horizontal bottom contact connector This FRU contains a horizontal bottom contact cable connector. Read the instructions before proceeding. The horizontal bottom contact connector uses a flip locking actuator to lock the ribbon cable into the Zero Insertion Force (ZIF) connector. The cable is inserted horizontally into the connector. Warning—Potential Damage: When opening or closing this type of actuator, gently lift the center of the actuator using your finger. - Page 166 4600-830, -835, -895 Inserting a cable into the horizontal bottom contact connector Check the actuator to verify it is in the open position. Insert the cable into the ZIF connector with the contacts facing downward and away from the locking actuator.
- Page 167 4600-830, -835, -895 Place your finger in the middle of the actuator, and then rotate the locking actuator to the locked position. Parts removal...
-
Page 168: Vertical Mount Contact Connector
4600-830, -835, -895 Vertical mount contact connector This FRU contains a vertical mount contact connector. Read the instructions before proceeding. The vertical mount contact connector uses a back flip locking actuator to lock the ribbon cable into the Zero Insertion Force (ZIF) connector. The cable is inserted vertically into the connector. Warning—Potential Damage: When opening or closing this type of actuator, gently lift the center of the actuator using your finger. - Page 169 4600-830, -835, -895 Inserting a cable into the vertical mount contact connector When installing the cable, check the locking actuator to verify it is in the open position. Insert the cable with the contacts on the cable away from the locking actuator. Insert the cable on top of the actuator.
- Page 170 4600-830, -835, -895 Rotate the locking actuator to the locked position by pressing down on both ends of the actuator. The cable should not move when this step is performed. If the cable moves, open the actuator, reposition the cable, and then close the actuator to the down position.
-
Page 171: Horizontal Sliding Contact Connector
4600-830, -835, -895 Horizontal sliding contact connector This FRU contains a horizontal sliding contact connector. Read the instructions before proceeding. The horizontal sliding contact connector uses a slide locking actuator to lock the ribbon cable into the Zero Insertion Force (ZIF) connector. The cable is inserted horizontally into the connector. Warning—Potential Damage: When opening or closing this type of actuator, gently push or pull the two tabs located on each end of the actuator. - Page 172 4600-830, -835, -895 Inserting a cable into the horizontal sliding contact connector When installing the cable, check the locking actuator to verify it is in the open position. If you are opening the connector, pull back on both end tabs using equal force to avoid breaking the connector. Insert the cable with the contacts on the cable facing away from the locking actuator.
- Page 173 4600-830, -835, -895 Slide the locking actuator towards the connector, locking the cable into place. The cable should not move when this step is performed. If the cable moves, open the actuator, reposition the cable, and then close the actuator to the down position. Parts removal...
-
Page 174: Low Insertion Force (Lif) Connector
4600-830, -835, -895 Low Insertion Force (LIF) connector This FRU contains a Low Insertion Force (LIF) connector. Read the instructions before proceeding. Warning—Potential Damage: When installing a cable into an LIF connector, care must be taken to avoid bending the edges of the cables and damaging the contacts on the cables. Inserting a cable into the LIF connector Looking at the connector, take note on which side the contacts are located. -
Page 175: Printhead Assembly Adjustment
4600-830, -835, -895 Printhead assembly adjustment A printhead must be correctly positioned after it has been removed. Use a sharp pencil or a small, flat-blade screwdriver to mark the location of the old printhead on the printer frame. Align the new printhead relative to the location of the old printhead. - Page 176 4600-830, -835, -895 Fold a second vertical fold near the center so that the left side top edge aligns with the right side top edge. If the grid lines of the right flap align below the corresponding lines on the left flap, then adjust the printhead clockwise relative to the printer, and recheck.
-
Page 177: Removal Procedures
4600-830, -835, -895 Removal procedures Keep the following tips in mind as you replace parts: • Some removal procedures require removing cable ties. You must replace cable ties during reassembly to avoid pinching wires, obstructing the paper path, or restricting mechanical movement. •... -
Page 178: Main Drive Gearbox Removal
4600-830, -835, -895 Main drive gearbox removal Remove the left cover. See “Left cover removal” on page 177. Release the latch (A), and then detach the link. Remove the four screws (B). Disconnect the cable from the main drive gearbox. Remove the gearbox. -
Page 179: Mpf Gearbox Removal
4600-830, -835, -895 MPF gearbox removal Remove the front door. See “MPF with front access cover removal” on page 201. Remove the left cover. See “Left cover removal” on page 177. Remove the main drive gearbox. See “Main drive gearbox removal” on page 178. - Page 180 4600-830, -835, -895 Remove the three screws (B). Remove the three screws (C). Remove the E-clip (D), and then remove the gear. Note: The solenoid hinders the removal. Parts removal...
- Page 181 4600-830, -835, -895 Release the two latches (E), and then remove the gears (F). Parts removal...
-
Page 182: Fuser Actuator Removal
4600-830, -835, -895 Fuser actuator removal Remove the left cover. See “Left cover removal” on page 177. Release the latch (A), and then detach the link. Remove the four screws (B). Parts removal... -
Page 183: Reverse Solenoid Removal
4600-830, -835, -895 Remove the screw (C). Remove the fuser actuator. Installation note: To test if the actuator is properly installed, push, and then release the actuator (A). The actuator should bounce back. Reverse solenoid removal Remove the right cover. See “Right cover removal”... -
Page 184: Cartridge Gearbox Removal
4600-830, -835, -895 Remove the top cover. See “Top cover removal” on page 238. Disconnect the cable JDUPSOL1 from the controller board. Remove the two screws (A). Remove the solenoid. Cartridge gearbox removal Remove the left cover. See “Left cover removal” on page 177. -
Page 185: Mpf Solenoid Removal
4600-830, -835, -895 Remove the screw (B). Lift the top cover enough to remove the cartridge gearbox. While lifting the cover, disconnect the cable from the gearbox, and then remove the gearbox. MPF solenoid removal Remove the left cover. See “Left cover removal”... -
Page 186: Right Side Removals
4600-830, -835, -895 Remove the rear cover. See “Rear door and cover removal” on page 234. Remove the power supply. See “Power supply removal” on page 216. Remove the duplex assembly. See “Duplex assembly removal” on page 218. Release the cut cable. Note: Pay attention to the cable route. - Page 187 4600-830, -835, -895 Remove the two screws (B) using a #1 Phillips screwdriver. Release the two latches (C). Remove the right cover. Note: The front cover hinders the removal. Parts removal...
-
Page 188: Interconnect Cable Removal
4600-830, -835, -895 Interconnect cable removal Remove the right cover. See “Right cover removal” on page 186. Position the printer on its rear side. Disconnect the cable JOPT1 from the controller board. Remove the three screws (A). Detach the right foot (B). Parts removal... -
Page 189: Sensor (Tray Present) Removal
4600-830, -835, -895 Release the two latches (C). Remove the cable. Sensor (tray present) removal Remove the right cover. See “Right cover removal” on page 186. Disconnect the cable (A). Parts removal... -
Page 190: Cooling Fan Removal
4600-830, -835, -895 Release the three latches (B), and then pry to remove the sensor. Cooling fan removal MS621 cooling fan Remove the right cover. See “Right cover removal” on page 186. Disconnect the cable JFAN1 from the controller board. Parts removal... - Page 191 4600-830, -835, -895 Remove the three screws (A), and then remove the fan duct. Remove the screw (B), and then remove the fan bracket. Parts removal...
- Page 192 4600-830, -835, -895 Remove the two screws (C), and then remove the fan. MS622 cooling fan Remove the right cover. See “Right cover removal” on page 186. Disconnect the cable JFAN1 from the controller board. Parts removal...
- Page 193 4600-830, -835, -895 Remove the three screws (A), and then remove the fan duct. Remove the two screws (B), and then remove the fan. Parts removal...
-
Page 194: Controller Board Removal
4600-830, -835, -895 Controller board removal MS621 controller board Remove the right cover. See “Right cover removal” on page 186. Disconnect all the cables. Remove the ground screw (A) and the four screws (B). Remove the screw (C). Remove the controller board. Parts removal... -
Page 195: Toner Cartridge Smart Chip Contact Removal
4600-830, -835, -895 MS622 controller board Remove the right cover. See “Right cover removal” on page 186. Disconnect all the cables. Remove the seven screws (A) and the screw (B) from the rear of the printer. Remove the controller board. Toner cartridge smart chip contact removal Remove the top cover. - Page 196 4600-830, -835, -895 Remove the screw (A). Remove the two screws (B), and then lower the right cartridge guide. Slightly pull the right cartridge guide to detach it. Note: The laser scanning unit frame (C) hinders the detachment. Warning—Potential Damage: To avoid damaging the right cartridge guide, do not cut or disconnect the cable at the rear of the cartridge guide.
- Page 197 4600-830, -835, -895 Release the four latches (E). Remove the toner cartridge smart chip contact. Note: Pay attention to the original position of the spring (F), actuator (G), and lock (H). Parts removal...
-
Page 198: Cartridge Barrel Shutter Sensor Kit Removal
4600-830, -835, -895 Installation notes: • To test if the spring and actuator are properly installed, press the actuator (A). The lock (B) should move up. • Make sure that the tab (C) at the back of the cartridge guide is properly installed as shown. Cartridge barrel shutter sensor kit removal Remove the top cover. - Page 199 4600-830, -835, -895 Remove the screw (A), and then remove the bracket, actuator, spring, and sensor. Installation notes: Install the sensor (cartridge barrel shutter) actuator (A) as shown. Note: Make sure that the spring (B) is behind the boss (C). Parts removal...
- Page 200 4600-830, -835, -895 Install the bracket (D) to the sensor (E) as shown. Install the sensor and bracket as shown. Note: Make sure that sensor is aligned with the actuator. Parts removal...
-
Page 201: Front Removals
4600-830, -835, -895 Front removals Nameplate removal Open the front door. Push the latch to the left, and then remove the screw (A). Remove the four screws (B). Remove the nameplate. Note: The MPF hinders the removal. Warning—Potential Damage: Avoid damaging the cable (C) when removing the nameplate. MPF with front access cover removal Remove the nameplate. -
Page 202: Control Panel Assembly Removal (Ms621Dn)
4600-830, -835, -895 Release the latch (A), and then detach the link. On the controller board, disconnect the control panel cable and remove the ground screw. Push the MPF with front access cover to the right, and then remove it. Control panel assembly removal (MS621dn) Remove the nameplate. -
Page 203: Control Panel Assembly Removal (Ms622De And Ms622Dte)
4600-830, -835, -895 Remove the three screws (A) and the bezel (B). Remove the control panel assembly. Control panel assembly removal (MS622de and MS622dte) Remove the right cover. See “Right cover removal” on page 186. Remove the nameplate. See “Nameplate removal” on page 201. -
Page 204: Control Panel (2.4-Inch Display) Cover, Buttons, And Board Removal
4600-830, -835, -895 Remove the screw (C). Open the controller board access cover, and then disconnect the control panel cables. Lift the stopper (D), and then remove the control panel cables. Remove the control panel assembly. Control panel (2.4‑inch display) cover, buttons, and board removal Remove the control panel assembly. -
Page 205: Control Panel (4.3-Inch Display) Cover, Buttons, And Board Removal
4600-830, -835, -895 Remove the cover, buttons, and board. Control panel (4.3‑inch display) cover, buttons, and board removal Remove the right cover. See “Right cover removal” on page 186. Remove the nameplate. See “Nameplate removal” on page 201. Remove the control panel assembly. See “Control panel assembly removal (MS622de and MS622dte)”... -
Page 206: Transfer Roller Removal
4600-830, -835, -895 Transfer roller removal Open the front door. CAUTION—HOT SURFACE: The inside of the printer might be hot. To reduce the risk of injury from a hot component, allow the surface to cool before touching it. Release the two latches (A) on each end of the transfer roller. Remove the roller. -
Page 207: Sensor (Front Door) Removal
4600-830, -835, -895 Remove the clip (D). Remove the cover. Sensor (front door) removal Remove the nameplate. See “Nameplate removal” on page 201. Remove the right cover. See “Right cover removal” on page 186. Disconnect the JCVR1 and control panel cables from the controller board. Parts removal... - Page 208 4600-830, -835, -895 Remove the four screws (A). Parts removal...
-
Page 209: Mpf Pick Roller And Separator Pad Removal
4600-830, -835, -895 Using a #1 Phillips screwdriver, remove the screw (B). Remove the sensor. MPF pick roller and separator pad removal Open the front door. Press the latches (A), and then open the cover. Warning—Potential Damage: Avoid damaging the MPF sensor flag (B) when removing the cover. Using a #1 Phillips screwdriver, remove the two screws (C). - Page 210 4600-830, -835, -895 Hold the end of the shaft (D), and then pull out the roller to remove it. Remove the two E‑clips (A). Move the roller (B) to the left, and then remove the pin (C). Parts removal...
- Page 211 4600-830, -835, -895 Move the hub (D) and roller (E) to the right. Push the separator pad (F) to the right. Push down the pad to remove it. Warning—Potential Damage: Do not lose the spring (G). Parts removal...
-
Page 212: Sensor (Mpf Paper Present) Removal
4600-830, -835, -895 Sensor (MPF paper present) removal Open the front door. Remove the screw (A). Open the controller board access cover, disconnect the cable JMPFPP1, and then release the cable. Remove the sensor. Installation note: Pay attention to the position of the MPF sensor flag when installing the sensor. Parts removal... -
Page 213: Front Input Guide Removal
4600-830, -835, -895 Front input guide removal Remove the MPF with front access cover. See “MPF with front access cover removal” on page 201. Remove the MPF pick roller and separator pad. See “MPF pick roller and separator pad removal” on page 209. - Page 214 4600-830, -835, -895 Remove the two screws (A). Open the front door. Remove the screw (B). Disconnect the cable JPHONE2 from the controller board. Parts removal...
- Page 215 4600-830, -835, -895 Lift the stopper (C), and then remove the front USB port. Parts removal...
-
Page 216: Bottom Removals
4600-830, -835, -895 Bottom removals Power supply removal CAUTION—POTENTIAL INJURY: This product uses a soft power switch. It does not physically disconnect the input AC voltage. To avoid the risk of electrical shock, always remove the power cord from the printer when removal of the input AC voltage is required. CAUTION—SHOCK HAZARD: The low-voltage power supply (LVPS) may have residual voltage present. - Page 217 4600-830, -835, -895 Disconnect the cable (C) under the printer, and then remove the two screws (D). Parts removal...
-
Page 218: Duplex Assembly Removal
4600-830, -835, -895 Disconnect the three cables (E). Remove the power supply. Duplex assembly removal Remove the rear cover. See “Rear door and cover removal” on page 234. Remove the power supply. See “Power supply removal” on page 216. Position the printer on its right side. Parts removal... - Page 219 4600-830, -835, -895 Remove the two screws (A) and the screw (B) on the left side of the printer. Remove the power supply shield. Remove the four screws (C). Remove the duplex. Note: Make sure that the duplex link (D) stays attached to the duplex assembly. Parts removal...
-
Page 220: Sensors (Duplex And Input) Removal
4600-830, -835, -895 Sensors (duplex and input) removal Remove the rear cover. See “Rear door and cover removal” on page 234. Remove the power supply. See “Power supply removal” on page 216. Remove the duplex. See “Duplex assembly removal” on page 218. - Page 221 4600-830, -835, -895 Remove the two screws (A), cut the cable near the frame, and then remove the sensors. Open the controller board access cover, and then disconnect the cable JDUPPI1. Remove the cables. Installation note: Route the sensor (input) cable (A) and sensor (duplex) cable (B) as shown. Parts removal...
-
Page 222: Sensor (Index) Removal
4600-830, -835, -895 Sensor (index) removal Remove the rear cover. See “Rear door and cover removal” on page 234. Remove the power supply. See “Power supply removal” on page 216. Remove the duplex. See “Duplex assembly removal” on page 218. Remove the right cover. - Page 223 4600-830, -835, -895 Remove the duplex. See “Duplex assembly removal” on page 218. Position the printer on its left side. Remove the spring (A) and the two screws (B). Disconnect the cable, and then remove the sensor. Parts removal...
-
Page 224: Sensor (Paper Present) Removal
4600-830, -835, -895 Installation notes: Apply RheoGel 793 to the top and bottom of the shutter blade extension. Apply RheoGel 793 to the point of contact between the bracket (A) and cam. Apply RheoGel 793 to the point of contact to the lower edge (B), where the wiper bracket glides. Sensor (paper present) removal Remove the rear cover. - Page 225 4600-830, -835, -895 Disconnect the cable from the sensor (A). Parts removal...
-
Page 226: Sensor (Trailing Edge) Removal
4600-830, -835, -895 Release the three latches (B). Sensor (trailing edge) removal Remove the rear cover. See “Rear door and cover removal” on page 234. Remove the power supply. See “Power supply removal” on page 216. Remove the duplex. See “Duplex assembly removal”... - Page 227 4600-830, -835, -895 Detach the spring (A), and then remove the screw (B) and sensor flag. Remove the screw (C) and sensor. Parts removal...
-
Page 228: Paper Present Sensor Flag Removal
4600-830, -835, -895 Paper present sensor flag removal Remove the rear cover. See “Rear door and cover removal” on page 234. Remove the power supply. See “Power supply removal” on page 216. Remove the duplex. See “Duplex assembly removal” on page 218. - Page 229 4600-830, -835, -895 Parts removal...
-
Page 230: Pick Roller Assembly Removal
4600-830, -835, -895 Pick roller assembly removal Remove the left cover. See “Left cover removal” on page 177. Remove the main drive gearbox. See “Main drive gearbox removal” on page 178. Remove the rear cover. See “Rear door and cover removal” on page 234. - Page 231 4600-830, -835, -895 Remove the six screws (A) and unhook the spring (B). Remove the pick roller assembly and the media present sensor flag. Parts removal...
-
Page 232: Pick/Lift Motor Gearbox Removal
4600-830, -835, -895 Remove the two screws (A) and release the two springs (B). Remove the lift cam. Pick/lift motor gearbox removal Remove the rear cover. See “Rear door and cover removal” on page 234. Remove the power supply. See “Power supply removal”... - Page 233 4600-830, -835, -895 Detach the spring (B). Lift the pick roller assembly. Disconnect the cable from the gearbox. Remove the gearbox. Parts removal...
-
Page 234: Rear Side Removals
4600-830, -835, -895 Rear side removals Rear door and cover removal Open the rear door. CAUTION—HOT SURFACE: The inside of the printer might be hot. To reduce the risk of injury from a hot component, allow the surface to cool before touching it. Remove the two screws (A). -
Page 235: Sensor (Bin Full) Removal
4600-830, -835, -895 Disconnect the two cables (A), and then remove the two screws (B). Remove the fuser. Installation note: Open the front door before installing the fuser. To check if the fuser is properly installed, open and close the front door and check if the fuser shutter moves to the left and right. Sensor (bin full) removal Remove the right cover. -
Page 236: Redrive Assembly Removal
4600-830, -835, -895 Remove the two screws (A), and then remove the plate. Remove the sensor. Redrive assembly removal Remove the right cover. See “Right cover removal” on page 186. Remove the left cover. See “Left cover removal” on page 177. -
Page 237: Redrive Gear Plate Removal
4600-830, -835, -895 Redrive gear plate removal Remove the top cover. See “Top cover removal” on page 238. Remove the left cover. See “Left cover removal” on page 177. Remove the redrive assembly. See “Redrive assembly removal” on page 236. Remove the two screws (A), and then detach the reverse solenoid. -
Page 238: Top Side Removals
4600-830, -835, -895 Remove the two screws (B). Remove the redrive gear plate. Top side removals Top cover removal Remove the right cover. See “Right cover removal” on page 186. Remove the left cover. See “Left cover removal” on page 177. -
Page 239: Printhead Removal
4600-830, -835, -895 Remove the two screws (A). Pull, and then lift the top cover to remove it. Printhead removal Remove the right cover. See “Right cover removal” on page 186. Remove the left cover. See “Left cover removal” on page 177. - Page 240 4600-830, -835, -895 Using a small, flat-blade screwdriver or a sharp pencil, mark the location of the printhead on the printer frame. Disconnect the printhead cable from the controller board. Parts removal...
- Page 241 4600-830, -835, -895 Remove the three screws (A). Remove the printhead. Installation note: Perform all the mechanical and electronic adjustments to the printhead after replacing it. “Printhead assembly adjustment” on page 175. Parts removal...
-
Page 242: Optional 250/550-Sheet Tray Removals
4600-830, -835, -895 Optional 250/550-sheet tray removals Separator roller assembly removal Remove the tray insert. Under the tray, remove the screw (A). Parts removal... - Page 243 4600-830, -835, -895 Remove the screw (B) on the left side. Do the same for the screw (C) on the opposite side. Remove the roller assembly. Parts removal...
- Page 244 4600-830, -835, -895...
-
Page 245: Component Locations
CAUTION—TIPPING HAZARD: Installing one or more options on your printer or MFP may require a caster base, furniture, or other feature to prevent instability causing possible injury. For more information on supported configurations, see www.lexmark.com/multifunctionprinters. CAUTION—TIPPING HAZARD: To reduce the risk of equipment instability, load each tray separately. - Page 246 4600-830, -835, -895 CAUTION—POTENTIAL INJURY: To avoid the risk of fire or electrical shock, connect the power cord to an appropriately rated and properly grounded electrical outlet that is near the product and easily accessible. CAUTION—POTENTIAL INJURY: To avoid the risk of fire or electrical shock, use only the power cord provided with this product or the manufacturer's authorized replacement.
-
Page 247: Printer Roller Locations
4600-830, -835, -895 Printer roller locations Standard path rollers Photoconductor drum First input roller MPF pick roller Second input roller Pick roller Separator roller Transfer roller Fuser roller Fuser exit roller Paper exit roller Component locations... - Page 248 4600-830, -835, -895 Duplex path rollers Duplex rear roller Duplex front roller Component locations...
-
Page 249: Printer Sensor Locations
4600-830, -835, -895 Printer sensor locations Sensor Sensor (input) Sensor (MPF paper present) Sensor (duplex) Sensor (index) Sensor (trailing edge) Sensor (pass-through) Sensor (media present) Sensor (fuser exit) Sensor (narrow media/bin full) Component locations... -
Page 250: Controller Board Connectors
4600-830, -835, -895 Controller board connectors Connector Connects to Pin no. Signal JDRC1 Cartridge smart chip contact +3.3V DAT_SC_CN1 CLK_SC_CN1 Ground JDRC2 Imaging unit smart chip contact 3.3V I2C_DAT_SC_CN2 I2C_CLK_SC_CN2 Ground JCART1 Motor (toner cartridge) V_5CART_1 +5V S_CART_ENC_CN Ground JBARR1 Sensor (cartridge barrel) V_5V_BARR +5V S_TONER_LOW... - Page 251 4600-830, -835, -895 Connector Connects to Pin no. Signal JTHM1 Belt fuser A_FUSER_TH_C +2V_ADC Ground JFAN1 Cooling fan V_MAIN_FAN24V Ground MAIN_FAN_ENC_R JEXIT1 Sensor (exit) V_5V_PAPER_OUT S_PAPER_OUT_C Ground JUSBD1 USB connector with flange V_USBD_5V USB_DEV_N USB_DEV_N USB_DEV_GND JRIP1 Debug port Ground RXD0_RIP_CN TXD0_RIP_CN JRIP_100_+5V...
- Page 252 4600-830, -835, -895 Connector Connects to Pin no. Signal JP_PRE1 Sensor (paper present) V_5V_PAPER_P S_PAPER_P_C Ground JMPFPP1 Sensor (MPF) V_3.3V_MPF_PP S_MPF_SNS_R Ground JTPRES1 Sensor (tray present) V_3.3V_TRAY1_P S_TRAY1PP_C Ground JMPFSOL1 MPF solenoid V_MPFSOL +24V_MSF V_MPFSOL- JPSU1 Power supply NC_JPSU1 PSU_DET_CN CHARGE_C SERVO_OUT_C DEV_C...
- Page 253 4600-830, -835, -895 Connector Connects to Pin no. Signal JMTR1 Motor (main) MAIN_HALL_U_CN MAIN_HALL_V_CN MAIN_HALL_W_CN MAIN_FG_CN Ground 5V_ENG V_MAINC1_U V_MAINC1_V V_MAINC1_W JWIFI1 Wireless network Ground NC_USB_DP NC_USB_DM Ground USB_WIFI_P_CN USB_WIFI_N_CN Ground no connection ISP_RESET- SDA_ISP SCL_ISP 5V_WIFI Ground Ground ‑‑ JRESET1 not used not used...
- Page 254 4600-830, -835, -895 Connector Connects to Pin no. Signal JFUSB1 Thumb drive V_FUSB_L USB_FRONT_N USB_FRONT_P NC_JFUSB_P4 Ground JLIFT1 Motor (ACM) V_5V_ACM S_ACM_ENC_C Ground V_ACM_MOT2- ACM_MOT2+ Component locations...
-
Page 255: Maintenance
• Damaged, missing, or altered covers, especially in the area of the top cover and the power supply cover • Possible safety exposure from any non-Lexmark attachments Use the following table to determine when specified parts should be inspected: PART... -
Page 256: Resetting The Maintenance Counter
4600-830, -835, -895 Part number and kit Contents 41X1226—Maintenance Kit (220 V) • 41X1179—Fuser (220 V) • 41X1197—MPF pick roller and separator pad • 41X1198—Pick tires • 41X1212—Separator roller assembly • 40X8393—Transfer roller When performing the 200K scheduled maintenance procedure, the following areas should be cleaned of media dust and toner contamination: •... -
Page 257: Cleaning The Printhead Lenses
4600-830, -835, -895 • Make sure that all areas of the printer are dry after cleaning. Connect the power cord to the electrical outlet, and then turn on the printer. CAUTION—POTENTIAL INJURY: To avoid the risk of fire or electrical shock, connect the power cord to an appropriately rated and properly grounded electrical outlet that is near the product and easily accessible. -
Page 258: Parts Catalog
4600-830, -835, -895 Parts catalog Legend The following column headings are used in the parts catalog: • Asm‑index—Identifies the item in the illustration. • Part number—Identifies the unique number that correlates with the part. • Units/mach—Refers to the number of units actually used in the base machine or product. •... -
Page 259: Assembly 1: Covers
4600-830, -835, -895 Assembly 1: Covers Parts catalog... - Page 260 4600-830, -835, -895 Assembly 1: Covers Asm-index Units/mach Units/FRU Description Removal procedure 41X1172 Top cover “Top cover removal” on page 238 41X1231 Output extender 41X1170 Rear door and cover “Rear door and cover removal” on page 234 41X1232 Rear access door 40X8521 Dust cover 41X1166...
-
Page 261: Assembly 2: Control Panel
4600-830, -835, -895 Assembly 2: Control panel Parts catalog... - Page 262 4600-830, -835, -895 Assembly 2: Control panel Asm-index Units/mach Units/FRU Description Removal procedure 41X1158 Bezel (MS621) 41X1159 Bezel (MS622) 41X1978 Control panel covers “Control panel (2.4‑inch display) (MS621) cover, buttons, and board removal” on page 204 41X2258 Control panel covers “Control panel (4.3‑inch display) (MS622) cover, buttons, and board...
-
Page 263: Assembly 3: Electronics 1
4600-830, -835, -895 Assembly 3: Electronics 1 Parts catalog... - Page 264 4600-830, -835, -895 Assembly 3: Electronics 1 Asm-index Units/mach Units/FRU Description Removal procedure 41X1185 Printhead “Printhead removal” on page 239 41X1178 Fuser, 110V “Fuser removal” on page 234 41X1179 Fuser, 220V “Fuser removal” on page 234 41X1180 Fuser, 100V “Fuser removal” on page 234 41X1195 Controller board (MS622)
-
Page 265: Assembly 4: Electronics 2
4600-830, -835, -895 Assembly 4: Electronics 2 Parts catalog... - Page 266 4600-830, -835, -895 Assembly 4: Electronics 2 Asm-index Units/mach Units/FRU Description Removal procedure 41X1989 Pick/lift motor “Pick/lift motor gearbox removal” on gearbox page 232 41X2259 Cooling fan “Cooling fan removal” on page 190 41X1214 Reverse solenoid “Reverse solenoid removal” on page 183 41X1237 Cartridge gearbox “Cartridge gearbox removal”...
-
Page 267: Assembly 5: Electronics 3
4600-830, -835, -895 Assembly 5: Electronics 3 Parts catalog... - Page 268 4600-830, -835, -895 Assembly 5: Electronics 3 Asm-index Units/mach Units/FRU Description Removal procedure 41X1988 Sensor (cartridge “Cartridge barrel shutter sensor kit barrel) removal” on page 198 41X1162 Toner cartridge smart “Toner cartridge smart chip contact chip contact removal” on page 195 41X1211 Sensor (bin full, MS621) “Sensor (bin full) removal”...
-
Page 269: Assembly 6: Electronics 4
4600-830, -835, -895 Assembly 6: Electronics 4 Parts catalog... - Page 270 4600-830, -835, -895 Assembly 6: Electronics 4 Asm-index Units/mach Units/FRU Description Removal procedure 41X1208 Sensor (trailing edge) “Sensor (trailing edge) removal” on page 226 41X1206 Sensor (duplex and “Sensors (duplex and input) removal” input) on page 220 41X1238 Sensor (paper present) “Sensor (paper present) removal”...
-
Page 271: Assembly 7: Paper Transport 1
4600-830, -835, -895 Assembly 7: Paper transport 1 Parts catalog... - Page 272 4600-830, -835, -895 Assembly 7: Paper transport 1 Asm-index Units/mach Units/FRU Description Removal procedure 41X1183 Jam access cover “Jam access cover removal” on page 206 41X1184 Front input guide “Front input guide removal” on page 213 41X1176 Duplex assembly “Duplex assembly removal” on page 218 41X1182 MPF gearbox “MPF gearbox removal”...
-
Page 273: Assembly 8: Paper Transport 2
4600-830, -835, -895 Assembly 8: Paper transport 2 Parts catalog... - Page 274 4600-830, -835, -895 Assembly 8: Paper transport 2 Asm-index Units/mach Units/FRU Description Removal procedure 40X8393 Transfer roller “Transfer roller removal” on page 41X1197 MPF pick roller and “MPF pick roller and separator pad separator pad removal” on page 209 41X1196 Pick roller assembly “Pick roller assembly removal”...
-
Page 275: Assembly 9: Mpf And Standard Tray
4600-830, -835, -895 Assembly 9: MPF and standard tray Parts catalog... - Page 276 4600-830, -835, -895 Assembly 9: MPF and standard tray Asm-index Units/mach Units/FRU Description Removal procedure 41X2605 MPF with front access cover “MPF with front access cover removal” on page 201 41X1987 Standard 550-sheet tray insert 41X1212 Separator roller assembly Parts catalog...
-
Page 277: Assembly 10: Optional Trays
4600-830, -835, -895 Assembly 10: Optional trays Parts catalog... - Page 278 4600-830, -835, -895 Assembly 10: Optional trays Asm-index Units/opt Units/FRU Description Removal procedure 41X1216 Optional 550-sheet tray 41X1217 Optional 250-sheet tray 41X1239 Pick roller 41X1222 550-sheet tray insert (optional tray) -- 41X1221 250-sheet tray insert (optional tray) -- 41X1212 Separator roller assembly “Separator roller assembly removal”...
-
Page 279: Assembly 11: Maintenance Kits
4600-830, -835, -895 Assembly 11: Maintenance kits Asm-index Units/mach Units/FRU Description Removal procedure 41X1227 Maintenance Kit (100 V) • Fuser (100 V) • MPF pick roller and separator pad • Pick tires • Separator roller assembly • Transfer roller 41X1225 Maintenance Kit (110 V) •... - Page 280 4600-830, -835, -895 Parts catalog...
-
Page 281: Assembly 12: Miscellaneous
4600-830, -835, -895 Assembly 12: Miscellaneous Asm-index Units/mach Units/FRU Description Removal procedure 41X1026 Hard disk, 500GB (USB) 41X1010 User Flash Memory, 256MB 41X1002 Forms and Bar Code card 41X1004 IPDS card 41X1006 PRESCRIBE card 41X1014 Font card, Traditional Chinese 41X1013 Font card, Simplified Chinese 41X1015 Font card, Korean... - Page 282 4600-830, -835, -895...
-
Page 283: Printer Specifications
The power consumption levels listed in the previous table represent time-averaged measurements. Instantaneous power draws may be substantially higher than the average. Values are subject to change. See www.lexmark.com for current values. Sleep Mode This product is designed with an energy-saving mode called Sleep Mode. The Sleep Mode saves energy by lowering power consumption during extended periods of inactivity. -
Page 284: Off Mode
4600-830, -835, -895 The Hibernate mode can be entered in any of the following methods: • Using the Hibernate Timeout • Using the Schedule Power modes Factory default Hibernate Timeout for this product in all countries or regions 3 days The amount of time the printer waits after a job is printed before it enters Hibernate mode can be modified between one hour and one month. -
Page 285: Noise Emission Levels
The following measurements were made in accordance with ISO 7779 and reported in conformance with ISO 9296. Note: Some modes may not apply to your product. 1-meter average sound pressure, dBA Printing Scanning Copying Ready Values are subject to change. See www.lexmark.com for current values. Printer specifications... -
Page 286: Temperature Information
4600-830, -835, -895 Temperature information Ambient operating temperature 10 to 32°C (50 to 90°F) Shipping temperature -20 to 40°C (-4 to 104°F) Storage temperature and relative humidity 0 to 40°C (32 to 104°F) 8 to 80% RH Printer specifications... -
Page 287: Options And Features
Input/output configurations and capacities Input sources Printer model Number of Maximum Maximum standard trays number of number of trays optional trays MS621, B2650 MS622, M3250 * The printer can support a maximum of three optional trays in one configuration. Options and features... - Page 288 Standard tray Multipurpose Total standard Maximum Maximum input feeder capacity optional capacity capacity MS621, B2650 1650 2300 MS622, M3250 1650 2300 Paper capacity means 20‑lb xerographic paper at ambient environment per sheet. Output destinations Printer model Number of standard destinations...
-
Page 289: Theory Of Operation
4600-830, -835, -895 Theory of operation POR sequence As the printer turns on, the engine code goes through a series of tests to verify hardware integrity. If a hardware failure is detected, then it is reported to the printer. If the POR sequence cannot be completed successfully, then the printer may post an error message. -
Page 290: Print Cycle
4600-830, -835, -895 Print cycle Flowchart EXPOSE DEVELOP IMAGING UNIT CHARGE TRANSFER CLEAN PAPER FUSE Theory of operation... - Page 291 4600-830, -835, -895 Charge Charge roller Photoconductor drum A uniform negative electrical charge is applied by the charge roller to the surface of the photoconductor drum. The photoconductive properties of the surface material allow it to hold the charge as long as it is not exposed to light.
- Page 292 4600-830, -835, -895 Expose Photoconductor drum Printhead The printhead emits the light that contacts the surface of the photoconductor drum. The light turns on or off coinciding with the digital latent image. The light causes areas of the photoconductor drum surface to lose charge, resulting in a relative opposite polarity.
- Page 293 4600-830, -835, -895 Develop Developer roller Toner cartridge Photoconductor drum The developer unit applies the toner from the toner cartridge to the photoconductor drum. The difference in charge causes the toner particles to attract to the photoconductor drum areas which are exposed to light. Theory of operation...
- Page 294 4600-830, -835, -895 Transfer Charge roller Transfer roller Paper The transfer roller applies a positive charge to the paper, which is pressed between the transfer roller and the photoconductor drum. Due to relative opposite polarities between the paper, from the transfer roller, and the photoconductor drum, from the charge roller, the charge attracts the toner onto the paper.
- Page 295 4600-830, -835, -895 Fuse Fuser Paper Even if the toner image is already on the paper, the toner particles are not yet permanently bonded to the surface. For the final part of printing, the paper is transported to the fuser where heat and pressure are applied to it.
-
Page 296: Printer Operation
4600-830, -835, -895 Printer operation Printer sections Printhead Imaging unit Toner cartridge Tray Transfer roller Paper paths Fuser Theory of operation... -
Page 297: Printer Paper Path
4600-830, -835, -895 Printer paper path One‑sided print job Photoconductor drum First input roller MPF pick roller Second input roller Pick roller Separator roller Transfer roller Fuser Fuser exit roller Paper exit roller The pick roller picks and feeds the paper to the separator roller. The separator roller feeds the paper to the second input roller, which feeds it to the first input roller. - Page 298 4600-830, -835, -895 The deskew shutter along the first input roller corrects the skew on the paper. The first input roller feeds the paper to the transfer roller. At the transfer roller, the photoconductor drum transfers the developed image to the paper to create the printed image. As the paper passes the fuser, heat and pressure are applied to permanently bond the toner to the paper.
-
Page 299: Printer Paper Path Sensors
4600-830, -835, -895 Printer paper path sensors Sensor Function Sensor (input) Detects the paper traveling between the first input roller and the transfer roller Sensor (MPF paper Detects if paper is in the MPF tray present) Sensor (duplex) Detects the paper traveling along the duplex path Sensor (index) Detects if the pick roller is at the correct height to pick paper from the tray Note: The sensor in the standard tray is supported only in some printer... -
Page 300: Main Drive
4600-830, -835, -895 Main drive Paper input Main drive gearbox motor Transfer roller Photoconductor Fuser Paper exit Duplex The gearbox provides mechanical power to the printer. Its motor transfer power through a number of gears to the following parts: MPF, paper input, transfer roll, photoconductor drum, fuser, paper exit, and duplex. Theory of operation... -
Page 301: Tray Drive
4600-830, -835, -895 Tray drive Pick roller Separator roller To prepare for feeding, the lift plate raises to push the paper against the pick roller. The lift plate stops pushing at the point where the pick roller is at the proper height for picking. After the pick roller is in position, it feeds the topmost paper to the separator roller. - Page 302 4600-830, -835, -895...
-
Page 303: Acronyms
4600-830, -835, -895 Acronyms Acronyms ASIC Application-Specific Integrated Circuit BLDC Brushless DC Motor Black Only Retract Cyan Charge Coupled Device Carbonless Copy Paper Cyclic Redundancy Check Customer Setup CTLS Capacitance Toner Level Sensing DIMM Dual Inline Memory Module DRAM Dynamic Random Access Memory Enhanced Data Out Electrophotographic Process EPROM... - Page 304 4600-830, -835, -895 Microswitch Nonvolatile Memory NVRAM Nonvolatile Random Access Memory Original Equipment Manufacturer Optical Sensor Photoconductor pel, pixel Picture element Power-On Reset POST Power-On Self Test Position Sensing Device Pulse Width Modulation Raster Imaging Processor Read Only Memory SDRAM Synchronous Dual Random Access Memory SIMM Single Inline Memory Module...
-
Page 305: Index
4600-830, -835, -895 Index acronyms 303 electrostatic‑sensitive parts 154 additional input tray diagnostics embedded solutions 160 motor tests 147 emission notices 285 sensor tests 146 error codes advanced print quality samples 140 0‑99.99 102 attaching cables 245 111 error messages 107 available internal options 287 121 error messages 108 avoiding paper jams 66... - Page 306 4600-830, -835, -895 horizontal light bands 49 horizontal sliding contact connector 171 paper curl 40 horizontal top contact connector 162 paper jam in door A 68 paper jam in the duplex unit 73 paper jam in the multipurpose feeder 74 identifying jam locations 67 paper jam in the rear door 71 incorrect margins on prints 62...
- Page 307 4600-830, -835, -895 toner rubs off 63 control panel assembly (MS622dte) 203 toner specks appear on prints 64 control panel board (MS621dn) 204 vertical dark bands 51 control panel board (MS622de) 205 vertical dark streaks with print missing 53 control panel board (MS622dte) 205 duplex assembly 218 vertical light bands 50 duplex sensor 220...
- Page 308 4600-830, -835, -895 vertical dark streaks with print missing 53 vertical light bands 50 scheduled maintenance 255 white streaks and voided areas 55 selecting a location for the printer 284 sensor locations 249 sensors, paper path 299 understanding the status of the power button and service engineer (SE) menu indicator light 138 accessing 150...
-
Page 309: Part Number Index
4600-830, -835, -895 Part number index Part name Page 3086579 Software CD..............................281 40X1367 Parallel cable, 10 feet............................ 281 40X1368 USB 2.0 cable, 2 meters..........................281 40X8044 Sensor (index)..............................270 40X8046 Sensor (toner density)..........................270 40X8393 Transfer roller..............................274 40X8521 Dust cover...............................260 40X8523 RS‑232C Serial Interface card........................ - Page 310 4600-830, -835, -895 Part name Page 41X1183 Jam access cover............................272 41X1184 Front input guide............................272 41X1185 Printhead................................. 264 41X1194 Controller board (MS621)..........................264 41X1195 Controller board (MS622)........................... 264 41X1196 Pick roller assembly............................274 41X1197 MPF pick roller and separator pad......................274 41X1198 Pick tire................................274 41X1201...
- Page 311 4600-830, -835, -895 Part name Page 41X1239 Pick roller.................................278 41X1372 Marknet N8370, Rear WiFi...........................281 41X1627 Control panel display assembly (MS621)....................262 41X1628 Control panel display assembly (MS622)....................262 41X1872 Marknet N8372, Front WiFi—FSM......................281 41X1945 MarkNet N8230 Fiber Ethernet 100BASE-FX (LC), 1000BASE-SX (LC) (Fiber + side backpack).................................281 41X1978 Control panel covers (MS621)........................262...
- Page 312 4600-830, -835, -895 Part number index...
-
Page 313: Part Name Index
4600-830, -835, -895 Part name index Part name Page 41X1221 250-sheet tray insert (optional tray)......................278 41X1222 550-sheet tray insert (optional tray)......................278 41X1158 Bezel (MS621)..............................262 41X1159 Bezel (MS622)..............................262 41X1237 Cartridge gearbox............................266 41X1978 Control panel covers (MS621)........................262 41X2258 Control panel covers (MS622)........................262 41X1627 Control panel display assembly (MS621).................... - Page 314 4600-830, -835, -895 Part name Page 41X1224 Main drive gearbox............................264 41X1227 Maintenance Kit (100 V)..........................279 41X1225 Maintenance Kit (110 V)..........................279 41X1226 Maintenance Kit (220 V)..........................279 41X1945 MarkNet N8230 Fiber Ethernet 100BASE-FX (LC), 1000BASE-SX (LC) (Fiber + side backpack).................................281 41X1372 Marknet N8370, Rear WiFi...........................281 41X1872 Marknet N8372, Front WiFi—FSM......................
- Page 315 4600-830, -835, -895 Part name Page 41X1233 Right access cover............................260 41X1166 Right cover..............................260 40X8523 RS‑232C Serial Interface card........................281 41X1211 Sensor (bin full, MS621)..........................268 41X2260 Sensor (bin full, MS622)..........................268 41X1988 Sensor (cartridge barrel)..........................268 41X1206 Sensor (duplex and input)........................... 270 41X1209 Sensor (front door)............................268 40X8044...
- Page 316 4600-830, -835, -895 Part name index...
- Page 317 B2650, MS621 WIRING DIAGRAM CONTROL PANEL SENSOR SOLENOID (CARTRIDGE (REVERSE) BARREL) MOTOR PRINTHEAD (CARTRIDGE) FUSER PCN7 SENSOR IMAGING UNIT PCN5 ASSEMBLY (NARROW) SMART CHIP CONTACT CARTRIDGE SMART CHIP CONTACT PCN1 MOTOR FUSER JDRC1 JDRC2 JNRW1 JTHM1 JLIFT1 JFAN1 (LIFT/PICK) JCART1...
- Page 318 MS622de, M3250 WIRING DIAGRAM CONTROL PANEL SENSOR PCN7 FUSER (CARTRIDGE PCN5 JSPKR1 ASSEMBLY JPHONE2 BARREL) JUICC43 IMAGING UNIT SECURE SMART CHIP CONTACT CARD PCN1 SOLENOID CARTRIDGE (REVERSE) JVIP2 SMART CHIP CONTACT PRINTHEAD SENSOR (COVER OPEN) SENSOR (BIN FULL) MOTOR (CARTRIDGE) PCN6 FUSER ASSEMBLY...
Need help?
Do you have a question about the B2650 and is the answer not in the manual?
Questions and answers