Table of Contents
Advertisement
Instructions for
Real Good Toys'
Congratulations on your choice of a Real Good Toys product. Your kit has been precision made with meticulous care by
our craftspeople using carefully selected materials. This Dollhouse will last for years, even generations, if heirloom care
and attention is given during assembly. Take your time and read the instructions completely. If you have questions, ask
the experts at your local Dollhouse store or at info@realgoodtoys.com
Before you begin -
You have already opened the box and
see all the parts organized in boxes and bundles. For the
moment, keep them that way. There are important things to
do before you open your glue bottle.
Choose your color scheme
munity, models in your local Dollhouse shop or at our web-
site: realgoodtoys.com; look at plan books from a paint store
or architectural books at your library (a favorite is: Painted
Ladies by Michael Larsen and Elizabeth Pomada). You will
be painting some of the parts right away so get the paint
now. Choose high-quality semi-gloss latex enamel paints
for ease of use and durability.
:
Prepare your space
This dollhouse will spread out over a
large area while it is being built. You will need a large flat
tabletop for the house, several boxes to keep parts organized
until they are needed, and several trays lined with waxed
paper for holding small parts like windows and railings.
A snap-lid box will keep your tools and supplies handy
between building sessions.
Supplies:
Paint: Interior semi-gloss latex paint... Everything gets at least one coat before assembly - get the paint now.
Paintbrushes 1" or 2" foam brushes for each color, 3" foam roller for interior painting
Sandpaper: 320 grit, 3-5 sheets
Glue: Aleene's Tacky Glue for the dollhouse, Solvent-Based panel cement for shingles
Masking tape: ¾" or 1"
Wiring: it's easiest to install some parts during assembly... order wiring supplies now.
Wallpaper paste: Roman's "Border" Paste
Real Good Toys 122 Gallison Hill Rd Montpelier VT 05602 802 479-2217 www.realgoodtoys.com
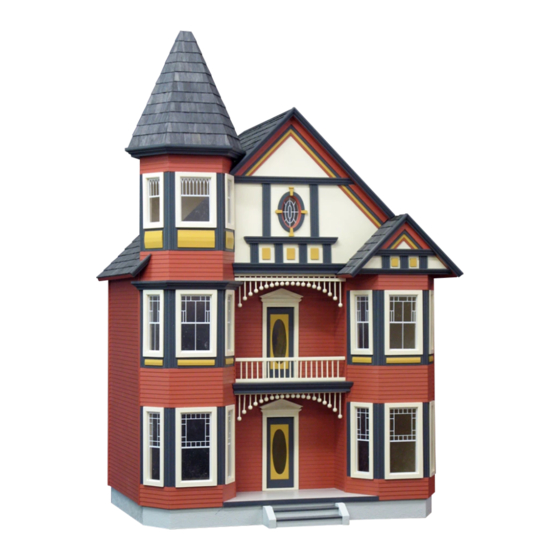
Victorian Painted Lady
the
.
Look at houses in your com-
Measure and identify the parts
groupings that protect the parts, and that is how the Parts
List is organized. As you measure and identify the parts,
label them with sticky notes using the names from the
parts list, and check them off the parts list so you know
you have everything. Taking the time now to identify
and organize the parts also makes them familiar so you
will understand what the instructions intend as you read
ahead.
• Plan ahead so you know where you are going
• Read ahead so you know how to get there
• Paint ahead so the parts will be ready when you
need them
Kit #JM-4600
©06/16
:
The kit is packed in
www.realgoodtoys.help
Advertisement
Table of Contents

Related Manuals for Real Good Toys Victorian Painted Lady


Summary of Contents for Real Good Toys Victorian Painted Lady
- Page 1 Real Good Toys’ ©06/16 Congratulations on your choice of a Real Good Toys product. Your kit has been precision made with meticulous care by our craftspeople using carefully selected materials. This Dollhouse will last for years, even generations, if heirloom care and attention is given during assembly.
- Page 2 Parts List page 2 Instructions for Kit #JM-4600 Identify the parts: Open one bundle at-a-time. Measure each part and find it on the parts list. Label the parts and group them by the ‘instruction section #’ at the end of each part’s name These groups are how the parts will be used.
- Page 3 Parts List page 3 Instructions for Kit #JM-4600 Drawings are not all the same scale (1) E9407 Left-bottom Eave: ( x 1, miters (1) E9465 Nosing, Left-Bottom Roof: ( molding) 2 , miter (1) E9463 Nosing, Right Roof: ( molding) 13 , miter (1) E9464 Nosing, Left-Top Roof: ( molding) 8...
- Page 4 Assembly Notes /Getting Started (A) page 4 Instructions for Special Edition Kit #JM-1065 Victoria’s Farmhouse Options for building the Victorian Painted Lady Dollhouse Doors: Exterior: Exterior Interior Exterior Paint Color: see www.realgoodtoys.help for suggestions Accessories: Gingerbread Flower Boxes Foundation Stucco Grit...
- Page 5 They are all used in some wood applications, but they all have some Stain the Shingles: Our pro uses Real Good Toys’ Shingle characteristic that makes them un-desirable for the Dye (available from Real Good Toys or your local miniature body of your dollhouse.
- Page 6 Paint (B) page 6 Instructions for Special Edition Kit #JM-33 Painting: www.RealGoodToys.help has painting and sanding videos Do not stack painted parts - even when they A word about primer: Primer is designed to help paint stick feel dry they will stick and damage each other. to an impervious surface or to join layers of dissimilar paints.
- Page 7 Painting (B) page 7 Instructions for Kit #JM-4600 B: Paint all the walls now including the Attic Front and one Gable Triangle. Do not paint the edges. The First Coat goes on quick and soaks into the wood which reinforces the wood’s grain so sanding clips off the surface fibers instead of push- ing them around.
- Page 8 Base, wait until the Treads are attached, and texture-paint close-to but not touching the Treads. Texture Paint: For the foundations and anywhere else a textured surface is desired, base coat the surface with plain paint and second-coat with a mixture of paint and “Real Good Toys’ Stucco Grit (www.realgoodtoys.com or your miniature store).
- Page 9 Floors and Walls (1) page 9 Instructions for kit #JM-4600 Prepare the Floors: □ Illus. #1 The Base Floor will be used to exactly locate the Base Floor will guide Bay Floor Bay Floors on the Middle Floor and Top Floor. Protect placement on the upper floors the Base Floor with waxed paper from the glue (Illustra- tion #1).
- Page 10 Front Sets and Foundation (1) page 10 Instructions for Kit #JM-4600 Assemble the Front Sets (Front Wall and Inset Walls) □ 6. Tape together (no glue) two Inset Walls and Glue and tape the Front Wall to the Inset Walls, lined up top- two Porch Spacers (the spacers are between the Inset and-bottom”.
- Page 11 Instructions for kit #JM-4600 Foundation (1) page 11 Illus. #8 □ Middle Foundations 9. Glue Middle Foundations (18”) to the Foun- dation and Base Floor as shown. (Illustration #8) 18” □ Tape together the Corner Foundations and the Front Foundation with the bevels face down. Front Foundation Corner Foundation Bevels...
- Page 12 Floors and Walls (1) page 12 Instructions for kit #JM-4600 Mark and paint the Porch Floors/ceilings □ 12. Set the Middle Floor on the Base, lined up on the Mid Floor Illus. #11 edges. Trace the edges of the Bay Floors onto the Base. Set a Pilaster on edge against the Bay Floor edges of the Mid Floor, and trace along the outside of...
- Page 13 Floors and Walls (1) page 13 □ 13. Glue the Front Set to the Base spaced from the back edge with the Dividers and centered side-to-side with the Front Spacers. Stretch tape a little above the floor all the way from one Side Wall to the other to tighten the Front Spacers.
- Page 14 Instructions for kit #JM-4600 Floors and Walls (1) page 14 □ Illus. #16 16. Repeat step 15 to attach the other Side Wall. (Illustration #16) □ Side 17. Spread glue on the top edge of the Front Set. Gable Triangle Tip the Mid Floor into one Side’s groove, then let the other (temporary) end down so it pops into the other.
- Page 15 Instructions for kit #JM-4600 Floors and Walls (1) page 15 Inspect the floor at the back of the Dividers and Side Walls to be sure nothing has moved □ 18. Glue the other Front Set to the Mid Floor, lined up in front and centered side-to-side. Press Dividers down, clean up the glue squeezings, then add weight while the glue dries.
- Page 16 Instructions for kit #JM-4600 Walls and Floors (1) page 16 Inspect the floor at the back of the Dividers Any flat panel and Side Walls to be sure nothing has moved Illus. #20 makes it easier to Gable Floor line up the outside □...
- Page 17 Instructions for kit #JM-4600 Walls and Floors (1) page 17 □ Illus. #21A 23. Lay out a set of Bay Walls for the Base; one 4 Front with a groove at the bottom, one 3 Side Base Bay Wall set for the right side Tape with a groove at the bottom, and one 3 Side with no...
- Page 18 Walls and Floors (1) page 18 Instructions for kit #JM-4600 □ 25. Lay out a set of Mid Bay Walls with all the clap- Illus. #25 board facing down on each Wall (Illustration #25). Tape the Mid Bay Walls (3 tall, grooved) Walls together and leave a 4”...
- Page 19 Walls and Floors (1) page 19 Instructions for kit #JM-4600 □ 29. Tape together a set of Top Bay Walls (1 ” tall, no groove) Glue and tape the Top Bay Walls to the walls and to the underside of the Gable Floor. Adjust the points to match the lower walls so the Top Bay Walls 1”...
- Page 20 Instructions for kit #JM-4600 Roofs (2) page 20 □ 31. Make a temporary Roof Support: Hold a 1” “Razor” saw Illustration #31A Stripwood behind the Attic Front, straight up-and-down, and The Attic Front from centered behind the peak. Use the edges of the Attic Front as inside the Attic a saw guide to cut the Stripwood to exactly match the Attic Front at the peak.
- Page 21 Roofs (2) page 21 Instructions for kit #JM-4600 Illustration #34 □ View from the back 34. The Kneewalls have a shiny edge; that’s the one to Kneewall leave exposed in the Attic. Glue the Kneewalls into the left and right corners of the Attic, lined up at the back edges. Lined up On the Right Kneewall (viewed from the front), don’t put any glue on the part that extends over the Gable Floor - it will be ad-...
- Page 22 Instructions for kit #JM-4600 Tower (3) page 22 □ 37. Lay out and tape together the Tower Back Walls. Illustration #36 Tower Back Walls □ 38. Glue and tape the Tower Back Walls to the Roof, lined up with the cutout. Tape the Tower Back-Right to the front edge of the Roof lined up with the corner of the cutout (Illus.
- Page 23 Tower and Gable (3) page 23 Instructions for kit #JM-4600 □ Illustration #39 40. Glue and tape the Gable Triangle to the top of the Gable Floor, lined up in front and side-to-side. Gable Triangle Porch Spacer holds the Tape a Porch Spacer against the back edge of the Gable Triangle straight Gable Triangle to hold it straight as the glue dries Porch Spacer...
- Page 24 Windows: Bay Verticals (4) page 24 Instructions for kit #JM-4600 Lining things up: You are puting together many parts and lining them up with each other and with parts that are already in place... it’s easy to get lost!! Start by having the parts touching and with everything lined up on the inside with the walls. After the tape is tight, pinch the parts to line up on the inside again, then make the outside work too (like 44B).
- Page 25 Windows: Bay Verticals (4) page 25 Instructions for kit #JM-4600 □ 45. Follow steps #43 and #44 for the Mid Bay openings using the 1 tall Window Blocks for the bottom and the ” tall Window Blocks (the same as the 1st floor’s Window Blocks) for Illustration #45 Mid Floor’s Bays the top.
- Page 26 Instructions for kit #JM-4600 Window Assembly (4) page 26 Illustration #48A Cross section of window Window Assembly: dhbuilder.com has more window assembly photos Outside Window Frame □ 47. Paint (first-coat) the Window Frames. Do not get paint on Wall the ends - wipe off any paint that has crept around the corner onto the ends.
- Page 27 Instructions for kit #JM-4600 Tower Roof and Eaves (5) page 27 □ Back Illustration #50 50. Tape together the Tower Roof set (two Corners, the Tower Roof set Face, two more Corners, then the Spacer), carefully lined up at the bottom edge. Wait to include the Tower Roof Back, use the Spacer to make the right space for the Back.
- Page 28 Instructions for kit #JM-4600 Balcony Rail (6) page 28 □ 55. Balcony Rail Assembly A. 1. Paint (the first coat) and sand the Rails before assembly. Wipe any paint out of the grooves, and do not paint the Rail ends at all. Paint and sand the Dowels.
- Page 29 Instructions for kit #JM-4600 Arched Rail (6) page 29 □ 56. Arch Rail Assembly: You may wish to remove this page from the instructions... there are many steps that have “let the glue dry” and you will want to skip ahead to other sec- tions while you are waiting A.
- Page 30 Moldings and Trim (7) page 30 Instructions for kit #JM-4600 Left-top Nosing* *If your Left Nosing doesn’t seem to fit, Right Roof Nosing you may have missed step #54 Attic Crosspiece Gable Nosing Pilaster Gable Crosspiece Clearance Attic Tabling Trim Pilaster Balcony Cornice Pilaster...
- Page 31 Trim (7) page 31 Instructions for kit #JM-4600 Pro tip: There are many ways to finish the outside of a true “Painted Lady” fancy shingles, sculpted plaster, fans, fleur- de-lis; the stripwood trim provided in this kit is only one of the techniques for you to consider as you finish your house □...
- Page 32 Exterior Finishing (8) page 32 Instructions for kit #JM-4600 □ 59. Install the Window Outside Frames and the Doors □ □ 63. Glue the Arched Rails to the Porch Ceiling and 60. Attach ” Stripwood to the front and back edges the Balcony Ceiling just behind the Cornice.
- Page 33 Shingles square-edge down along the bottom edge of the Roof, or “Flash” the edge with ” strip of copper (#SC from Real Good Toys is available through your dealer) to prepare the bottom edge of the Roof for Line of Adhesive the first row of shingles B.
- Page 34 Every choice makes a difference in the order of painted face up, and lined up around the edge of the finishing. Real Good Toys has provided materials for some narrow face basic interior work, but you may choose to do it differently.
Need help?
Do you have a question about the Victorian Painted Lady and is the answer not in the manual?
Questions and answers