Advertisement
Quick Links
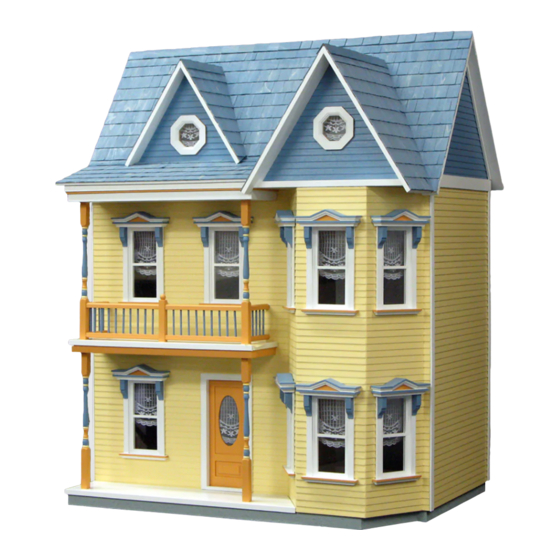
Instructions for
Real Good Toys'
Congratulations on your choice of a Real Good Toys product. Your kit has been precision made with meticulous care by
our craftspeople using carefully selected materials. This Dollhouse will last for years, even generations, if heirloom care
and attention is given during assembly. Take your time and read the instructions completely. If you have questions, ask
the experts at your local Dollhouse store or at info@realgoodtoys.com
Before you begin -
You have already opened the box and
see all the parts organized in boxes and bundles. For the
moment, keep them that way. There are important things to
do before you open your glue bottle.
Choose your color scheme
munity, models in your local Dollhouse shop or at our web-
site: realgoodtoys.com; look at plan books from a paint store
or architectural books at your library (a favorite is: Painted
Ladies by Michael Larsen and Elizabeth Pomada). You will
be painting some of the parts right away so get the paint
now. Choose high-quality semi-gloss latex enamel paints
for ease of use and durability.
:
Prepare your space
This dollhouse will spread out over a
large area while it is being built. You will need a large flat
tabletop for the house, several boxes to keep parts organized
until they are needed, and several trays lined with waxed
paper for holding small parts like windows and railings.
A snap-lid box will keep your tools and supplies handy
between building sessions.
Tools and Supplies:
Tape measure or ruler, Pencil, Sticky notes
White glue
(like Aleene's Tacky Glue®)
Solvent-based Panel Cement for shingles
Masking tape, Utility knife or coarse file
Fine tooth saw (razor saw
Painting Supplies, Sandpaper
Waxed paper
PostIts®, Aleene's®, and X-Acto® are trademarks of their manufacturers and have no affiliation with Real
Good Toys
Real Good Toys - 122 Gallison Hill Rd - Montpelier VT 05602 - 802 262-6018 - www.realgoodtoys.com
Special Edition
the
.
Look at houses in your com-
(like PostIts®)
for all construction
or a hacksaw)
(like X-Acto®)
(especially 320gr)
Princess Anne
Measure and identify the parts
groupings that protect the parts, and that is how the Parts
List is organized. As you measure and identify the parts,
label them with sticky notes using the names from the parts
list, and check them off the parts list so you know you have
everything. Taking the time now to identify and organize
the parts also makes them familiar so you will understand
what the instructions intend as you read ahead.
• Plan ahead so you know where you are going
• Read ahead so you know how to get there
• Paint ahead so the parts will be ready when you need them
:
Options
www.realgoodtoys.com or your miniature dealer
6888: the "Best 1" Dollhouse Electrical Kit
Stucco Grit: Paint additive for foundation texture
Dye-1: Brown shingle dye
Dye-3: Grey shingle dye
SC:
Copper flashing
1015: 6-panel interior door fits the Divider
J-FK Interior finishing materials: Baseboard
and crown moldings & stairway
banisters and landing rails.
This kit will accommodate 1" Scale furniture
Kit #SE JM-975
©09/17
:
The kit is packed in
Advertisement

Related Manuals for Real Good Toys Special Edition Princess Anne


Summary of Contents for Real Good Toys Special Edition Princess Anne
- Page 1 Real Good Toys’ Congratulations on your choice of a Real Good Toys product. Your kit has been precision made with meticulous care by our craftspeople using carefully selected materials. This Dollhouse will last for years, even generations, if heirloom care and attention is given during assembly.
- Page 2 Parts List page 2 Instructions for Special Edition Kit #J-M975, the Princess Anne Identify the parts: Open one bundle at-a-time. Measure each part and find it on the parts list. Label the parts and group them by the ‘instruction section letter’ at the end of each part’s name These groups are how the parts will be used.
- Page 3 Parts List, Assembly Notes page 3 Instructions for Special Edition Kit #J-M975, the Princess Anne Top Stair Block’s “bevel” Box #1 1 E 8020 Porch Floor ): 15 ; Angled 2 E 3616 Stringer x 10 edge 1 E 8021 Porch Roof ): 14 ;...
- Page 4 Foundation Paint (page 9): For the show models we will fit. assemble here at Real Good Toys, we paint the Founda- tions with one coat of regular paint, then a coat of paint mixed with Stucco Grit. Keep the mixture well stirred Stain the Shingles: Our pro uses Real Good Toys’...
- Page 5 B: Railing Assembly page 5 Instructions for Special Edition Kit #J-M975, the Princess Anne Rail Dowel Illustration A Porch Posts and Balcony Railings: Paint, then assem- Dowel ble the Porch Posts, Newel, and the Balcony Railings Shingle in between house assembly steps (the ones that make you stop to let glue dry).
- Page 6 C: Housebody Assembly page 6 Instructions for Special Edition Kit #J-M975, the Princess Anne Assemble the Housebody: Preview: In this section, you will square the openings, Identify the top of the floors, and glue together the Floors and Side Panels. Finish to #11 before letting the glue dry.
- Page 7 C: Housebody Assembly page 7 Instructions for Special Edition Kit #J-M975, the Princess Anne 6. Glue and tape the Base Floor into the Base Floor Groove. Make extra-sure that the Base Floor is Illustration 6 pressed to the top-edge of the groove. (Illustration #6) Slide the Housebody to overhang the worktable so you can fully tape the Right Side to the floors.
- Page 8 C: Housebody Assembly page 8 Instructions for Special Edition Kit #J-M975, the Princess Anne Preview: In this section, you will build the Bay. Illustration 12 12. Glue and tape the Bay Floors to the house floors, centered between the fronts, and lined up carefully Tape on Both Sides on top.
- Page 9 D: Foundation page 9 Instructions for Special Edition Kit #J-M975, the Princess Anne Assemble and Attach the Foundation: Illustration 17A 16. Mark the length of the 2 ” Inset Foundation onto the 22” Back Foundation (Illustration #16). **Be sure to complete Step 20 before letting the glue dry.
- Page 10 D: Foundation, E: Porch page 10 Instructions for Special Edition Kit #J-M975, the Princess Anne Porch Assembly: The parts used in this section should be painted ahead of time. If they have not been painted, do Porch Base Floor Illustration 20 so now.
- Page 11 F: Roofs page 11 Instructions for Special Edition Kit #J-M975, the Princess Anne Roof Assembly Illustration 25 & 26 Shingling Guidelines Rear Roof 25. Glue and tape the Front Eaves to the Front Roof, and the Rear Eaves to the Rear Roof, lined up on the outside edge.
- Page 12 F: Roofs page 12 Instructions for Special Edition Kit #J-M975, the Princess Anne 32. Glue the Porch Roof Triangles to the Top Floor and Front Roof, straight front-to-back. Set Step 32 the left triangle in about ” from the Left edge. 33.
- Page 13 G: Shingling page 13 Instructions for Special Edition Kit #J-M975, the Princess Anne Shingle The Roof: Glue: Use a thick panel adhesive such as Liquid Nails available in a caulking gun tube at ® Macco building supply stores. Trim just a little of the end of the tube for a tiny hole, to give a thin bead of 1”...
- Page 14 H: Trim page 14 Instructions for Special Edition Kit #J-M975, the Princess Anne ” Porch Banding Tracing of the ” Eave Trim (both Sides are the same) ” Porch Banding Finish the Outside Plan your outside trim. The material supplied is more than enough to trim the house the way we do for our show models (Steps 41 –...
- Page 15 I: Interior page 15 Instructions for Special Edition Kit #J-M975, the Princess Anne Finish the Inside... Plan Ahead for the materials you will need Our pro finishes the interior of a few houses each Bevel year. Here’s the order that he follows for tackling Top Stair Block the interior finishing: •...
Need help?
Do you have a question about the Special Edition Princess Anne and is the answer not in the manual?
Questions and answers