Advertisement
Quick Links
Instructions for
Real Good Toys'
Congratulations on your choice of a Real Good Toys product. Your kit has been precision made with meticulous
care by our craftspeople using carefully selected materials. This Dollhouse will last for years, even generations,
if heirloom care and attention is given during assembly. Take your time and read the instructions completely.
If you have questions, ask the experts at your local Dollhouse store or at info@realgoodtoys.com
Before you begin -
For the moment, keep them that way. There are important things to do before you open your glue bottle.
Prepare your space:
out over a large area while it is being built. You will
need a large flat tabletop for the house, several boxes to
keep parts organized until they are needed, and several
trays lined with waxed paper for holding small parts
like windows and railings.
A snap-lid box will keep your tools and supplies handy
between building sessions.
Preview the Overview
your build; this helps make it fun and fulfilling.
JM66 can be set up with an 1
foundation to fit the JM907
Each available separately
Supplies:
Paint: Interior semi-gloss latex paint... Everything gets at least one coat before assembly - get the paint now.
Paintbrushes 1" or 2" foam brushes for each color, 3" foam roller for interior painting
Sandpaper: 320 grit, 3-5 sheets
Glue: Aleene's Tacky Glue for the dollhouse
Masking tape: ¾" or 1"
Wiring: it's easiest to install some parts during assembly... order wiring supplies now.
Wallpaper paste: Roman's "Border" Paste
Real Good Toys 122 Gallison Hill Road Montpelier, VT 05602 802 479-2217 www.realgoodtoys.com
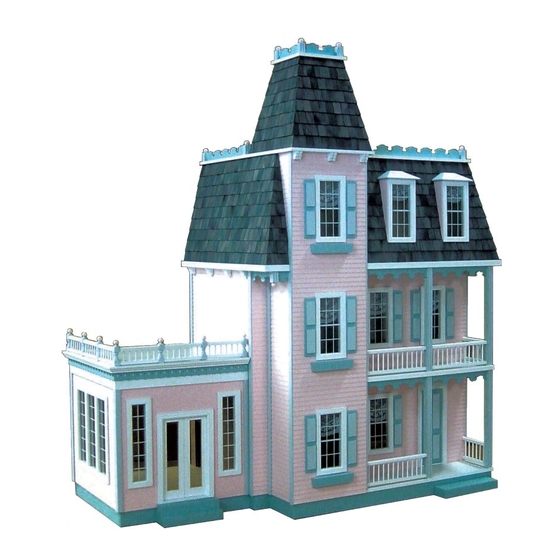
Junior Conservatory
the
You have already opened the box and see all the parts organized in boxes and bundles.
This conservatory will spread
(page 3) to plan and organize
1
/
"
4
Measure and identify the parts:
groupings that protect the parts, and that is how the Parts
List is organized. As you measure and identify the parts,
label them with sticky notes using the names from the parts
list, and check them off the parts list so you know you have
everything. Taking the time now to identify and organize
the parts also makes them familiar so you will understand
what the instructions intend as you read ahead.
• Plan ahead so you know where you are going
• Read ahead so you know how to get there
• Paint ahead so the parts will be ready when you need them
Special Edition Kit #JM-66
The kit is packed in
The Conservatory can be assembled
to fit on either side of the Alison Jr.
Cutting doors into the Addition is
only recommended on the left side.
©06/16
Advertisement

Subscribe to Our Youtube Channel
Related Manuals for Real Good Toys Junior Conservatory


Summary of Contents for Real Good Toys Junior Conservatory
- Page 1 Real Good Toys’ ©06/16 Congratulations on your choice of a Real Good Toys product. Your kit has been precision made with meticulous care by our craftspeople using carefully selected materials. This Dollhouse will last for years, even generations, if heirloom care and attention is given during assembly. Take your time and read the instructions completely.
- Page 2 Accessories /Parts List page 2 Instructions for Special Edition Kit #JM-66 Customizing? Options for building Real Good Toys’ Dollhouses Exterior: Doors: Exterior Paint Color: see www.RealGoodToys.help for suggestions #1015 #6022 Accessories: Gingerbread Trim and Stripwood: Flower Boxes Ideal for window interior trim...
-
Page 3: Assembly Tips
Assembly Notes page 3 Instructions for Special Edition Kit #JM-66 Overview of the Build: Assembly Tips: A large, clutter-free, well-lighted work area is helpful Details of each step will be expanded along the way, but lots of during assembly, but a flat work surface is essential. folks like to see how it all fits together before they start Read the instructions carefully;... - Page 4 Getting Started (A) page 4 Instructions for Special Edition Kit #JM-66 A: Getting Started: Do these things before the house assembly Square the corners of the window, door, and stair holes with a utility knife - each cutout has a rounded corner left over from the tool that made it. Make two cuts in each corner from the outside (one from each direction), then cut from each direc- tion on the inside to cut away the rounding in the corner so the window, door, or stairs will fit.
- Page 5 Paint (B) page 5 Instructions for Special Edition Kit #JM-66 B. Painting: www.RealGoodToys.help has painting and sanding videos Do not stack painted parts - even when they A word about primer: Primer is designed to help paint stick feel dry they will stick and damage each other. to an impervious surface or to join layers of dissimilar paints.
- Page 6 Instructions for Special Edition Kit #JM-66 Assembly Instructions page 6 Q: How can I prevent glue from getting on the floor after I press it into the groove? A: Do not skimp on the glue... a little squeezing out tells you that there’s enough glue in the joint. Clean up the squeez- ings with a damp rag followed by a dry rag, and the little bit that remains down in the scoring will shrink back as it dries, and will not be visible.
-
Page 7: Assembly Details
Instructions for Special Edition Kit #JM-66 Photo Support page 7 built Assembly Details: Photos support the descriptions but do not replace them Note: Many of these photos are of un-painted parts, but you should have painted these parts at least one- coat already, and have sanded thoroughly. - Page 8 Assembly Instructions page 8 Instructions for Special Edition Kit #JM-66 Builder’s Note: a trimstrip on the house can be re- moved with heat. □ 8. Test the Ceiling on the Conservatory, but wait to attach it until the Facia and Gingerbread are attached (it’s easier to get the Facia and Gingerbread tight without the Ceiling in place).
- Page 9 Photo Support page 9 Instructions for Special Edition Kit #JM-66 Liner Make sure the floor is tight to the top of the groove - Let the glue dry Foundation Spacer Now is a good time to finish painting everything This is when you need a flat table the most! Straight and Flush Avoid taping to the printed surface of the Floors...
- Page 10 Assembly Instructions page 10 Instructions for Special Edition Kit #JM-66 Carve the House’s Trim These Front Steps are set up to fit on a Vermont Farmhouse Jr.
- Page 11 Photo Support page 11 Instructions for Special Edition Kit #JM-66 Facia is beveled at the corner Lined up on top Gingerbread Note: Many of these photos are of a temporary build (tape only) and the tape stayed on throughout the build, but you should take your tape off when the glue is dry.
- Page 12 Exterior Trim page 12 Instructions for Special Edition Kit #JM-66...
- Page 13 Details for Painting Rails page 13 Instructions for Special Edition Kit #JM-66 Details for painting rails Dab skimpy paint on a small celled sponge. Lay a few dowels on the sponge. Rub the dowels between the sponges to get some paint all around the dowel. Paint the Rails - mop excess paint out of the groove. Let the glue dry.
- Page 14 Finishing the outside page 14 Instructions for Special Edition Kit #JM-66 see: www.RealGoodToys.help for details...
Need help?
Do you have a question about the Junior Conservatory and is the answer not in the manual?
Questions and answers
I received a Jr Conservatory kit several months ago and am just now building it. The kit is missing several pieces for the large (tri-pane window. Specifically the two vertical frames (6 15/16, angles). Also missing is the vertical and horizontal trim for the door. Is it possible to obtain replacements for these missing parts? I am unable to proceed with construction at this point. Thank you for your assistance.