Table of Contents
Advertisement
Instructions for
Real Good Toys'
Congratulations on your choice of a Real Good Toys product. Your kit has been precision made with meticulous
care by our craftspeople using carefully selected materials. This Dollhouse will last for years, even generations,
if heirloom care and attention is given during assembly. Take your time and read the instructions completely.
If you have questions, ask the experts at your local Dollhouse store or at info@realgoodtoys.com
Before you begin -
You have already opened the box and
see all the parts organized in boxes and bundles. For the
moment, keep them that way. There are important things
to do before you open your glue bottle.
Choose your color scheme
community, models in your local Dollhouse shop or at our
website: realgoodtoys.com; look at plan books from a paint
store or architectural books at your library (a favorite is:
Painted Ladies by Michael Larsen and Elizabeth Pomada).
You will be painting some of the parts right away so get the
paint now. Choose high-quality interior semi-gloss latex
enamel paints for ease of use and durability.
:
Prepare your space
This dollhouse
will spread out over a large area while
it is being built. You will need a large
flat tabletop for the house, several
boxes to keep parts organized until
they are needed, and several trays
lined with waxed paper for hold-
ing small parts like windows and
railings. A snap-lid box will
keep your tools and supplies
handy between building
sessions.
Tools and Supplies:
Tape measure or ruler, Pencil, Sticky notes
White glue
(like Aleene's Tacky Glue®)
Solvent-based Panel Cement for shingles
Masking tape, Utility knife or coarse file
Fine tooth saw (razor saw
Painting Supplies, Sandpaper
Waxed paper
®
®
®
PostIts
, Aleene's
, and X-Acto
are registered trademarks of their manufacturers
and have no affiliation with Real Good Toys
Real Good Toys 122 Gallison Hill Rd Montpelier, VT 05602 802 262-6018 www.realgoodtoys.com
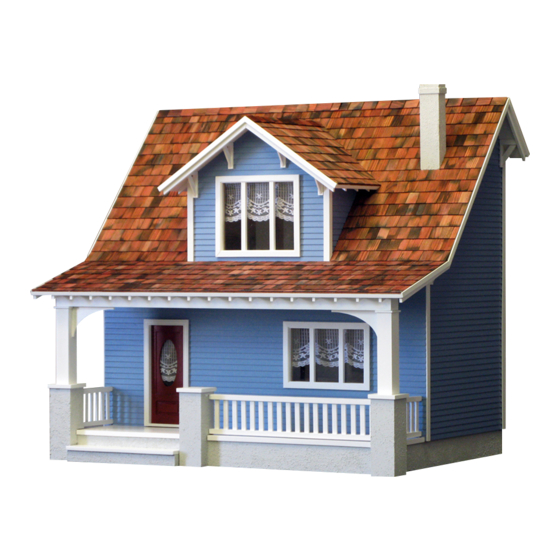
Beachside Bungalow
the
.
Look at houses in your
(like PostIts®)
for all construction
or a hacksaw)
(like X-Acto®)
(especially 320gr)
Measure and identify the parts
groupings that protect the parts, and that is how the Parts
List is organized. As you measure and identify the parts,
label them with sticky notes using the names from the
parts list, and check them off the parts list so you know
you have everything. Taking the time now to identify and
organize the parts also makes them familiar so you will
understand what the instructions intend as you read ahead.
• Plan ahead so you know where you are going
• Read ahead so you know how to get there
• Paint ahead so the parts will be ready when you need them
:
Options
www.realgoodtoys.com or your miniature dealer
6888: the "Best 1" Dollhouse Electrical Kit
Stucco Grit: Paint additive for foundation texture
Dye-1: Brown shingle dye
Dye-3: Grey shingle dye
SC:
Copper flashing
1015: 6-panel interior doors for Dividers
J-FK
Interior finishing materials: Baseboard
and crown moldings & stairway
banisters and landing rails.
This kit will accommodate 1" Scale furniture
Kit #B 1895
©
01/17
:
The kit is packed in
Advertisement
Table of Contents

Related Manuals for Real Good Toys Beachside Bungalow


Summary of Contents for Real Good Toys Beachside Bungalow
- Page 1 01/17 Real Good Toys’ Congratulations on your choice of a Real Good Toys product. Your kit has been precision made with meticulous care by our craftspeople using carefully selected materials. This Dollhouse will last for years, even generations, if heirloom care and attention is given during assembly. Take your time and read the instructions completely.
- Page 2 Parts List page 2 Instructions for Kit #B 1895 Identify the parts: Open one bundle at-a-time. Measure each part and find it on the parts list. Label the parts and mark the parts list so you know you’ve found everything. Drawings are not all the same scale Box A Parts (1) E9626 Dormer Front Wall: (...
- Page 3 Parts List page 3 Instructions for Kit #B 1895 Panels (1) E9630 Porch Floor: ( ) 23 (1) E9621 Front Wall: ( ) 11 x 24 4 clapboard 16, cutouts 8 tall (1) E9622 Side Wall Left: ( ) 21 x 11 4 clapboard 8, angled...
- Page 4 Trim and Stripwood Flute24 SW16 Best1 Real Good Toys’ RGT8 #4017 Stair 6803 Banister Dollhouse Wiring Set and Landing Set & Landing Set Real Good Toys 122 Gallison Hill Rd Montpelier, VT 05602 802 262-6018 www.realgoodtoys.com...
- Page 5 (stacks of books, gallons of pure Vermont Maple Syrup - anything heavy) Stain the Shingles: Our pro uses Real Good Toys’ Shingle Glue the body of your dollhouse together with Dye (available through your miniature dealer or www.real- white, water clean-up glue that dries clear.
- Page 6 Getting Started: Do these things before the house assembly Instruction for Kit #B 1895 Painting: www.realgoodtoys.help has painting and sanding videos Paint (first-coat) everything. Don’t try to sand , fill, primp, or do much of anything to the wood before the first coat.
- Page 7 Pre-assembly page 7 Instructions for kit #B 1895 C. Put a finish on the floors now to protect them from the mess and wear-and-tear of construction. Do not use penetrating stain on these floors. Use a surface-coating finish like acrylic urethane or a “one- coat”...
- Page 8 Instructions for kit #B 1895 Foundation page 8 □ 2 Foundation. Glue and tape the Foundation Longs Long Foundation ”) and Foundation Mids (16 ”) together. Tape the Base Floor to the Foundation to hold it square as the glue dries. If you haven’t put finish on the Base Floor Mid Foundation yet, tape it up-side-down so the tape won’t damage the flooring (see “Put finish on the floors now”, page 7).
- Page 9 Let the glue dry, then paint the Postbases. Front Texture Paint: Real Good Toys’ “Stucco Grit” mixed with paint is tough and good looking on Foundations, Postbases, and the Front Step Block. Paint (one coat) the base color and sand now, and apply the paint + grit during final assembly.
- Page 10 Instructions for kit #B 1895 page 10 □ 6. Glue, tape, and weight the Porch Floor to the Foundation, carefully lined up on the edges. Finish painting the Porch Floor before you attach the housebody to this assembly. Step 6 Porch Floor Wiring? Some of the steps are easiest before and Base Floor temporarily...
- Page 11 Instructions for kit #B 1895 page 11 □ 7. D. Glue and tape the Front to the Sides and Floors. - Line up the bottom corners side-to-side - tape the Front to the Base. Step 7D: Line up the Front side-to- side, tape along the bottom - Line up the top corners side-to-side - tape the Front to the Sides.
- Page 12 Instructions for kit #B 1895 Test Assembly: Roofs page 12 □ 8 Draw Shingle Guidelines spaced 1” apart, starting from the top of each roof . Look at the drawings to identify the outside of the Roofs (a dotted line shows a beveled edge that faces down). Dormer Roofs (bevels face down) Rear Roof...
- Page 13 page 13 Instructions for Kit #B 1895 □ Prepare flaps of tape 10. Glue and tape Dormer Sides to the Dormer Front, lined up at the top. Tape Handy Squares into the assembly to hold the Sides square. Dormer Side Handy Square Dormer Side Lined up on top...
- Page 14 page 14 Instructions for Kit #B 1895 Assemble the Porch: These instructions are customized for stucco/texture paint. The Foundation, the Postbases, and the Step are painted with one coat only of the paint color with no texture additive, and they are sanded. The Rails, the Post sets, the Arches, and the Porch Beam are painted with two coats.
- Page 15 page 15 Instructions for kit #B 1895 □ 14. Repeat the glue-dot, paint, and glue process for the other side of the porch. Do the “glue-dot” routine with the Front Railing and the Side Railing at the same time. Mark, Texture-paint, and glue both Postbases in place.
- Page 16 page 16 Instructions for kit #B 1895 □ 16. Cut wide Stripwood ( ) for the Side Trim. Hold the Stripwood against the Side, lined up at the back edge and bottom. Use the top of the Side and Front wall as a cutting guide - cut the Stripwood with a fine-tooth saw (like the X-Axto razor saw) Save the cutoffs for Dormer Trim Cut a Side Trim pair for the other side too.
- Page 17 page 17 Instructions for kit #B 1895 □ 18. Lay out the Front Roof and Porch Roof up-side-down. Tape them together with the points of the bevels touching. Turn them over and spread glue in the bevel where they touch. Without glue, set the Front and Rear Roof on the housebody.
- Page 18 page 18 Instructions for kit #B 1895 □ 20. Glue and tape the Dormer to the house, lined up on the inside of the cutout. □ 21. Cut Dormer Vertical Trim for the Dormer. Use Stripwood for the side trim, and left overs of Stripwood used on the Side Vertical Trim for the front.
- Page 19 page 19 Instructions for kit #B 1895 Brackets The easiest and strongest bracket construction is with first-coated parts that have been sanded. □ 23. Arrange a backstop that makes a right angle (90 ) with Strut the work surface. Protect the work surface with waxed paper. Glue together 14 Bracket Bases and Struts.
- Page 20 page 20 Instructions for kit #B 1895 □ 27. Pull the bottom hinge pin to disassemble the door for painting. Tape the pins under the threshold so you don’t lose them (a cut off of a paper clip can substitute for a lost pin).
- Page 21 page 21 Instructions for kit #B 1895 □ 29. 49 Side Brackets: A. Glue the rear Bracket to the side and roof, touching the Side Trim at the back edge. Notice the amount of space from the bottom edge of the Bracket to the next clapboard edge.
- Page 22 page 22 Instructions for kit #B 1895 On this model this edge was On this model this edge was 13 On this model this edge was 4 □ 30. Side Eave Rafter: Cut Eave Rafters using Rafter Material ( The guide at the right has the right angles, but you must mark the length in place on your house.
- Page 23 page 23 Instructions for kit #B 1895 □ 31 A. 35 Dormer Brackets: Glue the Dormer Window in the Dormer Front. Glue two 35 Brackets to the Dormer Front and roof, touching the Trim. Glue the other two 35 Brackets centered over the left and right window spaces.
- Page 24 page 24 Instructions for kit #B 1895 □ Chimney Caps 32. Chimney: Assemble the Chimneys up side down. Let the glue dry, and paint the Chimneys. Attach the Chimneys 1 ” from the edge of the Roof and 2” down from the peak. Chimney Block see www.realgoodtoys.help for flashing or shingling demos □...
- Page 25 page 25 Instructions for kit #B 1895 Finish the Outside □ 34. Install the Door and Exterior Window Frames □ Eave Trim 35. Finish the Trim (cut the long pieces first, and the Roof short pieces from the ends: Cut and attach Eave Trim ( ).
- Page 26 Every choice makes a difference in the order of Test the Stringer on the edge of the Stairs, lined up finishing. Real Good Toys has provided materials for some at the bottom. Mark, then cut the Stringer. Glue basic interior work, but you may choose to do it differently.
- Page 27 Cut and tape together the layout diagram for the 12 ” Railing Editor’s Note: Two printers never print exactly same size... If this illustration is close to the length of your Rails, center the rails on the Illustration. If not, space 18 Balusters evenly using another Baluster to lay out the spacing.
Need help?
Do you have a question about the Beachside Bungalow and is the answer not in the manual?
Questions and answers