Table of Contents
Advertisement
Advertisement
Table of Contents

Summary of Contents for Intrepid Control Systems neoVI FIRE 2
- Page 1 FIRE 2 Multi-Protocol Vehicle Network Interface User’s Guide Version 2.1 - October 10, 2016 Intrepid Control Systems, Inc. 31601 Research Park Drive Madison Heights, MI 48071 USA (ph) +1-586-731-7950 (fax) +1-586-731-2274 www.intrepidcs.com www.aeta-rice.com...
-
Page 2: Version History
Added contact information for international ICS offices. Corrected miscellaneous I/O hardware connections. Corrected several pinout tables and clarified that the neoVI FIRE 2 does not 2016/10/10 support J1850 or J1708. Updated contact information for international ICS offices. -
Page 3: Table Of Contents
USB Host ..............................66 Reference: Connector Pinouts and Cable Signal Mappings ..............neoVI FIRE 2 Connector Pinouts ......................67 FIRE 2 Ethernet Cable Adapter Connector Pinouts and Signal Mapping ..........69 neoVI-OBD-1 Cable Connector Pinouts and Signal Mapping ..............71 neoVI-OBD-MULTI (Regular and Right Angle) Cable Connector Pinouts and Signal Mapping .... - Page 4 FIRE 2 User’s Guide Support Contact Information ........................ICS United States Headquarters ......................82 8.2 ICS International Offices .......................... 82 Version 2.1 - October 10, 2016 © 2016 Intrepid Control Systems, Inc.
-
Page 5: Introduction And Overview
Introduction and Overview Introduction Thank you for purchasing an Intrepid Control Systems neoVI FIRE 2 multi-network vehicle network interface. The FIRE 2 is Intrepid’s fourth-generation general purpose interface tool, providing access to multiple channels of CAN, LIN and other vehicle networks. The FIRE 2 can be used to monitor and transmit on networks, to create custom simulations for network analysis and troubleshooting, and for standalone logging based on precise specifications. - Page 6 FIRE 2 User’s Guide Figure 1: neoVI FIRE 2 in its Protective Insert. Lift up the plastic sheet, remove the FIRE 2, and then fold back the cardboard upon which it rested. Underneath you will find the cables and other accessories listed above. Please remove, unwrap and inspect all of the contents, an example of which is shown in Figure 2.
- Page 7 FIRE 2 User’s Guide Figure 2: neoVI FIRE 2 Package Contents. Starting top center with the FIRE 2 itself and going clockwise: µDB-9 to DB-9 conversion cable; USB cable; microSD card reader; FIRE 2 Ethernet Cable Adapter; neoVI-OBD-1 cable. The software/driver CD can be found in the center.
-
Page 8: Operational Overview
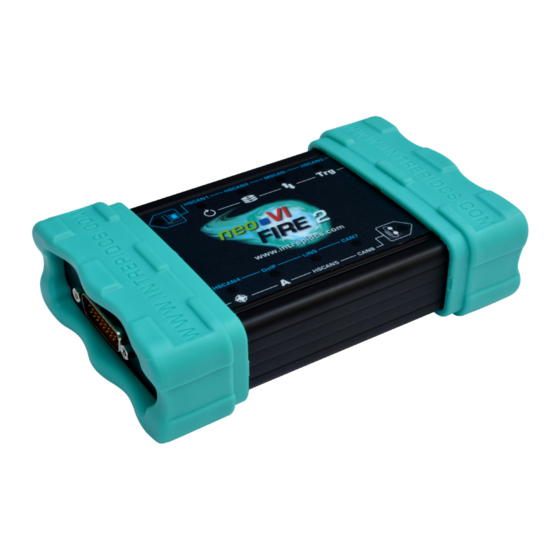
Vehicle Spy, a trial version of the program will be provided instead, which allows access to VSpy’s basic features. It is also possible to control the neoVI FIRE 2 from within other software using one of the APIs that the device supports. - Page 9 FIRE 2 User’s Guide Construction, Controls and Cabling • Compact design: 5.5” x 3.5” x 1.5” (14 x 9 x 4 cm). • Light weight: less than 12 oz (340 g). • Solid anodized aluminum case. • Thick rubber end boots for shock protection.
- Page 10 FIRE 2 User’s Guide • Software-programmable CAN termination. • 4 LIN channels. • 2 MISC I/O channels, which can be configured as analog / PWM. • Software-configurable CAN and LIN channel enables/disables, baud rates and other parameters. • 10/100 Ethernet with low power mode and activation line. • Ethernet link usable for DoIP/XCP, or to connect to Automotive Ethernet (BroadR-Reach / 100BASE-T1) network through Intrepid RAD-Moon (sold separately).
-
Page 11: Hardware And Software Requirements
FIRE 2 User’s Guide Hardware and Software Requirements Only a small amount of hardware is required to use the neoVI FIRE 2: • A vehicle network, either within an actual vehicle or in a test bench environment. • A DC power supply capable of providing 4.5V to 40V of DC power, with a nominal current of 250 mA at 12V. -
Page 12: Tour Of Neovi Fire2 Hardware
FIRE 2 User’s Guide A Tour of neoVI FIRE2 Hardware Let’s now take a short tour of the neoVI FIRE 2’s hardware. We’ll examine the device from all sides, showing its external components and explaining what each does. This will help you become more familiar with the unit so you can more easily set up, configure and use it. - Page 13 (Figure 4). Pinouts for all FIRE 2 connectors and cables can be found in Chapter 7. Figure 4: neoVI FIRE 2 Bottom View. Note that the FIRE 2’s miscellaneous I/O channels are “EMISC 1” and “EMISC 2”. (The “MISC DIO 5” and “MISC DIO 6” entries will be removed in future FIRE 2 label printings.) Version 2.1 - October 10, 2016...
-
Page 14: Left Side Interfaces And Connectors
FIRE 2 User’s Guide Left Side Interfaces and Connectors The left side of the neoVI FIRE 2 contains two components: the HD-26 connector and a set of red and green LEDs (Figure 5). Figure 5: neoVI FIRE 2 Left Side View. - Page 15 Please see Section 6.2 for more details. microSD Slot and Cover This slot holds the microSD card that stores data logged or captured by the neoVI FIRE 2. It is protected by a metal cover that prevents accidental ejection of the card and protects the slot from dirt and debris.
-
Page 16: Membrane Led Display And Keypad
FIRE 2 User’s Guide Membrane LED Display and Keypad One of the neoVI FIRE 2’s many improvements over the original neoVI FIRE is the addition of a membrane LED display and keypad on top of the unit (Figure 7). The membrane contains 10 LEDs that provide immediate visual feedback about the status of the device, and two keypad buttons that can be used to toggle the indicator mode and for other functions. - Page 17 LEDs show which set of indicator meanings is active, and may also be more convenient for monitoring general device status than the left-side LEDs. The green and red status LEDs here, and on the side of the neoVI FIRE 2, show information about it through a number of flash patterns, which are described in Table 1.
- Page 18 LED being lit within the blue computer icon in the top left corner (this LED alternates between green and red when the device is online). The other LEDs thus mean that the neoVI FIRE 2 is active and transmitting on the HSCAN1, HSCAN2, MSCAN, HSCAN3 and HSCAN4 channels (in use these all flash a few times per second.) Note that the LED for HSCAN4 is actually yellowish; it is flashing both a bright green and a dim red to indicate errors...
-
Page 19: Standard Cables And Cable Options
FIRE 2 User’s Guide Label Description HSCAN1 Transmit / receive / error status of HS CAN channel 1 HSCAN2 Transmit / receive / error status of HS CAN channel 2 MSCAN Transmit / receive / error status of MS CAN channel... - Page 20 FIRE 2 User’s Guide USB “A/B” Cable This is a standard cable is used to connect PCs or other hosts to USB devices that do not have integrated cables (Figure 9). The detachable cable makes the FIRE 2 easier to transport than would be the case if it were built in, and also allows the cable to be easily replaced if it is ever damaged.
- Page 21 FIRE 2 User’s Guide Figure 10: µDB-9 (Micro DB-9) to DB-9 Cable Figure 11: Close-up of µDB-9 Connector. This connector attaches to the mating connector on the neoVI FIRE 2, adapting it into an industry-standard DB-9 connector. FIRE 2 Ethernet Cable Adapter This special cable “breaks out”...
- Page 22 FIRE 2 User’s Guide Figure 12: FIRE 2 Ethernet Cable Adapter. This cable allows the FIRE 2 to connect to vehicle networks and receive its primary power input. DB-25 Connector This is the main vehicle network interface connector, carrying CAN, LIN and Ethernet messages, as well as providing power to the FIRE 2 from the network (Figure 13).
- Page 23 FIRE 2 User’s Guide Figure 14: DB-9 Connector. This industry-standard connector carries LIN traffic. RJ-45 Connector This female RJ-45 socket is used to attach a standard Ethernet cable for Automotive Ethernet and DoIP applications (Figure 15). Figure 15: RJ-45 Socket. OBD Cables The FIRE 2 comes with your choice of one of five OBD cables, which are used to interface the device to a vehicle or bench OBD port. Four of these cables attach to the DB-25 connector on the FIRE 2 Ethernet Cable Adapter (Figure 13), while the fifth actually takes the place of that cable, connecting directly to the FIRE 2.
- Page 24 FIRE 2 User’s Guide See Section 3.3 for hookup diagrams that show how to connect all of these cables to the FIRE 2 and your network or bench. neoVI-OBD-1 Cable This cable, which has a red OBD-II connector, is used primarily for General Motors vehicles. It can be seen in Figure 16.
- Page 25 FIRE 2 User’s Guide neoVI-OBD-MULTI Right Angle Cable This is the same as the neoVI-OBD-MULTI cable but terminates with a right-angled OBD II connector for vehicles where this is required. A picture of the cable is shown in Figure 18.
- Page 26 FIRE 2 User’s Guide FIRE 2 OBD Cable with DoIP Support This special cable attaches to the FIRE 2’s HD-26 connector in place of the regular FIRE 2 Ethernet Cable Adapter. It contains DB-25, DB-9 and OBD-II connectors wired for DoIP use, and is illustrated in Figure 20.
-
Page 27: Hardware And Software Setup
FIRE 2 User’s Guide Hardware and Software Setup In this chapter we will explain the steps necessary to set up your neoVI FIRE 2 to work with a vehicle network. This will include explaining how to install the required software and drivers, connect cables between the FIRE 2 and the network, and link the unit to a PC. - Page 28 FIRE 2 User’s Guide Figure 21: neoVI FIRE2 Software Install Dialog Box. From this menu you can start installing Vehicle Spy 3, install the API support files, and access videos, documentation and online support materials. Start Vehicle Spy 3 Installation: Click Vehicle Spy 3 Install. Select Language: Select your preferred language, and then click to proceed.
- Page 29 FIRE 2 User’s Guide Start Vehicle Spy 3 Setup Wizard: Click to start the setup wizard. Review and Accept License Agreement: Review the license agreement, and assuming its terms are acceptable, select I accept the agreement, then click (Figure 23).
- Page 30 FIRE 2 User’s Guide Select Data Directory Location: Next, choose where you want Vehicle Spy 3 to store its data files. We recommend sticking with the provided default, C:\IntrepidCS\Vehicle Spy 3 (Figure 25). Click to continue. Figure 25: Selecting the Data Directory Location. Select Start Menu Folder: Choose where you want your Windows shortcuts for Vehicle Spy 3 to reside. Again, the defaults are generally fine here, though you can change...
- Page 31 FIRE 2 User’s Guide 11. Review Installation Options and Begin Installation: Ensure that the options you have chosen are correct, and then click The wizard will now begin installing Vehicle Spy 3. A window will appear showing you the progress of the installation (Figure 27).
- Page 32 FIRE 2 User’s Guide Next, support files for Microsoft Visual C++ 2010 and 2005 will be installed, if they are not already on the computer. This happens automatically, and you may briefly see a dialog box like the one in Figure 29. Many systems already have these files, however; if that is the case, a message may appear telling you that they are already present; just hit to continue. Figure 29: Installing Support Files for Microsoft Visual C++ 2005. The WinPcap installer will start next. This is a special support program that allows Ethernet traffic on a PC to be captured and displayed by Vehicle Spy 3. You will see a window similar to...
- Page 33 FIRE 2 User’s Guide Figure 31: SMSC LAN9500 device driver installation. Another ICS driver installer dialog box will now appear, similar to the first one. 14. Install ICS Port Drivers: Click to begin installing the ICS port drivers. At this point you may receive a prompt from Windows like the one shown in Figure 32. Please click to authorize driver installation.
-
Page 34: Driver And Api Support File Installation And Setup
16. Exit the Setup Wizard: Click Congratulations, you’re done! Driver and API Support File Installation and Setup If you plan to use the neoVI FIRE 2 without Vehicle Spy 3, you will need to install drivers and support files to allow the hardware to be accessed via its API. Please follow the steps below. All of these files are installed automatically with Vehicle Spy 3, so if you followed the instructions in Section 3.1, you can skip the directions here. - Page 35 FIRE 2 User’s Guide Figure 35: neoVI FIRE2 Software Install Dialog Box. Start Support File Installation: Click RP1210 J2534 Intrepid API Install. Select Language: Select your preferred language, and then click to proceed. (We will assume that English has been used.) The setup wizard for the ICS API and driver kit will now start, displaying a welcome screen as shown in Figure 36.
- Page 36 FIRE 2 User’s Guide Start API and Driver Setup Wizard: Click to start the setup wizard. Review and Accept License Agreement: Review the license agreement, and assuming its terms are acceptable, select I accept the agreement, then click (Figure 37).
- Page 37 FIRE 2 User’s Guide You have now provided all of the information the wizard needs, and it will display a summary as shown in Figure 39. Figure 39: API Installation Options Review. Review Installation Options and Begin Installation: Ensure that the options you have chosen are correct, and then click The wizard will now begin installing Vehicle Spy 3.
- Page 38 FIRE 2 User’s Guide Install VCP Drivers: Click to begin installing the first set of drivers. When completed, a message will appear like the one in Figure 41. Click Figure 41: VCP Driver Installation Complete. Next, support files for Microsoft Visual C++ 2010 and 2005 will be automatically installed, if they are not already on the computer. You may briefly see a dialog box like the one in Figure 42. If a prompt appears saying the files are already installed, hit to continue. Figure 42: Installing Support Files for Microsoft Visual C++ 2005.
- Page 39 FIRE 2 User’s Guide Once installation begins, it will take only a few seconds, and when completed, a message will appear like the one in Figure 44. 11. Complete Port Driver Installation: Click to exit this part of the install.
-
Page 40: Hardware Hookup Diagrams
FIRE 2 User’s Guide Hardware Hookup Diagrams Hookup diagrams show you at a glance how to physically connect your neoVI FIRE 2 to vehicle networks and your PC. Below you will find first a hookup diagram for using the FIRE 2 without an OBD cable, and then five additional ones showing the connections for each of the OBD cable options discussed in Section 2.5. Four of the OBD cables—the neoVI-OBD-1, neoVI-OBD-MULTI, neoVI-OBD-MULTI Right Angle, and neoVI FIRE/RED J1939—are connected to the DB-25 of the FIRE 2 Ethernet Cable... - Page 41 FIRE 2 User’s Guide Vehicle Networks Figure 47: FIRE 2 Hardware Hookup Diagram with neoVI-OBD-1 Cable. OBD Hardware Hookup Diagram - neoVI-OBD-MULTI Cable Figure 48 shows the hardware setup using the neoVI-OBD-MULTI cable. Vehicle Networks Figure 48: FIRE 2 Hardware Hookup Diagram with neoVI-OBD-MULTI Cable.
- Page 42 FIRE 2 User’s Guide Vehicle Networks Figure 49: FIRE 2 Hardware Hookup Diagram with neoVI-OBD-MULTI Right Angle Cable. OBD Hardware Hookup Diagram - neoVI FIRE/RED J1939 Cable Figure 50 shows the setup when using the neoVI FIRE/RED J1939 cable for OBD.
-
Page 43: Vehicle Network And Power Connections
Two connectors on the FIRE 2 are used to attach it to vehicle networks. The HD-26 connector on the left side of the device provides primary power input to the neoVI FIRE 2 and also carries most of the network channels. This is also where your OBD cable is attached, either directly or indirectly. - Page 44 FIRE 2 User’s Guide Figure 52: Connecting the HD-26 Cable Connector to the neoVI FIRE 2. Attach OBD Cable to DB-25 Connector on FIRE 2 Ethernet Cable Adapter (OBD Use Only): Connect the female DB-25 connector of your neoVI-OBD-1, neoVI-OBD- MULTI, neoVI-OBD-MULTI Right Angle or neoVI FIRE/RED J1939 cable to the male DB-25 of the FIRE 2 Ethernet Cable Adapter (Figure 53).
-
Page 45: Pc Connection
Attach the connectors from the FIRE 2 Ethernet Cable Adapter and your OBD cable (if using) to their mating halves on your network, then secure them in place. As soon as you connect the device supplying power to the cable attached to the neoVI FIRE 2, the device should boot up. You will recognize this by green LEDs beginning to flash in a quick and regular pattern on both the side of the device next to the HD-26 connection, and in the upper left corner of the top membrane interface. If the LEDs do not start flashing, please see... - Page 46 FIRE 2 User’s Guide The neoVI FIRE 2 can draw up to the USB standard maximum of 500 mA through its USB connection. All computers should be able to supply this amount of current, however, unpowered USB hubs may not be able to do so, especially if they have multiple devices connected to them. If you experience difficulties with the FIRE 2 when using an unpowered...
-
Page 47: Device Configuration
FIRE 2 User’s Guide Device Configuration Your neoVI FIRE 2 ships from the factory ready to use with its default settings. However, its operation can also be customized to your exact needs by adjusting dozens of parameters that control its internal hardware and firmware. In this chapter, we’ll show you how to manage and fine-tune your neoVI FIRE 2, including enabling and disabling networks, adjusting baud rates, turning on or off specific features, and much more. - Page 48 Connecting to the FIRE 2 When neoVI Explorer loads, it will start up with the first hardware device it can find selected in the menu pane on the left. You should see your neoVI FIRE 2 listed here, along with its serial number, which begins with “CY”. If you don’t see the FIRE 2, but do see other Intrepid devices, be sure to scroll down to look for it.
- Page 49 Figure 59 (but note that the version number shown at the bottom may be different). Figure 59: Typical neoVI Explorer Window After Initial Connection to the neoVI FIRE 2. Note: It is possible to click on various parameter groups at any time, but they will not show valid data until you connect to the device.
-
Page 50: System Settings And Firmware Updates
FIRE 2 User’s Guide update the parameters within the firmware in your FIRE 2. If you make changes you do not want to keep, pressing the Read Settings button will reload the settings stored in the device, wiping out any modifications made in neoVI Explorer that had not yet been saved. Reloading Device Defaults To return all settings to factory defaults, press the Load Defaults button. This is convenient if many changes have been made and written to the firmware in the past, and you want to start over with a clean slate. - Page 51 • Enable Slave VNET Settings: This setting is used for the FIRE 2 VNet module used with a neoVI Plasma or Ion, and can be ignored for the neoVI FIRE 2. • Enable Auto Update: When enabled, both neoVI Explorer and Vehicle Spy will automatically update firmware. If this box is not checked, firmware must be updated...
-
Page 52: General Settings And Product Details
FIRE 2. General Settings and Product Details These two areas of the neoVI FIRE 2’s parameter setup provide information about the device and allow you to perform a few basic maintenance tasks. Version 2.1 - October 10, 2016... - Page 53 • A message showing that the hardware license for the device was recognized. • A current readout of the FIRE 2’s real-time clock. Figure 63: neoVI Explorer neoVI FIRE 2 General Settings This information can be displayed again at any time by clicking the FIRE 2’s name in the explorer navigation window, or the General Settings entry immediately below it.
-
Page 54: Standard Can Networks (Hs Can 1-5 And Ms Can)
FIRE 2 User’s Guide Standard CAN Networks (HS CAN 1-5 and MS CAN) This area of neoVI Explorer is used to enable, disable and configure the six standard dual wire CAN networks in the FIRE 2: High Speed CAN channels 1 to 5 (HS CAN and HS CAN2-5) and the Medium Speed CAN channel (MS CAN). Each channel has an entry under the “CAN”... - Page 55 FIRE 2 User’s Guide Specifying by baud rate is the default, and is recommended except for advanced users with special requirements. Baud Rate When Specify by Baud is selected, choose a baud rate for the channel from the drop-down box below.
-
Page 56: Selectable Can Networks
FIRE 2 User’s Guide Bit Rate Calculator Press this button to launch the Intrepid Bit Timing Calculator. Selectable CAN Networks The 7th and 8th of the FIRE 2’s CAN channels are user-selectable: they can be set as additional High Speed (dual wire) CAN channels (HS CAN6 and HS CAN7), as Low Speed Fault Tolerant CAN channels (LSFT CAN and LSFT CAN 2), or as Single Wire CAN channels (SW CAN and SW CAN 2). - Page 57 FIRE 2 User’s Guide DW CAN (HS CAN 6 / HS CAN 7) When DWCAN is selected, two additional High Speed CAN channels are turned on. Their parameters are identical to the six standard CAN channels described in Section 4.4, and are configured in the same way.
-
Page 58: Lin Networks (Lin1 To Lin4)
FIRE 2 User’s Guide Figure 69: neoVI Explorer SW CAN Parameters with Default Settings. LIN Networks (LIN1 to LIN4) This section of the FIRE 2 explorer tree allows you to enable, disable and configure its four LIN channels, LIN1 to LIN4. Each channel has an entry under the “LIN” group (Figure 70). As with the CAN channels, a green checkmark indicates that a particular channel is enabled, while a red X means it is disabled. -
Page 59: Misc Io
LIN driver are displayed. MISC IO This section contains parameters controlling the neoVI FIRE 2’s miscellaneous I/O channels. Reporting parameters can be found within the main “MISC IO” entry, while others are contained in two subordinate panels in the explorer navigation tree. -
Page 60: Other Parameters
FIRE 2 User’s Guide Figure 72: neoVI Explorer MISC I/O Reporting Parameters Initial Values In this section you can select the operating mode of each I/O channel (Figure 73). Each can be set as a digital input, as a digital output that is initially off, or as a digital output that is initially... - Page 61 FIRE 2 User’s Guide ISO 15765-2 This page contains one setting: IFS Shift Register (Figure 75). Changing this from its default value of 0 causes time to be added to the Inner Frame Spacing of USDT frames transmitted by CoreMini scripts running in the FIRE 2. The number entered is multiplied by 6.4 µs to determine the time offset.
- Page 62 Figure 77: neoVI Explorer Network Enable/Disable Parameters. Enable Networks on Boot Normally, the neoVI FIRE 2 will not acknowledge messages on a network unless it is online with that network or running a CoreMini script. When this option is enabled, the device always acknowledges frames on all enabled networks.
-
Page 63: Core Feature Operation
Now that we have completed installing and configuring our hardware and software, we are ready to use the neoVI FIRE 2. As discussed at the start of this guide, you can do a lot with this little box, and in this chapter we show you just some of the many applications of the FIRE 2. -
Page 64: Transmitting On Conventional Vehicle Networks
Scroll button located just above the message display. Figure 80: Monitoring Message Traffic in Vehicle Spy Using the neoVI FIRE 2. Notice that the CAN messages are shown in their raw form, with arbitration IDs and data bytes. - Page 65 Launch Vehicle Spy: Start Vehicle Spy by double-clicking its icon or selecting it from the Windows Start Menu. Select neoVI FIRE 2: On the Logon Screen, select the neoVI FIRE 2 if it is not already selected: right-click the device name and choose Select Hardware (see Figure 79).
- Page 66 FIRE 2 User’s Guide Set Message to Arbitration ID 123: Under the Arb ID column for the message, enter the value “123”. Add Message Signal: In the middle of the screen, find “Signals in Message”; just below this click the button. A signal called “Signal 0” is created. Rename Message Signal: Under the Description column, double-click “Signal 0” and change the name to “Engine Speed”.
- Page 67 FIRE 2 User’s Guide 12. Set Signal Data Value: On the right side of the screen, double-click under Value for the Engine Speed signal, and enter “207”. (You may need to first move the vertical divider bar that separates the two halves of the Tx Panel, by clicking on it and dragging it to the left.)
-
Page 68: Interfacing To Automotive Ethernet (Broadr-Reach / 100Base-T1)
Interfacing to Automotive Ethernet (BroadR-Reach / 100BASE-T1) The neoVI FIRE 2 can be used to monitor and transmit on a BroadR-Reach (100BASE-T1) Automotive Ethernet network, with the help of a device that changes the BroadR-Reach PHY into the standard 10/100 Ethernet PHY used by the FIRE 2. -
Page 69: Using The Ethernet Interface For Doip And Xcp
FIRE 2 to power the RAD-Moon on or off as needed. Vehicle Networks Figure 85: neoVI FIRE 2 Hookup Diagram for Automotive Ethernet Using RAD-Moon Media Converter. Using the Ethernet Interface for DoIP and XCP This section will be detailed in a future version of this manual. -
Page 70: Advanced Features
ICSDocumentation/neoVIDLL/neoVIDLLhelpdoc.html. USB Host The neoVI FIRE 2 comes with a USB host port that allows other devices to be plugged into it (see Figure 6 in Section 2.3). Due to the difficulties associated with driver development, this port is intended for specific devices rather than general purpose use. It is especially designed to work with devices such as the Intrepid neoVI MIC microphone/trigger pendant, or the RAD- Moon (as seen in Section 5.3). -
Page 71: Reference: Connector Pinouts And Cable Signal Mappings
FIRE 2 User’s Guide Reference: Connector Pinouts and Cable Signal Mappings This section contains complete pinouts for the connectors on the neoVI FIRE 2, as well as those on the network interface cables used to attach to it. For your convenience, tables are also provided that show the mappings of signals between pin numbers on the connectors of each network cable. - Page 72 Single Wire CAN channel 1 Table 4: neoVI FIRE 2 HD-26 Connector Pinout. Figure 86: neoVI FIRE 2 HD-26 Connector Pin Numbering. µDB-9 Connector Pinout The pinout for the µDB-9 connector on the FIRE 2 can be seen in Figure 87 and Table 5.
-
Page 73: Fire 2 Ethernet Cable Adapter Connector Pinouts And Signal Mapping
FIRE 2 User’s Guide FIRE 2 Ethernet Cable Adapter Connector Pinouts and Signal Mapping The primary cable for connecting the FIRE 2 to vehicle networks has four connectors: HD- 26, DB-25, DB-9 and RJ-45. The HD-26 connector mates to the HD-26 on the FIRE 2 and uses the same pinout shown in Table 4;... - Page 74 FIRE 2 User’s Guide DB-9 Connector Pinout Table 7 contains the pinout for the DB-9 connector on this cable. Pin # Name Description LIN 1 LIN channel 1 LIN 2 LIN channel 2 LIN 3 LIN channel 3 ETH ACTIVATE...
-
Page 75: Neovi-Obd-1 Cable Connector Pinouts And Signal Mapping
FIRE 2 User’s Guide HD-26 DB-25 DB-9 RJ-45 Signal Name Signal Description Pin # Pin # Pin # Pin # ETH TX+ Ethernet transmit channel, positive HS CAN 4 L High Speed CAN channel 4, low HS CAN 5 L... - Page 76 FIRE 2 User’s Guide DB-25 Connector Pinout Table 10 shows the pinout of the DB-25 connector on the neoVI-OBD-1. Pin # Name Description SW CAN Single Wire CAN channel No connection No connection No connection MS CAN H Medium Speed CAN channel, high...
- Page 77 Unswitched Vehicle Battery Positive Table 11: neoVI-OBD-1 Cable OBD-II / J1962 Connector Pinout. The table shows standard signals for the OBD-II connector; this includes J1850, which is not supported by the NEOVI FIRE 2. Cable Signal Mapping Table 12 contains the mapping of signals for the neoVI-OBD-1 cable. The signal names for both connectors are shown and the table is based on the OBD-II connector’s pin order.
-
Page 78: Neovi-Obd-Multi (Regular And Right Angle) Cable Connector Pinouts And Signal Mapping
FIRE 2 User’s Guide OBD-II OBD-II DB-25 DB-25 Pin # Signal Signal Pin # Discretionary HS CAN 3 H (ALDL) J1850 - HS CAN 3 L Discretionary MS CAN L (MS CAN L) Discretionary HS CAN 2 H Discretionary... - Page 79 Unswitched Vehicle Battery Positive Table 14: neoVI-OBD-MULTI Cable OBD-II / J1962 Connector Pinout. The table shows standard signals for the OBD-II connector; this includes J1850, which is not supported by the NEOVI FIRE 2. Cable Signal Mapping Table 15 contains the mapping of signals for the neoVI-OBD-MULTI regular and right angle cables.
-
Page 80: Neovi Fire/Red J1939 Cable Connector Pinouts And Signal Mapping
FIRE 2 User’s Guide OBD-II OBD-II DB-25 DB-25 Pin # Signal Signal Pin # Discretionary HS CAN 3 H J1850 + Discretionary MS CAN H Chassis GND Signal GND CAN H HS CAN 1 H ISO9141/K ISO9141/K/LIN1 Discretionary Discretionary... - Page 81 High Speed CAN channel 1, low Table 17: neoVI FIRE/RED J1939 Cable Deutsch 9-Pin Connector Pinout. The table shows standard signals for the Deutsch 9-pin connector; this includes J1708, which is not supported by the NEOVI FIRE 2. Cable Signal Mapping Table 18 contains the mapping of signals for the neoVI FIRE/RED J1939 cable.
-
Page 82: Fire 2 Obd Cable With Doip Support Connector Pinouts And Signal Mapping
FIRE 2 User’s Guide Deutsch Deutsch DB-25 DB-25 Pin # Signal Signal Pin # Ground (-) Battery (+) VBATT CAN High (+) HS CAN H CAN Low (-) HS CAN L CAN Shield J1708 (+) J1708 (-) CAN2 High (+) - Page 83 FIRE 2 User’s Guide Pin # Name Description No connection Ground HS CAN 4 H High Speed CAN channel 4, high HS CAN 4 L High Speed CAN channel 4, low HS CAN 2 H High Speed CAN channel 2, high...
- Page 84 FIRE 2 User’s Guide OBD-II / J1962 Connector Pinout Table 21 shows the pinout for the OBD-II / J1962 connector on the cable. Pin # Name Description MS CAN H Medium Speed CAN channel, high No connection ETH TX+...
- Page 85 FIRE 2 User’s Guide HD-26 DB-25 DB-9 OBD-II Signal Name Signal Description Pin # Pin # Pin # Pin # ETH TX+ Ethernet transmit channel, positive HS CAN 4 L High Speed CAN channel 4, low HS CAN 5 L...
- Page 86 FIRE 2 User’s Guide Support Contact Information If you have a problem you cannot resolve on your own, feel free to contact ICS for assistance at one of our offices. ICS United States Headquarters Our primary support personnel can be reached at our American headquarters in the Detroit area, using the following contact information: •...
- Page 87 FIRE 2 User’s Guide • Phone: +82 31 698 3460. • Fax: +82 31 698 3461. • Email: icskorea@intrepidcs.com China Office Intrepid’s Shanghai office can also be reached by phone, fax or email: • Phone: +86 4006151011. • Fax: +86 021-51330271-601. • Email: icschina@intrepidcs.com We can also be contacted in Shenzhen: •...
Need help?
Do you have a question about the neoVI FIRE 2 and is the answer not in the manual?
Questions and answers